It was 10:47 PM on a random Wednesday, and I had a very specific, almost aggressive craving for a warm chocolate chip cookie. You know that feeling when only one thing will do, and it has to be *that* thing? The problem? I didn’t have a block of butter to soften. I didn’t have an egg that was at room temperature. What I did have was a half-stick of cold butter, one egg straight from the fridge, and a crazy idea that maybe, just maybe, the rules didn’t apply at this hour. Honestly, I was too tired to care about proper technique. I just wanted a cookie.
So, I did what any reasonable, slightly-unhinged person would do at that hour. I melted the butter. I didn’t wait for anything to come to room temperature. I just mixed it all together in one bowl, scooping out the dough with a spoon and hoping for the best. The dough looked a little greasier than usual, and I was half-convinced I was about to bake a flat, sad pancake. But the smell that filled my tiny kitchen five minutes later was pure magic. It was the smell of a gamble paying off.
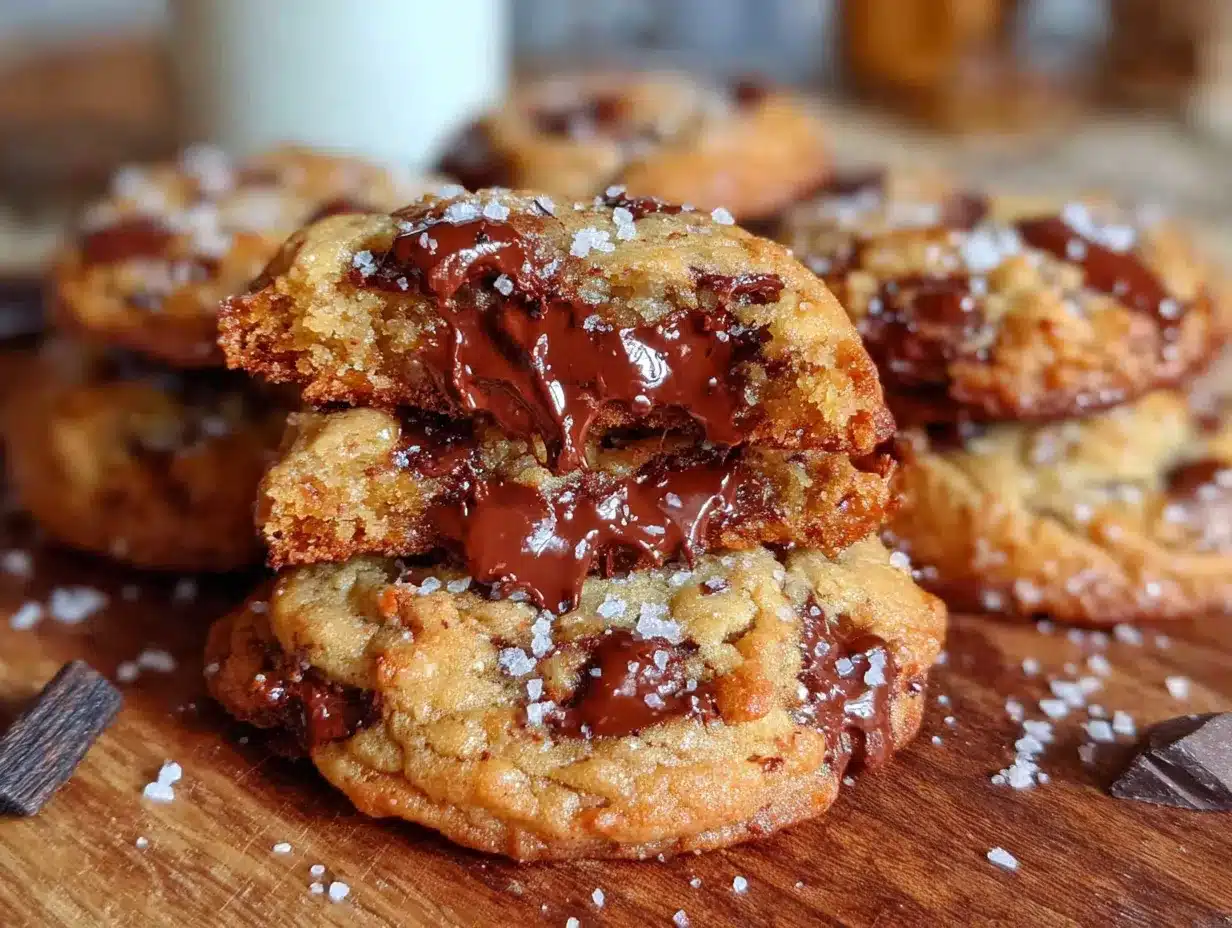
That first bite was a revelation. The edges were perfectly crisp, the center was soft and gooey, and it tasted like a classic bakery cookie, not a desperate late-night experiment. I stood there at the counter, eating a cookie that was born from pure laziness and a stubborn craving, and I knew I had stumbled onto something special. This recipe isn’t about patience or planning. It’s about getting what you want, when you want it. Maybe you’ve been there—standing in your own kitchen, staring at ingredients, wondering if it’s worth the effort. Let me tell you, it is. This is the cookie recipe that says “yes” when everything else says “maybe later.”
Why You’ll Love This Recipe
Let me be real with you. I’ve tested a lot of cookie recipes over the years, and most of them require a level of planning that just doesn’t fit into a busy week. This one is different. It’s the kind of recipe that feels like a secret weapon in your back pocket.
- No Chilling Required: This is the big one. You don’t have to wait an hour (or overnight) for the dough to rest. From mixing to eating, it’s about 15 minutes. Honestly, that’s faster than driving to the store to buy a single cookie.
- Perfectly Sized Batch: It makes exactly 6 cookies. Not 24, not 36. Six. That’s enough for a small craving without having a mountain of cookies tempting you for the next three days. It’s perfect for a quiet night in.
- Uses Pantry Staples: You likely have everything you need right now. Butter, sugar, an egg, flour, chocolate chips. No weird ingredients, no special trips to the store. It’s designed for those moments when you just need a cookie, now.
- Kid-Approved & Budget-Friendly: This recipe uses simple, affordable ingredients that won’t blow your grocery budget. And because it’s so quick, you can even let the kids help without losing your patience. The cookies come out soft, chewy, and full of chocolate—a guaranteed hit with picky eaters.
- Consistently Delicious: I’ve made this recipe at least a dozen times since that first late-night experiment. It works every single time. The texture is spot-on: crisp edges with a soft, almost underbaked center. It’s the kind of cookie that makes you close your eyes after the first bite.
This isn’t just another cookie recipe. It’s a solution to a very specific problem: the need for instant gratification. It’s comfort food, simplified. It’s the recipe I turn to when I’ve had a long day and just want something warm and sweet without the hassle. And I think you’re going to love it, too.
What Ingredients You Will Need
This recipe relies on simple, everyday ingredients to deliver that classic chocolate chip cookie flavor. No fancy flours or obscure extracts here—just the good stuff that makes a cookie taste like a cookie. Here’s what you’ll need:
For the Cookie Dough
- 4 tablespoons unsalted butter (melted and slightly cooled) – Melting the butter is the key to skipping the chilling step. It creates a chewier, denser texture that doesn’t need time to rest. I usually use salted butter in a pinch and just skip the extra salt, but unsalted gives you better control.
- ¼ cup granulated sugar – This adds sweetness and helps create those crispy, golden edges. White sugar spreads more than brown sugar, which is perfect for this quick recipe.
- ¼ cup packed light brown sugar – The brown sugar adds moisture and a subtle molasses flavor that makes the cookies soft and chewy in the center. Make sure it’s packed firmly into the measuring cup.
- 1 large egg yolk – This is a little trick I learned from a bakery cookbook. Using just the yolk gives you all the richness and structure of a whole egg, but without the extra moisture that can make cookies cakey. Save the egg white for an omelet tomorrow!
- ½ teaspoon vanilla extract – Pure vanilla extract is worth the splurge here. It rounds out the flavors and makes the cookies taste more complex. If you only have imitation vanilla, it will still work—just use a little less.
- ¾ cup all-purpose flour – Spoon and level your flour for the best results. Scooping directly from the bag can pack in too much flour, leading to dry cookies. I use Gold Medal unbleached all-purpose flour, and it works perfectly every time.
- ¼ teaspoon baking soda – This helps the cookies spread just the right amount and creates those lovely craggy tops. Make sure your baking soda is fresh—test it by dropping a pinch into vinegar; it should fizz immediately.
- ¼ teaspoon salt – Salt isn’t just for savory food. It balances the sweetness and enhances the chocolate flavor. I use fine sea salt for baking because it dissolves evenly.
- ⅓ cup semi-sweet chocolate chips – This is the star of the show. I prefer Ghirardelli semi-sweet chips for their rich flavor and ability to stay melty even after the cookies cool slightly. You can use milk chocolate for a sweeter cookie, or dark chocolate for a more intense flavor. Feel free to chop up a chocolate bar instead of using chips for those beautiful pools of melted chocolate.
That’s it. Seven simple ingredients (plus the chocolate chips) that come together in about 10 minutes. No cream cheese, no cornstarch, no weird tricks. Just honest, delicious cookies.
Equipment Needed
You don’t need a professional bakery setup for these cookies. In fact, you probably already have everything you need. Here’s the short list:
- Medium mixing bowl – Any bowl will do, but a medium-sized one (about 2-3 quarts) gives you enough room to mix without flinging flour everywhere. I use a simple glass Pyrex bowl.
- Whisk or wooden spoon – A whisk works great for combining the wet ingredients and sugar. A sturdy wooden spoon or silicone spatula is perfect for folding in the flour and chocolate chips. I actually prefer a rubber spatula for scraping every last bit of dough.
- Measuring cups and spoons – Accurate measurements are important in baking. Use dry measuring cups for the flour and sugar, and liquid measuring cups for the melted butter. A set of measuring spoons is essential for the vanilla, baking soda, and salt.
- Baking sheet – A standard half-sheet pan (about 13×18 inches) works perfectly. You don’t need a fancy non-stick pan; a light-colored aluminum pan will give you the most even browning. Dark pans can cause the bottoms to burn before the centers are done.
- Parchment paper or silicone baking mat – This is non-negotiable for me. Parchment paper ensures the cookies release easily and makes cleanup a breeze. A silicone mat works just as well and is reusable.
- Cookie scoop or tablespoon – For evenly sized cookies, a small cookie scoop (about 1.5 tablespoons) is a game-changer. If you don’t have one, just use a regular tablespoon to portion the dough. The cookies will be slightly different sizes, but they’ll still taste amazing.
- Cooling rack – A wire rack allows air to circulate around the cookies, preventing the bottoms from getting soggy. If you don’t have one, you can let them cool on the baking sheet for a few minutes, then carefully transfer them to a plate.
That’s really all you need. No stand mixer, no hand mixer, no chilling the dough. Just a bowl, a spoon, and 15 minutes of your time.
Preparation Method
Alright, let’s get to the good part. This method is designed to be as straightforward as possible, with no wasted steps. Follow these instructions, and you’ll have warm cookies in your hands in under 15 minutes. I promise.
- Preheat your oven to 375°F (190°C). Line your baking sheet with parchment paper or a silicone mat. Do this first so the oven is ready when you are. A hot oven is crucial for that initial burst of heat that creates crispy edges.
- Melt the butter. Place the 4 tablespoons of unsalted butter in a microwave-safe bowl. Microwave in 15-second intervals until just melted. It should be liquid but not boiling hot. Let it sit for a minute to cool slightly. If it’s too hot, it will cook the egg yolk when you add it.
- Combine the sugars and butter. In your medium mixing bowl, add the melted butter, ¼ cup granulated sugar, and ¼ cup packed light brown sugar. Whisk them together vigorously for about 30 seconds. The mixture should look like a thick, grainy paste. This step helps dissolve some of the sugar, which contributes to that perfect texture.
- Add the egg yolk and vanilla. Drop in the single egg yolk and ½ teaspoon vanilla extract. Whisk again until everything is smooth and glossy. The mixture might look a little separated at first, but keep whisking—it will come together into a beautiful, thick emulsion. This should take about 20 seconds.
- Add the dry ingredients. Sprinkle the ¾ cup all-purpose flour, ¼ teaspoon baking soda, and ¼ teaspoon salt evenly over the wet mixture. Use a rubber spatula or wooden spoon to fold everything together. Stir just until you no longer see any streaks of flour. Be careful not to overmix—that’s what makes cookies tough. A few small lumps are totally fine.
- Fold in the chocolate chips. Add the ⅓ cup semi-sweet chocolate chips to the bowl. Gently fold them into the dough until they are evenly distributed. The dough will be thick, slightly greasy-looking, and very forgiving. Don’t worry if it doesn’t look like a typical cookie dough—it’s supposed to be a little more like a thick paste.
- Portion the dough. Using a cookie scoop or a tablespoon, scoop out 6 equal portions of dough. Each portion should be about 1.5 tablespoons. Place them on the prepared baking sheet, spacing them about 2 inches apart. They will spread, but not dramatically. For a more bakery-style look, you can slightly flatten each dough ball with the palm of your hand.
- Bake for 8-10 minutes. Place the baking sheet on the middle rack of your preheated oven. Bake for 8 minutes for a softer, gooier center, or 10 minutes for a slightly crisper cookie. The edges should be golden brown, and the centers should look slightly puffed and pale. They will look underbaked—that’s what you want! The carryover heat will finish cooking them on the sheet.
- Cool on the baking sheet. Remove the baking sheet from the oven. Let the cookies rest on the hot sheet for exactly 2 minutes. This is crucial. During this time, the centers will set up perfectly while the edges stay crisp. After 2 minutes, carefully transfer the cookies to a wire rack to cool completely. Or, you know, eat one immediately. I won’t judge.
And that’s it. From start to finish, you’re looking at about 15 minutes, including baking time. The hardest part is waiting for them to cool enough so you don’t burn your tongue.
Cooking Tips & Techniques
I’ve made this recipe enough times to learn a few things the hard way. Here are my best tips to ensure your cookies turn out perfectly every single time.
Use melted butter, not softened. This is the number one trick for skipping the chilling step. Melted butter creates a denser, chewier cookie that doesn’t need to rest in the fridge. The moisture in the melted butter hydrates the flour differently, resulting in that perfect soft center. I once tried this with softened butter out of habit, and the cookies spread too much and were thin. Stick with melted.
Don’t overmix the dough. When you add the flour, mix only until it disappears. Overmixing develops the gluten in the flour, which leads to tough, cakey cookies. You want them to be tender and slightly crumbly. A few streaks of flour are better than a dough that’s been beaten into submission.
Use a cookie scoop for even sizes. This isn’t just about aesthetics (though uniform cookies do look prettier). Evenly sized cookies bake at the same rate. If you have one big lump and one small lump, the small one will burn before the big one is done. A scoop takes the guesswork out of it.
Bake one sheet at a time. If you try to bake two sheets at once, the heat won’t circulate properly, and your cookies will be unevenly baked. If you only have one sheet, just bake in batches. The second batch will be just as good as the first.
Let them rest on the hot pan. I cannot stress this enough. Those 2 minutes on the hot baking sheet are where the magic happens. The residual heat sets the centers without over-baking the edges. If you move them too soon, they’ll fall apart. If you leave them too long, they’ll continue cooking and become dry.
I learned this last tip the hard way. The first time I made these, I was so excited that I tried to move a cookie after only 30 seconds. It completely fell apart in my hands. I ate the pieces anyway (obviously), but it was a valuable lesson in patience.
Variations & Adaptations
One of the best things about this recipe is how easily it adapts to what you have on hand or what you’re in the mood for. Here are a few of my favorite variations:
- Double Chocolate Chip: Replace 1 tablespoon of the all-purpose flour with 1 tablespoon of unsweetened cocoa powder. Add the cocoa powder along with the other dry ingredients. The result is a rich, dark chocolate cookie studded with semi-sweet chips. It’s like a brownie in cookie form.
- Gluten-Free Version: Swap the all-purpose flour with a 1-to-1 gluten-free baking flour blend (I use Bob’s Red Mill). The texture will be slightly more delicate and crumbly, but the flavor is still fantastic. Make sure your blend contains xanthan gum for structure.
- Nutty Crunch: Fold in ¼ cup of toasted, chopped walnuts or pecans along with the chocolate chips. The nuts add a wonderful crunch and a savory note that balances the sweetness. Toast them in a dry pan for 2-3 minutes first to really bring out their flavor.
- White Chocolate & Macadamia: This is my personal indulgence. Swap the semi-sweet chips for ⅓ cup white chocolate chips and fold in ¼ cup chopped macadamia nuts. It feels fancy, but it’s still just as quick and easy. The white chocolate gets beautifully golden in the oven.
- Spiced Cookie: Add ½ teaspoon of cinnamon and a pinch of nutmeg to the dry ingredients. This gives the cookies a warm, cozy flavor that’s perfect for fall or winter. It pairs surprisingly well with dark chocolate chips.
Don’t be afraid to experiment. This recipe is a great base for whatever you’re craving. I once added a handful of leftover M&Ms and crushed pretzels—salty, sweet, and absolutely delicious.
Serving & Storage Suggestions
These cookies are best enjoyed warm, straight from the oven. The contrast between the crisp edges and the soft, gooey center is at its peak within the first 15 minutes. I like to serve them with a cold glass of milk for dipping, or a scoop of vanilla ice cream for an extra-special treat.
If you have any leftovers (which is rare in my house), here’s how to store them:
- At Room Temperature: Store the cookies in an airtight container at room temperature for up to 3 days. Place a slice of bread in the container—the cookies will absorb the moisture from the bread and stay soft. Replace the bread slice every day.
- In the Freezer (Baked): Freeze the cooled cookies in a single layer on a baking sheet, then transfer them to a freezer-safe bag or container. They’ll keep for up to 3 months. Thaw at room temperature for about 15 minutes, or pop them in a 300°F oven for 5 minutes to re-crisp the edges.
- In the Freezer (Unbaked): This is my favorite trick. Scoop the dough into balls and place them on a parchment-lined baking sheet. Freeze until solid, then transfer the dough balls to a freezer bag. You can bake them straight from the frozen state—just add 2-3 minutes to the baking time. Instant cookies whenever you want them!
The flavor actually improves slightly after a day or two. The sugars continue to caramelize, and the flavors meld together. But honestly, they rarely last that long in my kitchen.
Nutritional Information & Benefits
Let’s be honest—these are cookies, not health food. But knowing what’s in them can help you enjoy them mindfully. Here’s the approximate nutritional breakdown per cookie (based on 6 cookies):
- Calories: 245
- Fat: 13g
- Carbohydrates: 32g
- Protein: 3g
- Sugar: 20g
- Sodium: 180mg
These numbers are estimates and will vary based on the exact ingredients you use. The good news is that this small batch size makes portion control easy. You get the satisfaction of a warm, homemade cookie without the temptation of a full batch sitting on your counter.
The butter provides a small amount of vitamin A, and the egg yolk contains choline, which is good for brain health. The chocolate chips, especially if you use dark chocolate, contain antioxidants. But let’s be real—the main benefit here is the joy of eating something delicious that you made yourself. That counts for something, right?
If you’re watching your sugar intake, you can reduce the granulated sugar to 3 tablespoons, but the texture will be slightly less crisp. For a lower-fat option, you can substitute 2 tablespoons of the butter with 2 tablespoons of unsweetened applesauce, but the cookies will be more cake-like.
Conclusion
This recipe is proof that you don’t need fancy techniques or hours of planning to make a truly great chocolate chip cookie. It’s born from a late-night craving and perfected through trial and error. It’s for those moments when you need something warm, sweet, and comforting, and you need it now.
I love this recipe because it’s honest. It doesn’t pretend to be something it’s not. It’s a simple, no-fuss cookie that delivers on flavor and texture every single time. It’s the recipe I turn to when I’ve had a rough day, when I need a little pick-me-up, or when I just want to make the kitchen smell amazing.
Now, I want to hear from you. Have you tried these cookies? Did you make any fun variations? Let me know in the comments below! And if you share a photo on Pinterest or Instagram, tag me so I can see your creations. Happy baking, friends. You’ve got this.
Frequently Asked Questions
Can I use salted butter instead of unsalted?
Yes, you can. Just reduce or omit the added salt in the recipe. Start with ⅛ teaspoon of salt and add more to taste if needed. The cookies will have a slightly saltier flavor, which can actually be quite nice with the sweet chocolate.
Why do my cookies look flat and spread out?
This usually happens if the butter was too hot when you mixed it, or if you used too much sugar. Make sure your melted butter has cooled for at least a minute before adding the other ingredients. Also, be precise with your measurements—packing the brown sugar too firmly can add extra moisture.
Can I double this recipe?
Absolutely! Simply double all of the ingredients. The baking time and temperature remain the same. Just make sure you have enough room on your baking sheets, and bake in batches if needed. A double batch makes 12 perfect cookies.
How do I make these cookies vegan?
To make these vegan, substitute the butter with a plant-based butter stick (like Miyoko’s or Country Crock Plant Butter). Replace the egg yolk with 1 tablespoon of ground flaxseed mixed with 3 tablespoons of water (let it sit for 5 minutes to thicken). The texture will be slightly different—more cakey than chewy—but they’ll still be delicious.
Can I use whole wheat flour instead of all-purpose?
You can substitute up to half of the all-purpose flour with whole wheat flour without drastically changing the texture. Using 100% whole wheat flour will result in denser, heavier cookies with a nuttier flavor. You may need to add an extra tablespoon of butter or milk to compensate for the extra absorbency of whole wheat flour.
PrintQuick Small-Batch Chocolate Chip Cookies – Easy & Ready in 15

These quick small-batch chocolate chip cookies are ready in just 15 minutes with no chilling required. Made with melted butter and pantry staples, they deliver perfectly crisp edges and a soft, gooey center every time.
- Prep Time: 5 minutes
- Cook Time: 10 minutes
- Total Time: 15 minutes
- Yield: 6 cookies 1x
- Category: Dessert
- Cuisine: American
Ingredients
- 4 tablespoons unsalted butter, melted and slightly cooled
- ¼ cup granulated sugar
- ¼ cup packed light brown sugar
- 1 large egg yolk
- ½ teaspoon vanilla extract
- ¾ cup all-purpose flour
- ¼ teaspoon baking soda
- ¼ teaspoon salt
- ⅓ cup semi-sweet chocolate chips
Instructions
- Preheat your oven to 375°F (190°C). Line your baking sheet with parchment paper or a silicone mat.
- Melt the butter in a microwave-safe bowl in 15-second intervals until just melted. Let it cool slightly.
- In a medium mixing bowl, whisk together the melted butter, granulated sugar, and brown sugar for about 30 seconds until it forms a thick, grainy paste.
- Add the egg yolk and vanilla extract. Whisk until smooth and glossy, about 20 seconds.
- Sprinkle the flour, baking soda, and salt evenly over the wet mixture. Fold with a rubber spatula or wooden spoon until just combined. Do not overmix.
- Fold in the chocolate chips until evenly distributed.
- Using a cookie scoop or tablespoon, portion the dough into 6 equal balls (about 1.5 tablespoons each). Place them on the prepared baking sheet, spacing about 2 inches apart. Optionally, slightly flatten each ball.
- Bake for 8-10 minutes, until edges are golden brown and centers look slightly puffed and pale.
- Let the cookies rest on the hot baking sheet for exactly 2 minutes, then transfer to a wire rack to cool completely.
Notes
Use melted butter for a chewier texture and to skip chilling. Do not overmix the dough. Let cookies rest on the hot pan for 2 minutes to set the centers. For a softer cookie, bake for 8 minutes; for a crisper cookie, bake for 10 minutes.
Nutrition
- Serving Size: 1 cookie
- Calories: 245
- Sugar: 20
- Sodium: 180
- Fat: 13
- Saturated Fat: 8
- Carbohydrates: 32
- Fiber: 1
- Protein: 3
Keywords: small batch chocolate chip cookies, quick cookies, no chill cookies, easy cookies, 15 minute cookies


