I was standing in the frozen food aisle last Tuesday, staring at a box of breaded chicken patties that cost more than my entire grocery bill used to be, when the smell hit me. It wasn’t from the store — it was from somewhere deep in my memory. That warm, buttery, herby scent of my Aunt Jo’s kitchen on a Thursday night in 1995. I was eleven, sitting on a cracked vinyl stool at her counter, watching her pull a baking sheet from the oven. The chicken was golden, almost glistening, and the sound it made when she set it down — that faint sizzle against the hot pan — I can still hear it. She wasn’t a fancy cook. She used margarine, not butter, and whatever herbs she had in the cabinet. But that smell, that specific combination of crispy skin and melted butter and something green and earthy, it was magic. I bought the chicken breasts instead of the boxed patties that day. I drove home thinking about her hands, the way she’d pat the chicken dry with paper towels she’d reused from lunch. She wasn’t trying to impress anyone. She was just feeding us. And honestly, I’ve been chasing that feeling ever since. Maybe you’ve been there too — that moment when a recipe isn’t just food, it’s a time machine. This budget-friendly crispy baked chicken breast with herb butter is my best attempt at building that machine again, one crispy bite at a time.
Why You’ll Love This Recipe
Let me tell you why this recipe has become a weekly staple in my house, and why I think it’ll become one in yours too. I’ve tested this about seven times to get it just right — the first batch was dry, the second was soggy, and the third had so much butter it slid right off the pan. But by the fourth try, I knew I had something special. This isn’t just another baked chicken recipe. This is the one that makes you look forward to leftovers.
- Budget-Friendly: Uses simple, affordable ingredients you probably already have. No fancy cuts of meat or expensive oils needed. I’m talking about chicken breasts that cost a few bucks, butter that’s on sale, and dried herbs from the back of your cabinet.
- Crispy Without Frying: We’re getting that golden, crunchy crust using a clever technique with breadcrumbs and a hot oven. No deep fryer, no excessive oil, no mess on your stovetop.
- Quick Enough for a Weeknight: From fridge to table in about 40 minutes. That’s faster than takeout in my neighborhood, and way cheaper.
- Picky Eater Approved: My own kids, who usually push chicken around their plates, actually asked for seconds. The herb butter melts into the meat, making it juicy and flavorful without being weird or overwhelming.
- Leftovers That Don’t Suck: This chicken reheats beautifully. I’ve had it cold on a salad the next day, and it was still crispy. I’m not kidding.
What makes this recipe different from all the others? It’s the technique. Most baked chicken recipes either dry out the meat or end up with a soggy coating. By using a simple butter-and-herb mixture as both a marinade and a basting sauce, we lock in moisture while building a crust that actually stays crunchy. Plus, the butter browns slightly in the oven, creating this nutty, rich flavor that makes the whole kitchen smell like Sunday dinner. This isn’t just good chicken. It’s the kind of meal that makes you close your eyes after the first bite, because for a second, you’re somewhere else. Maybe you’re at your aunt’s kitchen counter. Maybe you’re just happy to be eating something that tastes like it cost twice as much as it did.
What Ingredients You Will Need
This recipe uses simple, everyday ingredients to deliver big flavor without breaking the bank. Most of these are probably in your kitchen right now, which is exactly the point. I’ve tested this with both fresh and dried herbs, and honestly, the dried ones work perfectly — and they’re cheaper.
- Boneless, skinless chicken breasts (4 pieces, about 1.5 lbs total): Look for breasts that are similar in size so they cook evenly. If they’re huge, consider cutting them in half horizontally. I usually buy a family pack when they’re on sale and freeze what I don’t use.
- Unsalted butter (4 tablespoons, softened): I prefer unsalted so I can control the salt level. If you only have salted butter, just reduce the added salt by a quarter teaspoon. Let it sit out for 20 minutes to soften — cold butter doesn’t spread well.
- Dried parsley (1 teaspoon): Adds a fresh, slightly peppery note. If you have fresh parsley, use about a tablespoon, chopped fine.
- Dried thyme (1/2 teaspoon): Earthy and warm. Thyme is my secret weapon for making chicken taste like it cooked all day.
- Garlic powder (1 teaspoon): Not garlic salt. Garlic powder gives you that savory punch without the extra sodium. I’ve used granulated garlic too, and it works fine.
- Onion powder (1/2 teaspoon): Adds depth without being sharp. It’s a background player, but you’d notice if it was missing.
- Salt (1 teaspoon): I use kosher salt because it’s easier to pinch and distribute. Table salt works too, just use a little less.
- Black pepper (1/2 teaspoon, freshly ground if possible): Fresh ground makes a difference, but pre-ground is fine. Don’t skip it — pepper wakes up the butter.
- Panko breadcrumbs (1 cup): This is the key to the crispy crust. Panko stays crunchier than regular breadcrumbs because they’re flakier and lighter. I’ve used crushed cornflakes in a pinch, and that works too.
- Grated Parmesan cheese (1/4 cup): Adds saltiness and helps the crust brown. The cheap stuff in the green can works perfectly here — no need for expensive imported cheese.
- Olive oil (2 tablespoons): Just a little to help the breadcrumbs crisp up. Use whatever you have on hand.
Equipment Needed
You don’t need a fancy kitchen for this recipe. I’ve made it in a tiny apartment oven and a big family kitchen, and it works the same. Here’s what you’ll need:
- Baking sheet (rimmed): A rimmed sheet catches any butter that melts off the chicken and prevents a mess in your oven. I use a half-sheet pan, which is about 18×13 inches. If you don’t have one, a 9×13 baking dish works, but the chicken won’t get quite as crispy on the bottom.
- Parchment paper or aluminum foil: Lining the pan makes cleanup so much easier. I’m a parchment person myself — nothing sticks to it.
- Mixing bowl (small): For combining the butter and herbs. A cereal bowl works fine.
- Shallow dish (like a pie plate): For the breadcrumb mixture. You need something wide enough to dredge the chicken.
- Sharp knife and cutting board: For trimming any fat or uneven bits off the chicken. A dull knife just makes things frustrating.
- Paper towels: Essential for drying the chicken. Wet chicken won’t get crispy. I learned that the hard way.
- Meat thermometer (optional but recommended): Takes the guesswork out of cooking. A basic instant-read thermometer costs about ten bucks and saves you from dry chicken forever.
Preparation Method
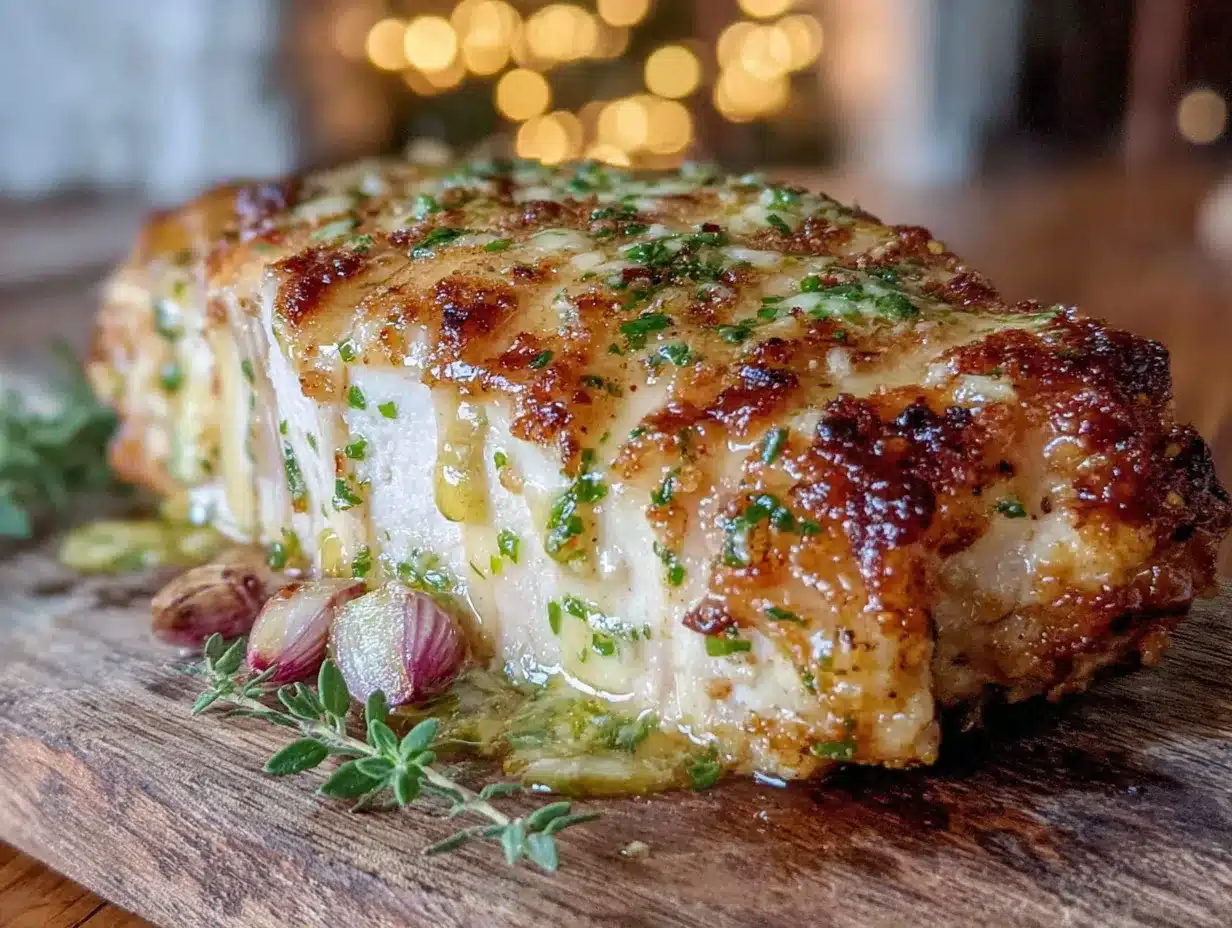
Let’s get cooking. I’ll walk you through each step like we’re in the kitchen together. Trust me on the order of things — it makes a difference.
- Preheat your oven to 400°F (200°C). This is important. A hot oven is what creates that crispy crust. While it’s heating, line your baking sheet with parchment paper or foil. Set it aside for now.
- Pat the chicken breasts dry. Take your chicken out of the package and lay them on a cutting board. Grab a handful of paper towels and press them firmly against each breast, both sides. You want them as dry as possible. This step is non-negotiable — moisture is the enemy of crispy. If you see any excess fat or weird bits, trim them off with your knife.
- Season the chicken lightly. Sprinkle a little salt and pepper on both sides of each breast. Just a pinch — we’re adding more flavor later. Set them aside while you make the herb butter.
- Make the herb butter. In your small mixing bowl, combine the softened butter, dried parsley, dried thyme, garlic powder, onion powder, remaining salt, and remaining pepper. Mash it all together with a fork until it’s evenly mixed. It should look like a soft, green-flecked spread. Taste a tiny bit if you want — it should taste savory and buttery, not raw.
- Rub the herb butter all over the chicken. Use your fingers (clean ones!) to spread the butter mixture over every surface of each chicken breast. Don’t be shy. The butter is what keeps the meat juicy and helps the breadcrumbs stick. Make sure you get the sides and the little tenderloin flap too.
- Prepare the breadcrumb coating. In your shallow dish, mix together the panko breadcrumbs, grated Parmesan cheese, and a drizzle of olive oil. Use your fingers to rub the oil into the breadcrumbs — this helps them brown evenly. The mixture should look like damp sand.
- Coat the chicken. Take one buttered chicken breast and press it firmly into the breadcrumb mixture. Flip it over and press again. Make sure every bit is covered, including the edges. Don’t just drop it in — really press the crumbs into the butter. Shake off any excess and place the coated breast on your prepared baking sheet. Repeat with all four pieces.
- Bake for 20-25 minutes. Place the baking sheet on the middle rack of your preheated oven. Set a timer for 20 minutes. At 20 minutes, check the internal temperature with your meat thermometer — it should read 165°F (74°C) in the thickest part of the breast. If it’s not there yet, give it another 3-5 minutes. Every oven is different, so trust the thermometer more than the timer.
- Let it rest. This is the hardest part. When the chicken is done, take it out of the oven and let it sit on the baking sheet for 5 minutes. Don’t cut into it right away. The juices need time to redistribute, or they’ll run out onto your plate and leave you with dry meat. I know you’re hungry. Wait anyway.
Cooking Tips & Techniques
I’ve made this recipe enough times to know where things can go wrong. Let me save you some trouble.
Don’t skip drying the chicken. I made this mistake on my second attempt. I was in a hurry, so I just patted the chicken once and moved on. The result was a soggy, pale crust that peeled off when I tried to flip it. Take the extra 30 seconds to really dry those breasts. Your future self will thank you.
Butter temperature matters. If your butter is too cold, it won’t spread evenly, and you’ll end up with clumps. If it’s too soft (like melted), it’ll slide right off the chicken. Room temperature — where it yields to gentle pressure but still holds its shape — is the sweet spot. Leave it out for 20-30 minutes before you start.
Space the chicken out on the pan. Crowding the baking sheet creates steam, and steam ruins crispiness. Leave at least an inch between each breast. If your pan is too small, use two pans or bake in batches. I learned this the hard way when I tried to fit six breasts on one pan — they came out more steamed than baked.
Use a thermometer, not your eyes. Chicken can look golden and beautiful on the outside while still being undercooked inside. Or it can look pale but be perfectly done. An instant-read thermometer is the only reliable way to know. I’ve ruined enough chicken by guessing. Don’t be like me.
Let it rest, seriously. I know I said this already, but it’s worth repeating. Those five minutes of resting time make the difference between juicy chicken and dry chicken. If you cut into it too soon, all that buttery goodness runs out onto the cutting board. Let it sit. Go set the table. Pour a drink. Whatever. Just wait.
Variations & Adaptations
This recipe is a great base for experimenting. Here are some ways I’ve changed it up depending on what I have on hand or who I’m feeding.
- Cheesy Herb Crust: Add an extra 2 tablespoons of Parmesan to the breadcrumb mixture and stir in 1/4 teaspoon of dried oregano. The cheese gets extra crispy and almost lacy around the edges. My kids call this the “fancy chicken” version.
- Spicy Kick: Mix 1/2 teaspoon of smoked paprika and 1/4 teaspoon of cayenne pepper into the herb butter. It adds a warm, smoky heat without being overwhelming. I made this for a game day snack and it disappeared fast.
- Lemon & Garlic: Add the zest of one lemon and an extra clove of minced garlic to the herb butter. The lemon brightens everything up, and the garlic gets mellow and sweet as it bakes. Perfect for spring dinners.
- Gluten-Free Option: Swap the panko breadcrumbs for crushed pork rinds or gluten-free panko. I’ve tried both, and the pork rinds actually give a really satisfying crunch. Just watch the salt — pork rinds are salty, so reduce the added salt in the butter.
- Dairy-Free Version: Use a plant-based butter stick (not margarine spread, which has too much water) and skip the Parmesan. The crust won’t be quite as golden, but it’ll still be delicious. I’ve used Miyoko’s brand with good results.
Serving & Storage Suggestions
This chicken is versatile enough to pair with almost anything. Here’s how I like to serve it and keep it for later.
Serving: Let the chicken rest for 5 minutes after baking, then slice it against the grain into thick strips. Serve it hot with a side of garlic mashed potatoes and a simple green salad dressed with lemon vinaigrette. The buttery juices from the chicken mix with the potatoes — honestly, that’s the best part. For a lighter meal, slice it over a bed of mixed greens with cherry tomatoes and cucumber. The chicken is substantial enough to be the star of the salad.
Storage: Let any leftover chicken cool completely to room temperature. Store it in an airtight container in the refrigerator for up to 4 days. Don’t stack the pieces on top of each other if you can help it — they’ll steam each other and lose their crispiness. I put a piece of parchment paper between layers if I have to stack them.
Reheating: The oven is your friend here. Reheat leftover chicken on a baking sheet at 375°F (190°C) for about 10 minutes. It’ll crisp right back up. The microwave works in a pinch, but the crust will be soft. If you’re in a hurry, try an air fryer at 375°F for 4-5 minutes — it works like magic.
Freezing: You can freeze the baked chicken for up to 3 months. Wrap each piece individually in plastic wrap, then place them in a freezer bag. To thaw, move them to the refrigerator overnight. Reheat using the oven method above. The flavor stays great, but the crust won’t be quite as crispy as fresh. Still better than anything from the freezer aisle.
Nutritional Information & Benefits
Here’s a rough estimate per serving (one chicken breast with coating). Values will vary based on exact ingredients and portion sizes.
- Calories: Approximately 380
- Protein: 42g
- Fat: 18g (including 8g saturated fat)
- Carbohydrates: 12g
- Fiber: 1g
- Sugar: 1g
- Sodium: 680mg
This recipe is a great source of lean protein, which helps keep you full and supports muscle health. The butter adds a little saturated fat, but it also helps your body absorb the fat-soluble vitamins in the herbs. If you’re watching your sodium, use unsalted butter and reduce the added salt — you can always add more at the table. For a lower-fat option, you can reduce the butter to 2 tablespoons, but the chicken won’t be quite as juicy. It’s a trade-off I’m usually willing to make on a Tuesday night.
Conclusion
This budget-friendly crispy baked chicken breast with herb butter is more than just a recipe. It’s the kind of meal that makes a regular Tuesday feel a little special. It’s affordable enough for a family dinner, simple enough for a beginner cook, and delicious enough to earn a permanent spot in your weekly rotation. I love that it uses ingredients I already have, that it doesn’t require standing over a hot stove, and that the leftovers are just as good the next day. But mostly, I love that first bite — when the crust cracks under your fork and the buttery, herby juices run out. It takes me back to that Thursday night in 1995, sitting on a cracked vinyl stool, watching my aunt prove that you don’t need fancy ingredients to make something memorable.
I’d love to hear how this turns out for you. Did your kids ask for seconds? Did you try the spicy version? Did you forget to dry the chicken and learn the same lesson I did? Drop a comment below and let me know. And if you’re looking for another affordable family favorite, you might enjoy this one pot creamy tomato pasta — it’s another weeknight hero. Happy cooking, friends!
Frequently Asked Questions
Can I use chicken thighs instead of breasts?
Absolutely. Chicken thighs will work great with this recipe. They have more fat, so they stay juicy even if you overcook them a little. Just adjust the cooking time — thighs usually need about 25-30 minutes at 400°F, and they’re safe at 175°F internal temperature (the higher temp helps break down connective tissue).
Why isn’t my crust getting crispy?
There are a few common culprits. First, your chicken might not be dry enough before you add the butter. Second, your oven might not be hot enough — make sure it’s fully preheated to 400°F. Third, you might be crowding the pan. Give each piece some space so the heat can circulate. If all else fails, try broiling for the last 2 minutes, but watch it closely so it doesn’t burn.
Can I prepare this ahead of time?
You can coat the chicken and refrigerate it for up to 4 hours before baking. Just place the coated breasts on the lined baking sheet, cover loosely with plastic wrap, and pop them in the fridge. Add about 5 minutes to the baking time since the chicken will be cold. I don’t recommend freezing the raw coated chicken — the breadcrumbs get soggy when they thaw.
What can I use instead of panko breadcrumbs?
Regular breadcrumbs work, but the crust won’t be as crispy. Crushed cornflakes or crushed crackers (like Ritz) are good alternatives — they give a nice crunch. For a low-carb option, try crushed pork rinds or almond flour mixed with a little Parmesan. Just keep in mind that different coatings will change the texture and flavor slightly.
How do I know when the chicken is fully cooked without a thermometer?
If you don’t have a thermometer, look for clear juices running from the chicken when you cut into it. The meat should be white all the way through with no pink spots. The crust should be deep golden brown. But honestly, a thermometer is the only way to be sure. They’re cheap and they save you from serving undercooked chicken or ruining perfectly good meat by overcooking it.
PrintBudget-Friendly Crispy Baked Chicken Breast with Herb

This budget-friendly crispy baked chicken breast with herb butter is a weeknight staple that delivers a golden, crunchy crust without frying. Made with simple ingredients and a clever technique, it’s juicy, flavorful, and picky eater approved.
- Prep Time: 15 minutes
- Cook Time: 25 minutes
- Total Time: 40 minutes
- Yield: 4 servings 1x
- Category: Main Course
- Cuisine: American
Ingredients
- 4 boneless, skinless chicken breasts (about 1.5 lbs total)
- 4 tablespoons unsalted butter, softened
- 1 teaspoon dried parsley
- 1/2 teaspoon dried thyme
- 1 teaspoon garlic powder
- 1/2 teaspoon onion powder
- 1 teaspoon salt
- 1/2 teaspoon black pepper, freshly ground if possible
- 1 cup panko breadcrumbs
- 1/4 cup grated Parmesan cheese
- 2 tablespoons olive oil
Instructions
- Preheat your oven to 400°F (200°C). Line a rimmed baking sheet with parchment paper or aluminum foil.
- Pat the chicken breasts dry with paper towels. Trim any excess fat or uneven bits. Season lightly with a pinch of salt and pepper on both sides.
- In a small mixing bowl, combine softened butter, dried parsley, dried thyme, garlic powder, onion powder, remaining salt, and remaining pepper. Mash together with a fork until evenly mixed.
- Rub the herb butter all over each chicken breast, covering every surface.
- In a shallow dish, mix together panko breadcrumbs, grated Parmesan cheese, and olive oil. Rub the oil into the breadcrumbs with your fingers until the mixture looks like damp sand.
- Press each buttered chicken breast firmly into the breadcrumb mixture, coating both sides and edges. Shake off excess and place on the prepared baking sheet.
- Bake for 20-25 minutes, until the internal temperature reaches 165°F (74°C) in the thickest part of the breast.
- Let the chicken rest on the baking sheet for 5 minutes before serving.
Notes
Don’t skip drying the chicken — moisture is the enemy of crispy. Butter should be at room temperature for easy spreading. Space chicken out on the pan to avoid steaming. Let chicken rest for 5 minutes after baking to keep juices inside. For a gluten-free option, use crushed pork rinds or gluten-free panko. For a dairy-free version, use plant-based butter and skip the Parmesan.
Nutrition
- Serving Size: 1 chicken breast wit
- Calories: 380
- Sugar: 1
- Sodium: 680
- Fat: 18
- Saturated Fat: 8
- Carbohydrates: 12
- Fiber: 1
- Protein: 42
Keywords: baked chicken, crispy chicken, herb butter chicken, budget-friendly chicken, easy chicken recipe, weeknight dinner


