This was supposed to be a batch of caramel apple hand pies. I had everything laid out on the counter—the pastry dough chilling in the fridge, the apples diced and tossed with cinnamon, a little dish of heavy cream for brushing the tops. But somewhere between answering a text from my sister and realizing I’d run out of butter for the crust, the whole plan just collapsed. The dough was too warm, the kitchen was too hot, and I was already 20 minutes behind schedule for a dinner I was supposed to bring dessert to. Honestly, I stood there staring at the bowl of spiced apples and felt that familiar wave of kitchen defeat wash over me. Maybe you’ve been there—that moment when you’re too far in to turn back but too far off course to follow the original plan.
So I did what any reasonable person would do: I scraped the apples into a small baking dish, grabbed some oats and flour from the pantry, and made a crisp topping with my fingers because I was too annoyed to dig out the pastry cutter. I wasn’t expecting much. I mean, I was literally throwing it together out of spite. But when it came out of the oven—bubbling at the edges, the topping golden and crunchy, the kitchen smelling like autumn in a jar—I took one bite and just stood there, fork in hand, completely stunned. It was better than the hand pies would have ever been. That tiny dish of accidental crisp became the thing everyone asked me to make again. And honestly? That’s how this recipe was born—not from careful planning, but from a distracted moment and a willingness to let the mistake lead somewhere good.
Why You’ll Love This Recipe
Let me tell you why this small-batch apple crisp keeps showing up in my kitchen, week after week, season after season.
- Perfectly Portioned: No more leftovers sitting in the fridge for days. This recipe makes exactly two generous servings—ideal for date night, a quiet evening, or when you just need a little something sweet without committing to a full pan.
- Simple Ingredients: You probably have everything in your pantry right now. Apples, oats, flour, butter, brown sugar, cinnamon. No fancy grocery trips, no obscure extracts.
- Quick & Easy: From start to oven in under 15 minutes. The hardest part is peeling the apples, and honestly, you can skip that if you’re feeling lazy—the peel adds nice texture anyway.
- Seasonally Perfect: This is the dessert that tastes like right now. Whether it’s peak apple season in September or you’re craving comfort in the dead of winter, this crisp delivers that cozy, nostalgic feeling every single time.
- Crowd-Pleaser: I’ve served this to friends who claimed they didn’t like cooked fruit, and they went back for seconds. There’s something about that warm, jammy apple filling paired with the buttery, crunchy topping that just works.
What makes this version different from every other apple crisp recipe out there? It’s the ratio. I spent weeks testing the perfect balance of apples to topping—because let’s face it, the topping is the whole point. You get a thick, craggy layer of oat streusel that stays crunchy even the next day (if it lasts that long). And the filling? It’s not too sweet, not too tart, with just enough thickener to keep it from turning into soup. This is the kind of dessert that makes you close your eyes after the first bite. It’s comfort food reimagined for two—simpler, faster, but with the same soul-soothing satisfaction.
What Ingredients You Will Need
This recipe uses simple, wholesome ingredients to deliver bold flavor and satisfying texture without the fuss. Most of these are pantry staples, especially if you keep your baking cabinet stocked during the cooler months.
For the Apple Filling
- 2 medium apples (about 300g total) – I prefer Honeycrisp or Granny Smith for their balance of sweetness and tartness. If you want a softer, sweeter filling, use Fuji or Gala. No need to peel if you’re short on time—just wash them well.
- 2 tablespoons granulated sugar (25g) – This helps draw out the apple juices and creates that lovely syrupy base.
- 1 tablespoon light brown sugar (12g), packed – Adds a hint of molasses depth that complements the cinnamon beautifully.
- 1 tablespoon all-purpose flour (8g) – This thickens the filling so it’s jammy, not watery. You can substitute cornstarch if you’re gluten-free.
- ½ teaspoon ground cinnamon – The backbone of any good apple crisp. I buy mine from a local spice shop, but any grocery store cinnamon works fine.
- ⅛ teaspoon ground nutmeg (freshly grated if you have it) – Optional but highly recommended. It adds a warm, almost floral note.
- 1 teaspoon lemon juice – Brightens the apples and prevents browning. A squeeze from half a lemon is perfect.
- Pinch of salt – Don’t skip this! It balances the sweetness and makes everything taste more like itself.
For the Crisp Topping
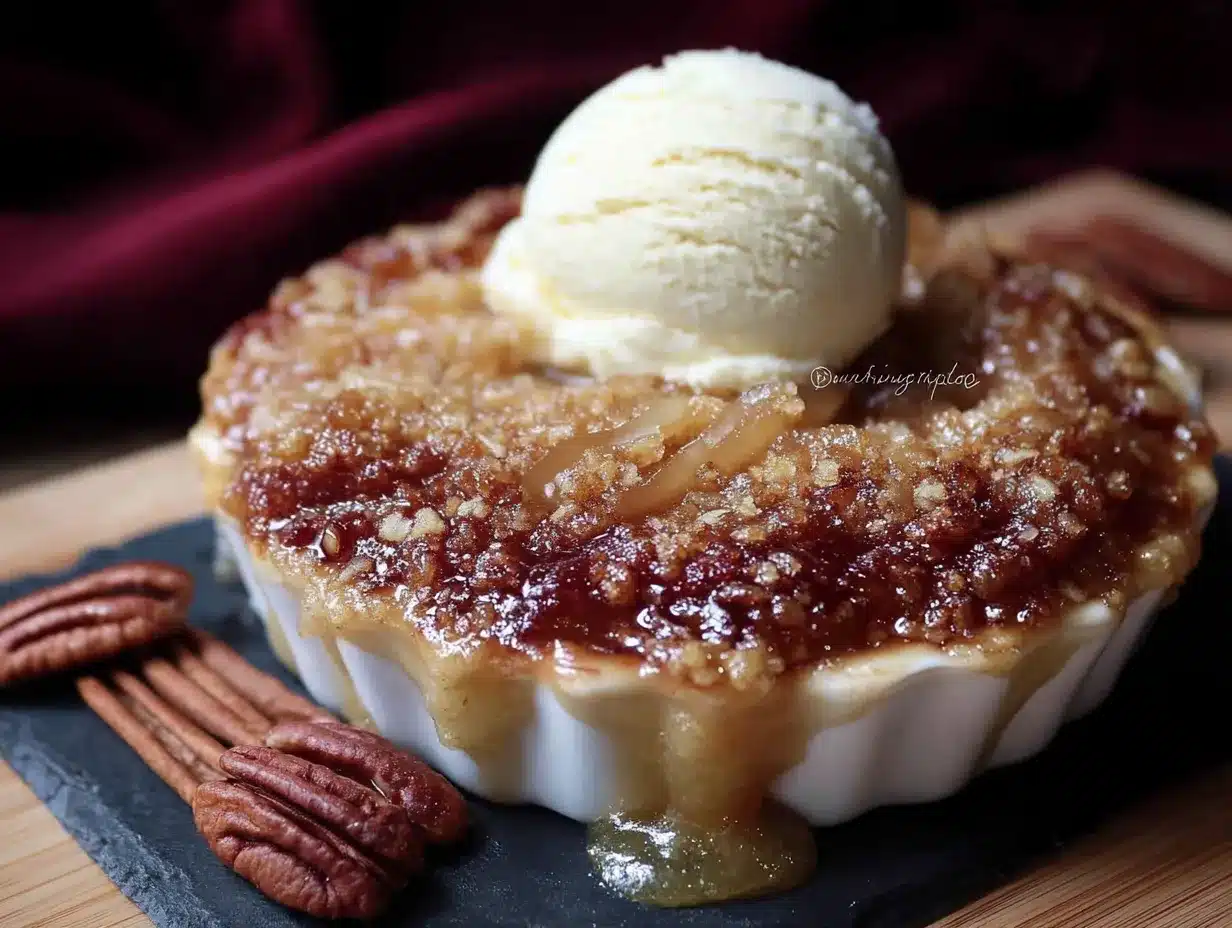
- ¼ cup old-fashioned rolled oats (25g) – I recommend Quaker or Bob’s Red Mill for the best texture. Quick oats work in a pinch but won’t give you that same chewy-crunchy contrast.
- ¼ cup all-purpose flour (30g) – The base of the streusel. For a gluten-free version, use a 1:1 gluten-free baking flour.
- ¼ cup light brown sugar (50g), packed – This is what makes the topping caramelized and crisp.
- ¼ teaspoon ground cinnamon – Because you can never have too much cinnamon in a crisp.
- 3 tablespoons unsalted butter (42g), cold and cut into small cubes – The butter must be cold. If it’s too warm, the topping will turn into a paste instead of forming those lovely clumps.
- Pinch of salt – Again, essential for balance.
Equipment Needed
You don’t need a fancy kitchen to make this recipe. Here’s what you’ll need:
- Small baking dish (about 4 to 5 cups capacity) – I use a 7×5-inch oval dish, but any small dish works. A 6-inch cast iron skillet is also perfect and looks beautiful for serving.
- Mixing bowls – One medium for the apples, one small for the topping.
- Chef’s knife and cutting board – For dicing the apples. A vegetable peeler is optional.
- Measuring cups and spoons – Or a kitchen scale for more accuracy. I’ve started weighing my ingredients and the results are so much more consistent.
- Pastry cutter or fork – For cutting the butter into the flour mixture. Your fingertips work too, just work quickly so the butter doesn’t warm up.
- Spatula or wooden spoon – For mixing the filling.
If you don’t have a small baking dish, use a standard loaf pan or even two individual ramekins. The baking time might be slightly shorter for ramekins, so start checking at 25 minutes. And honestly, I’ve made this in a small pie plate before and it worked just fine. Don’t overthink the equipment—use what you have.
Preparation Method
Let’s get to the good part. Here’s how to make the coziest small-batch apple crisp for two, step by step.
- Preheat your oven to 350°F (175°C). While it’s heating, position a rack in the center of the oven. This ensures even baking and a golden topping that’s not burnt on the bottom.
- Prepare the apples. Peel, core, and dice your apples into ½-inch cubes. I know peeling is a bit tedious, but it gives the filling a smoother texture. If you’re in a rush, leave the peels on—they add fiber and a rustic look. Aim for uniform pieces so they cook evenly. You should end up with about 2 cups of diced apples.
- Make the filling. In a medium bowl, combine the diced apples with granulated sugar, brown sugar, flour, cinnamon, nutmeg, lemon juice, and salt. Stir everything together until the apples are evenly coated. Let the mixture sit for 5 minutes while you prepare the topping—this gives the sugar time to start drawing out the juices. You’ll notice a little liquid pooling at the bottom of the bowl. That’s a good sign.
- Make the crisp topping. In a small bowl, whisk together the oats, flour, brown sugar, cinnamon, and salt. Add the cold butter cubes. Using a pastry cutter, fork, or your fingertips, cut the butter into the dry ingredients until the mixture resembles coarse crumbs with some pea-sized butter pieces remaining. Don’t overwork it—those little pockets of butter are what create the flaky, crunchy texture. If the mixture looks too dry, add another tablespoon of cold butter. If it looks too wet, add a teaspoon more flour.
- Assemble the crisp. Transfer the apple filling to your baking dish, spreading it into an even layer. Sprinkle the topping evenly over the apples, gently pressing it down with your fingers. Don’t pack it too tightly—you want some texture and air pockets for maximum crunch. The topping should cover the apples completely, with a few gaps where you can see the filling peeking through.
- Bake. Place the dish on a baking sheet to catch any drips (trust me on this one—I’ve learned the hard way). Bake for 30 to 35 minutes, or until the filling is bubbly around the edges and the topping is deep golden brown. If the topping is browning too quickly, tent the dish loosely with foil for the last 10 minutes. The filling should be thick and jammy when you poke a knife through the center.
- Cool slightly before serving. Let the crisp rest for at least 10 minutes after it comes out of the oven. This allows the filling to set up so it doesn’t run all over the plate. I know it’s tempting to dig in right away, but those 10 minutes make a huge difference in texture.
Sensory cues to watch for: When it’s done, you’ll see the filling bubbling up around the edges with thick, syrupy bubbles. The topping should be a rich golden brown and feel firm to the touch. Your kitchen will smell like cinnamon, butter, and baked apples—that unmistakable scent of comfort.
Cooking Tips & Techniques
I’ve made this recipe more times than I can count, and I’ve learned a few things along the way. Here are my best tips for perfect results every time.
Don’t skip the rest time. I know I mentioned this above, but it’s worth repeating. Letting the crisp sit for 10 minutes after baking allows the juices to thicken into a syrupy consistency. If you serve it too soon, you’ll end up with a soupy mess. Trust me, I’ve done it—and it’s still delicious, just less photogenic.
Use cold butter for the topping. This is non-negotiable. If your butter is too soft, the topping will turn into a dense paste instead of those beautiful, craggy clumps. Cut your butter into small cubes and pop them in the freezer for 5 minutes if your kitchen is warm. Your fingers should feel cold when you’re working the butter into the flour.
Toast your oats first for extra crunch. This is a little trick I picked up from a pastry chef friend. Spread the oats on a baking sheet and toast them at 350°F for 5 to 7 minutes before adding them to the topping mixture. It gives the topping a nuttier flavor and helps it stay crunchy longer, even the next day.
Adjust the sweetness based on your apples. If you’re using very sweet apples like Fuji or Gala, reduce the sugar in the filling by a tablespoon. For tart apples like Granny Smith, you might want to add an extra tablespoon of brown sugar. Taste a piece of your apple before mixing—that’s your best guide.
Watch your bake time closely. Every oven runs differently. Start checking your crisp at the 25-minute mark. If the topping is golden but the filling isn’t bubbly, continue baking and check every 3 minutes. If the topping is browning too fast, cover loosely with foil.
Variations & Adaptations
One of the best things about this recipe is how easy it is to adapt. Here are some of my favorite variations.
Gluten-Free Version: Substitute the all-purpose flour with a 1:1 gluten-free baking flour blend. I’ve used Bob’s Red Mill with great results. Make sure your oats are certified gluten-free as well. The texture will be slightly more crumbly, but just as delicious.
Vegan Adaptation: Use cold coconut oil or vegan butter in place of regular butter. I recommend using refined coconut oil so you don’t get a coconut flavor. The topping might be a bit less crispy, but it still works beautifully. Serve with vegan vanilla ice cream for the full experience.
Seasonal Fruit Swaps: This recipe works with almost any fruit. In summer, try peaches or nectarines with a pinch of ginger. In fall, pears are amazing with a little cardamom. You can even use frozen fruit—just thaw and drain it first, and add an extra tablespoon of flour to compensate for the extra moisture.
Nutty Crunch: Add 2 tablespoons of chopped pecans or walnuts to the topping mixture. Toast them first for maximum flavor. I made this version for a Thanksgiving dinner and it was the first thing to disappear from the dessert table.
Spiced-Up Version: Add ¼ teaspoon of ground ginger and a pinch of cloves to the apple filling. This gives the crisp a chai-inspired warmth that’s perfect for cold winter nights.
Serving & Storage Suggestions
This small-batch apple crisp is best served warm, straight from the oven. The contrast between the hot, jammy apples and cold ice cream is absolutely magical. Here are my favorite ways to serve it:
- Classic: Top with a generous scoop of vanilla bean ice cream. The melting ice cream mingling with the warm filling is pure comfort.
- Extra Decadent: Drizzle with homemade caramel sauce and a sprinkle of flaky sea salt. This takes it from cozy to company-worthy in seconds.
- Lighter Option: Serve with a dollop of Greek yogurt or whipped cream. The tanginess balances the sweetness beautifully.
- Breakfast Style: Leftover crisp (if there is any) is amazing spooned over warm oatmeal or yogurt. Don’t judge—it’s basically baked oatmeal, right?
Storage: Cover any leftovers tightly with foil or plastic wrap and store in the refrigerator for up to 3 days. The topping will soften over time, but it’s still delicious. To reheat, pop it in a 350°F oven for 10 to 15 minutes, or microwave individual portions for 30 to 45 seconds. If you want to restore some crunch to the topping, reheat it under the broiler for 1 to 2 minutes—watch it closely so it doesn’t burn.
Freezer Instructions: You can assemble the crisp (without baking) and freeze it for up to 3 months. Wrap the dish tightly in plastic wrap and foil. When you’re ready to bake, add about 10 minutes to the baking time. You can also freeze baked crisp, but the topping will be softer when thawed.
Nutritional Information & Benefits
Here’s the approximate nutritional breakdown for one serving (half of the recipe, without ice cream):
- Calories: 320
- Fat: 12g
- Carbohydrates: 54g
- Fiber: 5g
- Sugar: 35g
- Protein: 3g
This dessert is surprisingly balanced. Apples are rich in fiber and vitamin C, and oats provide heart-healthy beta-glucans. The butter and sugar are obviously indulgent, but this is a treat—not an everyday meal. I love that this recipe uses whole-food ingredients and lets the apples shine. If you’re watching your sugar intake, you can reduce the sugar in the filling by half and add an extra teaspoon of cinnamon for sweetness without the calories.
For a lower-carb option, try using almond flour in the topping and a sugar substitute like monk fruit sweetener. The texture will be different, but it’s a great alternative for those with dietary restrictions.
Conclusion
This small-batch apple crisp for two has become my go-to dessert for so many reasons. It’s quick enough for a Tuesday night, special enough for a celebration, and forgiving enough for beginner bakers. The fact that it came from a kitchen disaster makes me love it even more—it’s a reminder that some of the best things in life come from happy accidents.
I hope you’ll make this recipe your own. Swap the apples for pears, add a handful of cranberries, or pile on extra oats if that’s your thing. The beauty of a crisp is that it’s almost impossible to mess up. And if you do? Well, serve it with extra ice cream and call it intentional.
I’d love to hear how yours turns out. Leave a comment below and let me know what variations you tried, or tag me in your photos on social media. There’s something so special about knowing this little recipe is bringing warmth and comfort to kitchens everywhere. Happy baking, friends!
Frequently Asked Questions
Can I make this apple crisp in advance?
Absolutely! You can assemble the crisp up to 24 hours ahead and keep it covered in the refrigerator. When you’re ready to bake, add 5 to 10 minutes to the baking time since you’re starting from cold. The topping might be slightly less crunchy, but it’s still delicious.
What’s the best apple for apple crisp?
I recommend a mix of sweet and tart apples. Honeycrisp and Granny Smith are my favorite combination—the Honeycrisp provides sweetness and juiciness, while the Granny Smith adds structure and tang. If you only have one type, go with Honeycrisp for the best all-around flavor.
Can I use quick oats instead of rolled oats?
You can, but the texture will be different. Quick oats are more finely chopped, so they absorb liquid faster and create a softer, more uniform topping. Rolled oats give you that chewy, rustic texture that I personally prefer. If you only have quick oats, reduce the butter by 1 tablespoon to prevent the topping from becoming too dense.
Why is my apple crisp runny?
This usually happens for two reasons: either you didn’t let it rest after baking, or your apples released more juice than expected. To fix a runny filling, make sure you’re using the correct amount of flour in the filling (1 tablespoon) and let the crisp rest for at least 10 minutes after baking. If it’s still runny, you can gently simmer the filling on the stovetop with an extra teaspoon of cornstarch to thicken it.
Can I double this recipe?
Yes! Simply double all the ingredients and use an 8×8-inch baking dish. Increase the baking time by 5 to 10 minutes, or until the filling is bubbly and the topping is golden brown. This makes about 4 to 6 servings, perfect for a small gathering or when you want leftovers for breakfast.
Pin This Recipe!
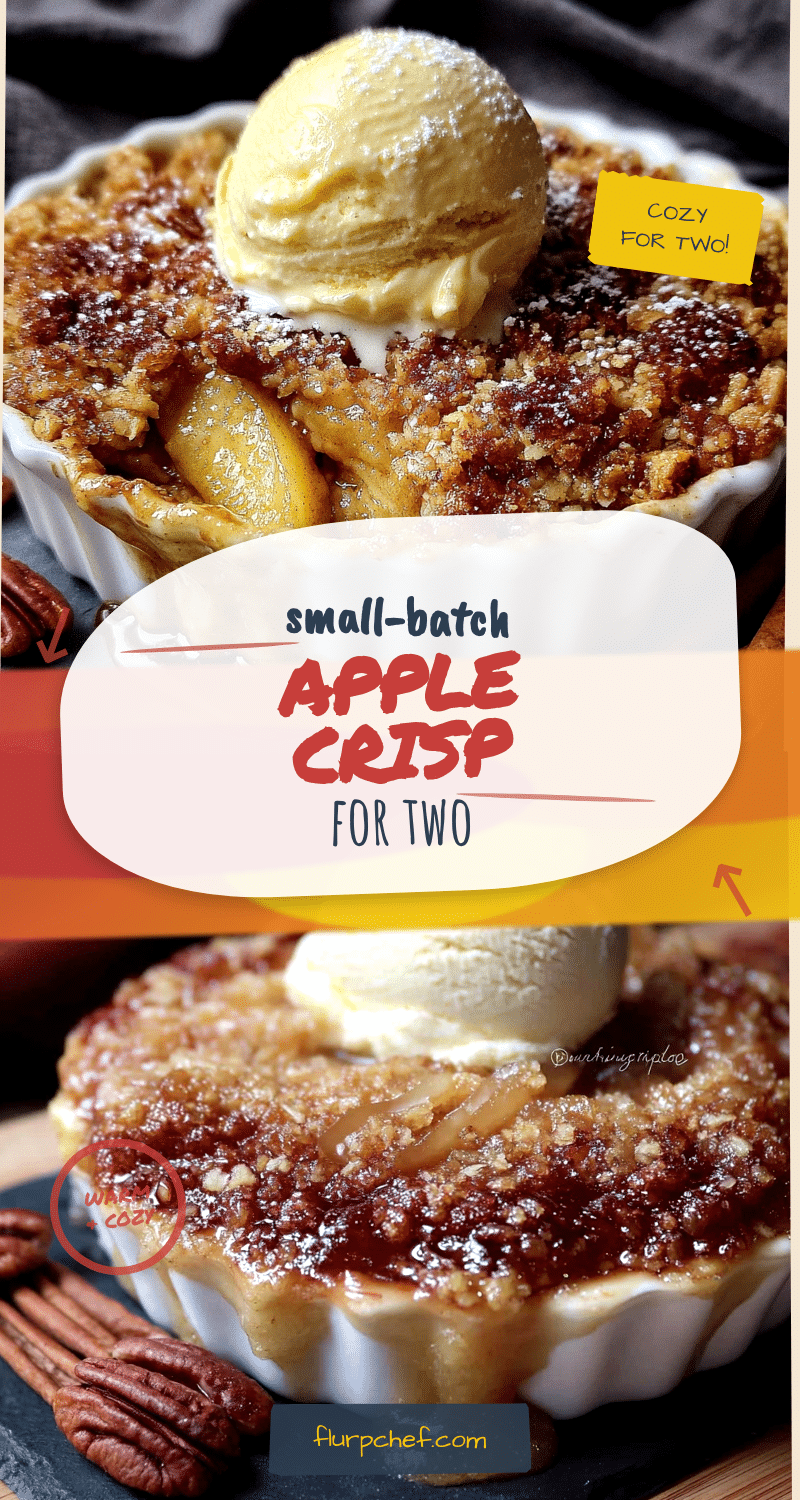
Cozy Small-Batch Apple Crisp for Two: Best Easy Dessert

This small-batch apple crisp is the perfect dessert for two, featuring a warm, jammy apple filling and a buttery, crunchy oat topping. It’s quick, easy, and made with simple pantry ingredients.
- Prep Time: 15 minutes
- Cook Time: 30 minutes
- Total Time: 45 minutes
- Yield: 2 servings 1x
- Category: Dessert
- Cuisine: American
Ingredients
- 2 medium apples (about 300g total), such as Honeycrisp or Granny Smith
- 2 tablespoons granulated sugar (25g)
- 1 tablespoon light brown sugar (12g), packed
- 1 tablespoon all-purpose flour (8g)
- 1/2 teaspoon ground cinnamon
- 1/8 teaspoon ground nutmeg (optional)
- 1 teaspoon lemon juice
- Pinch of salt
- 1/4 cup old-fashioned rolled oats (25g)
- 1/4 cup all-purpose flour (30g)
- 1/4 cup light brown sugar (50g), packed
- 1/4 teaspoon ground cinnamon
- 3 tablespoons unsalted butter (42g), cold and cut into small cubes
- Pinch of salt
Instructions
- Preheat your oven to 350°F (175°C). Position a rack in the center of the oven.
- Peel, core, and dice the apples into 1/2-inch cubes. You should have about 2 cups.
- In a medium bowl, combine the diced apples with granulated sugar, brown sugar, flour, cinnamon, nutmeg, lemon juice, and salt. Stir until evenly coated. Let sit for 5 minutes.
- In a small bowl, whisk together the oats, flour, brown sugar, cinnamon, and salt. Add the cold butter cubes. Using a pastry cutter, fork, or your fingertips, cut the butter into the dry ingredients until the mixture resembles coarse crumbs with some pea-sized butter pieces remaining.
- Transfer the apple filling to a small baking dish (about 4 to 5 cups capacity), spreading into an even layer. Sprinkle the topping evenly over the apples, gently pressing it down with your fingers.
- Place the dish on a baking sheet to catch drips. Bake for 30 to 35 minutes, or until the filling is bubbly around the edges and the topping is deep golden brown. If the topping browns too quickly, tent loosely with foil for the last 10 minutes.
- Let the crisp rest for at least 10 minutes before serving to allow the filling to set.
Notes
For extra crunch, toast the oats at 350°F for 5-7 minutes before adding to the topping. Adjust sweetness based on apple variety: reduce sugar for sweet apples like Fuji, increase for tart apples like Granny Smith. Let the crisp rest for 10 minutes after baking to allow the filling to thicken.
Nutrition
- Serving Size: 1/2 of recipe
- Calories: 320
- Sugar: 35
- Sodium: 150
- Fat: 12
- Saturated Fat: 7
- Carbohydrates: 54
- Fiber: 5
- Protein: 3
Keywords: apple crisp, small batch, dessert for two, easy apple crisp, cozy dessert, fall dessert


