I was standing in the checkout line at the hardware store—of all places—when the woman behind me started talking about dirt. Not the potting soil kind, but the dessert kind. She was maybe seventy, with gardening gloves tucked into her back pocket and a smudge of something green on her elbow. “You know what my grandkids beg for every single time they visit?” she asked, nodding at the bag of chocolate pudding mix sitting in my basket. I figured she was about to recommend some fancy baking project. Instead, she just laughed and said, “Dirt cups. The ones with the gummy worms poking out. Takes ten minutes, and they act like you’ve been in the kitchen all day.”
Honestly, I almost didn’t buy the pudding. I had a dozen other things to do that Saturday morning—laundry, meal prep, the usual weekend chaos. But something about the way she said it made me smile. So I grabbed the pudding, found some crushed Oreos in the pantry when I got home, and threw together a batch before my kids even knew what was happening. Let me tell you, the looks on their faces when I handed them those little cups with the gummy worms wiggling out of the “dirt”—pure magic. My youngest actually asked if we could eat it or if it was just for looking at. That’s when I knew this one was a keeper.
Maybe you’ve been there too—staring at a snack aisle, trying to find something that won’t get rejected after two bites. These chocolate dirt cups are the answer. They’re silly, they’re fun, and they somehow make everyone at the table feel like a kid again. I keep making them because they work. Every single time.
Why You’ll Love This Recipe
Let’s face it—finding a dessert that checks every box for a busy family is like finding a matching pair of socks on laundry day. Rare. But these chocolate dirt cups deliver on all fronts, and I’ve tested them enough times to know they don’t disappoint.
- Quick & Easy : Comes together in under 10 minutes. No oven, no baking, no complicated steps. Perfect for those afternoons when the kids are hungry and you’re out of ideas.
- Simple Ingredients : You probably already have most of this stuff in your kitchen. Chocolate pudding mix, milk, Oreos, and gummy worms. That’s it. No fancy grocery trips required.
- Perfect for Everyday Fun : Great for birthday parties, classroom treats, rainy day activities, or just a regular Tuesday when everyone needs a pick-me-up.
- Crowd-Pleaser : I’ve served these to kids, teenagers, and adults, and every single person has smiled. There’s something about eating “dirt” that brings out the kid in everyone.
- Unbelievably Delicious : The creamy chocolate pudding paired with the crunchy Oreo “dirt” and the chewy gummy worms creates a texture combo that’s next-level comfort food. It’s simple, but it hits every note.
What makes this recipe different from the rest? It’s the technique. I’ve learned that letting the pudding set just long enough—about 5 minutes—before layering makes all the difference. And crushing the Oreos to just the right consistency (not too fine, not too chunky) gives you that real “dirt” texture that makes kids giggle. This isn’t just another version of dirt cups. It’s the version that works every time, with no fuss and maximum payoff.
This recipe isn’t just good—it’s the kind that makes you close your eyes after the first bite. It’s comfort food reimagined, faster, simpler, but with the same soul-soothing satisfaction. Perfect for impressing little guests without stress, or turning a simple afternoon into something memorable.
What Ingredients You Will Need
This recipe uses simple, pantry-friendly ingredients to deliver big flavor and even bigger smiles. Nothing complicated here—just the good stuff you can find at any grocery store.
For the Pudding Layer
- 1 box (3.9 oz) instant chocolate pudding mix (I recommend Jell-O brand for consistent results, but store brands work fine too)
- 2 cups cold milk (whole milk gives the creamiest texture, but 2% works well. For a dairy-free version, use unsweetened almond or oat milk)
For the “Dirt” Layer
- 1 package (14.3 oz) Oreo cookies (about 20 cookies—regular or Double Stuf both work. You’ll use the whole cookie, cream filling and all)
For the Decoration
- 1 cup gummy worms (any brand works—I prefer the sour ones for an extra flavor pop, but classic sweet ones are great too)
- Optional: green sprinkles or shredded coconut tinted green (to look like grass poking out of the dirt)
- Optional: small plastic flowers or toy gardening tools (for serving fun—totally optional but kids love it)
A quick note on ingredient selection: Look for instant pudding mix, not cook-and-serve. The instant kind sets up in minutes, which is the whole point of this quick dessert. For the Oreos, I’ve tried generic chocolate sandwich cookies, and honestly, they just don’t crush the same way. The real deal gives you that perfect dark “dirt” color and the right crumbly texture. As for gummy worms, pick your favorite—sour, sweet, or even the giant ones cut in half. My kids prefer the sour ones because they cut through the sweetness of the pudding.
If you’re looking to make substitutions, here’s what works: Use dairy-free milk and dairy-free pudding mix for a vegan version. Swap Oreos with gluten-free chocolate sandwich cookies if needed. And if gummy worms aren’t your thing (though I can’t imagine why), try gummy bugs, candy rocks, or even crushed peanut butter cups for a different twist.
Equipment Needed
You don’t need much for this recipe, which is part of the beauty. Here’s what you’ll need:
- Mixing bowl – A medium-sized bowl for whisking the pudding. Any bowl works, but a glass one lets you see if the pudding is smooth.
- Whisk – For mixing the pudding and milk together. A fork works in a pinch, but a whisk gives you a smoother result.
- Measuring cups – For the milk. A liquid measuring cup is best for accuracy.
- Ziploc bag or food processor – For crushing the Oreos. I prefer the Ziploc bag method because it’s less cleanup and the kids can help smush them. A rolling pin or even your hands works too.
- 6-8 small cups or clear plastic cups – Clear cups are best so you can see the layers. I use 7-ounce disposable cups for parties, but small mason jars or even juice glasses work great. You want something you can see through—that’s half the fun.
- Spoon or small spatula – For layering the pudding and dirt.
If you don’t have a food processor, don’t worry. I’ve crushed Oreos with a rolling pin, a heavy skillet, and even a clean wine bottle. The Ziploc bag method is my go-to because it’s quick and the kids love helping. Just seal the bag tight before you start smashing—trust me on that one. I learned the hard way after a chocolate explosion in my kitchen.
Preparation Method
Alright, let’s get to the fun part. Here’s how to make these chocolate dirt cups step by step.
- Make the chocolate pudding. In a medium mixing bowl, whisk together the instant chocolate pudding mix and 2 cups cold milk. Whisk for about 2 minutes until the mixture starts to thicken. It should look smooth and glossy with no lumps. Let it sit for 5 minutes to set up slightly. It will be soft but not runny—like a thick milkshake. Don’t skip this resting time, or your layers will blend together.
- Crush the Oreos. While the pudding sets, place the Oreo cookies (cream filling and all) into a large Ziploc bag. Seal it tightly, squeezing out as much air as possible. Now, the fun part—let the kids smash them! Use a rolling pin, your hands, or even a heavy pan to crush the cookies into fine crumbs. You want a texture that looks like real dirt—some small pieces are fine, but avoid big chunks. If you’re using a food processor, pulse about 10-15 times until you get a crumbly consistency. Set aside about 2 tablespoons of the cookie crumbs for garnish on top.
- Layer the cups. Grab your clear cups or jars. Start with a layer of crushed Oreos at the bottom—about 1-2 tablespoons per cup, depending on the size. Press it down gently with the back of a spoon to create a solid “dirt” base. Next, spoon or pour the chocolate pudding on top, filling each cup about three-quarters full. Leave some room at the top for the final dirt layer.
- Add the final dirt layer. Sprinkle the remaining crushed Oreos over the top of the pudding. You want a thick enough layer that you can’t see the chocolate pudding underneath—that’s the “dirt” effect. About 1-2 tablespoons per cup should do it.
- Add the gummy worms. Here’s where the magic happens. Gently push 2-3 gummy worms into the top of each cup so they look like they’re crawling out of the dirt. Some should be halfway buried, some poking out. Get creative with it—make it look like a little worm party. If you’re using green sprinkles or coconut, sprinkle a little on top to look like grass.
- Chill (optional but recommended). For the best texture, refrigerate the dirt cups for at least 30 minutes before serving. This helps the pudding set completely and the Oreo crumbs soften just slightly. If you’re in a hurry, you can serve them right away—they’ll still taste amazing, just a bit softer.
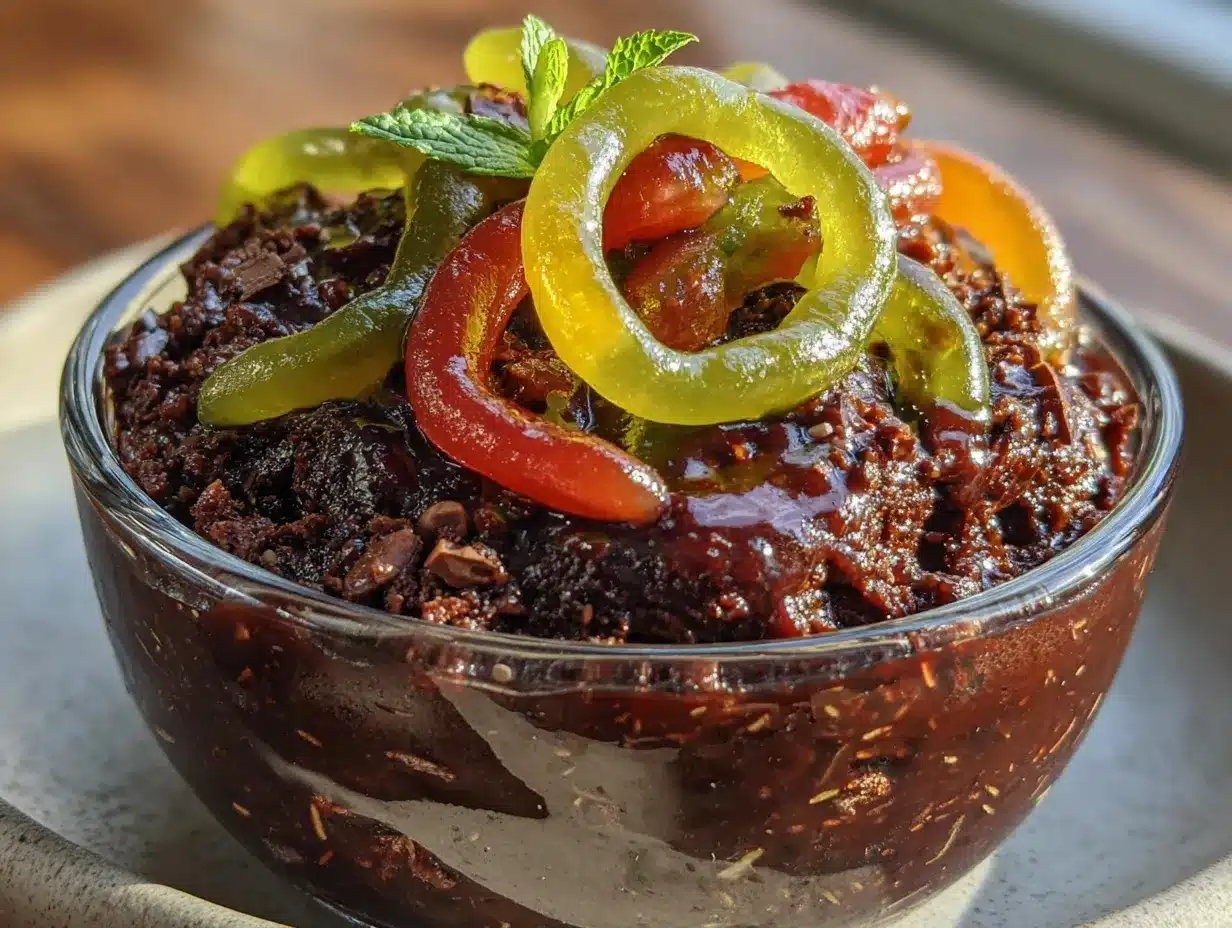
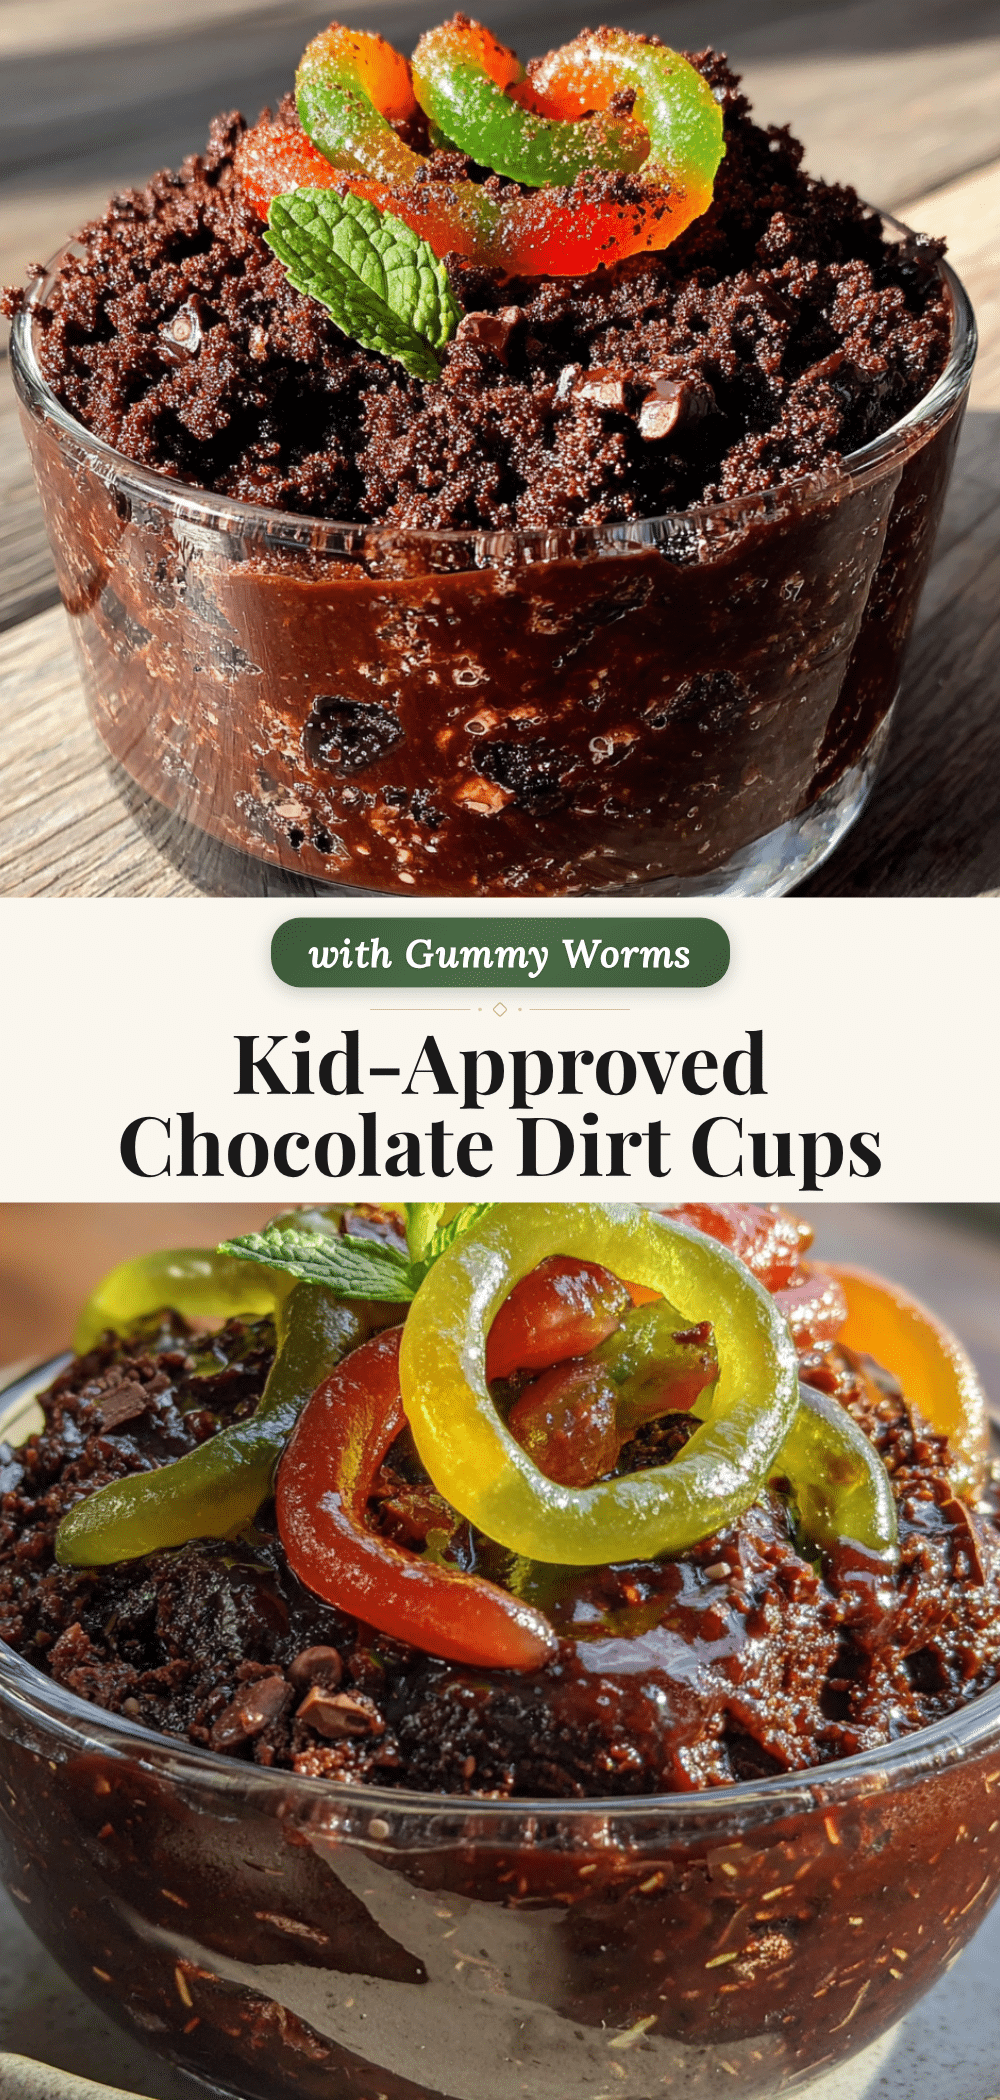
- Serve and enjoy. Grab a spoon and dig in! The layers should be visible through the clear cup—dark dirt, creamy chocolate, and those wiggly worms poking out. Watch the kids’ faces light up when they see it.
One thing I’ve learned: if you’re making these for a party, assemble them right before serving or within an hour. The Oreo crumbs can get soggy if they sit too long in the fridge. For the best crunch, keep the crushed cookies separate and add them just before serving.
Cooking Tips & Techniques
After making these dirt cups more times than I can count, I’ve picked up a few tricks that make the process smoother and the results better.
Don’t overmix the pudding. I know it’s tempting to keep whisking until it’s perfectly smooth, but overmixing can make the pudding thinner. Whisk just until the powder dissolves and the mixture starts to thicken—about 2 minutes. Let it rest, and it will set up perfectly on its own.
Crush Oreos to the right consistency. You want crumbs that look like soil, not sand. If you crush them too fine, they turn into a paste. If you leave them too chunky, they don’t look like dirt. Aim for a mix of fine crumbs with a few slightly larger pieces. I like to crush them in a bag and then pick out any big chunks that didn’t break down.
Use clear cups for the full effect. I made the mistake of using opaque bowls the first time, and honestly, it wasn’t the same. Half the fun is seeing those layers—the dark dirt, the creamy pudding, the worms wiggling out. Clear plastic cups, small mason jars, or even glass dessert dishes work perfectly.
Let the kids help. This is one of those recipes where mess is part of the fun. Let them crush the Oreos, layer the cups, and poke in the gummy worms. My youngest once got so into the smashing that Oreo dust ended up on the ceiling, but you know what? The dirt cups were perfect, and he still talks about that afternoon.
Watch the timing. These are best eaten within a few hours of assembly. If you’re making them ahead, prepare the pudding and crush the cookies separately, then assemble just before serving. The Oreo crumbs will stay crunchy, and the pudding will be perfectly creamy.
One failure I’ll admit to: I once tried using homemade pudding instead of instant. It was richer, sure, but it took forever to set, and the layers blended together into a brown mess. Stick with instant for this one. It’s faster and gives you those clean, beautiful layers that make the dessert so fun.
Variations & Adaptations
One of the best things about this recipe is how easy it is to switch things up. Here are a few variations I’ve tried and loved.
Dairy-Free Version : Use unsweetened almond milk or oat milk with a dairy-free instant pudding mix. Most store brands have a dairy-free option. The texture will be slightly less creamy, but still delicious. Top with dairy-free chocolate sandwich cookies and gummy worms (most are dairy-free).
Gluten-Free Version : Swap the Oreos with gluten-free chocolate sandwich cookies. There are several brands available now that taste just as good. The rest of the ingredients are naturally gluten-free as long as you check your pudding mix label.
Flavor Twist : Try different pudding flavors! I’ve made these with vanilla pudding and called them “sand cups” with gummy crabs. Butterscotch pudding works great too, especially with chocolate cookie crumbs. My personal favorite is white chocolate pudding with Oreos—it looks like actual dirt and has a sweeter, creamier taste.
Add a Crunch Layer : Before adding the final dirt layer, sprinkle some crushed peanuts, toffee bits, or mini chocolate chips on top of the pudding. It adds an extra texture that adults especially seem to love.
Make It a Parfait : Layer the pudding and crushed cookies multiple times in taller glasses. Start with cookies, then pudding, then cookies, then pudding, and finish with cookies on top. It looks even more impressive and gives you more of that crunchy cookie texture in every bite.
My personal favorite variation? I add a layer of sliced bananas between the pudding and the first cookie layer. It sounds weird, but the banana and chocolate combo is amazing, and it makes the dessert feel a little more substantial. My kids don’t even notice the fruit—they’re too busy hunting for worms.
Serving & Storage Suggestions
These chocolate dirt cups are best served cold, straight from the fridge. The contrast between the cool, creamy pudding and the crunchy Oreo “dirt” is what makes them so satisfying. I like to serve them with a small spoon and a napkin—things can get a little messy, but that’s part of the fun.
For parties, set up a “dirt cup bar” with different toppings and let everyone build their own. Set out bowls of crushed Oreos, gummy worms, sprinkles, crushed peanuts, and maybe some chocolate shavings. Kids love customizing their own cups, and it makes for great photos.
These pair perfectly with a glass of cold milk or a scoop of vanilla ice cream on the side. If you’re serving them at a birthday party, add a candle to each cup for a fun twist. The kids will lose their minds.
Storage: Keep assembled dirt cups covered in the refrigerator for up to 2 days. The Oreo crumbs will soften over time, so they won’t be as crunchy on day two, but they’ll still taste great. If you want to prep ahead, store the crushed cookies in an airtight container at room temperature and the pudding in the fridge, then assemble just before serving.
Freezing: I don’t recommend freezing these. The pudding gets icy and the texture changes completely. Stick to the fridge for best results.
One thing I’ve noticed: the flavors actually get better after a few hours in the fridge. The pudding sets up perfectly, and the cookie crumbs absorb just a little moisture from the pudding, creating a texture that’s almost like a soft cookie crust. If you can wait, let them sit for an hour before serving.
Nutritional Information & Benefits
Let’s be real—these are a treat, not a health food. But here’s the estimated nutritional breakdown for one serving (based on 8 servings per recipe):
- Calories: Approximately 320-350 per cup
- Fat: 12-15g
- Carbohydrates: 50-55g
- Protein: 5-7g
- Sugar: 35-40g
- Fiber: 2-3g
While this isn’t exactly a health food, there are a few bright spots. The milk provides calcium and vitamin D, and if you use whole milk, you get a little protein too. The Oreos contain a small amount of iron from the enriched flour. And hey, the gummy worms are fat-free—so there’s that.
For dietary considerations: This recipe contains dairy and gluten. For a dairy-free version, use plant-based milk and dairy-free pudding mix. For a gluten-free version, use gluten-free chocolate sandwich cookies. Always check labels if you’re serving someone with allergies.
My take? These are a fun, occasional treat that brings joy to the table. I don’t stress about the sugar content when I know my kids are getting a balanced meal the rest of the day. Sometimes, a little dirt is exactly what everyone needs.
Conclusion
These chocolate dirt cups with gummy worms are proof that the best desserts don’t have to be complicated. They’re quick, they’re fun, and they bring out the kid in everyone who eats them. Whether you’re making them for a birthday party, a classroom treat, or just a random Tuesday afternoon, they never fail to deliver smiles.
I love this recipe because it reminds me that cooking doesn’t always have to be serious. Sometimes, the most memorable meals are the ones that make people laugh. And honestly, watching my kids dig into a cup of “dirt” with gummy worms poking out is one of my favorite parenting moments. It’s simple, it’s silly, and it works.
I’d love to hear how yours turn out! Try different variations, add your own twist, and let me know what your family thinks. Drop a comment below or tag me in your photos—I can’t wait to see your dirt cups. Happy cooking, and don’t forget to save a worm for yourself!
Frequently Asked Questions
Can I make these dirt cups ahead of time?
Yes! You can assemble them up to 24 hours in advance. Just keep them covered in the refrigerator. The Oreo crumbs will soften slightly, but they’ll still taste delicious. For the crunchiest texture, add the crushed cookies and gummy worms just before serving.
Can I use homemade pudding instead of instant?
You can, but I don’t recommend it for this recipe. Homemade pudding takes longer to set and can be runny, which makes the layers blend together. Instant pudding gives you that perfect, clean layering effect that makes these cups so fun to look at and eat.
How many cups does this recipe make?
This recipe makes about 6-8 servings, depending on the size of your cups. I use 7-ounce cups and get 7 full cups. If you’re using smaller cups (like 4-ounce), you’ll get closer to 10-12 servings. Adjust the layering amounts based on your cup size.
Can I use a different type of cookie?
Absolutely! Any chocolate sandwich cookie works. You can also try vanilla sandwich cookies for a lighter “dirt” look, or crushed graham crackers for a different texture. Just keep in mind that the color and flavor will change. Oreos give you that dark, realistic dirt look.
How do I keep the gummy worms from sinking?
Push the gummy worms into the top layer of crushed Oreos, not into the pudding. The cookie crumbs help hold them in place. If you’re worried about them sinking, add a thicker layer of crushed cookies on top—about 2 tablespoons per cup. This gives the worms something to grip onto.
Pin This Recipe!
Easy Chocolate Dirt Cups: 10-Minute Kid-Approved Dessert
These no-bake chocolate dirt cups with gummy worms come together in under 10 minutes using simple ingredients like instant pudding, Oreos, and gummy worms. A fun, crowd-pleasing dessert that brings out the kid in everyone.
- Prep Time: 10 minutes
- Cook Time: 0 minutes
- Total Time: 10 minutes (plus optional 30 minutes chilling)
- Yield: 6-8 servings 1x
- Category: Dessert
- Cuisine: American
Ingredients
- 1 box (3.9 oz) instant chocolate pudding mix
- 2 cups cold milk
- 1 package (14.3 oz) Oreo cookies (about 20 cookies)
- 1 cup gummy worms
- Optional: green sprinkles or shredded coconut tinted green
- Optional: small plastic flowers or toy gardening tools
Instructions
- In a medium mixing bowl, whisk together the instant chocolate pudding mix and 2 cups cold milk. Whisk for about 2 minutes until the mixture starts to thicken. Let it sit for 5 minutes to set up slightly.
- While the pudding sets, place the Oreo cookies into a large Ziploc bag. Seal tightly and crush with a rolling pin or your hands until you get a texture like real dirt. Set aside about 2 tablespoons for garnish.
- Grab your clear cups or jars. Start with a layer of crushed Oreos at the bottom—about 1-2 tablespoons per cup. Press down gently with the back of a spoon.
- Spoon or pour the chocolate pudding on top, filling each cup about three-quarters full.
- Sprinkle the remaining crushed Oreos over the top of the pudding to create a thick ‘dirt’ layer.
- Gently push 2-3 gummy worms into the top of each cup so they look like they’re crawling out of the dirt. Add optional green sprinkles or coconut for grass.
- Refrigerate for at least 30 minutes before serving for best texture. Serve cold.
Notes
For best results, use instant pudding mix (not cook-and-serve). Crush Oreos to a fine crumb with some small pieces for realistic ‘dirt’ texture. Assemble just before serving to keep Oreo crumbs crunchy. For dairy-free, use plant-based milk and dairy-free pudding mix. For gluten-free, use gluten-free chocolate sandwich cookies.
Nutrition
- Serving Size: 1 cup
- Calories: 320350
- Sugar: 3540
- Fat: 1215
- Carbohydrates: 5055
- Fiber: 23
- Protein: 57
Keywords: chocolate dirt cups, no-bake dessert, easy dessert, kid-friendly, gummy worms, Oreo dessert, quick dessert


