I was supposed to be making gingerbread. It was mid-October, and my kitchen counter was covered in molasses, ginger, and cloves. I had the whole thing planned out—spicy, dark, perfect for the first crisp evening of autumn. But somewhere between measuring the flour and realizing I was out of molasses, the whole plan fell apart. I stood there, spatula in hand, staring at a bowl of butter and sugar that was already creamed and ready to go. The molasses jar was empty. Completely empty. I think I actually said “you’ve got to be kidding me” out loud to no one.
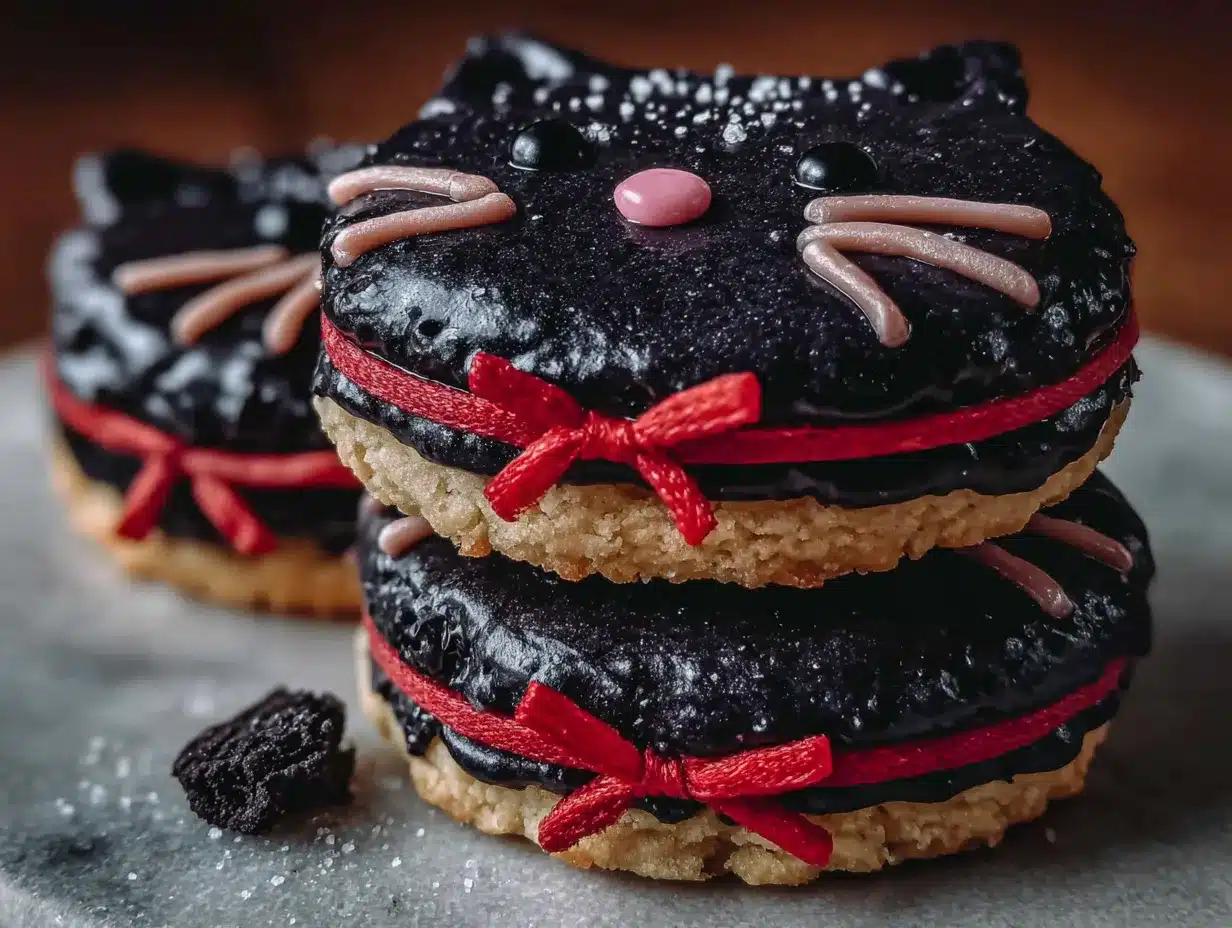
So I grabbed the only sweetener I had left—a bag of powdered sugar I’d bought for a frosting emergency last spring. I figured I’d make a simple sugar cookie, throw in some vanilla, and call it a day. But then I saw the black cocoa powder in the back of my pantry. You know, the stuff that looks like dirt and smells like dark chocolate dreams? I’d bought it on a whim months ago for a recipe I never got around to making. On a total whim, I tossed a few tablespoons into the dough. The color turned this gorgeous, deep charcoal gray, almost black. I rolled it out, cut it into cat shapes (because I had a cat cookie cutter buried in a drawer), and baked them.
Honestly? I was half-expecting a disaster. The dough was a little dry, the edges were cracking, and I was sure I’d ruined the whole batch. But when those cookies came out of the oven, golden on the bottom and perfectly dark on top, I nearly dropped the tray. They were beautiful. And the taste—soft, buttery, with this deep, almost mysterious chocolate flavor that wasn’t too sweet. My neighbor, who’d stopped by to borrow an egg, took one bite and said “you need to make these again.” Maybe you’ve been there—when a kitchen mistake turns into something you didn’t know you needed. That’s how these Cozy Black Cat Sugar Cookies were born. And honestly? I’ve never gone back to gingerbread.
Why You’ll Love This Recipe
These aren’t your average sugar cookies. I’ve tested this recipe at least six times to get the texture just right—soft in the center, slightly crisp at the edges, and with a flavor that makes you want to curl up on the couch with a cup of tea. Here’s why this recipe is going to become your new fall favorite:
- Quick & Easy: From start to finish, these cookies come together in about 45 minutes. No chilling required (yes, really), so you can whip up a batch even on a busy weeknight.
- Simple Ingredients: You probably have most of these in your pantry right now. Butter, sugar, flour, eggs, vanilla—and that magical black cocoa powder that does all the heavy lifting.
- Perfect for Halloween: These are great for classroom parties, spooky movie nights, or just a cozy evening at home when you want something festive but not overly complicated.
- Crowd-Pleaser: I’ve brought these to three different gatherings now, and every single time, people ask for the recipe. Kids love the cat shape, and adults love the rich chocolate undertone.
- Unbelievably Delicious: The black cocoa powder gives these cookies a flavor that’s hard to describe—like a cross between a classic sugar cookie and a dark chocolate dream. It’s comforting, cozy, and just a little bit mysterious.
What makes this recipe different from all the other sugar cookie recipes out there? It’s the texture. Most black cookies I’ve tried are either too dry or too cakey. This one hits that perfect sweet spot—tender, buttery, and sturdy enough to hold its shape without being tough. Plus, the black cocoa powder adds a subtle richness that regular cocoa just can’t match. It’s not just another version of a sugar cookie. It’s the version you’ll keep coming back to.
And let’s be honest—sometimes you need a recipe that feels like a hug. These cookies are that. They’re the kind of treat that makes you close your eyes after the first bite, even if you’re just standing in your kitchen in your pajamas. Whether you’re making them for a Halloween party or just because it’s Tuesday and you need something cozy, these cookies deliver.
What Ingredients You Will Need
This recipe uses simple, wholesome ingredients to deliver that deep, cozy flavor and soft-yet-slightly-crisp texture. Most of these are pantry staples, so you probably won’t need to make a special trip to the store. Here’s what you’ll need:
For the Cookie Dough
- Unsalted butter, softened (1 cup / 226g) – I always use unsalted so I can control the salt level. Let it sit out for about 30 minutes before you start.
- Granulated sugar (1 cup / 200g) – Regular white sugar gives these cookies that classic sweet base and helps with the slightly crisp edges.
- Large egg (1, room temperature) – Room temperature eggs blend into the butter-sugar mixture more smoothly. If you forgot to take it out early, just place the egg in a bowl of warm water for 5 minutes.
- Vanilla extract (2 teaspoons) – Pure vanilla extract makes a difference here. I personally prefer Nielsen-Massey, but any good-quality vanilla works.
- All-purpose flour (2 cups / 250g) – Spoon and level your flour for the most accurate measurement. Scooping directly from the bag can pack in too much flour and make the cookies dry.
- Black cocoa powder (1/3 cup / 40g) – This is the star of the show. Black cocoa powder is different from regular Dutch-process cocoa—it’s more alkaline, less acidic, and gives that gorgeous dark color. I recommend Rodelle or King Arthur Flour brands for the best results.
- Baking powder (1/2 teaspoon) – Helps the cookies spread just enough without puffing up too much.
- Salt (1/4 teaspoon) – Balances the sweetness and brings out the chocolate flavor.
For the Royal Icing (Optional but Recommended)
- Powdered sugar (1 cup / 120g) – Sift it first to avoid lumps.
- Meringue powder (1 tablespoon) – This gives the icing that smooth, glossy finish that hardens nicely. If you don’t have it, you can use 1 egg white instead, but meringue powder is safer for kids.
- Water (2-3 tablespoons) – Add slowly until you reach a thick but drizzle-able consistency.
- White gel food coloring (optional) – For making the icing bright white against the dark cookies. I use Americolor brand.
Substitution Tips: If you can’t find black cocoa powder, you can use regular Dutch-process cocoa powder, but the color will be more of a dark brown than black. For a dairy-free version, swap the butter with vegan butter sticks (I like Earth Balance). The texture will be slightly different, but still delicious. And if you’re avoiding eggs, you can use a flax egg (1 tablespoon ground flaxseed mixed with 3 tablespoons water) for the cookie dough, though the icing is harder to replace.
Equipment Needed
You don’t need a fancy kitchen to make these cookies. Here’s what I use every time:
- Stand mixer or hand mixer – A stand mixer makes creaming the butter and sugar effortless, but a hand mixer works just fine. I’ve used both, and honestly, the hand mixer is easier to clean.
- Large mixing bowls – You’ll need at least two: one for the dry ingredients and one for the wet.
- Whisk – For mixing the dry ingredients together evenly.
- Rolling pin – I use a wooden rolling pin, but any kind works. If you don’t have one, a wine bottle works in a pinch (just wash it first!).
- Cat-shaped cookie cutter – This is key for the black cat shape. You can find these at most craft stores or online. If you don’t have a cat cutter, any Halloween shape works—pumpkins, bats, ghosts.
- Baking sheets – Two large baking sheets lined with parchment paper or silicone baking mats.
- Cooling rack – Essential for letting the cookies cool completely before icing.
- Piping bags or zip-top bags – For the royal icing. I usually use a small zip-top bag with the corner snipped off—it’s cheaper and works just as well.
- Offset spatula – Optional, but helpful for spreading icing smoothly.
One tip I learned the hard way: make sure your baking sheets are completely cool before placing raw cookie dough on them. If you put dough on a hot sheet, the cookies will start spreading before they even hit the oven. I ruined an entire batch this way last year!
Preparation Method
Let’s get baking. This process is straightforward, but I’ll walk you through every step with the little tricks I’ve picked up along the way.
- Preheat your oven to 350°F (175°C). Line two baking sheets with parchment paper or silicone baking mats. This prevents sticking and makes cleanup so much easier.
- Cream the butter and sugar. In a large mixing bowl (or the bowl of your stand mixer), beat the softened butter and granulated sugar together on medium speed until light and fluffy. This takes about 3-4 minutes. You’re looking for a pale, creamy texture. Scrape down the sides of the bowl halfway through. Don’t rush this step—proper creaming adds air to the dough, which gives the cookies a tender texture.
- Add the egg and vanilla. Crack the egg into a small bowl first (just in case you get any shell), then add it to the butter mixture along with the vanilla extract. Beat on low speed until just combined. The mixture might look a little curdled at this point—that’s totally normal, don’t panic.
- Mix the dry ingredients. In a separate bowl, whisk together the all-purpose flour, black cocoa powder, baking powder, and salt. Whisking ensures everything is evenly distributed. I once skipped this step and ended up with a pocket of baking powder in one cookie—it tasted like metal. Learn from my mistake!
- Combine the wet and dry ingredients. Gradually add the dry ingredients to the wet mixture, mixing on low speed. Stop as soon as the flour disappears. Overmixing will make the cookies tough. The dough will be thick and slightly crumbly—that’s what you want. If it feels too dry to come together, add one teaspoon of milk at a time until it holds together when pressed.
- Roll out the dough. Lightly flour your work surface and rolling pin. Place the dough on the surface and sprinkle a little flour on top. Roll the dough to about 1/4-inch (6mm) thickness. Try to keep it even—if some parts are thinner than others, they’ll bake unevenly. If the dough sticks to your rolling pin, dust with a little more flour.
- Cut out the cat shapes. Press your cat-shaped cookie cutter firmly into the dough, then lift straight up. Transfer the cut shapes to your prepared baking sheets, spacing them about 2 inches (5cm) apart. They don’t spread much, so you can fit about 8-10 cookies per sheet. Gather the dough scraps, gently press them together, and re-roll to cut more cookies. Avoid overworking the scraps, or the cookies will be tougher.
- Bake. Place the baking sheets in the preheated oven and bake for 8-10 minutes. The cookies are done when the edges look set and the bottoms are lightly golden. The centers might look slightly soft—that’s okay, they’ll firm up as they cool. For softer cookies, bake for 8 minutes. For slightly crisper cookies, go for 10 minutes.
- Cool completely. Let the cookies cool on the baking sheets for 5 minutes, then transfer them to a cooling rack. Let them cool completely before icing—this is crucial. If you ice warm cookies, the icing will melt and slide right off. I learned this the hard way and ended up with a sticky mess.
- Make the royal icing (optional). In a small bowl, whisk together the powdered sugar and meringue powder. Add water one tablespoon at a time, whisking until you reach a thick but drizzle-able consistency. If you want bright white icing, add a tiny drop of white gel food coloring. Transfer the icing to a piping bag or a zip-top bag with a tiny corner snipped off.
- Decorate the cookies. Pipe the icing onto the cooled cookies to create faces, whiskers, or any design you like. I usually do simple eyes and a little smile. Let the icing set for at least 30 minutes before stacking or serving.
And that’s it! You’ve got a batch of the coziest, most adorable black cat cookies you’ve ever seen.
Cooking Tips & Techniques
Over the years, I’ve made every mistake in the book with sugar cookies. Here are the lessons I’ve learned so you don’t have to repeat them:
Don’t overwork the dough. This is the number one mistake people make. When you re-roll the dough scraps, handle them gently. The more you work the dough, the more gluten develops, and the tougher the cookies get. I usually re-roll only once, then bake any remaining scraps as “test cookies” for quality control (wink).
Chill if you need to, but you probably don’t. Most sugar cookie recipes insist on chilling the dough for hours. This one doesn’t need it—the black cocoa powder absorbs some of the moisture, making the dough sturdier. However, if your kitchen is very warm (like 80°F+), pop the cut-out cookies in the fridge for 10 minutes before baking. This helps them hold their shape better.
Watch the bake time like a hawk. These cookies go from perfectly baked to overdone in about 60 seconds. I set my timer for 8 minutes and check them. If they need more time, I add it in 1-minute increments. Remember, they continue to bake on the hot sheet for a few minutes after you pull them out.
Use a light-colored baking sheet. Dark baking sheets absorb more heat and can cause the bottoms of your cookies to brown too quickly. If you only have dark sheets, reduce the oven temperature by 25°F and check the cookies a minute earlier.
Keep your cocoa powder fresh. Black cocoa powder can go stale faster than regular cocoa because it’s more processed. Store it in an airtight container in a cool, dark place. If your cookies don’t turn as dark as expected, your cocoa powder might be old. I keep mine in a mason jar in the pantry.
Multitasking strategy: While the first batch is baking, I roll out the next batch of dough. This way, the oven is always working. Just make sure your baking sheet is completely cool before placing raw dough on it. I keep a second sheet in the fridge so it’s ready to go.
Variations & Adaptations
One of the best things about this recipe is how adaptable it is. Here are some variations I’ve tried and loved:
Gluten-Free Version: Swap the all-purpose flour with a 1:1 gluten-free baking flour blend (I like Bob’s Red Mill). The dough will be a little more delicate, so handle it gently. Bake time might be 1-2 minutes longer. My gluten-free friend tried these and said they were the best cookies she’d had in years.
Vegan Adaptation: Use vegan butter sticks instead of regular butter, and replace the egg with a flax egg (1 tablespoon ground flaxseed mixed with 3 tablespoons water, let sit for 5 minutes). For the royal icing, skip the meringue powder and use 2 tablespoons of aquafaba (chickpea water) mixed with powdered sugar until thick. The texture is slightly different—more tender, less crisp—but still delicious.
Spiced Black Cats: Add 1 teaspoon of cinnamon and 1/2 teaspoon of nutmeg to the dry ingredients. This gives the cookies a warm, chai-like flavor that pairs beautifully with the black cocoa. I made these for a fall bonfire party, and they disappeared in minutes.
Different Shapes: Don’t have a cat cutter? Use any Halloween shape—pumpkins, bats, ghosts, or even just circles. You can also skip the cutter altogether and roll the dough into small balls, then flatten them with the bottom of a glass for a simpler cookie. I’ve done this when I was short on time, and they still taste amazing.
Glazed Instead of Iced: If royal icing feels too fussy, make a simple glaze with 1 cup powdered sugar, 2 tablespoons milk, and 1/2 teaspoon vanilla. Dip the tops of the cooled cookies into the glaze and let them set. It’s faster and still looks pretty.
Sandwich Cookies: Bake the cookies without icing, then sandwich two cookies together with a dollop of vanilla buttercream or chocolate ganache in the middle. This turns them into an extra-indulgent treat that’s perfect for parties.
Serving & Storage Suggestions
These cookies are best served at room temperature, ideally with a warm drink in hand. I love pairing them with a cup of hot cocoa, a chai latte, or even a simple glass of cold milk. The deep chocolate flavor of the cookies is a perfect match for something cozy and warm.
For presentation, arrange the cookies on a rustic wooden board or a simple white platter. The contrast between the dark cookies and the light surface is striking. If you decorated them with royal icing, the white faces really pop against the black cookies. I like to add a few mini pumpkins or fall leaves around the platter for a festive touch.
Storage Instructions: Store the cookies in an airtight container at room temperature for up to 5 days. If you used royal icing, let the icing set completely (about 2 hours) before stacking them. Place a sheet of parchment paper between layers to prevent sticking. These cookies actually taste better on day two—the flavors meld together and the texture softens slightly.
Freezer Instructions: You can freeze the baked, un-iced cookies for up to 3 months. Place them in a single layer in a freezer-safe container, with parchment between layers. Thaw at room temperature for about 30 minutes before icing. You can also freeze the raw dough—wrap it tightly in plastic wrap, then place it in a freezer bag. Thaw in the fridge overnight, then roll and bake as directed. I always keep a batch of dough in the freezer for emergencies.
Reheating Tip: If you want that just-baked warmth, pop a cookie in the microwave for 10 seconds. It softens the cookie and makes it taste fresh from the oven. Don’t overdo it, or the icing will melt.
One thing I’ve noticed: the flavor of these cookies deepens over time. The black cocoa becomes more pronounced, and the vanilla mellows out. So if you can resist eating them all on day one, you’re in for a treat on day three.
Nutritional Information & Benefits
Let’s be real—these are cookies, not health food. But they’re made with real ingredients, and that counts for something. Here’s the estimated nutritional breakdown per cookie (based on 24 cookies, without icing):
| Nutrient | Amount Per Cookie |
|---|---|
| Calories | 145 |
| Total Fat | 8g |
| Saturated Fat | 5g |
| Cholesterol | 25mg |
| Sodium | 55mg |
| Total Carbohydrates | 17g |
| Dietary Fiber | 1g |
| Sugars | 9g |
| Protein | 2g |
Health Benefits: Black cocoa powder is rich in antioxidants called flavonoids, which can help reduce inflammation and support heart health. It also contains less sugar than milk chocolate, so these cookies are lower in sugar than many other Halloween treats. Plus, the butter provides a small amount of vitamin A, and the eggs add protein. Are these a superfood? No. But they’re a treat made with love, and that has its own benefits for your mental health.
Dietary Considerations: This recipe contains dairy (butter) and gluten (flour). For a dairy-free version, use vegan butter. For a gluten-free version, use a 1:1 gluten-free flour blend. The cookies are nut-free as written, making them safe for school parties. Always check your ingredient labels for potential cross-contamination if you’re serving someone with severe allergies.
Allergen Information: Contains: wheat (gluten), dairy, eggs. May contain traces of nuts depending on your ingredient brands.
Conclusion
These Cozy Black Cat Sugar Cookies started as a kitchen accident, but they’ve become one of my most-requested recipes. There’s something magical about a cookie that looks this striking but comes together with such simple ingredients and no fuss. The deep black color, the soft texture, the subtle chocolate flavor—it all adds up to a treat that feels special without being complicated.
I hope you give these cookies a try, whether you’re making them for a Halloween party, a cozy night in, or just because you want to bake something that makes you smile. Don’t be afraid to customize them—add spices, change the shape, skip the icing if you’re short on time. The beauty of this recipe is that it works no matter how you tweak it.
So go ahead, preheat that oven, and make some magic. And when you do, I’d love to hear about it. Leave a comment below and let me know how your black cat cookies turned out—did you add your own twist? Did the kids love them? Did you eat three before they even cooled? (No judgment here, I’ve been there.)
Happy baking, and may your kitchen always be filled with the cozy smell of butter and cocoa.
Frequently Asked Questions
Can I make these cookies ahead of time?
Absolutely! You can bake the cookies up to 3 days in advance and store them in an airtight container. Ice them the day you plan to serve them for the best appearance. You can also freeze the baked, un-iced cookies for up to 3 months.
Why did my cookies turn out gray instead of black?
This usually happens if your black cocoa powder is old or if you didn’t use enough. Make sure your cocoa powder is fresh and measure it accurately. If you want an even darker color, you can add an extra tablespoon of black cocoa powder, but reduce the flour by the same amount to keep the texture right.
Can I use regular cocoa powder instead of black cocoa?
You can, but the color will be dark brown, not black. The flavor will also be different—black cocoa is less acidic and has a more mellow, Oreo-like taste. If you use regular cocoa, add 1/4 teaspoon of espresso powder to deepen the chocolate flavor.
My dough is too crumbly and won’t hold together. What do I do?
Don’t worry, this is fixable! Add one teaspoon of milk at a time and mix until the dough comes together. The dough should feel like play-dough—slightly firm but pliable. If it’s still too dry, your flour measurement might have been too generous. Next time, spoon and level your flour instead of scooping.
How do I get the royal icing to be perfectly white?
The black cookies can make white icing look slightly gray. Use white gel food coloring (not liquid) to brighten the icing. Add just a tiny drop—a little goes a long way. Also, make sure your powdered sugar is fresh and lump-free. Sifting it before mixing helps too.
Pin This Recipe!
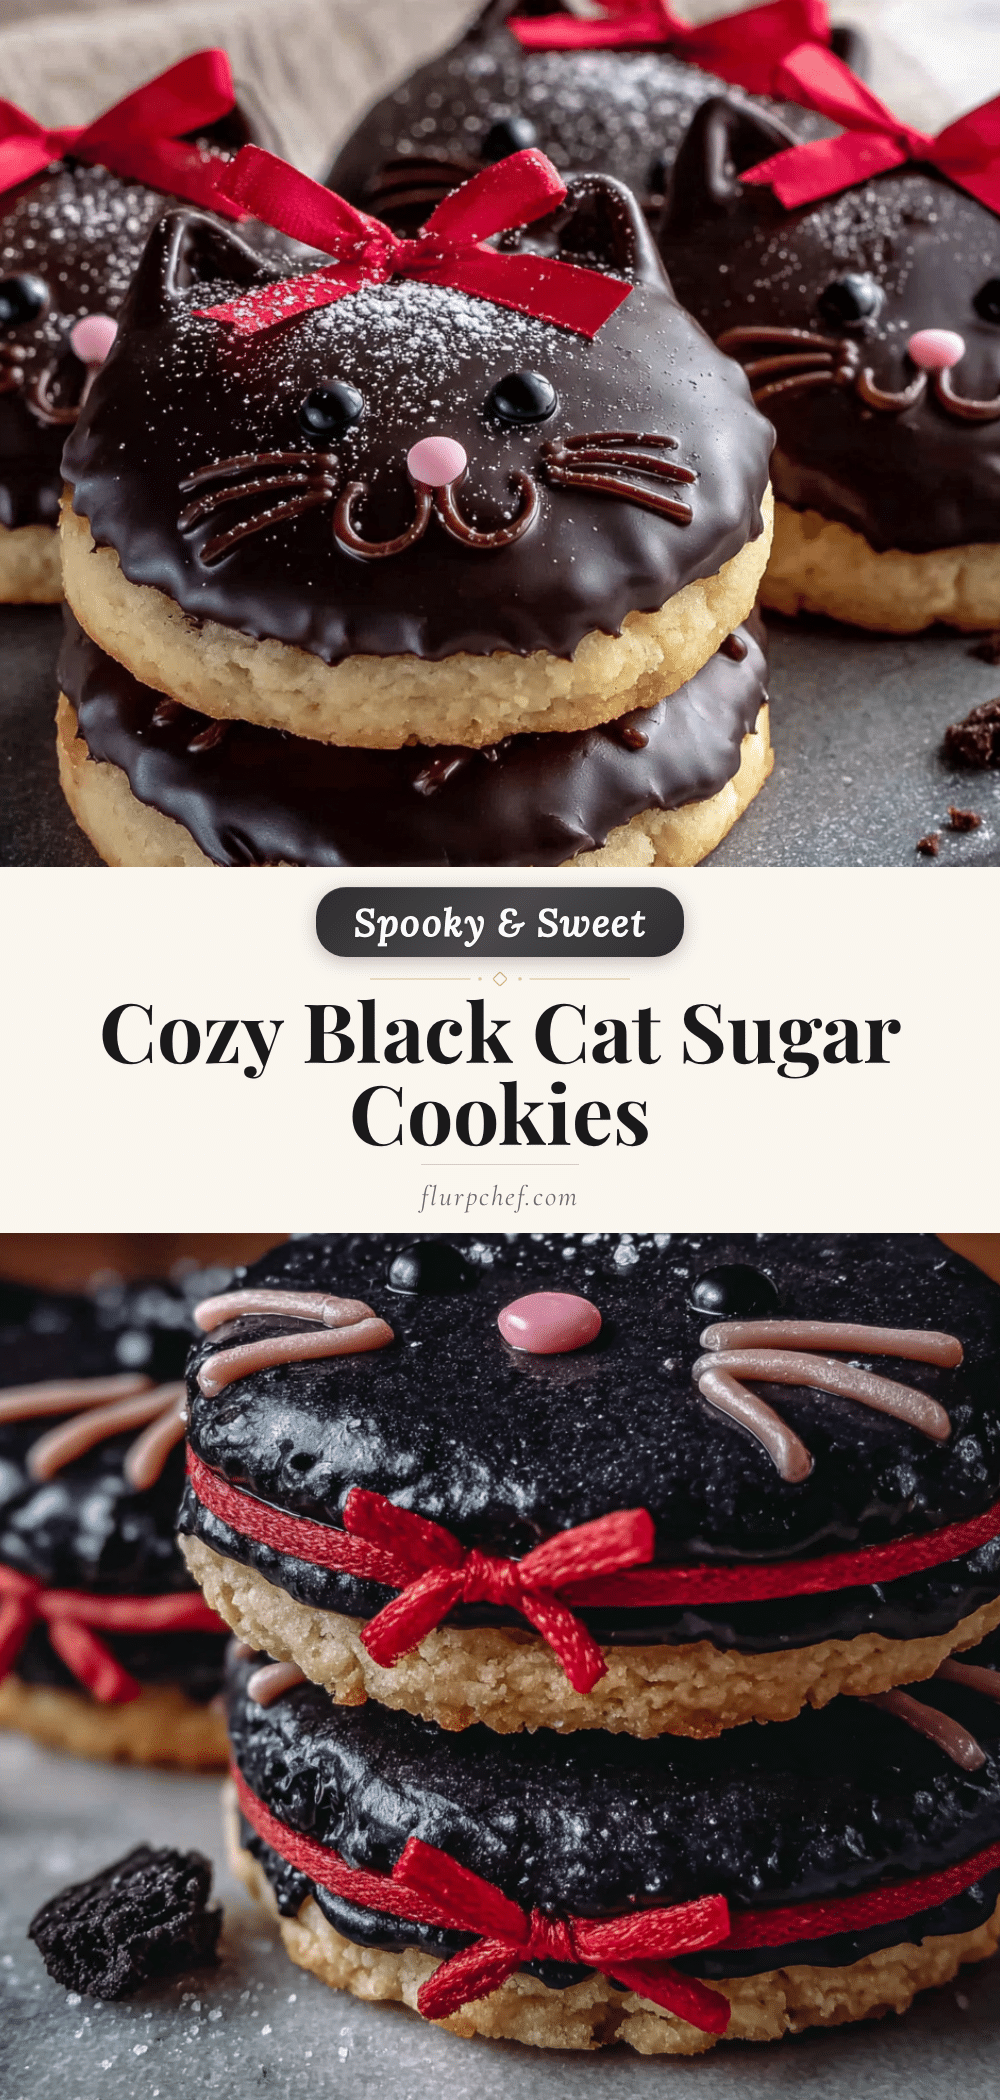
Cozy Black Cat Sugar Cookies – Easy Halloween Treat

These soft, buttery black cat sugar cookies are made with black cocoa powder for a deep, mysterious chocolate flavor. Perfect for Halloween parties, cozy nights in, or any time you need a festive treat that’s quick and easy to make.
- Prep Time: 15 minutes
- Cook Time: 10 minutes
- Total Time: 45 minutes
- Yield: 24 cookies 1x
- Category: Dessert
- Cuisine: American
Ingredients
- 1 cup (226g) unsalted butter, softened
- 1 cup (200g) granulated sugar
- 1 large egg, room temperature
- 2 teaspoons vanilla extract
- 2 cups (250g) all-purpose flour
- 1/3 cup (40g) black cocoa powder
- 1/2 teaspoon baking powder
- 1/4 teaspoon salt
- 1 cup (120g) powdered sugar (for royal icing)
- 1 tablespoon meringue powder (for royal icing)
- 2–3 tablespoons water (for royal icing)
- White gel food coloring (optional, for royal icing)
Instructions
- Preheat your oven to 350°F (175°C). Line two baking sheets with parchment paper or silicone baking mats.
- In a large mixing bowl, beat the softened butter and granulated sugar together on medium speed until light and fluffy, about 3-4 minutes. Scrape down the sides of the bowl halfway through.
- Add the egg and vanilla extract. Beat on low speed until just combined. The mixture may look slightly curdled.
- In a separate bowl, whisk together the all-purpose flour, black cocoa powder, baking powder, and salt.
- Gradually add the dry ingredients to the wet mixture, mixing on low speed until just combined. Stop as soon as the flour disappears. The dough will be thick and slightly crumbly.
- Lightly flour your work surface and rolling pin. Roll the dough to about 1/4-inch (6mm) thickness. If the dough sticks, dust with a little more flour.
- Press a cat-shaped cookie cutter firmly into the dough and lift straight up. Transfer cut shapes to the prepared baking sheets, spacing them about 2 inches (5cm) apart. Gather scraps, gently press together, and re-roll to cut more cookies.
- Bake for 8-10 minutes, until the edges look set and the bottoms are lightly golden. For softer cookies, bake for 8 minutes; for crisper cookies, bake for 10 minutes.
- Let cookies cool on the baking sheets for 5 minutes, then transfer to a cooling rack to cool completely before icing.
- For the royal icing: In a small bowl, whisk together powdered sugar and meringue powder. Add water one tablespoon at a time until you reach a thick but drizzle-able consistency. Add a tiny drop of white gel food coloring if desired.
- Transfer icing to a piping bag or zip-top bag with a tiny corner snipped off. Pipe designs onto cooled cookies. Let icing set for at least 30 minutes before stacking or serving.
Notes
No chilling required for this dough. If your kitchen is very warm (80°F+), chill cut-out cookies for 10 minutes before baking. For gluten-free version, use 1:1 gluten-free flour blend. For vegan version, use vegan butter and a flax egg. Store in airtight container at room temperature for up to 5 days. Freeze baked, un-iced cookies for up to 3 months.
Nutrition
- Serving Size: 1 cookie
- Calories: 145
- Sugar: 9
- Sodium: 55
- Fat: 8
- Saturated Fat: 5
- Carbohydrates: 17
- Fiber: 1
- Protein: 2
Keywords: black cat cookies, Halloween cookies, sugar cookies, black cocoa cookies, easy Halloween treats, cat-shaped cookies, fall baking


