My sister swore she hated Halloween. For about fifteen years, give or take. The whole thing—the costumes, the candy chaos, the doorbell ringing every ten minutes—she wanted no part of it. Then last October, I threw together a last-minute snack board for her kids before trick-or-treating, nothing fancy, just some cheese cut into spooky shapes and a few crackers arranged to look like a graveyard. I walked back into the living room and found her standing at the coffee table, a piece of ghost-shaped mozzarella halfway to her mouth, muttering, “Okay, this is actually kind of fun.” She didn’t even put it down when she said it. That’s when I knew I was onto something.
Honestly, I get the resistance. Halloween can feel expensive. Between costumes, decorations, and bags of candy that somehow vanish before the first ghost even knocks, the costs add up fast. But here’s the thing—a good charcuterie board doesn’t have to drain your wallet. In fact, it’s one of the smartest ways to feed a crowd without breaking the bank. You buy a few key ingredients, stretch them with clever presentation, and suddenly you’ve got a spread that looks like it cost twice what you actually paid. Maybe you’ve been there, standing in the grocery aisle wondering how a tiny block of fancy cheese costs the same as a whole pizza. I’ve been there too. That’s exactly why I developed this budget-friendly Halloween charcuterie board.
The trick is all in the strategy. You pick ingredients that do double duty—cheddar that works for both the pumpkin shapes AND the general snacking pile. Crackers that cost pennies per serving but look impressive when arranged right. And you lean hard into the Halloween theme because honestly, a pretzel stick wrapped in prosciutto suddenly feels festive when you call it a “mummy finger.” This board became my go-to for every family gathering that fall. My sister asks for it by name now, which I find deeply satisfying. She still won’t dress up, though. Some battles you just don’t win.
Why You’ll Love This Recipe
Let me tell you why this budget-friendly Halloween charcuterie board has become my most-requested party centerpiece. I’ve tested this thing through three different Halloweens, two different grocery budgets, and one very memorable incident where I accidentally bought smoked gouda instead of regular (it actually worked fine, but that’s a story for another section).
- Costs Under $25 to Feed a Crowd : I’ve broken down the math on this. You can feed 6-8 people for about what you’d spend on two large pizzas. The secret? Smart ingredient choices and strategic placement that makes a little look like a lot.
- Simple Ingredients from Any Grocery Store : No specialty shops needed. No $12 imported cheese that requires its own zip code. Everything on this board comes from the regular grocery aisles—most of it from the sale section if you time it right.
- Perfect for Halloween Parties or Pre-Trick-or-Treat Fuel : This board solves the eternal question of “what do we eat before the candy?” It’s substantial enough to fill hungry bellies but fun enough that kids actually want to eat it.
- Kid-Approved and Adult-Friendly : The spooky shapes and fun names hook the little ones. The quality ingredients and balanced flavors keep the grown-ups happy. Everyone wins.
- Takes Only 15 Minutes to Assemble : No cooking required. No complicated recipes. Just slicing, arranging, and maybe a little cookie-cutter action. You can literally put this together while your kids are putting on their costumes.
What makes this board different from the hundreds you see on Pinterest? It’s the budget-first approach. I’m not telling you to buy three kinds of fancy cheese and imported olives. I’m showing you how to make affordable ingredients look spectacular. That block of store-brand cheddar? It becomes pumpkins and ghosts. Those dollar-bin pretzels? They’re graveyard fence posts. This isn’t just another charcuterie board—it’s a smart, resourceful way to feed your family without the Halloween price tag.
And honestly? The first time you set this down on the table and watch everyone’s faces light up, you’ll feel like a kitchen wizard. That’s the real magic.
What Ingredients You Will Need
This budget-friendly Halloween charcuterie board relies on simple, affordable ingredients that work together to create something that looks way more expensive than it actually is. I’ve organized everything by category so you can shop smart and stretch every dollar.
The Cheese Selection (The Stars of the Board)
- Block cheddar cheese, 8 ounces (orange cheddar works best for pumpkin shapes—I use the store brand and it cuts perfectly)
- Mozzarella cheese block, 8 ounces (for ghost shapes—the mild flavor appeals to kids and it’s cheap)
- Spreadable cheese, 4-5 ounces (I like the garlic and herb variety from the refrigerated section, usually under $3)
- String cheese, 4-6 sticks (for mummy fingers—these are usually on sale near Halloween)
The Meats (Keep It Simple and Affordable)
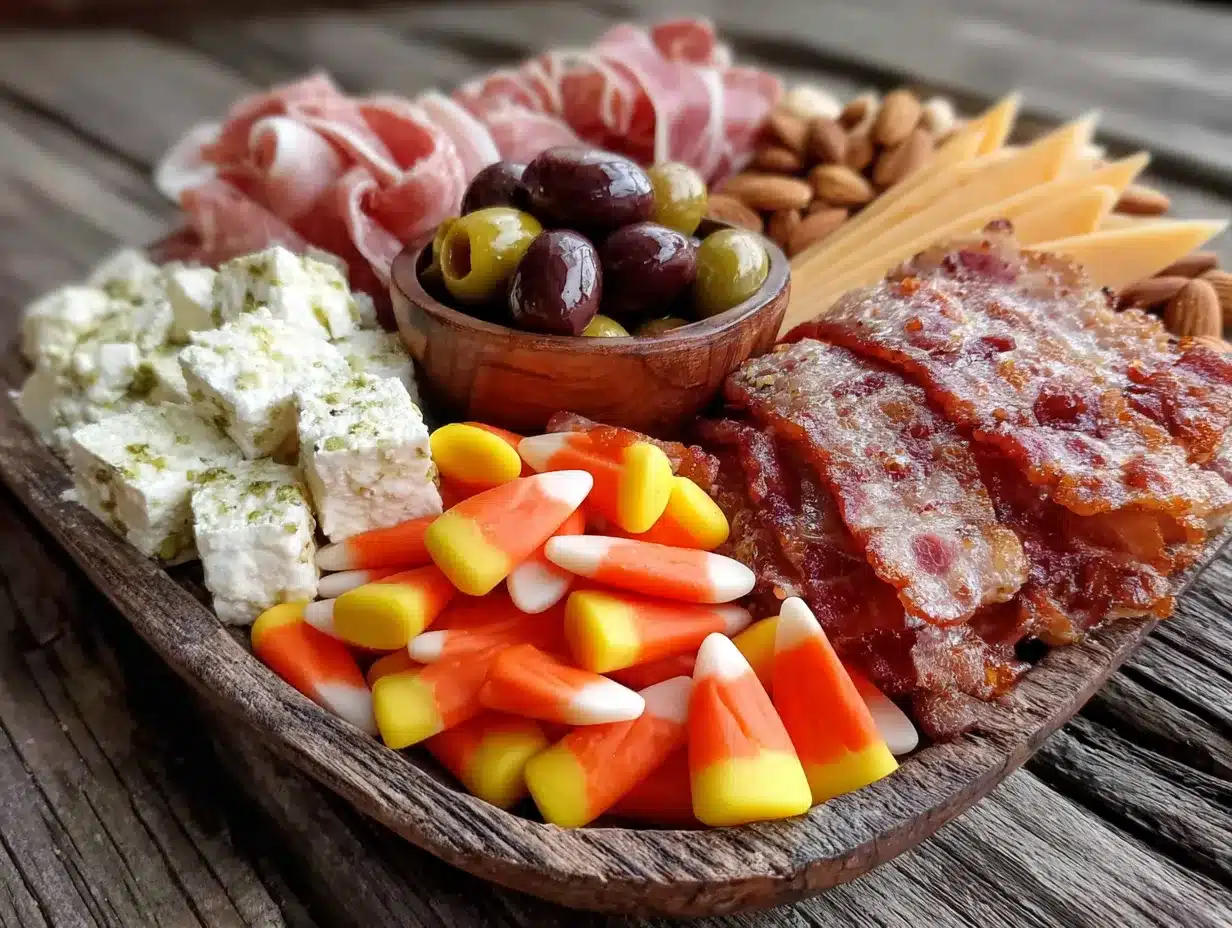
- Salami or pepperoni, 6 ounces (sliced thin—I buy the store brand and ask them to slice it at the deli counter for free)
- Prosciutto or ham, 4 ounces (prosciutto is pricier but a little goes a long way; ham works great as a budget swap)
The Crackers and Bread (The Foundation)
- Pretzel sticks, 1 bag (these become graveyard fences and mummy fingers—super cheap and versatile)
- Round crackers, 1 sleeve (Ritz or store brand—the buttery flavor pairs with everything)
- Breadsticks or grissini, 1 package (for spider legs and general crunch—check the dollar store for these)
The Fruits and Vegetables (Color and Freshness)
- Red grapes, 1 bunch (they look like little eyeballs when arranged right—kids love this)
- Baby carrots, 1 bag (witch fingers—peel them partially for a creepy effect)
- Apple slices, 1 apple (toss in lemon water to prevent browning—I use green apples for contrast)
- Olives, 1 small can (black olives look like spider bodies—drain and pat dry)
The Spooky Decorations (The Fun Part)
- Pretzel sticks or bugles (for spider legs—bugles look more realistic)
- Blackberries or blueberries, 1 small container (look like tiny creepy eyes in the dip)
- Edible googly eyes, 1 small package (optional but worth the $2—they make everything instantly Halloween)
The Dips and Spreads
- Pumpkin-shaped cheese ball or cream cheese (mix cream cheese with pumpkin puree and spices for a homemade version—saves money)
- Marinara sauce, 1 cup (looks like blood for dipping—use a small bowl)
- Hummus, 1 container (green hummus looks especially creepy—I’ve used spinach hummus before and it worked great)
Ingredient Selection Tips: Shop the sales circular before you go. I’ve found that the week before Halloween, stores often put entertaining items on clearance to make room for candy. Grab your cheese and crackers then. Also, check the discount bin at the back of the store—I once found a block of fancy white cheddar for $1.50 because the wrapper was slightly torn. Best Halloween ever.
Substitution Guidance: If you’re feeding picky eaters, swap the olives for cucumber slices cut into shapes. If someone in your family doesn’t do pork, use turkey pepperoni and beef salami. For a dairy-free version, use vegan cheese blocks and hummus as your primary dip. The theme stays the same—the ingredients just adapt.
Equipment Needed
You don’t need fancy kitchen tools for this budget-friendly Halloween charcuterie board. Here’s what actually matters:
- Large cutting board or serving platter (a wooden board looks best, but a baking sheet lined with parchment works perfectly—I’ve done both)
- Small cookie cutters in Halloween shapes (pumpkin, ghost, bat—I found a set at the dollar store for $1.25 and they’ve lasted three years)
- Cheese knife or sharp paring knife (for cutting shapes if you don’t have cookie cutters—a paring knife works fine with a steady hand)
- Small bowls for dips (ramekins work great—I use the ones from my microwave set)
- Toothpicks or small skewers (for assembling mummy fingers and holding things together)
- Parchment paper (optional but helpful for easy cleanup—also makes the board look more intentional)
Budget-Friendly Alternatives: No cookie cutters? Use a knife to freehand simple shapes—pumpkins are just circles with a stem, ghosts are blobs with a wavy bottom. No wooden board? A sheet pan covered in foil or parchment looks surprisingly polished. I once used a clean pizza box covered in wax paper when I was hosting at a friend’s house. It worked fine and nobody cared because they were too busy eating.
Maintenance Tip: If you invest in cookie cutters, wash them by hand after using them on cheese. The cheese residue can get stuck in the crevices and harden. Ask me how I know this. (I ruined a perfectly good bat-shaped cutter last year.)
Preparation Method
Here’s how to assemble this budget-friendly Halloween charcuterie board in about 15 minutes. I’ve broken it down into clear steps with time estimates and sensory cues so you know exactly what you’re looking for at each stage.
Step 1: Prep Your Cheese Shapes (5 minutes)
Take your block cheddar and mozzarella out of the fridge. Let them sit on the counter for about 5 minutes—this softens them just enough that they won’t crack when you cut. Slice each block into 1/4-inch thick slabs. Press your Halloween cookie cutters into the cheese slabs firmly, then wiggle gently to release. You should get about 4-6 shapes per block depending on the size of your cutters. Don’t throw away the scraps—those become the “snacking pile” that fills gaps on the board. I learned this the hard way after throwing away perfectly good cheese scraps my first time.
Troubleshooting Tip: If the cheese is too cold, the shapes will crack. If it’s too warm, they’ll get mushy. Room temperature for 5-8 minutes is the sweet spot. You want the cheese to feel cool but not cold to the touch.
Step 2: Assemble the Mummy Fingers (3 minutes)
Take your string cheese sticks and cut them in half crosswise. Wrap each half with a thin strip of prosciutto or ham, leaving a small gap at one end to look like a fingertip. Press an edible googly eye (or a small dot of cream cheese with a black olive sliver) into the exposed end. Arrange these on the board in a small cluster—they look best when grouped together. You should have about 8-10 mummy fingers total from 4-5 string cheese sticks.
Sensory Cue: The prosciutto should be thin enough that the white cheese shows through slightly. If it’s too thick, it looks more like a bandage than a mummy wrap. You want that translucent, gauzy look.
Step 3: Build the Graveyard Scene (3 minutes)
Take your pretzel sticks and break about half of them in half. Arrange the full pretzel sticks vertically in a small cluster to look like a fence. Place a small pile of round crackers at the base of the fence to look like tombstones. I like to arrange them at slightly crooked angles for that spooky, abandoned graveyard feel. Add a few black olives near the base to look like spiders crawling out of the ground.
Personal Tip: Don’t break all the pretzel sticks at once. Some will inevitably break in the bag, so save the intact ones for the fence and use the broken pieces for snacking or crushing into “dirt” for the graveyard effect.
Step 4: Create the Spider Scene (2 minutes)
Take a small bowl of hummus or cream cheese and place it in the center of the board. Arrange 8 breadsticks or pretzel sticks around the bowl to look like spider legs. Place a black olive on top of the dip to look like the spider body. If you have edible googly eyes, press two into the olive. This is always the first thing kids go for at my house—they love the spider.
Visual Cue: The breadsticks should be arranged symmetrically, four on each side, angled slightly outward. It looks more spider-like than if they’re all pointing in random directions.
Step 5: Fill In with Fruits and Veggies (2 minutes)
Arrange your red grapes in small clusters around the board—they look like creepy eyeballs when you group them. Place your baby carrots in a small pile with the pointed ends facing outward (witch fingers). Arrange apple slices in a fan pattern. Scatter blackberries or blueberries in small groups. The goal here is color contrast—the dark fruits against the orange cheddar and white mozzarella create visual interest.
Pro Tip: Toss your apple slices in a mixture of lemon juice and water (about 1 tablespoon lemon juice per cup of water) to keep them from browning. Nobody wants brown apples on their spooky board.
Step 6: Add the Dips and Finishing Touches (2 minutes)
Place your marinara sauce in a small bowl and position it near the cheese shapes. If you made a pumpkin cheese ball, place it in the center of the board or at one end. Drizzle a little extra olive oil over the hummus for a polished look. Sprinkle a few edible googly eyes around the board for that extra Halloween touch. Step back and look at your board—fill any empty gaps with extra crackers or fruit.
Final Check: The board should look full but not crowded. You want people to be able to reach everything without knocking things over. If it looks too sparse, add more crackers—they’re cheap and fill space beautifully.
Cooking Tips & Techniques
I’ve made this budget-friendly Halloween charcuterie board about a dozen times now, and I’ve learned some things the hard way. Here are my best tips for making yours look amazing without the stress.
The Secret to Perfect Cheese Shapes: Spray your cookie cutters with a little non-stick cooking spray before pressing them into the cheese. This prevents the cheese from sticking inside the cutter and breaking your shapes. I figured this out after destroying three ghost-shaped pieces in a row. The spray makes them release cleanly every time.
Timing Is Everything: Assemble your board no more than 2 hours before serving. Any longer and the crackers get soft from the moisture in the fruits and dips. The cheese shapes also start to dry out and crack at the edges. If you need to prep ahead, slice everything and store it separately in the fridge, then assemble right before guests arrive. I’ve done this for three different parties and it works perfectly.
The Multitasking Strategy: While your cheese is coming to room temperature (that 5-minute wait), use that time to wash your grapes and carrots. While you’re cutting cheese shapes, have your kids arrange the crackers on the board—they love helping and it keeps them busy. The whole thing comes together in layers if you think about it that way.
Common Mistake to Avoid: Don’t put your dips in the center of the board unless you’re building the scene around them. I once placed the marinara in the middle and then couldn’t figure out why everything felt cramped. Put your dips at the edges or corners of the board instead. It opens up the center for the main attractions—the cheese shapes and the graveyard scene.
My Biggest Failure: The first time I made this, I used pre-shredded cheese because I was lazy. Don’t do this. Pre-shredded cheese has anti-caking agents that make it dry and crumbly—it won’t hold shapes. Buy blocks and shred or cut them yourself. The texture is better, it melts better if you’re using it warm, and honestly, it’s cheaper per ounce. I wasted $4 on shredded cheese that turned into a crumbly mess. Learn from my mistakes.
Variations & Adaptations
One of the best things about this budget-friendly Halloween charcuterie board is how adaptable it is. Here are some variations I’ve tried and loved.
The Vegetarian Version
Skip the meat entirely and double up on the cheese and veggies. I’ve made this for a vegetarian friend by adding roasted red peppers (they look like bloody fingers), marinated artichoke hearts (they look like creepy brains), and extra hummus varieties. The board actually looks more colorful without the meat, and it costs even less. Win-win.
The Allergy-Friendly Board
For gluten-free guests, swap the crackers for rice crackers or corn chips. Use gluten-free pretzel sticks (they exist and taste fine). For dairy-free, use vegan cheese blocks—I’ve found the cheddar-style ones cut into shapes just as well as regular cheese. Check the labels on your dips, too; some marinara sauces contain hidden dairy. This version requires a little more label-reading, but it’s totally doable.
The Sweet and Savory Twist
Add some Halloween-themed sweets to balance the savory elements. I’ve added candy corn in a small bowl (looks like little pumpkins), chocolate-covered pretzels (look like witch’s broomsticks when arranged right), and gummy worms crawling out of the dip. The kids go absolutely wild for this version. Just be careful not to go overboard—the board should still feel like a meal, not a dessert table.
The Seasonal Fruit Swap
Depending on what’s on sale at your grocery store, swap in seasonal fruits. In October, apples and pears are usually cheap and abundant. I’ve used sliced pears arranged to look like ghost shapes (they’re pale and ethereal). Pomegranate seeds look like little red jewels scattered across the board. Clementines are perfect for little pumpkin shapes when you leave the peel on. The fruit section is where you can really save money by shopping the sales.
Serving & Storage Suggestions
This budget-friendly Halloween charcuterie board is best served at room temperature, so take it out of the fridge about 20 minutes before you plan to serve. The cheese flavors are more pronounced at room temperature, and the crackers stay crunchier. I like to set it on the kitchen island or coffee table about 15 minutes before trick-or-treating starts so people can graze while they wait.
What to Serve Alongside: This board pairs beautifully with warm apple cider or a simple punch. For adults, a dry red wine or a pumpkin beer complements the cheese and meat nicely. I’ve also served it with a bowl of popcorn tossed with nutritional yeast (looks like creepy cheese dust) for extra crunch. The popcorn costs pennies to make and fills people up so they eat less of the expensive stuff.
Storage Instructions: If you have leftovers (unlikely, but possible), separate the components into individual containers. The cheese shapes will keep in the fridge for 3-4 days. The meat should be eaten within 2 days. The crackers will get soft if stored with anything moist, so keep them in a separate airtight container. The fruit should be eaten within a day or two—grapes and apples don’t last long once cut.
Reheating Tips: This is a cold board, so there’s nothing to reheat. However, if you made a warm dip like a pumpkin cheese ball, let it come to room temperature before serving. If you’re serving the board outside on a cool Halloween night, keep it in the kitchen and bring out small plates of food rather than leaving the whole board out where it will get cold and unappetizing.
Flavor Development: Honestly, this board tastes best the day you make it. The crackers stay crunchy, the cheese is fresh, and the fruit hasn’t oxidized. That said, the cheese shapes actually taste fine the next day—they just look a little sad. If you’re planning to have leftovers, store the cheese shapes separately and add fresh fruit and crackers when you serve them again.
Nutritional Information & Benefits
I’m not a nutritionist, but I’ve done enough label-reading to give you a rough idea of what’s in this board. The exact numbers depend on your specific ingredients and how much everyone eats, but here’s a general breakdown per serving (assuming 8 servings):
- Calories: Approximately 350-450 per serving (varies based on how much cheese and meat people grab)
- Protein: 15-20 grams (thanks to the cheese and meat)
- Carbohydrates: 25-30 grams (from crackers, fruit, and pretzels)
- Fat: 20-25 grams (mostly from cheese—choose lower-fat options if needed)
- Fiber: 3-5 grams (from the fruits and vegetables)
Health Benefits: This board actually has some redeeming nutritional qualities. The cheese provides calcium and protein. The grapes and apples offer antioxidants and fiber. The hummus adds plant-based protein and healthy fats. Even the crackers contribute some whole grains if you choose the right kind. It’s not health food, but it’s a balanced snack that won’t send anyone into a sugar crash like candy would.
Dietary Considerations: This recipe is naturally vegetarian-friendly if you skip the meat. It can be made gluten-free with the right cracker choices. It’s not dairy-free in its standard form, but the vegan version works well. The main allergens here are dairy (cheese) and gluten (crackers), so label accordingly if you’re serving guests with allergies.
Personal Wellness Perspective: I love that this board lets people control their own portions. Kids can grab a few cheese shapes and some fruit. Adults can load up on meat and crackers. Everyone eats what they want, and nobody feels deprived. That’s the kind of balanced eating I can get behind—especially on a night when candy is the main event.
Conclusion
This budget-friendly Halloween charcuterie board has become my go-to for every October gathering, and I think it deserves a spot in your Halloween traditions too. It’s affordable, it’s fun, and honestly, it’s the kind of thing that makes people stop and say, “Wait, you made this?” The first time you watch your kids’ faces light up when they see the spider made of breadsticks and olives, you’ll understand why I keep making it year after year.
Don’t be afraid to make it your own. Swap in your family’s favorite cheeses. Use whatever Halloween cookie cutters you can find. Add the candy your kids love most. The beauty of a charcuterie board is that it’s endlessly customizable—it’s more of a template than a rigid recipe. I’ve made versions with gummy worms crawling out of the dip and versions that were strictly savory. They were all delicious in their own way.
I’d love to hear how yours turns out. Did your kids love the mummy fingers? Did you find a genius budget swap I haven’t thought of? Drop a comment below and share your Halloween board creations. And if you’re looking for more budget-friendly entertaining ideas, check out my easy fall appetizer recipes that work perfectly for any autumn gathering. Happy Halloween, and happy snacking!
Frequently Asked Questions
How far in advance can I make this board?
You can prep all the components up to 24 hours in advance, but I recommend assembling the board no more than 2 hours before serving. Store the cheese shapes, meat, and dips separately in the fridge, then arrange everything on the board right before your guests arrive. The crackers and pretzels will stay crunchier this way.
Can I make this board for a crowd larger than 8 people?
Absolutely. Just double or triple the ingredients based on your guest count. For a larger crowd, I recommend using a bigger board or even a clean baking sheet. You can also set up multiple smaller boards on different tables to prevent crowding. The cost per person actually goes down when you buy in bulk, so larger boards are even more budget-friendly.
What if I can’t find Halloween cookie cutters?
No problem at all. You can freehand shapes with a sharp knife—pumpkins are just circles with a small stem, ghosts are rounded blobs with a wavy bottom, and bats are simple wing shapes. You can also use small biscuit cutters for round shapes and call them “spider eggs” or “monster eyes.” The theme is flexible.
How do I keep the board from getting messy?
Use small bowls or ramekins for anything wet or saucy—dips, olives, and wet fruits like grapes. Keep the crackers and pretzels away from the dips to prevent sogginess. I like to arrange the board with dips at the edges and dry ingredients in the center. A few napkins nearby help, too. Kids will make a mess no matter what, but this keeps it contained.
Can I make this board nut-free for school parties?
Yes, easily. Just check the labels on your crackers and dips to make sure they’re nut-free. Most standard cheese and meat products are naturally nut-free. Skip any dips that might contain nuts (like certain pestos or flavored hummus) and stick with plain hummus, marinara, or cream cheese. The rest of the board is naturally nut-free as written.
Pin This Recipe!
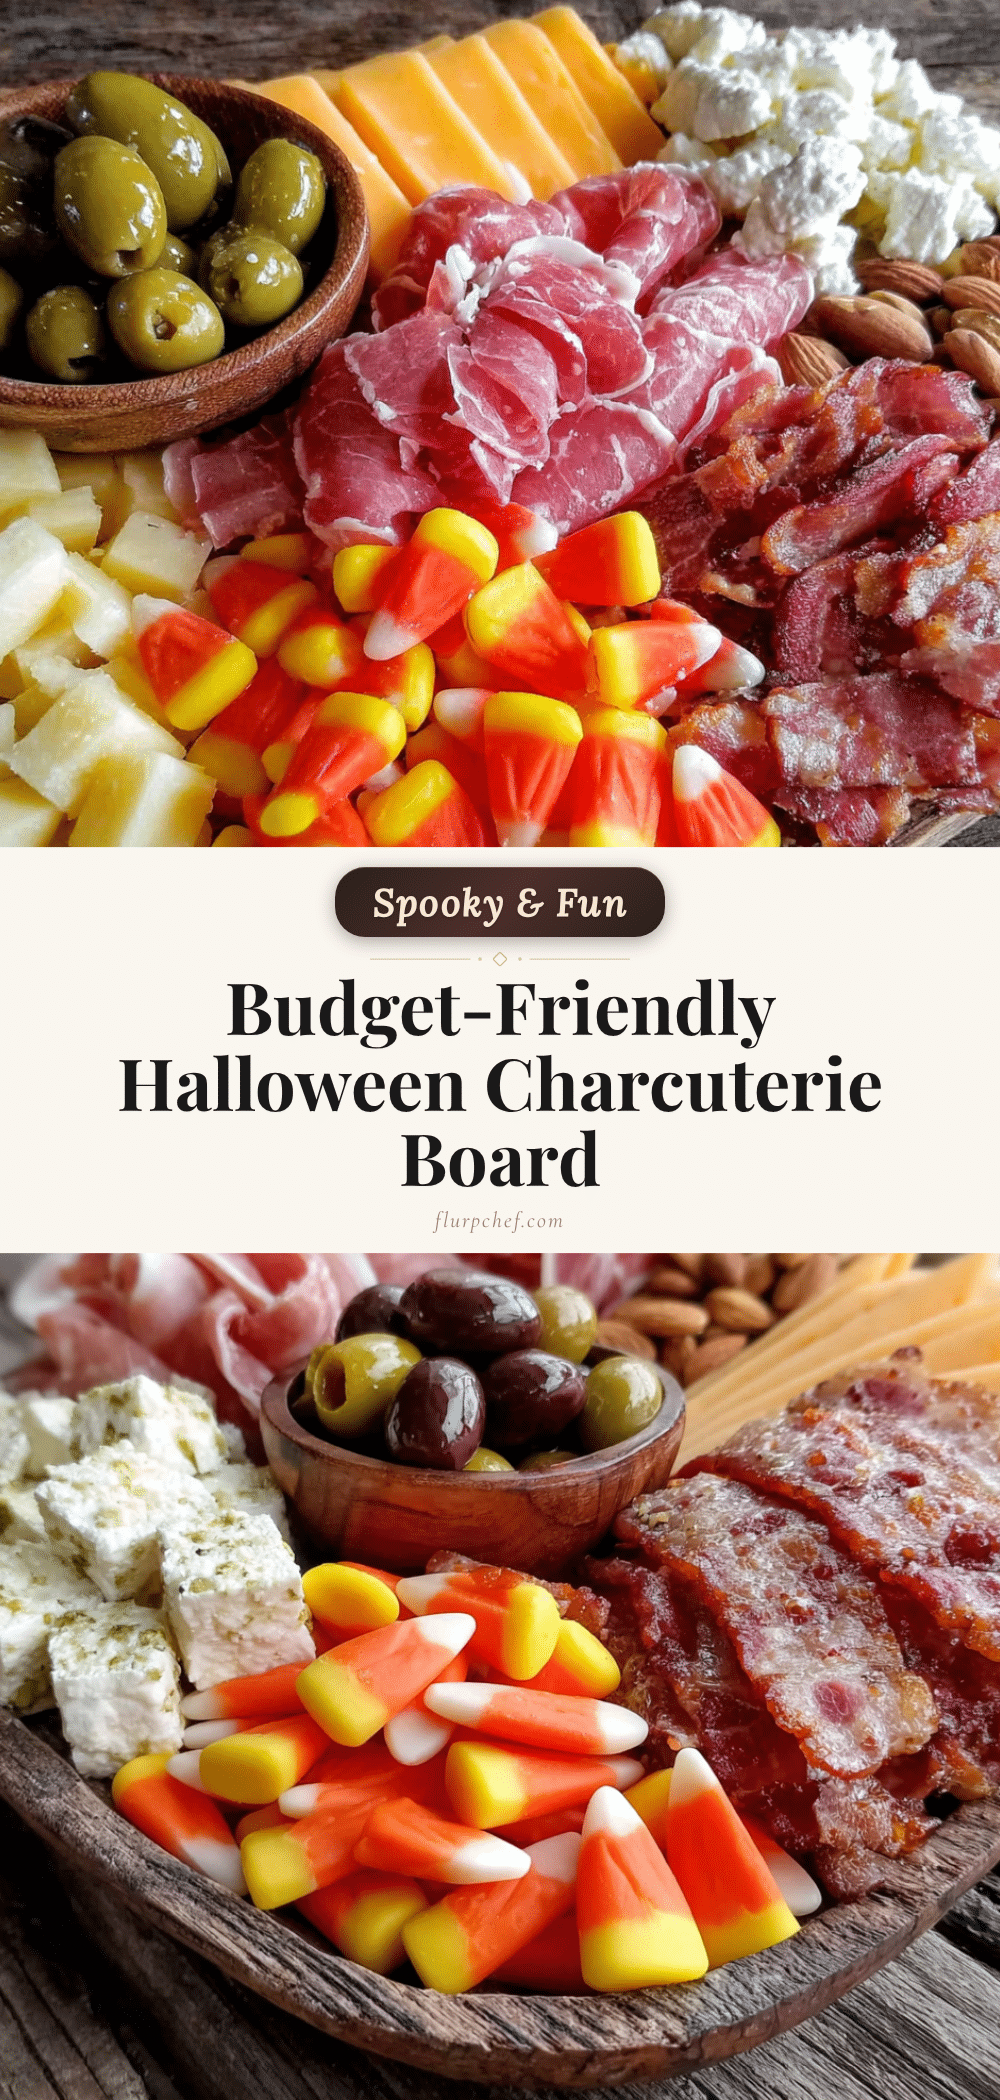
Budget-Friendly Halloween Charcuterie Board for the Whole Family
A spooky, budget-friendly charcuterie board that feeds a crowd for under $25. Featuring cheese cut into Halloween shapes, mummy fingers, a graveyard scene, and a spider dip, it’s perfect for pre-trick-or-treat fuel or Halloween parties.
- Prep Time: 15 minutes
- Cook Time: 0 minutes
- Total Time: 15 minutes
- Yield: 8 servings 1x
- Category: Appetizer
- Cuisine: American
Ingredients
- 8 ounces block cheddar cheese (orange cheddar works best for pumpkin shapes)
- 8 ounces mozzarella cheese block (for ghost shapes)
- 4–5 ounces spreadable cheese (garlic and herb variety)
- 4–6 sticks string cheese (for mummy fingers)
- 6 ounces salami or pepperoni (sliced thin)
- 4 ounces prosciutto or ham
- 1 bag pretzel sticks
- 1 sleeve round crackers (Ritz or store brand)
- 1 package breadsticks or grissini
- 1 bunch red grapes
- 1 bag baby carrots
- 1 apple (green apples for contrast)
- 1 small can black olives
- 1 small container blackberries or blueberries
- 1 small package edible googly eyes (optional)
- 1 cup marinara sauce
- 1 container hummus (green hummus looks especially creepy)
- Pumpkin-shaped cheese ball or cream cheese (mix cream cheese with pumpkin puree and spices for homemade version)
Instructions
- Prep Your Cheese Shapes (5 minutes): Take block cheddar and mozzarella out of the fridge. Let them sit on the counter for about 5 minutes. Slice each block into 1/4-inch thick slabs. Press Halloween cookie cutters into the cheese slabs firmly, then wiggle gently to release. Save scraps for the snacking pile.
- Assemble the Mummy Fingers (3 minutes): Cut string cheese sticks in half crosswise. Wrap each half with a thin strip of prosciutto or ham, leaving a small gap at one end to look like a fingertip. Press an edible googly eye (or a small dot of cream cheese with a black olive sliver) into the exposed end. Arrange in a small cluster.
- Build the Graveyard Scene (3 minutes): Break about half of the pretzel sticks in half. Arrange full pretzel sticks vertically in a small cluster to look like a fence. Place a small pile of round crackers at the base to look like tombstones. Add a few black olives near the base to look like spiders.
- Create the Spider Scene (2 minutes): Place a small bowl of hummus or cream cheese in the center of the board. Arrange 8 breadsticks or pretzel sticks around the bowl to look like spider legs. Place a black olive on top of the dip for the spider body. Press two edible googly eyes into the olive if desired.
- Fill In with Fruits and Veggies (2 minutes): Arrange red grapes in small clusters. Place baby carrots in a small pile with pointed ends facing outward. Arrange apple slices in a fan pattern. Scatter blackberries or blueberries in small groups.
- Add the Dips and Finishing Touches (2 minutes): Place marinara sauce in a small bowl near the cheese shapes. If using a pumpkin cheese ball, place it in the center or at one end. Drizzle extra olive oil over the hummus. Sprinkle edible googly eyes around the board. Fill any empty gaps with extra crackers or fruit.
Notes
Assemble the board no more than 2 hours before serving to keep crackers crunchy. Spray cookie cutters with non-stick cooking spray for clean cheese shapes. For a dairy-free version, use vegan cheese blocks and hummus as the primary dip. Leftover cheese shapes keep in the fridge for 3-4 days.
Nutrition
- Serving Size: 1 serving (approxima
- Calories: 400
- Sugar: 12
- Sodium: 800
- Fat: 22
- Saturated Fat: 10
- Carbohydrates: 28
- Fiber: 4
- Protein: 18
Keywords: Halloween charcuterie board, budget-friendly, spooky snacks, party platter, kid-friendly, easy appetizer


