My niece, who was maybe nine at the time, asked why I couldn’t just use gingersnaps instead of graham crackers for the crust of my cheesecake. I started to explain why that wouldn’t work—the texture would be off, the flavor too strong, the whole thing would be a mess. Then I stopped. Honestly, I had no good reason. I just assumed, you know, because I was the adult in the kitchen.
That Thanksgiving, I was already stressed. The turkey was taking forever, my mother-in-law kept asking about the menu, and I had this pumpkin cheesecake I was supposed to be making for the big dinner. It was a Tuesday, the day before the holiday, and I was out of graham crackers. Completely out. My niece, sitting on the counter licking a spoon, pointed at the box of gingersnaps I’d bought for snacking. “Why not those?” she said again. I sighed, rolled my eyes a little, and figured—fine, let’s see what happens.
What happened was pure magic. The gingersnap crust was spicy, crunchy, and held together perfectly. It didn’t overpower the pumpkin filling—it completed it. That first bite, with the velvety cheesecake and the warm, molasses-y crunch, made me close my eyes. I had to admit it out loud: she was right. I was wrong. And honestly, I’ve never gone back. That little moment of being humbled by a nine-year-old gave me the recipe I now bring to every single dinner party, potluck, and festive get-together. It’s the one people ask for by name. It’s my guest-favorite pumpkin cheesecake with gingersnap crust, and it’s the dish that steals the table every single time.
Why You’ll Love This Recipe
Let me tell you, this isn’t just another pumpkin cheesecake. This is the one that makes people stop mid-conversation and ask for the recipe before they’ve even finished their slice. I’ve tested it for years—brought it to Friendsgivings, Christmas dinners, even a summer cookout where someone begged me to make it “out of season.” It works every time.
- Crowd-Pleaser: Kids love the gingersnap crunch, adults love the sophisticated pumpkin-spice balance. It disappears fast, so make two if you can.
- Make-Ahead Friendly: You can prepare this beauty a full day before your party. That means less stress on the day of, and more time to actually enjoy your guests.
- No Water Bath Needed: I figured out a foolproof method that gives you a crack-free top without the fuss of a water bath. Trust me, your sanity will thank me.
- Simple Ingredients: Nothing weird here. Cream cheese, pumpkin puree, eggs, sugar, and those glorious gingersnaps. You probably have most of it already.
- Perfect for Hosting: It slices beautifully, looks stunning on a cake stand, and pairs with everything from coffee to red wine. It’s the centerpiece your table deserves.
What makes this recipe different? It’s the crust, honestly. That gingersnap base adds a warmth and complexity that a plain graham cracker crust just can’t touch. It’s not trying to be fancy—it’s just right. And the filling? Silky, creamy, not too dense, with just the right amount of pumpkin spice. I’ve had people tell me it’s the best cheesecake they’ve ever eaten. I don’t say that to brag. I say it because I want you to have that moment too.
What Ingredients You Will Need
This recipe uses simple, honest ingredients to create something that feels absolutely luxurious. Most of these are pantry staples for a baker, but a few key players make all the difference. Let’s walk through them.
For the Gingersnap Crust
- 2 cups (about 8 oz) gingersnap cookies, finely crushed – I prefer Nabisco or a bakery brand with a strong molasses kick. Pulse them in a food processor for the finest crumb.
- 1/4 cup (50g) granulated sugar – Just a touch of sweetness to balance the spice.
- 6 tablespoons (85g) unsalted butter, melted – Use real butter here, not margarine. It binds the crust and adds richness.
- 1/4 teaspoon salt – Trust me, salt makes the crust pop.
For the Pumpkin Cheesecake Filling
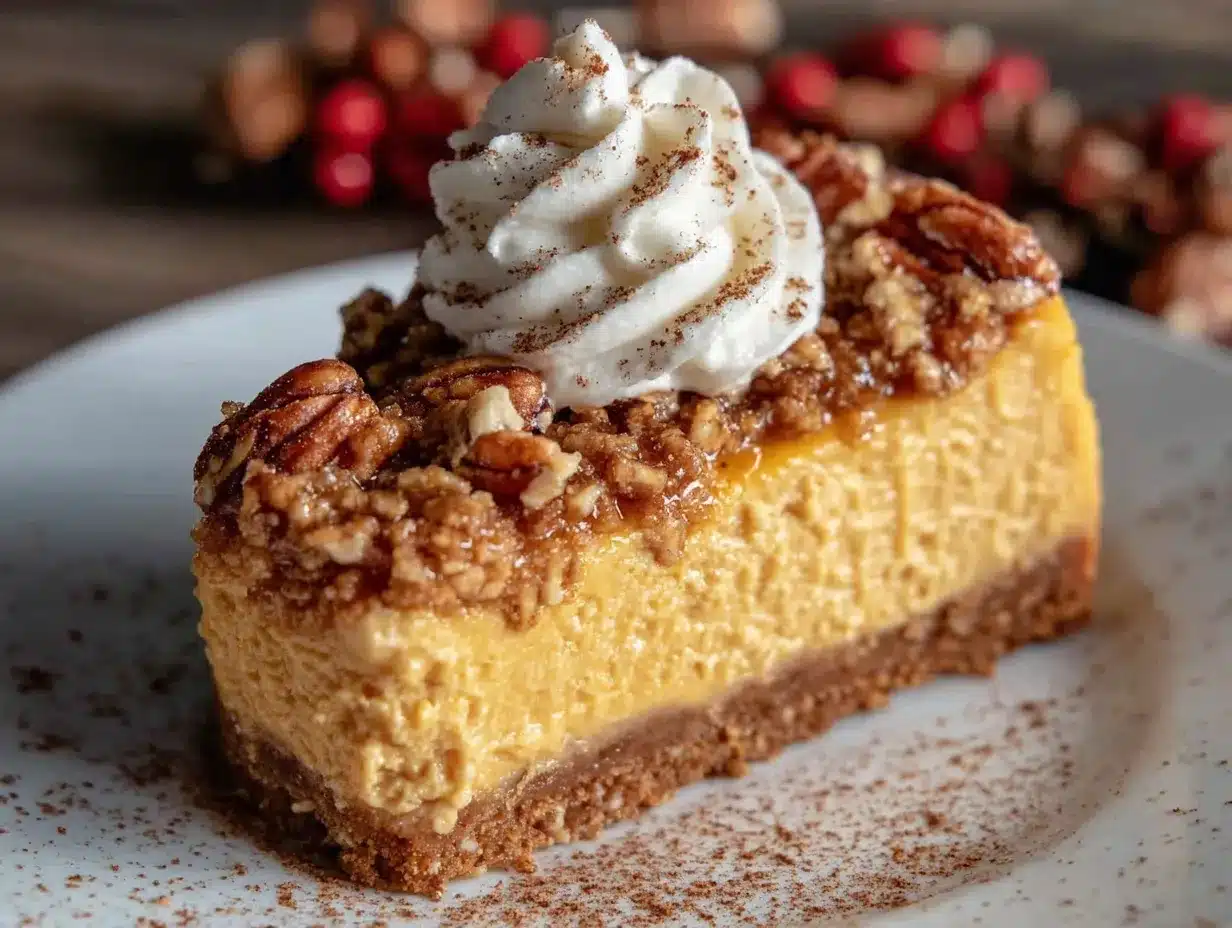
- 24 oz (680g) cream cheese, softened to room temperature – Full-fat is non-negotiable for that silky texture. I use Philadelphia brand.
- 1 cup (200g) granulated sugar – Standard white sugar works perfectly.
- 1/2 cup (110g) packed light brown sugar – Adds depth and a hint of molasses that plays beautifully with the crust.
- 1 cup (245g) pumpkin puree – Not pumpkin pie filling! Pure pumpkin puree is what you need. Libby’s is my go-to.
- 3 large eggs, room temperature – Cold eggs can make the filling lumpy. Let them sit out for 30 minutes.
- 1/4 cup (60g) sour cream, room temperature – Adds tang and keeps the cheesecake creamy.
- 2 teaspoons vanilla extract – Pure, not imitation, for the best flavor.
- 1 tablespoon pumpkin pie spice – Or make your own: 2 teaspoons cinnamon, 1/2 teaspoon ginger, 1/2 teaspoon nutmeg, 1/4 teaspoon cloves.
- 1/2 teaspoon salt – Balances the sweetness and brightens the pumpkin.
For the Optional Topping
- 1 cup (240ml) heavy cream – For homemade whipped cream. A dollop on each slice is pure heaven.
- 2 tablespoons powdered sugar – Sweetens the cream without making it grainy.
- 1/2 teaspoon vanilla extract – Because everything is better with vanilla.
- Crushed gingersnaps or candied pecans for garnish – Adds a nice crunch on top.
Equipment Needed
You don’t need a professional kitchen to nail this recipe, but a few key tools will make your life easier. Here’s what I use:
- 9-inch springform pan – Absolutely essential for easy removal. I’ve had good luck with the Wilton brand, which is affordable and reliable.
- Food processor or rolling pin – For crushing the gingersnaps. A food processor gives the finest crumb, but a rolling pin and a zip-top bag work in a pinch.
- Electric hand mixer or stand mixer – Cream cheese needs to be whipped smooth, and doing it by hand is a workout. I prefer my KitchenAid stand mixer.
- Large mixing bowls – One for the crust, one for the filling.
- Rubber spatula – For scraping every last bit of filling into the pan. Don’t waste a drop.
- Measuring cups and spoons – Accuracy matters in baking.
- Parchment paper – Optional, but it makes removing the cheesecake from the pan bottom easier.
- Cooling rack – For cooling the cheesecake gradually to prevent cracking.
If you don’t have a springform pan, you can use a deep-dish pie plate, but the slices won’t be as clean. I’d recommend investing in one—it’s a game-changer for any cheesecake recipe.
Preparation Method
Alright, let’s get to the good part. This method is tried and true, and I’ve included every little trick I’ve learned along the way. Take your time, and you’ll be rewarded with a stunning cheesecake.
- Preheat your oven to 350°F (175°C). Position a rack in the middle of the oven. While it’s heating, lightly grease your springform pan with butter or non-stick spray.
- Make the crust. In a food processor, pulse the gingersnap cookies until they become fine crumbs. You should have about 2 cups. Transfer to a medium bowl, then add the sugar and salt. Pour in the melted butter and stir with a fork until the mixture looks like wet sand and holds together when squeezed.
- Press the crust into the pan. Dump the crumb mixture into your prepared springform pan. Use the bottom of a flat measuring cup or a glass to press it firmly and evenly into the bottom and about 1 inch up the sides. Don’t skip the sides—they help hold the filling and look beautiful. Bake for 10 minutes, then set aside to cool while you make the filling. Leave the oven on.
- Beat the cream cheese. In a large bowl, beat the softened cream cheese with an electric mixer on medium speed until smooth and creamy, about 2 minutes. Scrape down the sides and bottom of the bowl with a spatula. This step is crucial—lumps now mean lumps later.
- Add the sugars. Add the granulated sugar and brown sugar, then beat on medium speed for another 2 minutes until light and fluffy. Scrape the bowl again.
- Mix in the pumpkin and wet ingredients. Add the pumpkin puree, sour cream, and vanilla extract. Beat on low speed until just combined. Don’t overmix—you don’t want to incorporate too much air, which can cause cracks.
- Add the eggs one at a time. Crack each egg into a small bowl first (to avoid shell bits), then add it to the batter. Beat on low speed just until the yolk disappears. Scrape the bowl after each addition. This gentle mixing keeps the filling dense and creamy.
- Add the spices and salt. Sprinkle the pumpkin pie spice and salt over the batter, then mix on low for about 15 seconds until evenly distributed. Give it one final scrape to make sure everything is combined.
- Pour the filling into the crust. Gently pour the cheesecake filling over the cooled crust. Use a spatula to spread it evenly. Tap the pan on the counter a few times to release any air bubbles.
- Bake low and slow. Place the springform pan on a baking sheet (to catch any drips) and bake at 350°F (175°C) for 15 minutes. Then, without opening the oven door, reduce the temperature to 325°F (163°C) and bake for another 45-55 minutes. The cheesecake is done when the edges are set and slightly puffed, but the center still jiggles like Jell-O when you gently shake the pan.
- Cool gradually. Turn off the oven, crack the door open, and let the cheesecake sit inside for 1 hour. This slow cooling prevents the dreaded crack. Then, remove it from the oven and run a thin knife around the edge of the pan to loosen the cheesecake. Let it cool completely on a wire rack, about 2 hours.
- Chill overnight. Cover the pan tightly with plastic wrap and refrigerate for at least 6 hours, but preferably overnight. This is the hardest part—waiting—but it’s essential for the perfect texture. The flavors meld and the cheesecake sets up beautifully.
- Serve and enjoy. When ready to serve, remove the sides of the springform pan. Slice with a sharp knife dipped in hot water and wiped dry between cuts. Add a dollop of whipped cream and a sprinkle of crushed gingersnaps. Watch your guests’ faces light up.
Cooking Tips & Techniques
I’ve made this pumpkin cheesecake with gingersnap crust more times than I can count, and I’ve learned a few things the hard way. Let me save you some trouble.
Room temperature ingredients are not optional. I know, it’s annoying to wait, but cold cream cheese creates lumps that no amount of beating will fix. Take everything out of the fridge 30-60 minutes before you start. Set a timer if you have to—I’ve forgotten, and the result was a lumpy filling that never quite smoothed out.
Don’t overmix the filling. Once you add the eggs, you’re just combining. Overmixing incorporates too much air, which expands in the oven and then collapses, leaving you with cracks. Mix on low speed and stop as soon as each egg is incorporated. I learned this after my third cracked cheesecake—it was a painful lesson.
The water bath alternative. Traditional cheesecake recipes call for a water bath, but I’ve found that starting the bake at a higher temperature (350°F) for 15 minutes, then lowering it, gives you a similar steamy environment without the risk of water seeping into your crust. Plus, it’s way less hassle. No wrapping pans in foil, no worrying about leaks.
Check for doneness with the jiggle test. Don’t rely on a toothpick—cheesecake should still be a little wobbly in the center when you take it out. It will continue to set as it cools. Overbaking is the number one cause of dry, grainy cheesecake. Trust the jiggle.
Patience is a virtue. I know you want to dig in, but cutting into a warm cheesecake is a disaster. The slices won’t hold their shape, and the texture will be loose. Let it chill overnight. I promise the wait is worth it.
Variations & Adaptations
This recipe is a fantastic base, and I love playing around with it depending on the occasion or who’s coming to dinner. Here are a few of my favorite twists.
Gluten-Free Version: Use gluten-free gingersnap cookies for the crust. Many brands are available now, and they work just as well. The filling is naturally gluten-free, so this swap is easy. I’ve done it for celiac friends, and they couldn’t tell the difference.
Dairy-Free Adaptation: Swap the cream cheese for a high-quality dairy-free version (I like Kite Hill or Miyoko’s). Use coconut cream instead of sour cream, and a plant-based butter for the crust. The texture will be slightly softer, but the flavor is still incredible. Just make sure everything is at room temperature.
Spiced-Up Version: For a bolder flavor, add 1/4 teaspoon of black pepper and a pinch of cayenne to the filling. It sounds weird, but the heat plays beautifully with the pumpkin and ginger. I tried this on a whim for a friend’s Halloween party, and it was a hit.
Chocolate Swirl: Melt 1/2 cup of semi-sweet chocolate chips and swirl it into the filling before baking. Use a knife to create a marbled effect. The chocolate and pumpkin are a surprisingly good pair—think pumpkin chocolate chip cookies, but cheesecake.
Individual Mini Cheesecakes: Press the crust into a muffin tin lined with paper liners, then fill with the cheesecake batter. Bake for about 18-22 minutes at 325°F. These are perfect for parties where you want individual servings. Plus, no slicing required!
Serving & Storage Suggestions
This cheesecake is a showstopper, so let’s treat it like one. Here’s how to serve and store it like a pro.
Serving Temperature: Take the cheesecake out of the fridge about 20 minutes before serving. This takes the chill off and allows the flavors to bloom. It should still be cold, but not ice-cold. Slice with a sharp, thin-bladed knife dipped in hot water and wiped clean between cuts for the neatest slices.
Presentation Tips: Place the cheesecake on a beautiful cake stand or platter. A dollop of freshly whipped cream on each slice, a sprinkle of crushed gingersnaps, and maybe a few candied pecans or a drizzle of caramel sauce. It’s the little touches that make it look like you spent all day on it (even though you didn’t).
What to Serve Alongside: A strong cup of black coffee is my favorite pairing. The bitterness cuts through the richness. For a dessert spread, serve it alongside a warm apple crisp with oat topping for a fall-themed dessert table. It also pairs beautifully with a spiced pumpkin latte cocktail for a festive gathering.
Storage: Cover the cheesecake tightly with plastic wrap or store it in an airtight container in the refrigerator. It will keep for up to 5 days. The flavors actually deepen after a day or two, so don’t be afraid to make it ahead.
Freezing: This cheesecake freezes beautifully. Once it’s fully chilled and set, wrap the entire cheesecake (still in the springform pan) in a layer of plastic wrap, then a layer of aluminum foil. Freeze for up to 3 months. To thaw, transfer it to the refrigerator for 24 hours. I often make two—one for now, one for later. Future me is always grateful.
Reheating: I actually prefer this cheesecake cold, but if you like it slightly warm, let a slice sit at room temperature for 30 minutes. Do not microwave it—that will turn the creamy filling into a soupy mess.
Nutritional Information & Benefits
Let’s be real—this is a dessert, not a health food. But it does have some redeeming qualities, and I think it’s worth knowing what’s in that delicious slice.
Estimated per slice (based on 12 servings): Calories: 480, Fat: 32g, Saturated Fat: 18g, Cholesterol: 145mg, Sodium: 380mg, Carbohydrates: 42g, Fiber: 1g, Sugar: 33g, Protein: 8g.
Health Highlights: Pumpkin is packed with vitamin A, which is great for eye health and immune function. It’s also a good source of fiber. The cream cheese provides calcium and protein, though it’s also high in saturated fat. The ginger in the crust has anti-inflammatory properties—so there’s that!
Dietary Considerations: This recipe is not gluten-free (unless you use GF gingersnaps), not dairy-free (unless you make the swaps above), and not low-carb. It is, however, vegetarian. If you’re watching your sugar intake, you can reduce the sugar by 1/4 cup without affecting the texture too much, but it will be less sweet.
My Perspective: I believe in balance. This cheesecake is a treat, and I enjoy every single bite without guilt. It’s the kind of dessert you make for special occasions, and that’s okay. Food is about joy, connection, and celebration—and this recipe delivers all three.
Conclusion
This pumpkin cheesecake with gingersnap crust has become my signature dish, and it all started with a kid’s simple question. It’s the recipe I bring to every gathering, the one people text me about afterward, the one that makes me feel like I’ve got this whole hosting thing figured out. And honestly? It’s not complicated. It’s just good ingredients, a little patience, and a willingness to be wrong every now and then.
I hope you make this for your next dinner party, your Thanksgiving, or just because it’s Tuesday and you deserve something amazing. Customize it, make it your own, and don’t forget to share it with the people you love. That’s what this recipe is really about—bringing people together around a table, one perfect slice at a time.
If you try it, I’d love to hear how it went. Leave a comment below, tag me in your photos, or tell me about the time a kid in your life taught you something in the kitchen. Happy baking, friends!
Frequently Asked Questions
Can I use canned pumpkin pie filling instead of pumpkin puree?
No, please don’t. Pumpkin pie filling is already sweetened and spiced, which will throw off the balance of this recipe. Stick with 100% pure pumpkin puree for the best results.
Why did my cheesecake crack on top?
Cracks usually happen from overbaking, overmixing, or cooling too quickly. Make sure you don’t overmix the batter, bake until the center is just slightly jiggly, and cool it gradually in the oven with the door cracked open. A little crack isn’t the end of the world—your whipped cream will cover it!
Can I make this cheesecake without a springform pan?
You can, but it’s trickier. A deep-dish pie plate will work, but you won’t get those clean, tall slices. If you use a regular cake pan, line it with parchment paper so you can lift the cheesecake out. A springform pan is really the best tool for the job.
How far in advance can I make this cheesecake?
You can make it up to 2 days ahead and keep it in the refrigerator. It also freezes beautifully for up to 3 months. Just make sure it’s tightly wrapped to prevent freezer burn.
Can I use a different cookie for the crust?
Absolutely. Graham crackers, vanilla wafers, or even shortbread cookies would work. But honestly, the gingersnaps are what make this recipe special. They add a warmth and spice that perfectly complements the pumpkin. Give them a try—you might be surprised.
Pin This Recipe!
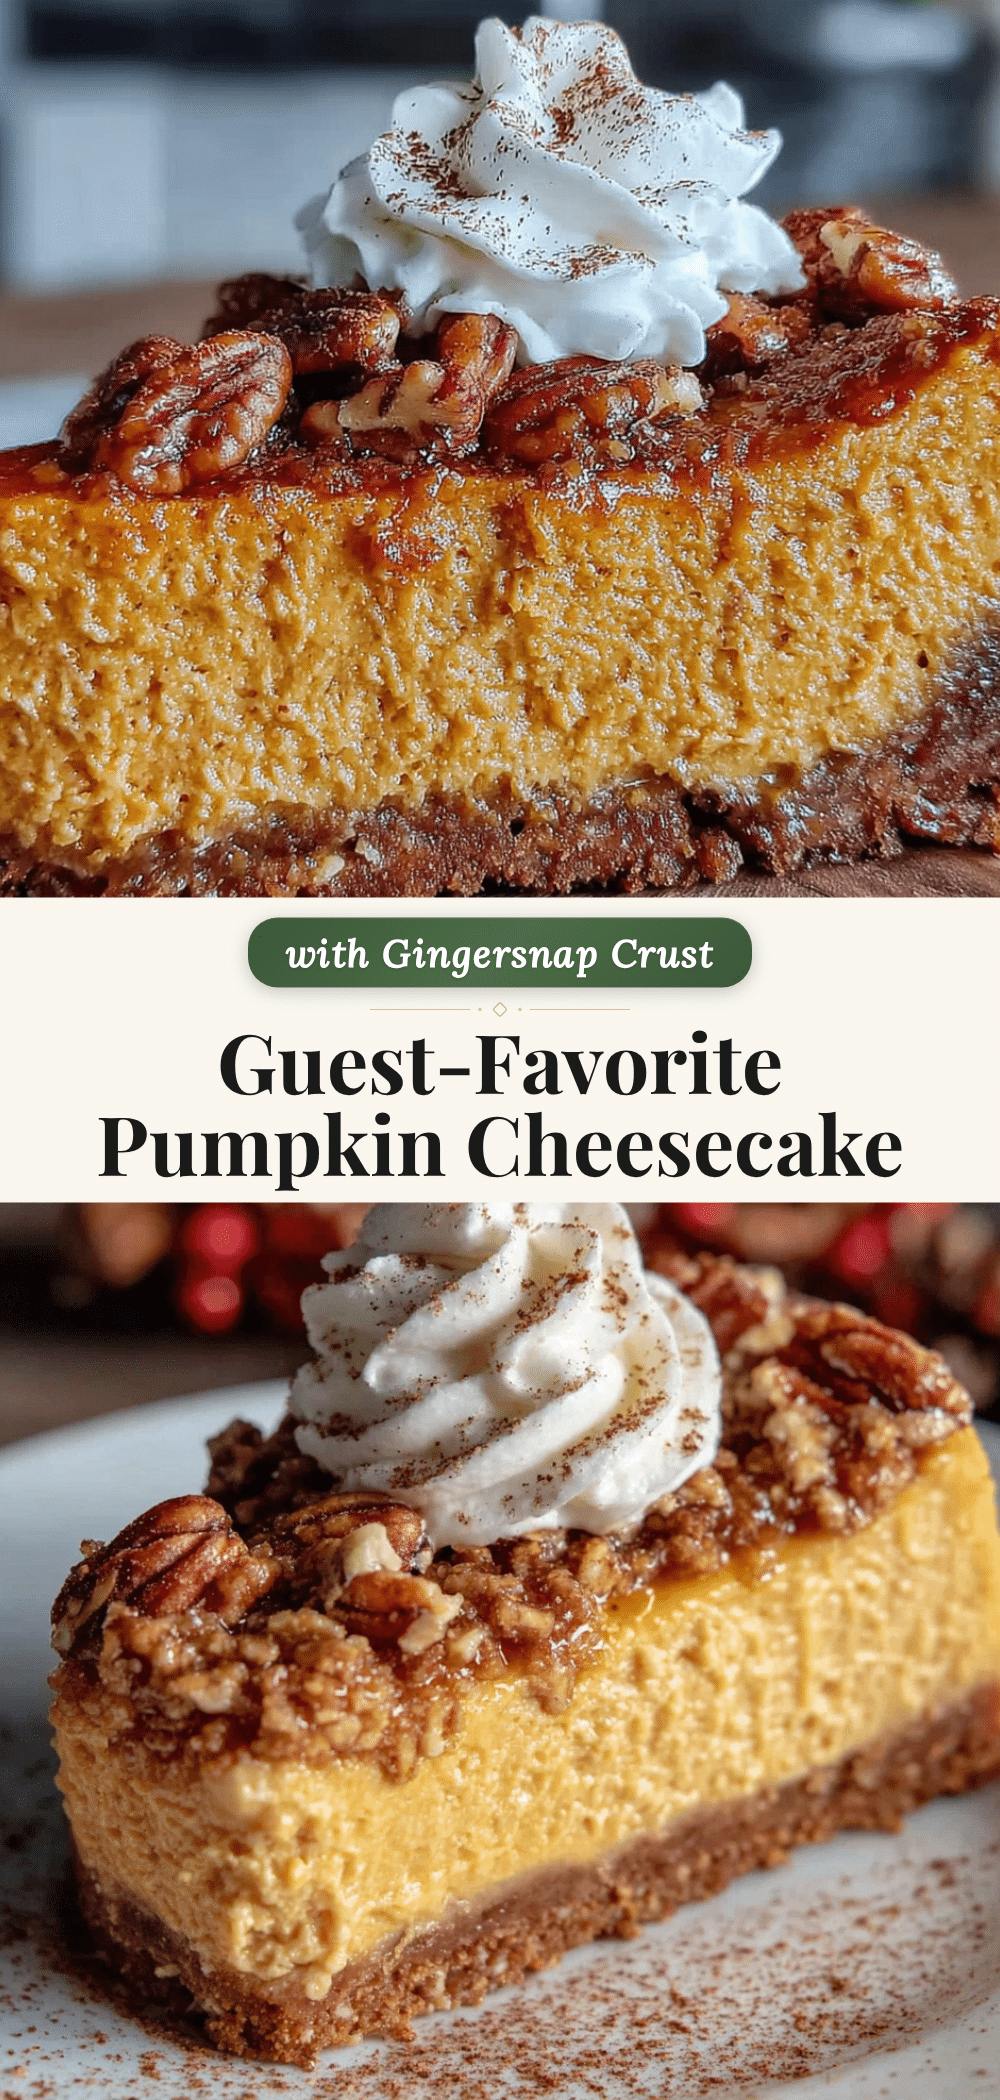
Best Pumpkin Cheesecake with Gingersnap Crust (Easy Recipe)
This pumpkin cheesecake features a spicy gingersnap crust and a silky, creamy filling. It’s a crowd-pleasing dessert that can be made ahead, requires no water bath, and uses simple ingredients.
- Prep Time: 30 minutes
- Cook Time: 1 hour 10 minutes
- Total Time: 8 hours 40 minutes (includes chilling)
- Yield: 12 servings 1x
- Category: Dessert
- Cuisine: American
Ingredients
- 2 cups (about 8 oz) gingersnap cookies, finely crushed
- 1/4 cup (50g) granulated sugar
- 6 tablespoons (85g) unsalted butter, melted
- 1/4 teaspoon salt
- 24 oz (680g) cream cheese, softened to room temperature
- 1 cup (200g) granulated sugar
- 1/2 cup (110g) packed light brown sugar
- 1 cup (245g) pumpkin puree
- 3 large eggs, room temperature
- 1/4 cup (60g) sour cream, room temperature
- 2 teaspoons vanilla extract
- 1 tablespoon pumpkin pie spice
- 1/2 teaspoon salt
- 1 cup (240ml) heavy cream
- 2 tablespoons powdered sugar
- 1/2 teaspoon vanilla extract
- Crushed gingersnaps or candied pecans for garnish
Instructions
- Preheat your oven to 350°F (175°C). Position a rack in the middle of the oven. Lightly grease your springform pan with butter or non-stick spray.
- Make the crust: In a food processor, pulse the gingersnap cookies until they become fine crumbs. Transfer to a medium bowl, then add the sugar and salt. Pour in the melted butter and stir with a fork until the mixture looks like wet sand and holds together when squeezed.
- Press the crust into the pan: Dump the crumb mixture into your prepared springform pan. Use the bottom of a flat measuring cup or a glass to press it firmly and evenly into the bottom and about 1 inch up the sides. Bake for 10 minutes, then set aside to cool while you make the filling. Leave the oven on.
- Beat the cream cheese: In a large bowl, beat the softened cream cheese with an electric mixer on medium speed until smooth and creamy, about 2 minutes. Scrape down the sides and bottom of the bowl with a spatula.
- Add the sugars: Add the granulated sugar and brown sugar, then beat on medium speed for another 2 minutes until light and fluffy. Scrape the bowl again.
- Mix in the pumpkin and wet ingredients: Add the pumpkin puree, sour cream, and vanilla extract. Beat on low speed until just combined.
- Add the eggs one at a time: Crack each egg into a small bowl first, then add it to the batter. Beat on low speed just until the yolk disappears. Scrape the bowl after each addition.
- Add the spices and salt: Sprinkle the pumpkin pie spice and salt over the batter, then mix on low for about 15 seconds until evenly distributed. Give it one final scrape.
- Pour the filling into the crust: Gently pour the cheesecake filling over the cooled crust. Use a spatula to spread it evenly. Tap the pan on the counter a few times to release any air bubbles.
- Bake low and slow: Place the springform pan on a baking sheet and bake at 350°F (175°C) for 15 minutes. Then, without opening the oven door, reduce the temperature to 325°F (163°C) and bake for another 45-55 minutes. The cheesecake is done when the edges are set and slightly puffed, but the center still jiggles like Jell-O when you gently shake the pan.
- Cool gradually: Turn off the oven, crack the door open, and let the cheesecake sit inside for 1 hour. Then, remove it from the oven and run a thin knife around the edge of the pan to loosen the cheesecake. Let it cool completely on a wire rack, about 2 hours.
- Chill overnight: Cover the pan tightly with plastic wrap and refrigerate for at least 6 hours, but preferably overnight.
- Serve and enjoy: When ready to serve, remove the sides of the springform pan. Slice with a sharp knife dipped in hot water and wiped dry between cuts. Add a dollop of whipped cream and a sprinkle of crushed gingersnaps.
Notes
Room temperature ingredients are crucial for a smooth filling. Do not overmix once eggs are added. The jiggle test is the best way to check doneness. Chill overnight for best texture and flavor.
Nutrition
- Serving Size: 1 slice
- Calories: 480
- Sugar: 33
- Sodium: 380
- Fat: 32
- Saturated Fat: 18
- Carbohydrates: 42
- Fiber: 1
- Protein: 8
Keywords: pumpkin cheesecake, gingersnap crust, fall dessert, Thanksgiving dessert, cheesecake recipe


