My sister had sworn off pumpkin pie for a solid decade. Every Thanksgiving, she’d push the slice around her plate, take a polite nibble, and declare it “fine.” Then, last November, I caught her standing at the kitchen counter at eleven o’clock at night, eating a slice of this version straight from the pie plate with a fork. She froze mid-bite, looked at me, and said, “Okay, this is different.”
Honestly, I get it. For years, I thought pumpkin pie was just the thing you had to eat before the pecan pie showed up. The filling could be grainy, the crust often tasted like cardboard, and the whole thing felt more like an obligation than a celebration. But then I started playing around with the ratios, testing different flours, and refusing to accept that “good enough” was the best we could do. I wanted a slice that made people close their eyes on the first bite—not one they pushed around the plate.
This Perfect Homemade Pumpkin Pie with Flaky All-Butter Crust is the result of that stubbornness. The filling is silky, spiced just right, and never, ever soggy. The crust shatters when you cut into it, then melts on your tongue. It’s the kind of pie that makes you reconsider everything you thought you knew about pumpkin pie. Maybe you’ve been the one pushing it around your plate all these years. I get it. But I think you’re about to change your mind.
Why You’ll Love This Recipe
Let me tell you why this pie is different from every other pumpkin pie recipe you’ve seen. I tested this thing seven times before I got it right—and my family was very happy to be the taste testers, by the way.
- Perfectly Spiced, Not Overpowering: The spice blend is balanced so the pumpkin flavor shines through. No one wants a mouthful of cinnamon that burns your throat.
- That Crust, Though: The all-butter crust is flaky, tender, and sturdy enough to hold the filling without getting mushy. It’s the crust that converts people.
- No Weird Ingredients: You don’t need evaporated milk or canned pumpkin pie filling. Just real pumpkin puree, cream, eggs, and pantry spices.
- Make-Ahead Friendly: You can prep the crust and filling a day ahead. The pie actually tastes better the next day—if you can wait that long.
- Foolproof Method: I’ve included every trick I learned the hard way so you don’t have to learn them yourself. No cracks, no soggy bottoms, no stress.
This isn’t just another pumpkin pie recipe. It’s the one I bring to every gathering, the one people ask for by name, and the one that finally won over my skeptical sister. It’s comfort food that feels special without being fussy—exactly what a holiday dessert should be.
What Ingredients You Will Need
This recipe uses simple, wholesome ingredients that work together to create something truly special. Most of these are pantry staples, but a few key choices make all the difference.
For the All-Butter Crust
- 2 ½ cups all-purpose flour (I prefer King Arthur for consistent results; spoon and level for accuracy)
- 1 teaspoon salt (fine sea salt works best; it dissolves evenly into the flour)
- 1 tablespoon granulated sugar (just a touch for tenderness, not sweetness)
- 1 cup cold unsalted butter (cut into small cubes and keep it very cold—pop it in the freezer for 10 minutes if your kitchen is warm)
- 6 to 8 tablespoons ice water (the exact amount depends on your flour and humidity; start with 6 and add more as needed)
For the Pumpkin Filling
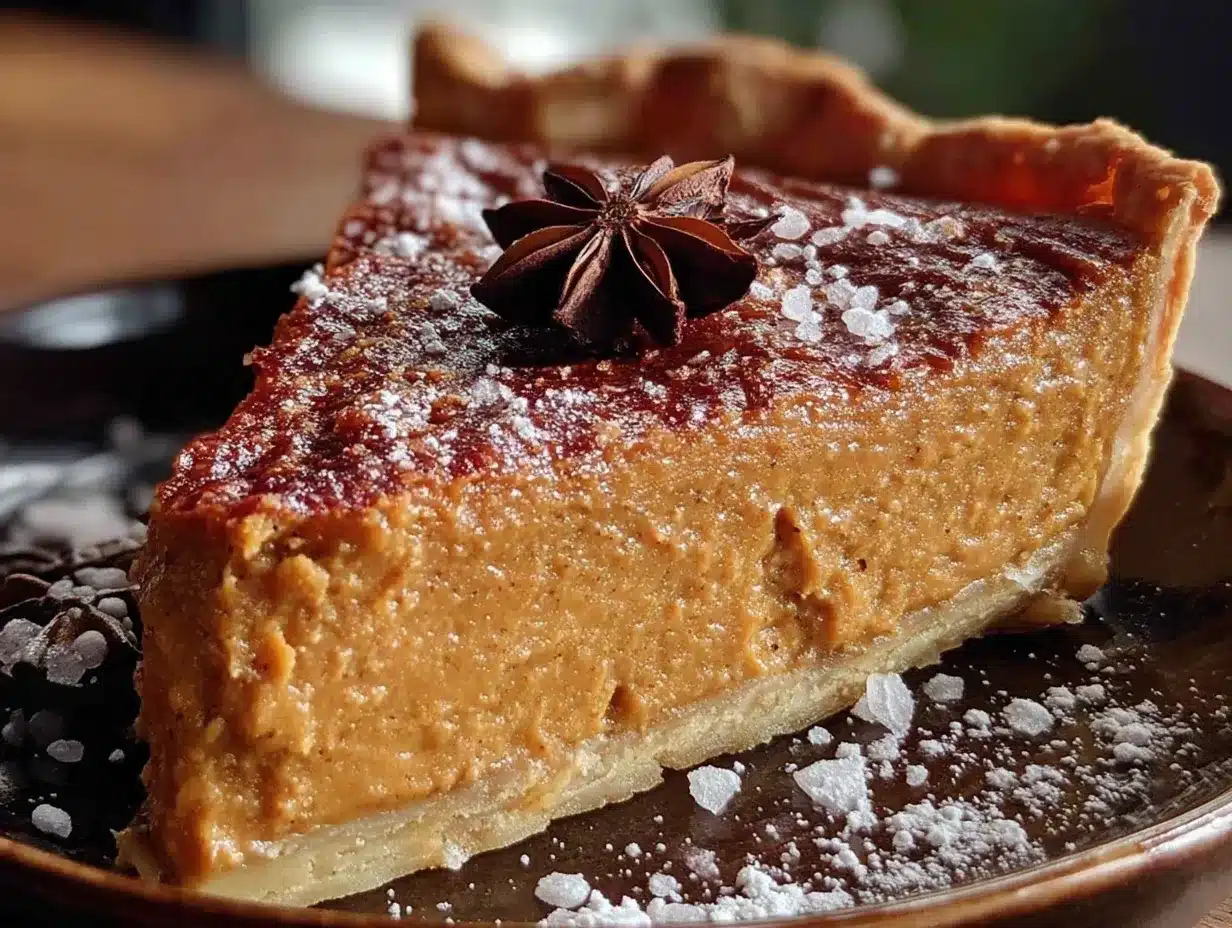
- 1 ¾ cups pumpkin puree (use canned pure pumpkin, not pumpkin pie filling; I like Libby’s for its consistent texture)
- ¾ cup granulated sugar
- ¼ cup packed light brown sugar (adds depth and a hint of molasses)
- 2 large eggs plus 1 egg yolk (room temperature; the extra yolk gives the filling a velvety richness)
- 1 ¼ cups heavy cream (don’t substitute milk—the fat content is crucial for that silky texture)
- 1 teaspoon vanilla extract (pure, not imitation)
- 2 teaspoons ground cinnamon
- 1 teaspoon ground ginger
- ½ teaspoon ground nutmeg (freshly grated if you have it—it’s a game-changer)
- ¼ teaspoon ground cloves
- ½ teaspoon salt
Ingredient Tip: If you can’t find fresh ginger for the ground version, don’t worry—the ground stuff works beautifully here. For a dairy-free option, you can substitute full-fat coconut cream for the heavy cream, but the texture will be slightly different. I’ve tried it, and it’s still delicious, just not as rich.
Equipment Needed
You don’t need a fancy kitchen to make this pie, but having the right tools makes the process smoother. Here’s what you’ll need:
- 9-inch pie dish (glass or ceramic works best; metal can conduct heat too quickly and burn the crust)
- Rolling pin (a French rolling pin without handles gives you better control, but any rolling pin will do)
- Large mixing bowls (one for the crust, one for the filling)
- Pastry cutter or food processor (for cutting the butter into the flour; I use a pastry cutter because it’s harder to overwork the dough)
- Plastic wrap (for chilling the dough)
- Parchment paper (for blind baking)
- Pie weights or dried beans (for weighing down the crust during blind baking)
- Whisk (for the filling—no electric mixer needed)
- Sharp knife or bench scraper (for trimming the dough)
- Cooling rack (essential for even cooling)
Budget Tip: If you don’t have pie weights, dried beans work perfectly. I keep a jar of old beans just for this purpose. You can reuse them for years.
Preparation Method
Step 1: Make the Crust Dough
In a large bowl, whisk together the flour, salt, and sugar. Add the cold butter cubes and toss them in the flour to coat. Using a pastry cutter or your fingertips, work the butter into the flour until the mixture looks like coarse meal with some pea-sized butter pieces remaining. Drizzle 6 tablespoons of ice water over the mixture and stir with a fork until the dough just comes together. If it seems dry, add the remaining water one tablespoon at a time. The dough should hold together when squeezed but not be sticky.
Sensory Cue: You should still see small flecks of butter in the dough—that’s what creates the flaky layers. If the butter has disappeared into the flour, you’ve overworked it.
Step 2: Chill the Dough
Flatten the dough into a disc about 1 inch thick, wrap it tightly in plastic wrap, and refrigerate for at least 1 hour. You can do this up to 3 days ahead. If you’re in a hurry, 30 minutes in the freezer works, but don’t skip this step—the dough needs to relax so it doesn’t shrink during baking.
Step 3: Roll Out the Crust
On a lightly floured surface, roll the dough into a 12-inch circle, about ⅛ inch thick. Rotate the dough occasionally and add more flour as needed to prevent sticking. Carefully transfer the dough to your pie dish by rolling it around the rolling pin and unrolling it over the dish. Gently press the dough into the bottom and up the sides of the dish. Trim the overhang to about ½ inch, then fold it under and crimp the edges however you like. I use my thumb and forefinger to make a simple fluted edge.
Tip from Experience: I once forgot to flour the surface and the dough stuck so badly I had to scrape it off with a spatula. Don’t be me. Keep that surface lightly floured.
Step 4: Blind Bake the Crust
Preheat your oven to 375°F (190°C). Line the pie crust with parchment paper and fill it with pie weights or dried beans. Bake for 15 minutes, then remove the parchment and weights. Prick the bottom of the crust all over with a fork and bake for another 10 minutes, until the crust is lightly golden and dry to the touch. Let it cool slightly while you make the filling.
Step 5: Make the Filling
In a large bowl, whisk together the pumpkin puree, granulated sugar, and brown sugar until smooth. Add the eggs and egg yolk one at a time, whisking well after each addition. Whisk in the heavy cream and vanilla extract. In a small bowl, stir together the cinnamon, ginger, nutmeg, cloves, and salt, then whisk the spice mixture into the pumpkin mixture until fully combined. The filling should be smooth and velvety.
Step 6: Bake the Pie
Reduce the oven temperature to 350°F (175°C). Pour the filling into the warm pre-baked crust. Bake for 50 to 60 minutes, until the edges are set but the center still jiggles slightly when you gently shake the pie dish. It will continue to set as it cools. If the edges of the crust are browning too quickly, loosely tent them with foil or a pie shield after 30 minutes.
Don’t Overbake: I learned this the hard way. An overbaked pumpkin pie cracks and becomes rubbery. It’s better to pull it out when the center is still a little wobbly—trust the jiggle.
Step 7: Cool Completely
Place the pie on a cooling rack and let it cool to room temperature, about 2 hours. Then refrigerate for at least 4 hours or overnight. This step is non-negotiable—the pie needs time to fully set and develop its flavor.
Cooking Tips & Techniques
Here are the things I wish someone had told me before I started making pumpkin pie from scratch.
Keep Everything Cold: For the flakiest crust, your butter and water need to be ice cold. If your kitchen is warm, pop the flour in the freezer for 10 minutes before you start. I once tried making this in July without air conditioning and ended up with a greasy mess. Never again.
Don’t Overmix the Filling: Whisk just until combined. Overmixing incorporates too much air, which can cause the filling to puff up and then crack as it cools. You want a dense, creamy texture, not a soufflé.
Use a Pie Shield: The edges of an all-butter crust brown faster than the rest of the pie. A silicone pie shield is worth its weight in gold, but foil works too. Just check the crust at 30 minutes and cover it if needed.
The Toothpick Test Lies: With pumpkin pie, a clean toothpick means it’s overbaked. Instead, use the jiggle test. The center should wobble like Jell-O, not slosh like liquid. It will firm up as it cools.
Let It Rest: I know it’s hard to wait, but this pie truly tastes better the next day. The spices meld, the texture sets perfectly, and the crust stays flaky. Make it a day ahead and thank me later.
Variations & Adaptations
This recipe is versatile enough to adapt to different needs and tastes. Here are some of my favorite variations.
Dairy-Free Version
Substitute the heavy cream with full-fat coconut cream. The texture will be slightly less rich but still delicious. Use a vegan butter stick for the crust—just make sure it’s very cold. I’ve tested this with Miyoko’s and it worked beautifully.
Gluten-Free Option
Replace the all-purpose flour with a 1:1 gluten-free baking flour blend that contains xanthan gum. I like Bob’s Red Mill for this. The crust will be a bit more delicate, so handle it gently. Blind baking is even more important here to prevent a soggy bottom.
Spice It Your Way
Not a fan of cloves? Leave them out and add an extra ¼ teaspoon of cinnamon and ginger. Want more warmth? Add a pinch of cardamom or allspice. I once made a version with a teaspoon of bourbon in the filling and it was dangerously good.
Mini Pies
Use a muffin tin to make individual pies. Roll the dough, cut circles, and press them into the muffin cups. Blind bake for 10 minutes, then fill and bake for 25 to 30 minutes. Perfect for parties or portion control.
Serving & Storage Suggestions
Serve this pie cold or at room temperature—never warm. A slice straight from the fridge with a dollop of lightly sweetened whipped cream is my personal favorite. For a fancy touch, add a sprinkle of flaky sea salt on top of the whipped cream. It sounds weird, but the salt amplifies the spices and makes everything pop.
Storage: Cover the pie loosely with foil or plastic wrap and refrigerate for up to 4 days. The crust will stay flaky for about 2 days; after that, it softens slightly but still tastes great.
Freezing: You can freeze the fully baked pie for up to 3 months. Wrap it tightly in plastic wrap and then foil. Thaw overnight in the refrigerator before serving. I do this every year for Thanksgiving prep and no one has ever noticed.
Reheating: If you prefer warm pie, reheat individual slices in a 300°F (150°C) oven for 10 minutes. Don’t microwave it—the crust will turn into a sad, soggy mess.
Nutritional Information & Benefits
Per slice (based on 8 servings): approximately 380 calories, 22g fat, 44g carbohydrates, 6g protein, and 3g fiber. These values are estimates and will vary based on your specific ingredients.
Pumpkin is packed with vitamin A, fiber, and antioxidants. It’s one of those rare ingredients that feels indulgent but actually has real nutritional benefits. The heavy cream adds calcium and vitamin D, and the butter in the crust provides a small amount of vitamin A as well.
Health Note: This pie is not low-calorie, and that’s okay. It’s a holiday dessert meant to be enjoyed in moderation. I believe in eating real food that makes you happy, and a slice of this pie is absolutely worth every bite.
Conclusion
This Perfect Homemade Pumpkin Pie with Flaky All-Butter Crust is the pie that changed my sister’s mind and it might just change yours too. It’s proof that homemade really is better, that a little patience pays off, and that the best recipes come from stubborn refusal to settle for “good enough.”
I’d love to hear how yours turns out. Did you try a variation? Did someone catch you eating it straight from the pie plate at midnight? Leave a comment below and tell me about it. Share this recipe with someone who claims they don’t like pumpkin pie—they might be the next convert. Happy baking, friends.
Frequently Asked Questions
Can I use fresh pumpkin instead of canned?
Yes, but you’ll need to roast and puree it first. Make sure to drain off any excess liquid—fresh pumpkin tends to be more watery than canned. I recommend roasting the pumpkin cut-side down at 400°F (200°C) for 45 minutes, then pureeing and straining through a fine-mesh sieve.
Why did my crust shrink during baking?
This usually happens when the dough is overworked or not chilled enough. The gluten tightens up in the oven and pulls the crust down. Make sure you chill the dough for at least an hour and handle it as little as possible.
Can I make this pie ahead of time?
Absolutely. The pie actually tastes better the next day. You can make it up to 2 days ahead and keep it covered in the refrigerator. You can also freeze it for up to 3 months.
How do I prevent a soggy bottom crust?
Blind baking is the key. Pre-baking the crust for 25 minutes before adding the filling ensures it stays crisp. Also, make sure your filling is not too thin—if it seems watery, add an extra tablespoon of flour.
My pie cracked on top. What went wrong?
Overbaking is the most common cause. The filling expands too much and then cracks as it cools. Pull the pie out when the center still jiggles slightly. Rapid temperature changes can also cause cracking, so let it cool gradually on a wire rack.
Pin This Recipe!
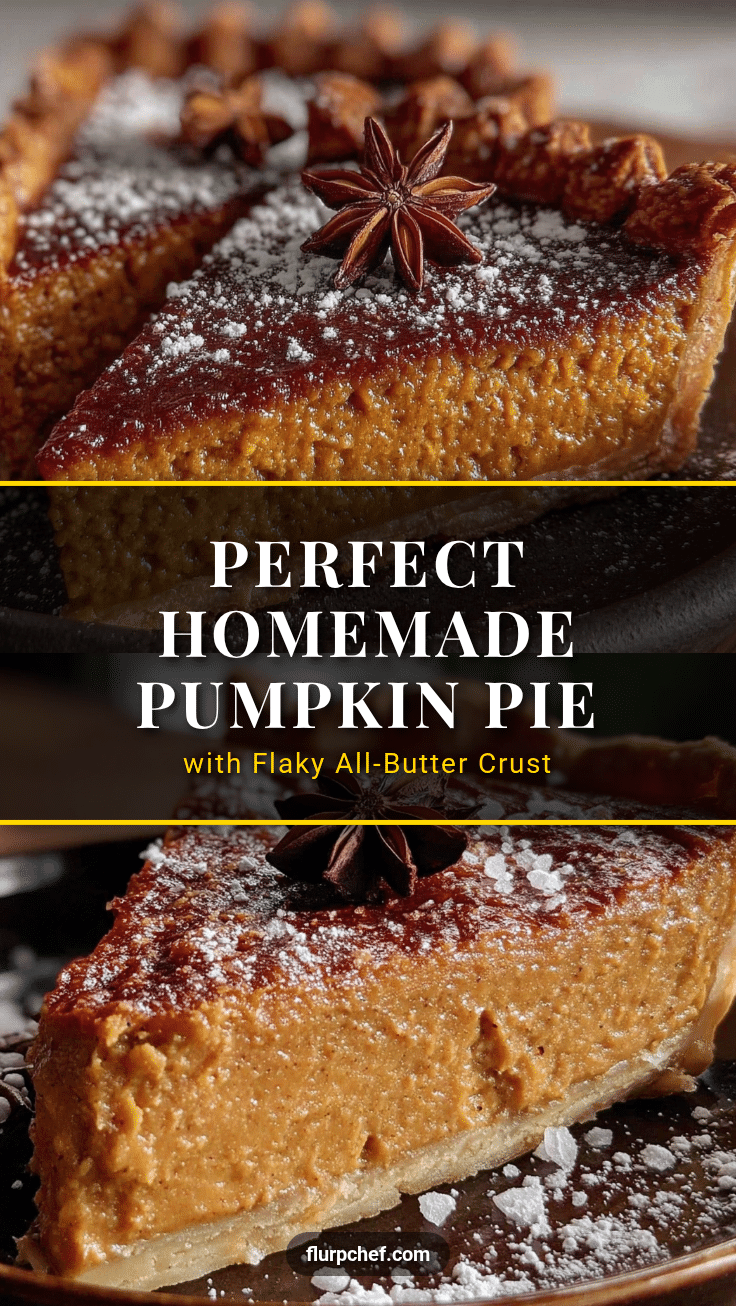
Perfect Homemade Pumpkin Pie with Flaky Butter Crust
This Perfect Homemade Pumpkin Pie with Flaky All-Butter Crust is the result of stubborn refusal to settle for ‘good enough.’ The filling is silky, spiced just right, and never soggy, while the crust shatters when you cut into it and melts on your tongue.
- Prep Time: 30 minutes
- Cook Time: 1 hour 10 minutes
- Total Time: 5 hours 40 minutes (includes chilling and cooling)
- Yield: 8 servings 1x
- Category: Dessert
- Cuisine: American
Ingredients
- 2 ½ cups all-purpose flour
- 1 teaspoon fine sea salt
- 1 tablespoon granulated sugar
- 1 cup cold unsalted butter, cut into small cubes
- 6 to 8 tablespoons ice water
- 1 ¾ cups pumpkin puree (canned pure pumpkin, not pie filling)
- ¾ cup granulated sugar
- ¼ cup packed light brown sugar
- 2 large eggs plus 1 egg yolk, room temperature
- 1 ¼ cups heavy cream
- 1 teaspoon pure vanilla extract
- 2 teaspoons ground cinnamon
- 1 teaspoon ground ginger
- ½ teaspoon ground nutmeg (preferably freshly grated)
- ¼ teaspoon ground cloves
- ½ teaspoon salt
Instructions
- Make the crust dough: In a large bowl, whisk together flour, salt, and sugar. Add cold butter cubes and toss to coat. Using a pastry cutter or fingertips, work butter into flour until mixture resembles coarse meal with some pea-sized butter pieces. Drizzle 6 tablespoons ice water over mixture and stir with a fork until dough just comes together. If dry, add remaining water 1 tablespoon at a time. Dough should hold together when squeezed but not be sticky.
- Chill the dough: Flatten dough into a 1-inch thick disc, wrap tightly in plastic wrap, and refrigerate for at least 1 hour (up to 3 days). For a quick chill, freeze for 30 minutes.
- Roll out the crust: On a lightly floured surface, roll dough into a 12-inch circle, about ⅛ inch thick. Transfer to a 9-inch pie dish, press into bottom and sides, trim overhang to ½ inch, fold under, and crimp edges.
- Blind bake the crust: Preheat oven to 375°F (190°C). Line crust with parchment paper and fill with pie weights or dried beans. Bake for 15 minutes. Remove parchment and weights, prick bottom with a fork, and bake another 10 minutes until lightly golden and dry. Let cool slightly.
- Make the filling: In a large bowl, whisk together pumpkin puree, granulated sugar, and brown sugar until smooth. Add eggs and yolk one at a time, whisking well after each. Whisk in heavy cream and vanilla. In a small bowl, stir together cinnamon, ginger, nutmeg, cloves, and salt, then whisk spice mixture into pumpkin mixture until fully combined.
- Bake the pie: Reduce oven temperature to 350°F (175°C). Pour filling into warm pre-baked crust. Bake for 50 to 60 minutes, until edges are set but center still jiggles slightly when shaken. If crust edges brown too quickly, tent with foil after 30 minutes.
- Cool completely: Place pie on a cooling rack and cool to room temperature, about 2 hours. Then refrigerate for at least 4 hours or overnight before serving.
Notes
Keep everything cold for the flakiest crust. Don’t overmix the filling to avoid cracks. Use the jiggle test instead of a toothpick to check doneness. The pie tastes better the next day. For dairy-free, substitute heavy cream with full-fat coconut cream and use vegan butter. For gluten-free, use a 1:1 gluten-free flour blend with xanthan gum.
Nutrition
- Serving Size: 1 slice
- Calories: 380
- Sugar: 28
- Sodium: 380
- Fat: 22
- Saturated Fat: 13
- Carbohydrates: 44
- Fiber: 3
- Protein: 6
Keywords: pumpkin pie, homemade pumpkin pie, flaky butter crust, Thanksgiving dessert, fall dessert, pumpkin dessert, all-butter crust


