The woman at the next stall watched me poke at a sad-looking butternut squash for a solid minute before she finally spoke. “You’re overthinking it,” she said, not unkindly, and handed me a squash from her own pile. “This one. It’s the one you want.” Her name was Rosa, and she ran the corner produce stand at our local farmers market every Saturday, rain or shine. I’d been trying to figure out how to make a mac and cheese that felt a little more special than the boxed stuff, but also not like a science project. Rosa didn’t give me a recipe that day. She just told me to roast the squash first, to let it get sweet and caramelized, and then to trust my instincts with the cheese.
That conversation stuck with me. I went home, roasted that squash until the kitchen smelled like fall in a jar, and started blending. The first attempt was okay, but the second—the one where I stopped trying so hard and just let the ingredients do their thing—that was the one. This best roasted butternut squash mac and cheese is the result of that moment. It’s creamy without being heavy, sweet from the squash but balanced by sharp cheddar, and it comes together in about 30 minutes once you’ve got your squash roasted. Honestly, it’s the kind of dish that makes you feel like you’ve pulled off something fancy, when really you just let a vegetable do most of the work for you.
Maybe you’ve been there—standing in a grocery aisle, wondering if you can pull off a crowd-pleasing dinner without spending your whole afternoon in the kitchen. I get it. This recipe is my answer to that feeling. It’s the one I bring to potlucks, the one I make when friends come over for game night, the one that disappears fastest from the table. And every time I make it, I think of Rosa and her simple advice: trust the squash, and don’t overthink it. That’s the spirit I want to share with you here.
Why You’ll Love This Recipe
Let me tell you why this isn’t just another mac and cheese recipe. I’ve tested this version more times than I can count—for weeknight dinners, holiday buffets, and even a picky toddler’s birthday party. It passed every test with flying colors. Here’s what makes it stand out:
- Quick & Easy: From start to finish, this comes together in about 30 minutes. The active prep time is even less—maybe 15 minutes of hands-on work. Perfect for those evenings when you need something impressive but don’t have hours to spare.
- Simple Ingredients: No fancy gourmet cheese shops or obscure spices required. You’ll find everything at your regular grocery store, and you probably already have most of it in your pantry.
- Perfect for Hosting: This is my go-to dish for dinner parties and potlucks. It travels well, reheats beautifully, and always gets that “who made this?” reaction. Your guests will think you spent way more time on it than you actually did.
- Crowd-Pleaser: I’ve served this to kids who “don’t like squash” and adults who consider themselves mac and cheese connoisseurs. Both groups went back for seconds. The squash blends in so smoothly that even the skeptics won’t know what hit them.
- Unbelievably Delicious: The texture is where this recipe really shines. The roasted squash creates an ultra-creamy sauce without needing a ton of heavy cream or butter. It’s comfort food that feels a little bit virtuous, but tastes completely indulgent.
What makes this different from every other butternut squash mac and cheese out there? It’s the roasting step. I know it adds a few extra minutes, but trust me on this—roasting the squash first caramelizes its natural sugars and deepens the flavor in a way that boiling or steaming just can’t match. The result is a sauce that’s rich, complex, and perfectly balanced. Plus, I use a blend of sharp cheddar and Gruyère that melts like a dream and gives the dish that classic mac and cheese pull you’re looking for.
This isn’t just good—it’s the kind of recipe that makes you close your eyes after the first bite. It’s comfort food reimagined: healthier, faster, but with the same soul-soothing satisfaction. Perfect for impressing guests without stress, or turning a simple Tuesday night into something memorable.
What Ingredients You Will Need
This recipe uses simple, wholesome ingredients to deliver bold flavor and satisfying texture without the fuss. Most of these are pantry staples or easy to find at any grocery store. Here’s what you’ll need:
For the Roasted Butternut Squash:
- 1 medium butternut squash (about 2 pounds or 900g), peeled, seeded, and cubed into 1-inch pieces
- 2 tablespoons olive oil (I prefer extra virgin for roasting)
- 1/2 teaspoon salt
- 1/4 teaspoon black pepper
- 1/4 teaspoon smoked paprika (optional, but adds a lovely depth)
For the Pasta:
- 1 pound (450g) elbow macaroni or any short pasta (cavatappi, shells, or fusilli work great too)
For the Cheese Sauce:
- 3 tablespoons unsalted butter
- 3 tablespoons all-purpose flour
- 2 cups (480ml) whole milk, warmed (use 2% if that’s what you have)
- 1 cup (240ml) reserved pasta water (this is liquid gold, don’t skip it)
- 2 cups (200g) sharp cheddar cheese, freshly grated (please don’t use pre-shredded—it doesn’t melt as smoothly)
- 1 cup (100g) Gruyère cheese, freshly grated (or substitute with more cheddar or Gouda)
- 1/2 teaspoon garlic powder
- 1/4 teaspoon nutmeg, freshly grated if possible
- Salt and pepper to taste
For the Topping (optional but highly recommended):
- 1/2 cup (50g) panko breadcrumbs
- 2 tablespoons butter, melted
- 1/4 cup (25g) Parmesan cheese, grated
- Fresh parsley or thyme for garnish
A few notes on ingredients: I recommend using a good-quality sharp cheddar—I’ve had great results with Cabot or Tillamook. For the Gruyère, even a small amount adds incredible creaminess, but if you’re on a budget, you can use all cheddar. The roasted squash is the star here, so take the time to get a good one. Look for squash that feels heavy for its size with firm, unblemished skin. If butternut squash isn’t in season, you can substitute with roasted sweet potato or pumpkin—both work beautifully.
For a dairy-free version, use plant-based butter and milk alternatives (unsweetened oat milk works best), and swap the cheeses for your favorite vegan shreds. Just know the texture will be slightly different. For a gluten-free option, use gluten-free pasta and a 1:1 gluten-free flour blend for the roux.
Equipment Needed
You don’t need a professional kitchen to pull this off. Here’s what you’ll need:
- Baking sheet: For roasting the squash. A rimmed baking sheet works best to catch any juices.
- Large pot: For boiling pasta. Go for at least a 5-quart pot so the pasta has room to move.
- Medium saucepan: For making the cheese sauce. A heavy-bottomed pan helps prevent scorching.
- Whisk: Essential for a smooth, lump-free sauce. A silicone whisk is my favorite—it won’t scratch your pans.
- Cheese grater: Please grate your own cheese. Pre-shredded cheese has anti-caking agents that prevent smooth melting. A box grater works perfectly.
- Blender or food processor: For pureeing the roasted squash with the milk. An immersion blender also works in a pinch.
- 9×13 inch baking dish: If you’re baking the mac and cheese (optional, but great for a crispy topping).
- Mixing bowls: For combining ingredients.
If you don’t have a blender, you can mash the roasted squash with a fork until smooth—it’ll just take a bit more elbow grease. And if you’re skipping the baked topping, you can serve this straight from the stovetop. I’ve done it both ways, and honestly, the stovetop version is just as delicious. The baking step is more for presentation and that extra crunch.
Preparation Method
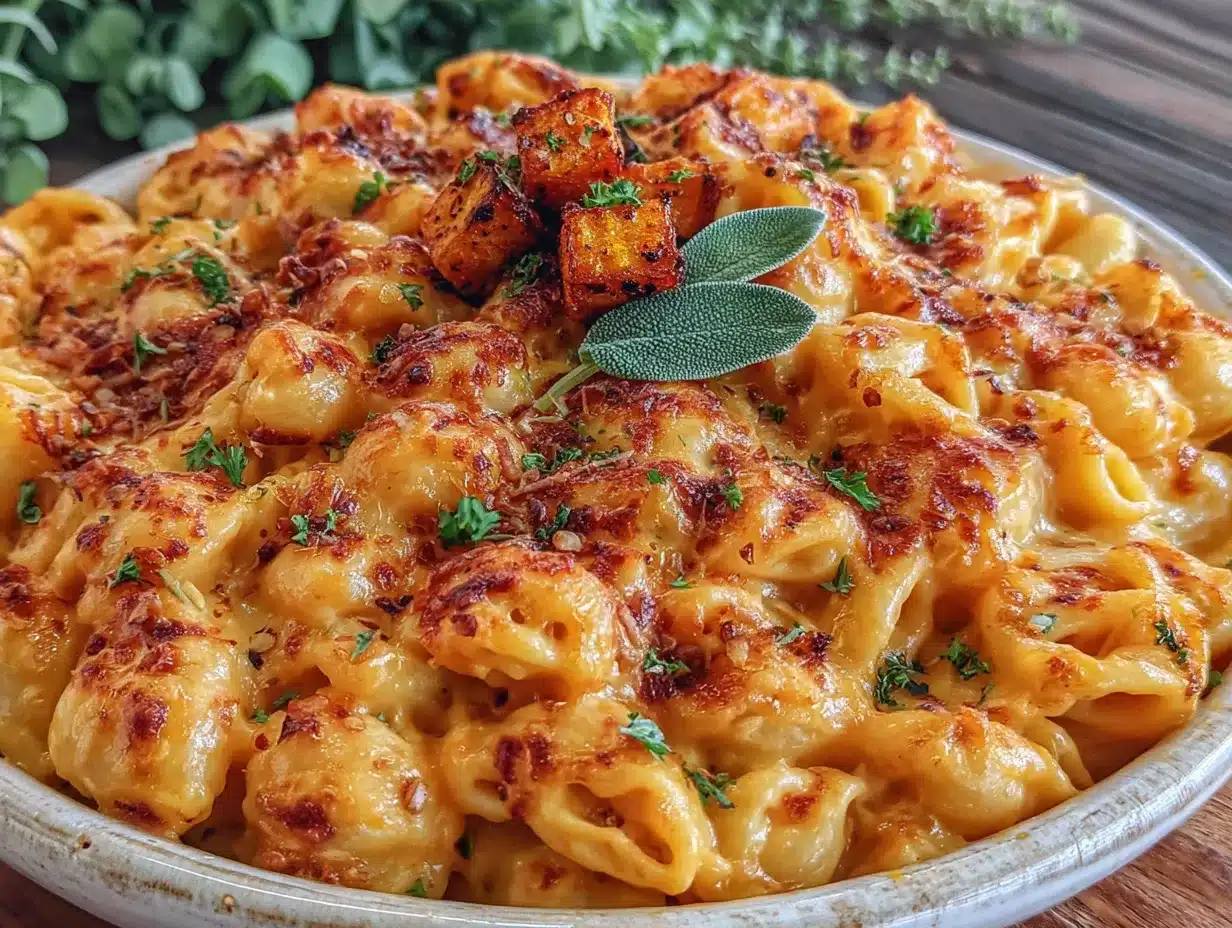
Let’s get cooking. I’ve broken this down into clear steps so you can follow along easily. The total time is about 30 minutes of active work, plus 25 minutes for roasting the squash (which you can do ahead of time).
Step 1: Roast the Butternut Squash
Preheat your oven to 400°F (200°C). While it’s heating, peel your butternut squash using a vegetable peeler or a sharp knife. Cut it in half lengthwise, scoop out the seeds, and then cube it into 1-inch pieces. Toss the cubes with olive oil, salt, pepper, and smoked paprika if using. Spread them in a single layer on your baking sheet—don’t overcrowd, or they’ll steam instead of roast. Roast for 20-25 minutes, flipping halfway through, until the squash is tender and the edges are golden brown. You want it soft enough to easily pierce with a fork. Let it cool slightly.
Step 2: Cook the Pasta
While the squash roasts, bring a large pot of salted water to a boil. Add your pasta and cook according to package directions until al dente (usually 7-9 minutes). Here’s the key: before you drain the pasta, reserve 1 cup of the pasta water. This starchy water is magic for your sauce—it helps everything come together smoothly. Drain the pasta and set it aside. Don’t rinse it; you want that starch on the noodles to help the sauce stick.
Step 3: Make the Squash Puree
Transfer the roasted squash to a blender or food processor. Add 1 cup of the warmed milk and blend until completely smooth. The mixture should be velvety and bright orange. If it’s too thick, add a splash more milk. Set this aside.
Step 4: Build the Cheese Sauce
In your medium saucepan, melt the butter over medium heat. Once it’s bubbly, whisk in the flour and cook for about 1 minute, stirring constantly. This is your roux, and it should smell slightly nutty. Slowly pour in the remaining 1 cup of warmed milk, whisking constantly to prevent lumps. Keep whisking until the mixture thickens, about 2-3 minutes. Now, here’s where the magic happens: add the squash puree to the saucepan and whisk until fully incorporated. The sauce will turn a beautiful golden-orange color.
Step 5: Add the Cheese
Reduce the heat to low. Add your grated cheddar and Gruyère cheese in handfuls, stirring gently until each addition is fully melted before adding the next. This gradual approach prevents the sauce from breaking or becoming grainy. Once all the cheese is incorporated, stir in the garlic powder, nutmeg, and salt and pepper to taste. If the sauce seems too thick, add some of that reserved pasta water, a tablespoon at a time, until it reaches your desired consistency. The sauce should be silky and coat the back of a spoon.
Step 6: Combine and Serve
Add the cooked pasta to the sauce and stir until every piece is coated. If you’re serving immediately, you’re done! Spoon it into bowls, top with fresh herbs, and enjoy. If you want a crispy topping, transfer the mac and cheese to a greased 9×13 baking dish. In a small bowl, mix the panko breadcrumbs with melted butter and Parmesan. Sprinkle this over the top and bake at 375°F (190°C) for 10-15 minutes, until the topping is golden and the sauce is bubbly. Let it rest for 5 minutes before serving—it’ll be piping hot.
Pro tip: Taste the sauce before you add the pasta. The squash adds natural sweetness, so you might need a bit more salt or a pinch of cayenne for heat. Trust your palate here.
Cooking Tips & Techniques
I’ve made this recipe more times than I can count, and I’ve learned a few things the hard way. Let me save you some trouble.
Don’t skip roasting the squash. I know it’s tempting to boil or microwave it to save time, but roasting is non-negotiable here. The caramelization that happens in the oven brings out the squash’s natural sweetness and adds a depth of flavor you just can’t get any other way. I learned this after making a batch with boiled squash that turned out watery and bland. Never again.
Grate your own cheese. I cannot stress this enough. Pre-shredded cheese is coated with cellulose and other anti-caking agents that prevent it from melting smoothly. Your sauce will end up grainy instead of silky. Take the extra three minutes to grate a block of cheese—your taste buds will thank you.
Warm your milk before adding it to the roux. Cold milk will shock the roux and can cause lumps. I just microwave it for 45 seconds before I start. It’s a small step that makes a big difference.
Reserve that pasta water. I forgot to do this once and ended up with a sauce that was too thick and sticky. The starch in the pasta water helps the sauce coat the noodles perfectly and adjusts the consistency without thinning out the flavor.
Multitasking is your friend. While the squash roasts, cook your pasta and grate your cheese. While the pasta boils, make your roux. With a little planning, you can have everything ready at the same time. I usually start the squash first, then put the pasta water on to boil about 10 minutes later. It all comes together seamlessly.
If your sauce breaks or looks grainy, don’t panic. This can happen if the heat was too high or the cheese was added too quickly. Remove the pan from the heat and whisk in a tablespoon of cold milk or a splash of lemon juice. Sometimes that’s enough to bring it back together.
Variations & Adaptations
One of the best things about this recipe is how adaptable it is. Here are some variations I’ve tried and loved:
Add Some Protein: Stir in 2 cups of shredded rotisserie chicken, crispy bacon bits, or cooked Italian sausage before baking. It turns this into a complete meal that’s even more satisfying. I did this for a Super Bowl party, and it was gone in 20 minutes.
Make It Spicy: Add 1/2 teaspoon of cayenne pepper or a diced jalapeño (seeds removed) to the sauce. You can also top it with crushed red pepper flakes before serving. My husband loves this version—he says it wakes up the flavors.
Vegetable Boost: Fold in 2 cups of steamed broccoli, sautéed spinach, or roasted Brussels sprouts along with the pasta. It adds color, texture, and extra nutrients. This is my go-to when I want to feel like I’m eating something healthy but still indulgent.
Dairy-Free Adaptation: Use plant-based butter, unsweetened oat milk, and your favorite vegan cheese shreds. The sauce won’t be as creamy, but it’s still delicious. I’ve made this for friends with dairy allergies, and they’ve asked for the recipe.
Different Cheeses: Try using smoked Gouda, fontina, or Monterey Jack in place of the Gruyère. Each cheese brings its own personality. A mix of cheddar and smoked Gouda is particularly wonderful—it gives the dish a subtle smoky flavor that pairs perfectly with the roasted squash.
Gluten-Free Option: Use gluten-free pasta and a 1:1 gluten-free flour blend for the roux. The texture will be slightly different, but it’s still creamy and satisfying. I recommend brown rice pasta for the best results.
Herb Infusion: Add 2 tablespoons of fresh sage or thyme to the butter before making the roux. The earthy herbs complement the sweetness of the squash beautifully. This is my favorite fall variation.
Serving & Storage Suggestions
This mac and cheese is versatile enough for any occasion. Here’s how to serve and store it like a pro.
Serving Temperature: Serve it hot, straight from the stovetop or oven. If you’ve baked it with the breadcrumb topping, let it rest for 5 minutes so the sauce sets slightly—this makes for cleaner servings. For a dinner party, I like to serve it in a warm, shallow bowl with a sprinkle of fresh parsley on top. The green against the orange sauce is gorgeous.
What to Serve Alongside: This dish pairs beautifully with a simple green salad dressed with lemon vinaigrette—the acidity cuts through the richness. For a heartier meal, serve it alongside roasted chicken, grilled sausages, or a simple green vegetable like roasted asparagus or sautéed green beans. If you’re hosting a potluck, it’s perfect on its own as a main dish or as a side to pulled pork or BBQ brisket.
Storage Instructions: Store leftovers in an airtight container in the refrigerator for up to 5 days. The flavors actually meld and deepen overnight, so it might taste even better the next day. To reheat, add a splash of milk or water to restore creaminess and microwave in 30-second intervals, stirring between each. Or reheat in a covered skillet over medium-low heat, stirring occasionally.
Freezing: This mac and cheese freezes beautifully. Let it cool completely, then transfer to a freezer-safe container. It will keep for up to 3 months. Thaw overnight in the refrigerator, then reheat gently on the stovetop or in the oven. If you’ve added the breadcrumb topping, it’s best to add fresh breadcrumbs after thawing and before reheating for that crispy texture.
Make-Ahead Tip: You can roast the squash up to 3 days in advance and store it in the refrigerator. You can also make the full dish a day ahead, refrigerate it, and then bake it with the topping just before serving. This is my secret weapon for stress-free hosting.
Nutritional Information & Benefits
Let’s talk numbers, but keep it real. This is still mac and cheese—it’s comfort food. But the butternut squash brings some serious nutritional perks to the table.
Per serving (about 1 1/2 cups, based on 8 servings):
- Calories: 480
- Protein: 22g
- Fat: 24g
- Carbohydrates: 48g
- Fiber: 5g
- Sugar: 8g
- Sodium: 620mg
The butternut squash is packed with vitamin A (over 200% of your daily needs per serving), vitamin C, potassium, and fiber. It’s what gives this dish that beautiful color and a boost of nutrients you won’t find in traditional mac and cheese. The cheese provides calcium and protein, while the whole milk adds vitamin D.
This recipe is vegetarian-friendly and can be made gluten-free or dairy-free with the substitutions mentioned above. It contains dairy and gluten in its standard form. For a lower-calorie version, use 2% milk and reduce the cheese by half a cup—it’ll still be creamy thanks to the squash.
I love that this dish lets me enjoy comfort food without the guilt. The squash adds volume and nutrition, so I feel satisfied with a reasonable portion. It’s not health food, but it’s a smarter indulgence.
Conclusion
This best roasted butternut squash mac and cheese is more than just a recipe—it’s the dish I turn to when I want to feel like I’ve got it all together. It’s the one that makes me look like I spent hours in the kitchen when I really just let a vegetable and some good cheese do the heavy lifting. It’s the dish that brings people together, that sparks conversations, that gets eaten down to the last scraped-clean spoonful.
I hope you’ll make it your own. Add extra spice if you like heat. Throw in some bacon if you’re feeling indulgent. Use whatever cheese you have on hand. The beauty of this recipe is that it’s forgiving and adaptable. It wants you to succeed.
When you make it—and I really hope you do—come back and let me know how it turned out. Did you add something unexpected? Did your picky eater go back for seconds? Did you bring it to a party and watch it disappear? I want to hear about it. Leave a comment below, share your photos, and tag me on social media. There’s nothing I love more than seeing this recipe come to life in your kitchens.
Here’s to good food, good company, and not overthinking it. Happy cooking, friends!
Frequently Asked Questions
Can I use frozen butternut squash instead of fresh?
Yes, you can use frozen butternut squash to save time. Just thaw it first, pat it dry to remove excess moisture, and roast it as directed. The texture might be slightly softer, and it won’t caramelize as deeply, but it will still work well in this recipe. If you’re in a real hurry, you can even steam the frozen squash and mash it directly into the sauce—just know you’ll lose some of that roasted flavor.
Why did my cheese sauce turn out grainy?
Grainy sauce usually happens for one of three reasons: the heat was too high when you added the cheese, you added the cheese too quickly, or you used pre-shredded cheese. Keep the heat on low, add the cheese in small handfuls, and always grate your own from a block. If your sauce does turn grainy, try whisking in a tablespoon of cold milk or a squeeze of lemon juice—sometimes that helps smooth it out.
Can I make this recipe ahead of time for a party?
Absolutely. You can make the entire dish up to 2 days in advance. Just prepare it without the breadcrumb topping, let it cool, cover it, and refrigerate. When you’re ready to serve, add the breadcrumb topping and bake at 375°F for 20-25 minutes, until hot and bubbly. This is actually my preferred method for hosting—it takes the stress out of last-minute cooking.
How can I make this recipe vegan?
To make this vegan, use plant-based butter and unsweetened oat milk for the sauce. Replace the cheddar and Gruyère with your favorite vegan cheese shreds that melt well (I’ve had good luck with brands like Violife or Miyoko’s). For the topping, use vegan butter and a vegan Parmesan alternative. The sauce won’t be as creamy, but it’s still delicious. You can also add a tablespoon of nutritional yeast for extra cheesy flavor.
What’s the best pasta shape for this recipe?
Elbow macaroni is the classic choice, but any short pasta works beautifully. I love using cavatappi or fusilli because their ridges catch the sauce perfectly. Shells are also great—they hold little pockets of cheesy goodness. Avoid long pasta like spaghetti or fettuccine; the sauce doesn’t cling to it as well. Whatever shape you choose, cook it al dente so it holds up to the sauce without getting mushy.
Pin This Recipe!
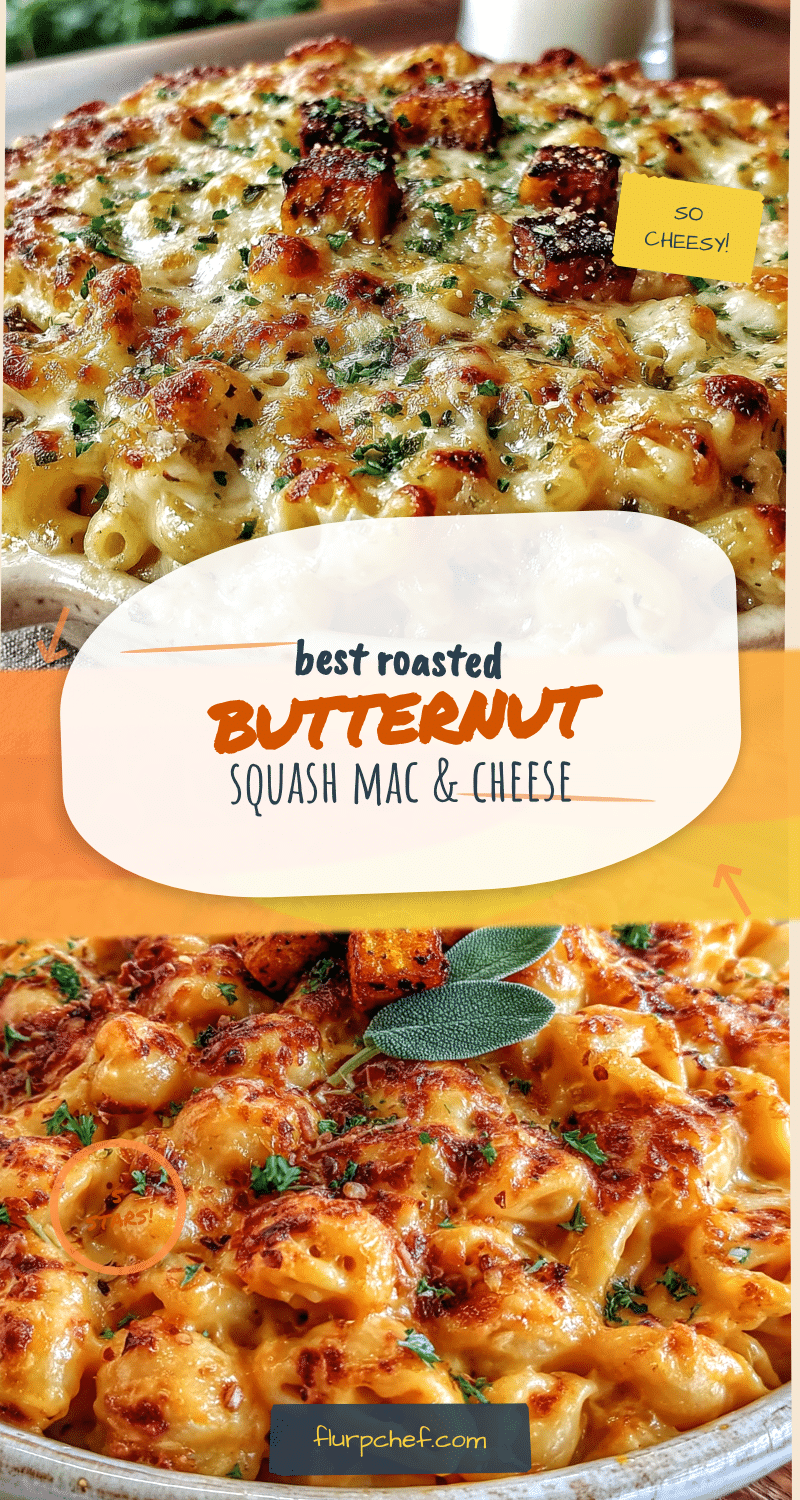
Best Roasted Butternut Squash Mac and Cheese (Easy, 30-Minute Recipe)

This creamy, sweet, and savory mac and cheese features roasted butternut squash blended into a velvety cheese sauce with sharp cheddar and Gruyère. It comes together in about 30 minutes and is perfect for weeknight dinners, potlucks, or holiday gatherings.
- Prep Time: 15 minutes
- Cook Time: 30 minutes
- Total Time: 45 minutes
- Yield: 8 servings 1x
- Category: Main Course
- Cuisine: American
Ingredients
- 1 medium butternut squash (about 2 pounds or 900g), peeled, seeded, and cubed into 1-inch pieces
- 2 tablespoons olive oil
- 1/2 teaspoon salt
- 1/4 teaspoon black pepper
- 1/4 teaspoon smoked paprika (optional)
- 1 pound (450g) elbow macaroni or any short pasta
- 3 tablespoons unsalted butter
- 3 tablespoons all-purpose flour
- 2 cups (480ml) whole milk, warmed
- 1 cup (240ml) reserved pasta water
- 2 cups (200g) sharp cheddar cheese, freshly grated
- 1 cup (100g) Gruyère cheese, freshly grated
- 1/2 teaspoon garlic powder
- 1/4 teaspoon nutmeg, freshly grated if possible
- Salt and pepper to taste
- 1/2 cup (50g) panko breadcrumbs (optional topping)
- 2 tablespoons butter, melted (optional topping)
- 1/4 cup (25g) Parmesan cheese, grated (optional topping)
- Fresh parsley or thyme for garnish
Instructions
- Preheat oven to 400°F (200°C). Peel, seed, and cube butternut squash into 1-inch pieces. Toss with olive oil, salt, pepper, and smoked paprika. Spread in a single layer on a baking sheet and roast for 20-25 minutes, flipping halfway, until tender and golden brown. Let cool slightly.
- While squash roasts, bring a large pot of salted water to a boil. Cook pasta according to package directions until al dente. Reserve 1 cup of pasta water before draining. Drain pasta and set aside (do not rinse).
- Transfer roasted squash to a blender or food processor. Add 1 cup of warmed milk and blend until completely smooth. Set aside.
- In a medium saucepan, melt butter over medium heat. Whisk in flour and cook for 1 minute, stirring constantly. Slowly pour in remaining 1 cup of warmed milk, whisking constantly, until mixture thickens (2-3 minutes). Add squash puree and whisk until fully incorporated.
- Reduce heat to low. Add grated cheddar and Gruyère cheese in handfuls, stirring until each addition is fully melted. Stir in garlic powder, nutmeg, and salt and pepper to taste. If sauce is too thick, add reserved pasta water a tablespoon at a time until desired consistency.
- Add cooked pasta to sauce and stir until coated. Serve immediately, or transfer to a greased 9×13 baking dish. For topping, mix panko breadcrumbs with melted butter and Parmesan. Sprinkle over mac and cheese and bake at 375°F (190°C) for 10-15 minutes until golden and bubbly. Let rest 5 minutes before serving. Garnish with fresh herbs.
Notes
Roasting the squash is key for caramelized flavor. Always grate your own cheese for smooth melting. Warm the milk before adding to the roux to prevent lumps. Reserve pasta water to adjust sauce consistency. For a dairy-free version, use plant-based butter, unsweetened oat milk, and vegan cheese. For gluten-free, use gluten-free pasta and a 1:1 gluten-free flour blend.
Nutrition
- Serving Size: 1 1/2 cups
- Calories: 480
- Sugar: 8
- Sodium: 620
- Fat: 24
- Saturated Fat: 12
- Carbohydrates: 48
- Fiber: 5
- Protein: 22
Keywords: butternut squash mac and cheese, roasted squash mac and cheese, easy mac and cheese, 30-minute mac and cheese, creamy mac and cheese, fall comfort food, vegetarian mac and cheese


