I was elbow-deep in turkey drippings at a church potluck, trying to salvage a gravy that looked more like brown dishwater, when the plumber leaned over and started talking. Not about pipes. Not about the leaky sink in the fellowship hall. About gravy. “You’re overthinking it,” he said, wiping his hands on a rag. “My grandmother fed twelve kids every Sunday with nothing but the pan drippings, a good roux, and patience. No fancy stock. No wine. Just technique.” I laughed—honestly, I thought he was joking. But he scribbled his grandmother’s method on a napkin stained with coffee, and I stuffed it in my pocket, not expecting much.
That napkin sat crumpled in my recipe box for months. Every time I pulled it out, I’d read her note: “Let the flour get tan, not brown.” It sounded too simple. But last Thanksgiving, with a 22-pound bird in the oven and thirteen guests arriving, I gave it a shot. I mean, what did I have to lose? The first batch was a little lumpy—I forgot to whisk constantly while pouring in the stock—but the flavor? Let me tell you, it was like everything good about Thanksgiving condensed into one silky, savory sauce. My brother-in-law, who usually skips gravy, asked for seconds. That’s when I knew this was the one.
Maybe you’ve been there—standing over a hot stove, stirring a gravy that refuses to thicken, or worse, one that tastes like flour paste. It’s a Thanksgiving nightmare. But after years of tweaking that plumber’s grandmother’s recipe, I’ve landed on a version that feeds a crowd without the stress. It’s rich, velvety, and packed with that deep turkey flavor you crave. The best part? It comes together in under 20 minutes once the turkey is out of the oven. Honestly, this gravy has saved more than one holiday dinner at my house, and I’m pretty sure it’ll become your go-to too.
Why You’ll Love This Recipe
This isn’t just any gravy—it’s the kind that makes people close their eyes after the first bite. I’ve tested it on picky kids, in-laws, and even a neighbor who swore she hated gravy. She asked for the recipe. Here’s why it works so well for feeding a crowd on a budget.
- Feeds a Crowd Without the Cost: This recipe scales beautifully. I’ve made it for 8 people and for 25, and it never disappoints. You use the turkey drippings you already have, plus a few pantry staples. No expensive stock or fancy ingredients required.
- Simple, Everyday Ingredients: Butter, flour, turkey drippings, and broth. That’s it. You probably have everything in your kitchen right now, which is a lifesaver when the stores are closed on Thanksgiving morning.
- Ready in Under 20 Minutes: Once the turkey is resting, this gravy comes together fast. No simmering for hours, no complicated steps. Just a quick roux and a steady pour.
- Picky Eater Approved: My kids used to push gravy around their plates. This version is so smooth and flavorful, they actually ask for it now. The secret is letting the flour cook just long enough to lose that raw taste.
- Reheats Like a Dream: Leftovers? This gravy thickens up in the fridge, but a splash of broth or water brings it right back. It tastes even better the next day, if you can believe it.
What makes this recipe different from every other gravy out there? It’s the technique. That plumber’s grandmother knew that a slow, patient roux—cooked until it’s the color of peanut butter—creates a gravy that’s silky, not gluey. I’ve tried shortcuts, and they never work. Trust the process, and you’ll get a gravy that’s smooth, rich, and perfectly seasoned every single time.
What Ingredients You Will Need
This recipe uses simple, wholesome ingredients to deliver bold flavor and satisfying texture without the fuss. Most of these are pantry staples, so you won’t need a special trip to the store.
- Turkey Drippings (about 1 cup): This is the liquid and fat left in the roasting pan after cooking your turkey. Skim off the excess fat, but leave the browned bits—they’re packed with flavor. If you’re short on drippings, supplement with unsalted butter and chicken broth.
- Unsalted Butter (1/4 cup, 4 tablespoons): I use unsalted so I can control the salt level. If you only have salted butter, reduce the added salt later. I prefer Kerrygold for its rich flavor, but any brand works.
- All-Purpose Flour (1/4 cup): This thickens the gravy. For a gluten-free option, use a 1:1 gluten-free flour blend. I’ve tried it, and it works—just whisk a little longer to avoid lumps.
- Low-Sodium Chicken or Turkey Broth (4 cups): Use a good-quality broth. I recommend Swanson or Kitchen Basics for consistent flavor. If you have homemade turkey stock, even better. Low-sodium is key because the drippings add salt too.
- Salt and Black Pepper (to taste): Start with 1/2 teaspoon of salt and 1/4 teaspoon of pepper, then adjust. The drippings are already salty, so taste before adding more.
- Fresh or Dried Thyme (1 teaspoon, optional): This adds a subtle herbal note that pairs beautifully with turkey. I prefer fresh thyme, but dried works too. If using dried, crush it between your fingers to release the oils.
- Optional: Splash of White Wine or Sherry (2 tablespoons): This brightens the gravy and cuts through the richness. I add it when I have an open bottle, but it’s not necessary. Skip it if you’re serving kids or prefer a milder flavor.
Ingredient selection tip: Look for turkey drippings that are golden brown, not burnt. If your pan has blackened bits, strain the drippings through a fine-mesh sieve to avoid a bitter taste. For the broth, I’ve found that boxed broth works just as well as canned—just shake it well before measuring.
Equipment Needed
You don’t need fancy tools for this gravy. I’ve made it in a cheap pan and a high-end saucepan, and it works the same. Here’s what you’ll need:
- Large Roasting Pan: The one you cooked your turkey in. The browned bits stuck to the bottom are gold—don’t wash them off yet.
- Fine-Mesh Strainer or Sieve: For straining the drippings to remove any burnt bits or turkey giblets. A mesh strainer works best; a colander will let too much through.
- Medium Saucepan or Skillet: For making the roux. A heavy-bottomed pan prevents the flour from burning. I use a 3-quart saucepan.
- Whisk: A flat-bottomed whisk is ideal for reaching the corners of the pan. A regular whisk works too, but you’ll need to be thorough.
- Measuring Cups and Spoons: For accurate measurements. Eyeballing works when you’re experienced, but for a crowd, precision matters.
- Liquid Measuring Cup (4-cup size): For combining the drippings and broth. A spouted cup makes pouring easier.
- Wooden Spoon or Silicone Spatula: For scraping up the browned bits from the roasting pan. A metal spoon can scratch non-stick pans.
Budget-friendly tip: If you don’t have a fine-mesh strainer, use a clean kitchen towel or cheesecloth. Just be careful—hot liquid can burn through thin fabric. I learned that the hard way.
Preparation Method
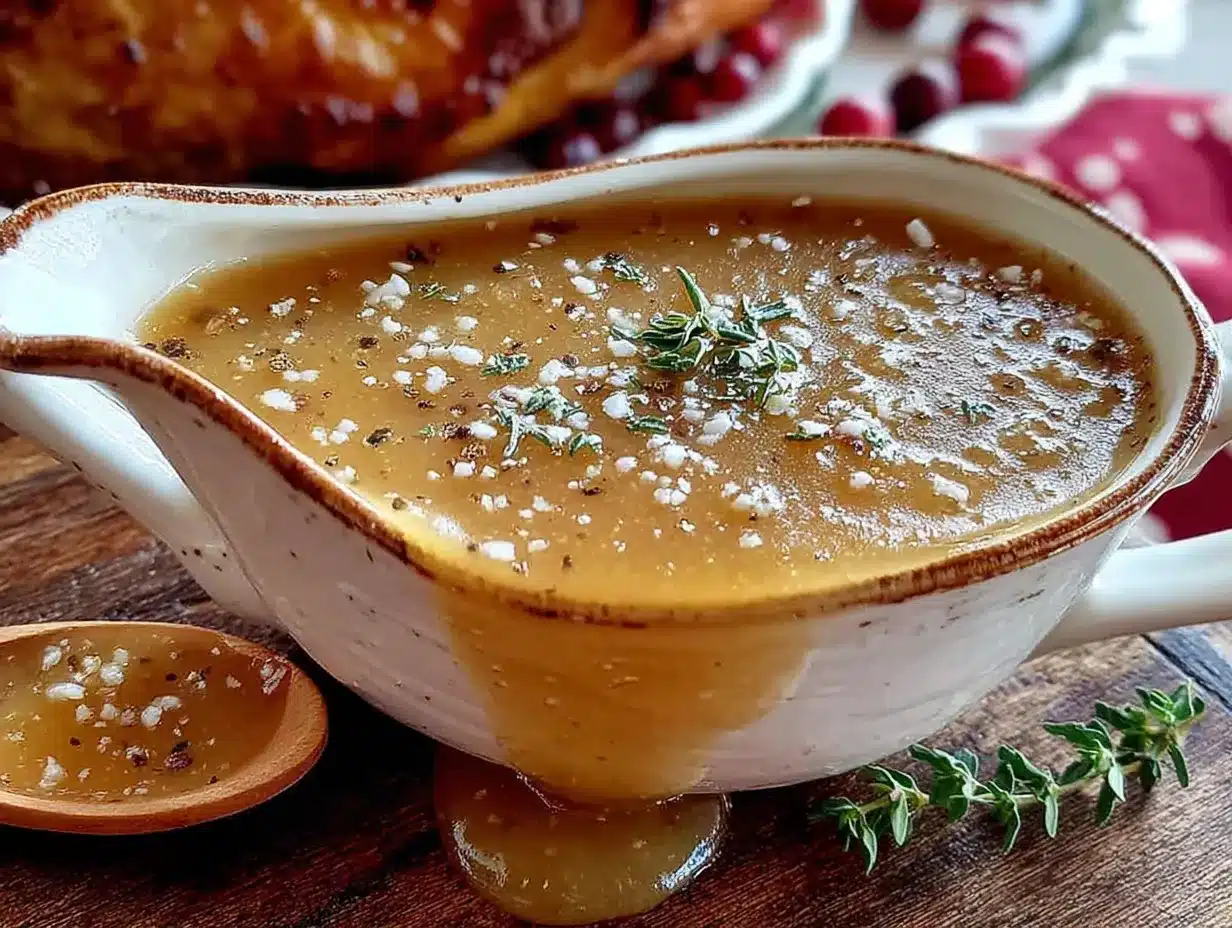
Follow these steps carefully, and you’ll have a gravy that’s smooth, rich, and ready for a crowd. Take your time with the roux—it’s the heart of the recipe.
- Prepare the Drippings (5 minutes): Once your turkey is out of the oven and resting, carefully pour the pan drippings through a fine-mesh strainer into a liquid measuring cup. Let it sit for 2-3 minutes so the fat rises to the top. Skim off about 1/4 cup of the fat and set it aside. You should have about 1 cup of strained drippings. If you have less, supplement with broth. If you have more, save the extra for another use.
- Deglaze the Roasting Pan (2 minutes): Set the roasting pan on the stovetop over medium heat. Add 1 cup of the broth and use a wooden spoon to scrape up all the browned bits from the bottom. This is called deglazing, and it adds incredible flavor. Pour this liquid into the measuring cup with the drippings. Set aside.
- Make the Roux (5-7 minutes): In a medium saucepan, melt the butter over medium heat. Once it’s foamy, add the flour. Whisk constantly until the mixture turns a light tan color—like peanut butter. This should take about 3-4 minutes. Don’t walk away! Burnt flour ruins the gravy. The smell should be nutty, not scorched.
- Add the Liquid Slowly (5 minutes): With the roux still over medium heat, slowly pour in the drippings and broth mixture, whisking constantly. Start with a thin stream, then increase once the mixture thickens. Keep whisking until the gravy is smooth and starts to bubble. This takes about 2-3 minutes. If you stop whisking, lumps will form.
- Season and Simmer (5 minutes): Reduce the heat to low. Add the thyme, salt, and pepper. Stir in the optional wine or sherry if using. Let the gravy simmer gently for 3-4 minutes, stirring occasionally, until it reaches your desired thickness. It should coat the back of a spoon. Taste and adjust seasoning.
- Strain and Serve (2 minutes): For the silkiest gravy, pour it through a fine-mesh strainer into a serving boat or bowl. This catches any tiny lumps or thyme stems. Serve immediately while hot. If the gravy gets too thick while sitting, whisk in a splash of warm broth or water.
Troubleshooting tip: If your gravy is lumpy, don’t panic. Pour it through a strainer, then whisk vigorously. If it’s too thin, mix 1 tablespoon of cornstarch with 2 tablespoons of cold water, then whisk it into the simmering gravy. If it’s too thick, add broth a tablespoon at a time until it loosens up.
Cooking Tips & Techniques
I’ve made this gravy more times than I can count, and I’ve messed it up plenty. Here are the lessons I’ve learned so you don’t have to repeat my mistakes.
- Don’t Rush the Roux: I once tried to speed things up by cranking the heat. The flour burned in under a minute, and the gravy tasted bitter. Keep the heat at medium and whisk constantly. The color should change slowly—like watching paint dry, but tastier.
- Whisk Like You Mean It: When you add the liquid, pour it slowly while whisking fast. If you dump it all at once, you’ll get lumps that are nearly impossible to smooth out. Think of it like making a smoothie—steady stream, constant motion.
- Taste Before You Season: Turkey drippings can be very salty, especially if you brined the bird. I always taste the gravy before adding salt. More often than not, I only need a pinch of pepper. A friend of mine ruined her gravy by salting first—it was like drinking seawater.
- Keep It Warm: Gravy cools fast, especially when serving a crowd. I pour it into a preheated gravy boat or keep it in a small slow cooker on the “warm” setting. Stir it every 15 minutes to prevent a skin from forming. If a skin does form, just whisk it back in.
- Double the Batch Without Fear: This recipe doubles easily. Just use a larger pan and give yourself an extra minute or two for the roux to cook. The proportions stay the same: equal parts butter and flour by volume, then 4 cups of liquid per 1/4 cup of each.
Variations & Adaptations
This gravy is a great base, but sometimes you want to mix it up. Here are a few ways I’ve adapted it for different crowds and dietary needs.
- Make It Gluten-Free: Swap the all-purpose flour with a 1:1 gluten-free flour blend or cornstarch. If using cornstarch, mix 3 tablespoons with 1/4 cup cold water, then whisk it into the simmering gravy. Cook for 2 minutes until thickened. I’ve done this for a friend with celiac disease, and nobody noticed the difference.
- Add Mushroom Flavor: Sauté 1 cup of finely chopped mushrooms in the butter before adding the flour. This adds an earthy, umami depth that’s amazing with turkey. I tried this after a mushroom-heavy Thanksgiving one year, and it was a hit.
- Make It Dairy-Free: Use olive oil or turkey fat (from the drippings) instead of butter. The flavor changes slightly—it’s a bit fruitier—but the texture stays silky. I’ve used this version for my lactose-intolerant sister-in-law, and she said it was the best gravy she’d ever had.
- Herb-Infused Version: Add a sprig of fresh rosemary or sage to the roux while it cooks, then remove it before serving. The herbs infuse the fat and create a fragrant gravy. I do this when I’m feeling fancy, like for Christmas dinner.
- Spicy Kick: Stir in 1/4 teaspoon of cayenne pepper or a dash of hot sauce at the end. This cuts through the richness and adds a subtle warmth. My brother loves this version—he says it wakes up the gravy.
Serving & Storage Suggestions
Gravy is the glue that holds Thanksgiving together, but it’s also surprisingly versatile. Here’s how to serve and store it like a pro.
- Serving Temperature: Serve gravy hot, straight from the stove. If it cools down, reheat it gently over low heat, whisking occasionally. Avoid boiling it—it can break and become greasy.
- Presentation: Pour the gravy into a warmed gravy boat or a small pitcher. I like to garnish with a fresh thyme sprig for a pop of color. If you’re serving buffet-style, keep the gravy in a small slow cooker on warm.
- What to Serve with It: This gravy is perfect over turkey, mashed potatoes, stuffing, and even biscuits. I’ve also used it to moisten leftover turkey sandwiches the next day. It’s amazing on roasted vegetables too—try it on carrots or green beans.
- Storage: Let the gravy cool completely, then transfer it to an airtight container. Store in the refrigerator for up to 4 days. The gravy will thicken as it chills—don’t worry, that’s normal.
- Reheating: To reheat, warm the gravy in a saucepan over low heat, whisking in a tablespoon of broth or water at a time until it reaches the right consistency. You can also microwave it in 30-second bursts, stirring between each. Avoid high heat, which can cause separation.
- Freezing: This gravy freezes beautifully for up to 3 months. Pour it into a freezer-safe bag or container, leaving an inch of headspace. Thaw overnight in the fridge, then reheat as directed. The flavor stays rich and fresh.
Nutritional Information & Benefits
Let’s be honest—gravy isn’t health food, but it adds so much joy to a meal. Here’s a rough breakdown per 1/4 cup serving, based on the recipe as written.
- Estimated Nutrition (per 1/4 cup): Calories: 80, Fat: 6g, Saturated Fat: 3g, Cholesterol: 15mg, Sodium: 250mg, Carbohydrates: 5g, Fiber: 0g, Sugar: 0g, Protein: 2g. These values vary based on your turkey drippings and broth.
- Health Benefits: Turkey drippings contain some protein and minerals like zinc and selenium from the bird. The broth adds collagen and amino acids, which are good for joint health. Butter provides vitamin A, though it’s high in saturated fat.
- Dietary Considerations: This recipe is nut-free and egg-free. For a gluten-free version, use cornstarch or gluten-free flour. For a dairy-free version, swap butter with olive oil or turkey fat. It’s not suitable for vegans, but you could try a vegetable broth base.
- Potential Allergens: Contains dairy (butter) and gluten (flour) in the standard version. Check your broth for hidden allergens—some brands add soy or yeast extract.
My personal take? Gravy is a once-a-year treat for most of us, so I don’t stress about the numbers. I focus on making it delicious and using quality ingredients. A little butter and flour never hurt anyone, especially when it brings the family together.
Conclusion
This gravy has become my non-negotiable Thanksgiving staple. It’s the recipe I turn to when I need something reliable, delicious, and crowd-pleasing. That plumber at the potluck had no idea he was handing me a family tradition on a coffee-stained napkin. Every time I make it, I think of his grandmother, stirring her roux in a tiny kitchen, feeding a house full of hungry kids. It’s humble, honest food, and it works.
I hope you give this gravy a try—not just because it’s easy, but because it’s the kind of recipe that makes the holiday feel complete. Customize it with your favorite herbs, adjust the salt to your taste, and don’t be afraid to double the batch. Trust me, you’ll want leftovers. When you make it, come back and let me know how it turned out. Did your family love it? Did you add a twist? I’d love to hear your story in the comments. Until then, happy cooking, and may your gravy always be smooth.
Frequently Asked Questions
Can I make this gravy ahead of time?
Yes, absolutely. You can make it up to 2 days in advance. Let it cool, store it in the fridge, and reheat gently on the stove with a splash of broth to loosen it up. The flavor actually deepens overnight.
What if I don’t have turkey drippings?
No problem. Use chicken or turkey broth instead, and add 2-3 tablespoons of butter to replace the fat. You’ll lose some of the roasted turkey flavor, but it’ll still be tasty. Some people add a teaspoon of poultry seasoning to compensate.
How do I fix lumpy gravy?
Don’t panic. Pour the gravy through a fine-mesh strainer to catch the lumps, then whisk vigorously. If it’s still lumpy, use an immersion blender for a few seconds. Next time, whisk the liquid in more slowly.
Can I use cornstarch instead of flour?
Yes. Mix 3 tablespoons of cornstarch with 1/4 cup cold water to make a slurry. Whisk it into the simmering gravy and cook for 2 minutes until thickened. Cornstarch gives a glossier finish, but it doesn’t hold up as well to reheating.
How do I make the gravy less salty?
If your gravy is too salty, add a splash of unsalted broth or water to dilute it. You can also add a peeled raw potato to the simmering gravy for 10 minutes—it absorbs some of the salt. Remove the potato before serving.
Pin This Recipe!

Best Homemade Thanksgiving Turkey Gravy for a Crowd

This rich, velvety turkey gravy comes together in under 20 minutes using simple ingredients and a patient roux technique. Perfect for feeding a crowd, it’s smooth, flavorful, and reheats beautifully.
- Prep Time: 5 minutes
- Cook Time: 15 minutes
- Total Time: 20 minutes
- Yield: 4 cups (about 16 servings of 1/4 cup each)
- Category: Sauce
- Cuisine: American
Ingredients
- Turkey drippings (about 1 cup)
- Unsalted butter (1/4 cup, 4 tablespoons)
- All-purpose flour (1/4 cup)
- Low-sodium chicken or turkey broth (4 cups)
- Salt and black pepper (to taste)
- Fresh or dried thyme (1 teaspoon, optional)
- Optional: Splash of white wine or sherry (2 tablespoons)
Instructions
- Prepare the Drippings (5 minutes): Once your turkey is out of the oven and resting, carefully pour the pan drippings through a fine-mesh strainer into a liquid measuring cup. Let it sit for 2-3 minutes so the fat rises to the top. Skim off about 1/4 cup of the fat and set it aside. You should have about 1 cup of strained drippings. If you have less, supplement with broth. If you have more, save the extra for another use.
- Deglaze the Roasting Pan (2 minutes): Set the roasting pan on the stovetop over medium heat. Add 1 cup of the broth and use a wooden spoon to scrape up all the browned bits from the bottom. This is called deglazing, and it adds incredible flavor. Pour this liquid into the measuring cup with the drippings. Set aside.
- Make the Roux (5-7 minutes): In a medium saucepan, melt the butter over medium heat. Once it’s foamy, add the flour. Whisk constantly until the mixture turns a light tan color—like peanut butter. This should take about 3-4 minutes. Don’t walk away! Burnt flour ruins the gravy. The smell should be nutty, not scorched.
- Add the Liquid Slowly (5 minutes): With the roux still over medium heat, slowly pour in the drippings and broth mixture, whisking constantly. Start with a thin stream, then increase once the mixture thickens. Keep whisking until the gravy is smooth and starts to bubble. This takes about 2-3 minutes. If you stop whisking, lumps will form.
- Season and Simmer (5 minutes): Reduce the heat to low. Add the thyme, salt, and pepper. Stir in the optional wine or sherry if using. Let the gravy simmer gently for 3-4 minutes, stirring occasionally, until it reaches your desired thickness. It should coat the back of a spoon. Taste and adjust seasoning.
- Strain and Serve (2 minutes): For the silkiest gravy, pour it through a fine-mesh strainer into a serving boat or bowl. This catches any tiny lumps or thyme stems. Serve immediately while hot. If the gravy gets too thick while sitting, whisk in a splash of warm broth or water.
Notes
Don’t rush the roux; cook it until it’s the color of peanut butter. Whisk constantly when adding liquid to avoid lumps. Taste before adding salt as drippings can be salty. For a gluten-free version, use cornstarch or a 1:1 gluten-free flour blend. For dairy-free, use olive oil or turkey fat instead of butter. Gravy can be made up to 2 days ahead and reheats well.
Nutrition
- Serving Size: 1/4 cup
- Calories: 80
- Sodium: 250
- Fat: 6
- Saturated Fat: 3
- Carbohydrates: 5
- Protein: 2
Keywords: turkey gravy, Thanksgiving gravy, homemade gravy, gravy for a crowd, easy gravy, roux gravy


