My kid claimed to hate pumpkin pie for six years. Six years of Thanksgiving dinners where he’d eye the pie plate like it might bite him, push the orange slice around his plate, and declare it “too mushy.” I stopped offering. I stopped caring. Then last November, his school announced a Friendsgiving celebration, and every kid was supposed to bring a dessert to share. He came home with the permission slip, looked me dead in the eye, and said, “I want to bring pumpkin pie. But little ones. For my friends.” I blinked. I waited for the punchline. There wasn’t one.
So I made these mini pumpkin pies, mostly because I didn’t want him to show up empty-handed. I used a buttery pre-made crust, my standard pumpkin filling, and a batch of tiny tart pans I’d forgotten I owned. The whole thing took maybe forty minutes of actual work. I handed him the tray of twelve little pies, each one barely bigger than his palm, and braced myself for him to change his mind. He didn’t. He carried them to school like they were made of gold.
Here’s where it gets interesting. That night, he asked if we had any left. We didn’t. I made another batch the next weekend, and another the weekend after that. Somewhere between the second and third batch, I caught him eating one cold from the fridge at 9 PM, standing in the dark in his pajamas. “These are actually good,” he said, mouth full. I didn’t say I told you so. I just handed him a napkin. Honestly, that quiet moment of being proven right without saying a word? That’s the whole reason I keep making these. Maybe you’ve been there — the one who just waits, makes the thing, and lets the recipe do the convincing for you.
Why You’ll Love This Recipe
These mini pumpkin pies aren’t just cute — though they are adorable, let’s be honest. They solve the real problem of feeding a crowd where opinions on dessert vary wildly. A full pie commits you to one flavor, one texture, one portion size. A tray of minis lets everyone grab what they want, and nobody has to fight over the corner piece.
- Quick & Easy: From start to table in under an hour, with only 15 minutes of active prep. The oven does the heavy lifting.
- Simple Ingredients: You probably have everything in your pantry right now. Canned pumpkin, evaporated milk, eggs, sugar, and a pre-made crust. No specialty store trips required.
- Perfect for Friendsgiving: Whether it’s a classroom party, a potluck, or just a Tuesday night that needs a little extra warmth, these fit the bill. Kids can even help assemble them.
- Crowd-Pleaser: My kid went from pumpkin pie hater to fridge-raiding fanatic. If that’s not a testimonial, I don’t know what is.
- Unbelievably Delicious: The filling is silky and spiced just right, and the crust-to-filling ratio is perfect. No soggy bottoms, no bland bites.
What makes these different from every other mini pumpkin pie recipe? It’s the technique. I blind-bake the crusts just long enough to set them, then pour in the filling and bake low and slow. That extra step means the crust stays flaky and the filling stays creamy — no mush, no sogginess. It’s a small thing that makes a huge difference. And honestly, it’s the kind of recipe that makes you close your eyes after the first bite. It’s comfort food reimagined — faster, easier, but with the same soul-soothing satisfaction.
What Ingredients You Will Need
This recipe keeps things simple. You don’t need a dozen exotic spices or hard-to-find pantry items. Just good, honest ingredients that work together to create something special. Most of these are probably in your kitchen right now.
For the Crust
- 1 box (14.1 ounces) refrigerated pie crusts (I prefer Pillsbury for consistency, but any brand works — or make your own if you’re feeling ambitious)
- All-purpose flour, for dusting (a light sprinkle keeps the dough from sticking)
For the Filling
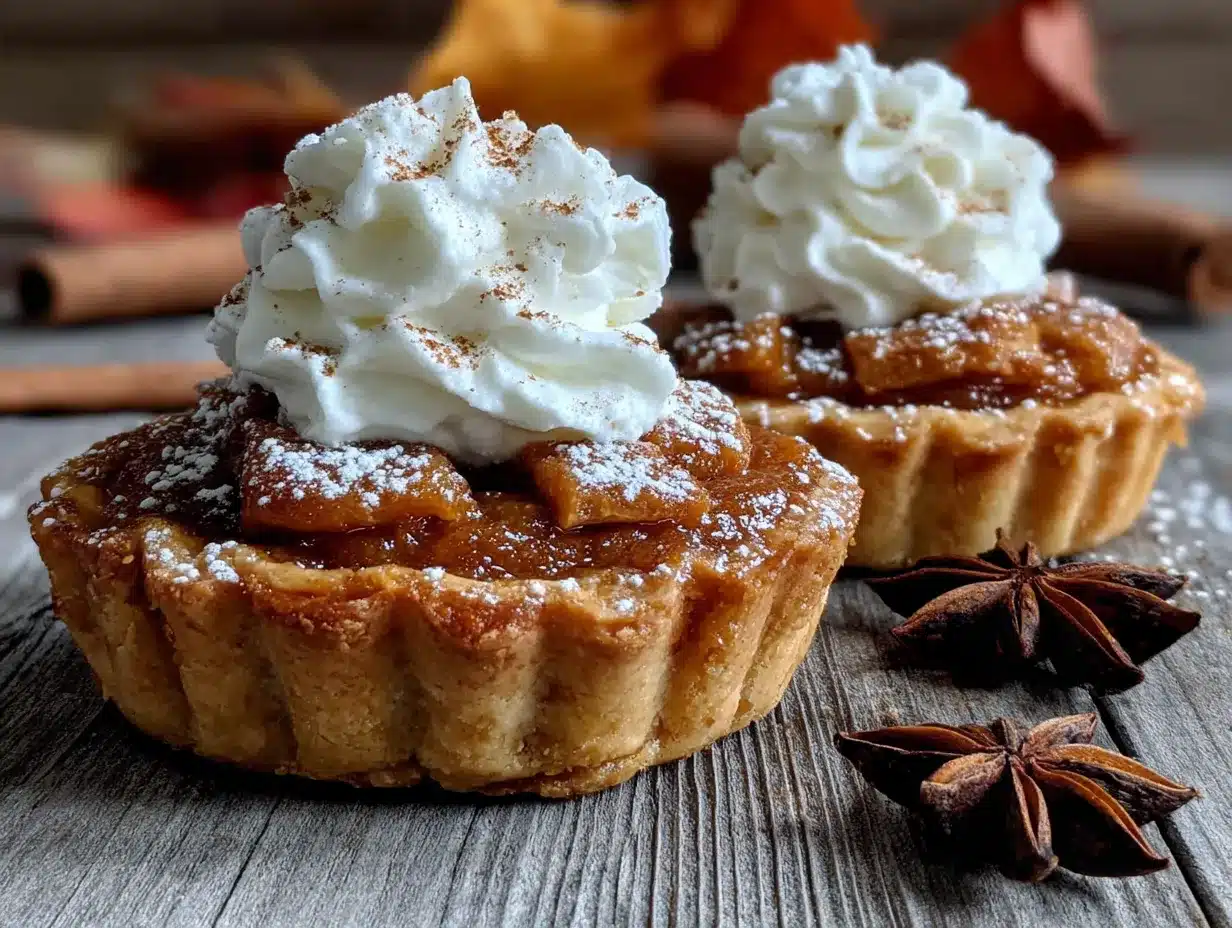
- 1 can (15 ounces) pumpkin puree (not pumpkin pie filling — look for 100% pure pumpkin, like Libby’s)
- 3/4 cup granulated sugar
- 1 teaspoon ground cinnamon
- 1/2 teaspoon ground ginger
- 1/4 teaspoon ground cloves
- 1/2 teaspoon salt
- 2 large eggs, room temperature
- 1 can (12 ounces) evaporated milk (adds richness without the heaviness of cream)
- 1 teaspoon vanilla extract (optional, but I think it rounds out the spices beautifully)
For the Topping (Optional but Recommended)
- Whipped cream, for serving (homemade or store-bought — no judgment here)
- Ground cinnamon or nutmeg, for dusting (a little sprinkle makes them look fancy)
If you’re feeding a crowd with dietary restrictions, here are some swaps that work well. For a dairy-free version, substitute the evaporated milk with full-fat coconut milk (the canned kind, not the carton). For a gluten-free option, use a gluten-free pie crust mix — just follow the package instructions for blind baking. And if you want to cut back on sugar, you can reduce it to 1/2 cup without ruining the texture, though the pies will be slightly less sweet.
A quick note on ingredient selection: I always use Libby’s pumpkin puree because it’s consistently thick and not watery. If you use a different brand, you might need to drain off any excess liquid before mixing. Also, make sure your eggs are at room temperature — cold eggs can make the filling seize up and create a lumpy texture. Just set them on the counter for 15 minutes before you start.
Equipment Needed
You don’t need a professional pastry kitchen to pull these off. Here’s what you’ll actually use:
- Mini muffin tin (24-cup or two 12-cup tins — I use a standard non-stick one and it works perfectly)
- 2 1/2-inch round cookie cutter (or a drinking glass with a similar diameter — I’ve used a juice glass in a pinch)
- Rolling pin (even if you’re using pre-made crust, a light roll helps even things out)
- Mixing bowls (one medium, one large)
- Whisk (for smoothing the filling)
- Measuring cups and spoons
- Fork (for docking the crusts and testing doneness)
- Cooling rack (metal is best, but a cutting board works too)
- Piping bag or zip-top bag (for filling the crusts neatly — a zip-top bag with the corner snipped off works great)
If you don’t have a mini muffin tin, you can use a regular muffin tin and cut larger circles — just increase the baking time by 5-7 minutes. I’ve also used disposable mini tart pans from the grocery store, and they work fine. Just place them on a baking sheet for stability. Budget-friendly tip: dollar stores often carry mini muffin tins for a fraction of the price, and they hold up just as well for this kind of recipe.
Preparation Method
Let’s get to the good part. This method is straightforward, but I’ll walk you through every step with the little tricks I’ve learned from making these more times than I can count.
- Preheat your oven to 375°F (190°C). Position a rack in the center of the oven. While it’s heating, take your pie crusts out of the fridge and let them sit at room temperature for about 10 minutes — they’re easier to work with when they’re not ice cold.
- Lightly flour your work surface. Unroll one pie crust and use your rolling pin to smooth it out just a little — you’re not trying to make it thinner, just evening out any creases. Use your 2 1/2-inch cookie cutter to cut out circles. You should get about 12 circles per crust. Re-roll the scraps once to get a few more if needed. Don’t overwork the dough, or it’ll get tough.
- Press each circle into a mini muffin cup. Gently ease the dough into the cup, making sure it touches the bottom and sides. Don’t stretch it — if you pull the dough, it’ll shrink back during baking. Just press it in gently with your fingers. If the dough tears, pinch it back together. Nobody’s looking at the bottoms anyway.
- Dock the crusts. Use a fork to prick the bottom of each crust 3-4 times. This lets steam escape and prevents the crust from puffing up. At this point, pop the muffin tin into the freezer for 10 minutes. Cold crusts hold their shape better during blind baking.
- Blind bake the crusts. Place the muffin tin on a baking sheet (for even heat distribution). Bake for 8-10 minutes, until the edges are just starting to turn golden. The bottoms will look pale and slightly set. Don’t overbake them here — they’ll get another 15-18 minutes with the filling. Remove from the oven and let them cool slightly while you make the filling. Leave the oven on.
- Make the filling. In a large bowl, whisk together the sugar, cinnamon, ginger, cloves, and salt. In a separate small bowl, lightly beat the eggs. Add the pumpkin puree to the sugar mixture and stir until combined. Then add the beaten eggs, evaporated milk, and vanilla extract. Whisk until everything is smooth and silky. Don’t overmix — you don’t want to incorporate too much air, which can cause cracks. The filling should be the consistency of heavy cream.
- Fill the crusts. Transfer the filling to a piping bag or a zip-top bag with a small corner snipped off. Carefully pipe the filling into each pre-baked crust, filling them about 3/4 full. The filling will puff up slightly as it bakes, so leave a little room at the top. If you don’t have a piping bag, you can use a small spoon or a measuring cup with a spout — just go slowly to avoid spills.
- Bake the pies. Place the muffin tin back in the oven and bake for 15-18 minutes, until the filling is set around the edges but still has a slight jiggle in the center. A knife inserted near the center should come out mostly clean. The pies will continue to set as they cool, so don’t overbake them. You want that silky, creamy texture — not a dry, crumbly one.
- Cool completely. Remove the tin from the oven and let it cool on a wire rack for 10 minutes. Then carefully remove the mini pies from the tin and transfer them directly to the cooling rack. Let them cool completely — at least 30 minutes. The filling needs this time to fully set. If you try to eat them warm, they’ll be too soft and the crust might fall apart. Patience, I know, but it’s worth it.
- Chill before serving. For the best texture, refrigerate the cooled pies for at least 2 hours before serving. This firms up the filling and makes the flavors meld together. They’re even better the next day — I’ve tested this extensively.
Cooking Tips & Techniques
I’ve made these mini pumpkin pies at least a dozen times now, and I’ve learned a few things the hard way. Here are my best tips to save you the same trouble.
Don’t skip the blind bake. I know it’s an extra step, and I know you’re busy. But if you skip it, the bottom crust will be soggy — it’s that simple. The filling releases moisture as it bakes, and without that head start, the crust just soaks it up. Ten minutes of blind baking makes all the difference.
Watch your filling temperature. If your filling ingredients are cold, the crust will shrink and the filling won’t bake evenly. Let your eggs and evaporated milk come to room temperature before mixing. I’ve forgotten this step before, and the pies took almost 10 extra minutes to set. Not a disaster, but annoying.
Use a light hand with the filling. It’s tempting to fill those crusts to the brim — they look so tiny and empty. But the filling puffs up as it bakes, and if you overfill, they’ll spill over and create a sticky mess in your muffin tin. Three-quarters full is the sweet spot. Trust me on this one.
Check for doneness with a gentle jiggle. The classic test for pumpkin pie is the jiggle test — the center should wobble slightly when you shake the pan. For mini pies, this is even more important because they bake faster. If the edges look set and the center still has a little movement, they’re done. They’ll continue to set as they cool.
Multitask like a pro. While the crusts are blind baking, make your filling. While the filled pies are baking, clean up your workspace. This recipe moves fast, and staying ahead of it makes the whole process feel effortless. I usually have the filling ready and waiting by the time the crusts come out of the oven.
One mistake I made early on: I used a metal spatula to pop the pies out of the tin while they were still warm. The crusts crumbled everywhere. Let them cool completely in the tin — the filling needs that time to set, and the crusts will release much more easily. A gentle twist is all you need.
Variations & Adaptations
These mini pumpkin pies are a great base recipe, but they’re also incredibly flexible. Here are some ways to make them your own.
Spiced-Up Version: Add 1/4 teaspoon of cardamom or allspice to the filling for a warmer, more complex flavor. I tried this one Thanksgiving when I ran out of cloves, and honestly, I might like it better. The cardamom adds this subtle floral note that’s unexpected but delicious.
Chocolate Pumpkin Pies: Melt 1/4 cup of semi-sweet chocolate chips and spread a thin layer on the bottom of each pre-baked crust before adding the filling. The chocolate and pumpkin combo is surprisingly good — my kid calls them “pumpkin brownie pies” and they disappear fast.
Vegan Version: Substitute the eggs with 2 tablespoons of flaxseed meal mixed with 6 tablespoons of water (let it sit for 5 minutes to gel). Use full-fat coconut milk instead of evaporated milk. The texture is slightly less creamy but still delicious. I’ve made these for a friend’s vegan Friendsgiving and nobody complained.
Gluten-Free Option: Use a gluten-free pie crust mix or pre-made gluten-free crusts. Just make sure to follow the blind baking instructions carefully — gluten-free crusts can be more fragile. I’ve had good luck with the Wholly Gluten Free brand.
Savory Twist: Reduce the sugar to 1/4 cup, skip the vanilla, and add 1/2 teaspoon of black pepper and a pinch of cayenne. Top with a dollop of sour cream and chives. It sounds weird, but it’s actually a fantastic appetizer for a fall gathering. I tried this on a whim and it was a hit at my book club.
Serving & Storage Suggestions
These mini pumpkin pies are best served chilled, straight from the fridge. The cold filling has a firm, creamy texture that contrasts beautifully with the flaky crust. If you’re serving them at a party, arrange them on a platter and let them sit at room temperature for about 10 minutes before serving — this takes the chill off without making them too soft.
For presentation, I like to top each pie with a small dollop of whipped cream and a light dusting of cinnamon. If you’re feeling fancy, add a tiny candied ginger piece or a small pecan half on top. Kids love the individual serving size — it makes them feel special without overwhelming them with a full slice.
These pies pair beautifully with hot apple cider, spiced chai, or a simple cup of coffee. For a Friendsgiving spread, serve them alongside a cinnamon apple crumble or a plate of soft pumpkin spice cookies for variety. The mini size encourages guests to try a little of everything.
Storage Instructions: Store the pies in an airtight container in the refrigerator for up to 5 days. Place a layer of parchment paper between stacked layers to prevent the crusts from sticking. Do not leave them at room temperature for more than 2 hours — the filling contains dairy and eggs, so food safety matters.
Freezer Instructions: These freeze beautifully. Place the cooled, unfilled pies (crusts only) on a baking sheet and freeze until solid, then transfer to a freezer bag. They’ll keep for up to 3 months. When you’re ready to use them, fill and bake directly from frozen — just add 2-3 minutes to the baking time. Fully baked pies can also be frozen, but the texture of the filling changes slightly upon thawing. I prefer to freeze the crusts and bake fresh.
Reheating Tips: If you prefer warm pies, reheat them in a 300°F (150°C) oven for 5-7 minutes. The microwave works in a pinch, but it will make the crust soft. I actually love these cold — the flavors seem more pronounced after a day in the fridge.
Nutritional Information & Benefits
These mini pumpkin pies are a treat, but they also pack some surprising nutritional benefits. Here’s the breakdown per mini pie (based on 24 servings, without whipped cream):
| Nutrient | Amount per Mini Pie |
|---|---|
| Calories | 110 |
| Total Fat | 5g |
| Saturated Fat | 2.5g |
| Cholesterol | 20mg |
| Sodium | 95mg |
| Total Carbohydrates | 14g |
| Dietary Fiber | 1g |
| Sugars | 8g |
| Protein | 2g |
| Vitamin A | 45% DV |
| Vitamin C | 2% DV |
| Calcium | 4% DV |
| Iron | 4% DV |
Pumpkin is a nutritional powerhouse — it’s loaded with vitamin A (great for eye health and immune function) and fiber (which helps with digestion and keeps you feeling full). The eggs add high-quality protein, and the evaporated milk contributes calcium for strong bones. While these are still a dessert, they’re a more nutrient-dense option compared to many other holiday treats. One mini pie satisfies that pumpkin craving without derailing your day.
For those with dietary concerns: this recipe contains gluten, dairy, and eggs. For allergen-friendly alternatives, check the variations section above. If you’re watching your sugar intake, the reduced-sugar version (using 1/2 cup sugar) works well and still tastes great.
Conclusion
These mini pumpkin pies have become a staple in our house, and not just because they’re the reason my kid finally admitted he likes pumpkin pie. They’re easy enough for a Tuesday night dessert, special enough for a holiday spread, and just the right size for little hands and big appetites alike. The recipe is forgiving, the ingredients are simple, and the result is genuinely delicious.
I love that I can make a batch in under an hour, freeze the crusts for later, or customize the filling to match whatever mood I’m in. But honestly, what I love most is the look on my kid’s face when he grabs one from the fridge — that quiet, satisfied smile that says “I was wrong about this, and I’m glad.” That’s the kind of moment you can’t plan for, but you can bake for.
If you make these, I’d love to hear how they turn out. Did your kids love them? Did you try a variation? Did you catch someone eating one cold in the dark at 9 PM? Drop a comment below or tag me in your photos — I’m always looking for new ideas. And if you’re planning a Friendsgiving menu, consider adding a batch of classic macaroni and cheese and a simple green bean casserole to round out the feast. Happy baking, friends!
Frequently Asked Questions
Can I use fresh pumpkin instead of canned?
Yes, but you’ll need to roast and puree it first, then drain off any excess liquid. Fresh pumpkin tends to be more watery than canned, so spread the puree on a paper towel-lined plate for 10 minutes to remove extra moisture. Otherwise, the filling might be too loose.
Why did my crusts shrink during baking?
This usually happens when the dough is stretched too thin or not chilled enough before baking. Make sure to press the dough gently into the muffin cups without stretching it, and freeze the crusts for 10 minutes before blind baking. Cold dough holds its shape better.
Can I make these ahead of time for a party?
Absolutely. You can fully bake the pies up to 2 days in advance and store them in the refrigerator. Or, bake the crusts up to a week ahead and freeze them — just fill and bake the day of your event. The filling is actually better after a day in the fridge because the flavors have time to meld.
How do I prevent the filling from cracking?
Cracks happen when the filling is overbaked or when the oven temperature is too high. Bake at 375°F (190°C) and check for doneness at the 15-minute mark. The center should still have a slight jiggle. Also, avoid overmixing the filling — too much air can cause bubbles that lead to cracks.
Can I double this recipe?
Yes, and I do it all the time. Just make sure you have enough muffin tins — you’ll need two 24-cup tins or equivalent. The filling doubles easily, and you can roll out the crusts in batches. The baking time stays the same as long as the pies aren’t crowded in the oven. If you’re baking two tins at once, rotate them halfway through for even baking.
Pin This Recipe!
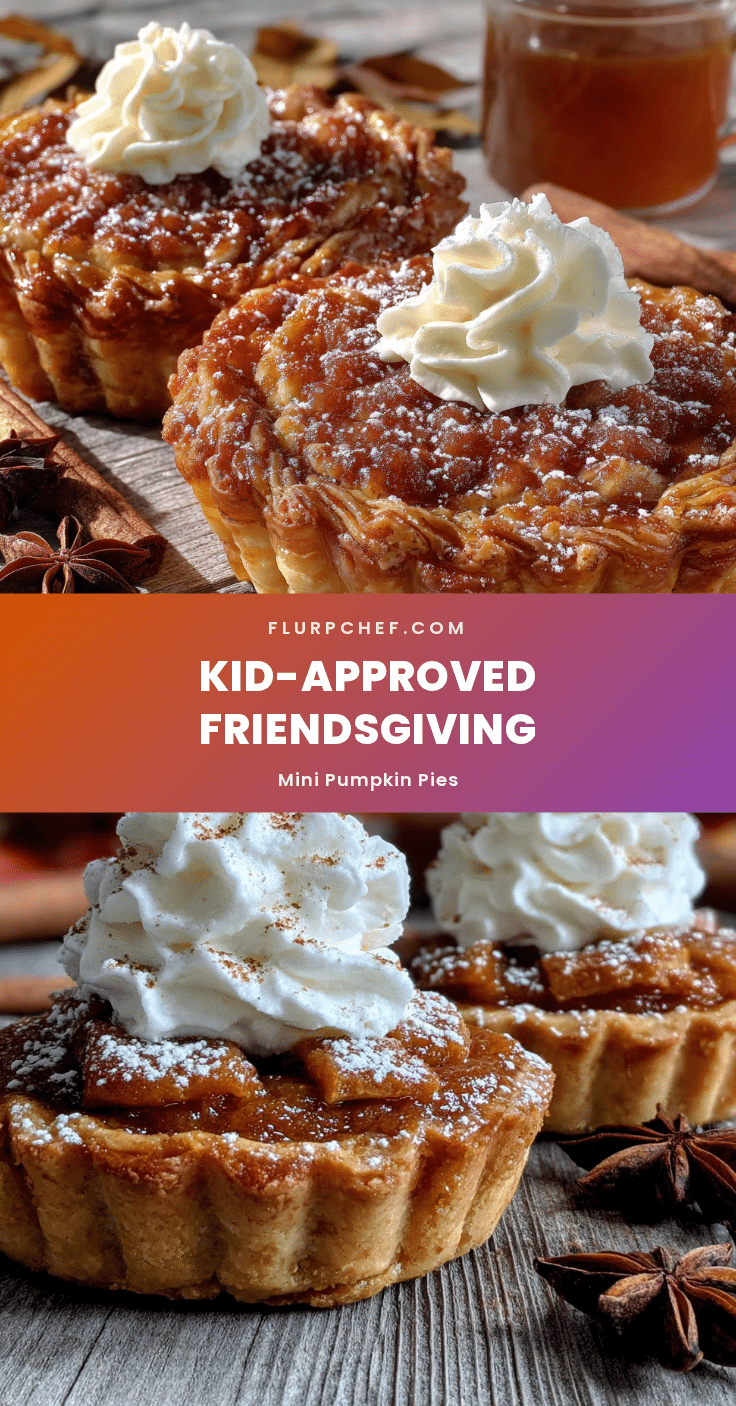
Best Mini Pumpkin Pies for a Kid-Friendly Friendsgiving
These mini pumpkin pies are quick, easy, and perfect for Friendsgiving or any fall gathering. With a buttery crust and silky spiced filling, they’re a crowd-pleaser that even pumpkin pie skeptics will love.
- Prep Time: 15 minutes
- Cook Time: 25 minutes
- Total Time: 40 minutes
- Yield: 24 mini pies 1x
- Category: Dessert
- Cuisine: American
Ingredients
- 1 box (14.1 ounces) refrigerated pie crusts
- All-purpose flour, for dusting
- 1 can (15 ounces) pumpkin puree (100% pure pumpkin)
- 3/4 cup granulated sugar
- 1 teaspoon ground cinnamon
- 1/2 teaspoon ground ginger
- 1/4 teaspoon ground cloves
- 1/2 teaspoon salt
- 2 large eggs, room temperature
- 1 can (12 ounces) evaporated milk
- 1 teaspoon vanilla extract (optional)
- Whipped cream, for serving (optional)
- Ground cinnamon or nutmeg, for dusting (optional)
Instructions
- Preheat your oven to 375°F (190°C). Position a rack in the center of the oven. Let pie crusts sit at room temperature for about 10 minutes.
- Lightly flour your work surface. Unroll one pie crust and smooth it out with a rolling pin. Use a 2 1/2-inch cookie cutter to cut out circles (about 12 per crust). Re-roll scraps once if needed.
- Press each circle into a mini muffin cup, easing the dough gently without stretching. Dock the crusts with a fork (3-4 pricks each). Freeze the muffin tin for 10 minutes.
- Blind bake the crusts: Place the muffin tin on a baking sheet and bake for 8-10 minutes, until edges are just golden. Remove and let cool slightly. Leave the oven on.
- Make the filling: In a large bowl, whisk together sugar, cinnamon, ginger, cloves, and salt. In a small bowl, lightly beat the eggs. Add pumpkin puree to the sugar mixture and stir. Add beaten eggs, evaporated milk, and vanilla extract. Whisk until smooth and silky.
- Fill the crusts: Transfer filling to a piping bag or zip-top bag with a snipped corner. Pipe filling into each pre-baked crust, filling about 3/4 full.
- Bake the pies: Return the muffin tin to the oven and bake for 15-18 minutes, until filling is set around the edges but still slightly jiggly in the center.
- Cool completely: Remove from oven and cool on a wire rack for 10 minutes. Then remove pies from the tin and cool completely on the rack (at least 30 minutes).
- Chill before serving: Refrigerate cooled pies for at least 2 hours before serving. Serve chilled with whipped cream and a dusting of cinnamon or nutmeg, if desired.
Notes
Don’t skip the blind bake to avoid soggy crusts. Let ingredients come to room temperature for even baking. Fill crusts only 3/4 full to prevent overflow. Check doneness with a gentle jiggle; the center should wobble slightly. Cool completely before removing from the tin to prevent crumbling. For best texture, refrigerate at least 2 hours before serving.
Nutrition
- Serving Size: 1 mini pie
- Calories: 110
- Sugar: 8
- Sodium: 95
- Fat: 5
- Saturated Fat: 2.5
- Carbohydrates: 14
- Fiber: 1
- Protein: 2
Keywords: mini pumpkin pies, Friendsgiving, kid-friendly, easy pumpkin pie, mini desserts, fall baking


