It was 11:47 PM on a random Tuesday, and I had a craving for something crispy, salty, and deeply satisfying. Not a salad craving, not a smoothie craving — a real, pull-out-the-frying-pan kind of craving. But here’s the thing: I didn’t have the energy for deep-frying, and I definitely didn’t have the patience for a complicated breading station. What I did have was a pack of bone-in chicken thighs in the fridge, a block of Parmesan that was getting a little sad around the edges, and a wild idea that maybe I could get that golden, crunchy crust without all the oil and mess. Honestly, I almost talked myself out of it. “Just order takeout,” the tired part of my brain whispered. But something about the late hour made me stubborn. I grabbed a baking sheet, cranked the oven, and started experimenting.
The result? These Crispy Garlic Parmesan Chicken Thighs came out of the oven looking like they belonged on a magazine cover — all bronzed and craggy and absolutely glistening. The smell that filled my kitchen was ridiculous, like a garlic knot had married a chicken wing in the best possible way. I stood at the counter eating one straight off the pan, burning my tongue a little, and I knew I had stumbled onto something special. It was one of those moments where the weird, late-night kitchen alchemy actually pays off.
Maybe you’ve been there — standing in front of the open fridge, wanting something indulgent but also not wanting to completely abandon your health goals. That’s exactly where this recipe lives. It gives you the crunch, the garlicky punch, and the cheesy crust you’re dreaming of, but it’s baked, not fried. And let me tell you, the texture is next-level. I’ve made these Crispy Garlic Parmesan Chicken Thighs at least a dozen times since that first late-night test, and they’ve never let me down. They’re the kind of recipe that makes you feel like you’re getting away with something — until you remember you’re actually eating a balanced, protein-packed dinner.
Why You’ll Love This Recipe
I’ve tested this recipe more times than I care to admit. I’ve tried different temperatures, different coatings, and different cooking times. I’ve even made it for my neighbor, who is a former chef, and she asked for the recipe before she finished her first piece. That’s when I knew this one was a keeper. Here’s why these Crispy Garlic Parmesan Chicken Thighs are going to become a staple in your kitchen:
- Quick & Easy : From fridge to table in about 45 minutes, with only 10 minutes of active prep. Perfect for those evenings when you’re tired but still want a real, home-cooked meal.
- Simple Ingredients : You probably have most of these in your kitchen right now. No weird specialty items, no trips to three different stores.
- Perfect for Weeknight Dinners : This is the kind of meal that feels special enough for a Sunday supper but easy enough for a Tuesday. It also reheats beautifully for lunch the next day.
- Crowd-Pleaser : I’ve served these to kids, picky eaters, and serious food lovers. Everyone goes back for seconds. The crispy Parmesan crust is universally adored.
- Unbelievably Delicious : The contrast between the crunchy, cheesy exterior and the juicy, tender meat is pure magic. You get all the satisfaction of fried chicken without the grease.
What makes this recipe different from every other chicken thigh recipe out there? It’s the technique. Instead of a heavy breading that can get soggy, we’re using a combination of finely grated Parmesan and panko breadcrumbs that creates an incredibly light, shatteringly crisp crust. The garlic isn’t just sprinkled on top — it’s infused into the coating and the pan juices, so every single bite is packed with flavor. And because we’re baking them on a wire rack, the hot air circulates all around each thigh, giving you that golden-brown crust on every surface. No flipping, no fussing, no greasy stovetop cleanup. This isn’t just another version of garlic Parmesan chicken — this is the version that will ruin all other versions for you.
Honestly, this recipe is comfort food reimagined. It’s healthier, faster, and cleaner than the fried version, but it has the same soul-soothing satisfaction. The kind of meal that makes you close your eyes after the first bite. The kind that makes you text your friends about it. The kind that becomes a regular request in your household. That’s what we’re making today.
What Ingredients You Will Need
This recipe uses simple, wholesome ingredients to deliver bold flavor and that irresistible crispy texture without any fuss. Most of these are pantry staples, which is exactly what you want on a busy weeknight. Here’s everything you need:
For the Chicken:
- 6 bone-in, skin-on chicken thighs (about 2.5 to 3 pounds total) — The skin helps keep the meat incredibly moist while the fat renders and crisps up. I prefer thighs over breasts here because they stay juicier and have more flavor. Look for thighs that are roughly the same size so they cook evenly.
- 1 tablespoon olive oil (adds richness and helps the coating stick and brown)
- 1 teaspoon salt (I use kosher salt for its clean flavor and easy pinch-ability)
- 1/2 teaspoon black pepper (freshly ground is always best)
For the Crispy Garlic Parmesan Coating:
- 1/2 cup finely grated Parmesan cheese — This is not the time for the green can. Buy a block of real Parmesan (I like Parmigiano-Reggiano for its nutty, salty depth) and grate it yourself on the fine side of a box grater. The pre-grated stuff has anti-caking agents that prevent it from melting and adhering properly. Trust me on this one.
- 1/2 cup panko breadcrumbs — Panko gives you that extra-light, extra-crispy texture that regular breadcrumbs just can’t match. They stay crunchy even after baking. Look for them in the Asian foods aisle or near the regular breadcrumbs.
- 4 cloves garlic, minced — Fresh garlic is non-negotiable here. It provides that pungent, aromatic punch that makes the whole dish sing. I mince mine by hand because I find the jarred stuff tastes metallic, but a garlic press works in a pinch.
- 2 tablespoons unsalted butter, melted (adds richness and helps the coating brown beautifully)
- 1 teaspoon dried oregano — Adds a subtle herbaceous note that complements the garlic without overpowering it.
- 1/2 teaspoon paprika — Not for heat, but for color and a gentle smokiness that makes the crust look extra appealing.
- 1/4 teaspoon red pepper flakes (optional) — I add these when I want a tiny kick of heat. Totally optional, but I love the little warmth it brings.
For Garnish (optional but recommended):
- 2 tablespoons fresh parsley, chopped — Adds a pop of color and freshness that cuts through the richness.
- Extra grated Parmesan for serving — Because more cheese is never a bad idea.
- Lemon wedges — A squeeze of lemon juice right before serving brightens everything up and balances the savory flavors.
Ingredient Selection Tips: When buying chicken thighs, look for meat that’s pink and plump with no off-odors. If you can, buy air-chilled chicken — it has better texture and hasn’t been plumped up with water, so it sears and roasts better. For the Parmesan, I recommend a block from the deli section of your grocery store. It’s more affordable than the fancy specialty cheese but still has real flavor. And please, please use fresh garlic. It makes a world of difference.
Substitution Guidance: If you need a gluten-free option, use gluten-free panko breadcrumbs — they work beautifully. You can substitute the Parmesan with Pecorino Romano for a saltier, more pungent flavor. No chicken thighs? Boneless, skinless thighs will work, but reduce the cooking time by about 10 minutes. And if you want to make this dairy-free, use a vegan Parmesan alternative and substitute the butter with olive oil. The texture will be slightly different, but still delicious.
Equipment Needed
You don’t need a fully stocked professional kitchen to make these Crispy Garlic Parmesan Chicken Thighs. Here’s what you’ll need:
- Baking sheet — A standard half-sheet pan works perfectly. I prefer one with a rim to catch any drips.
- Wire rack — This is the secret to maximum crispiness. Placing the chicken on a rack allows hot air to circulate underneath, preventing the bottom from getting soggy. If you don’t have one, you can still make this recipe — just flip the chicken halfway through cooking and expect a slightly less crispy bottom.
- Box grater or microplane — For grating your Parmesan cheese. A microplane gives you the finest, fluffiest texture that melts into the coating beautifully.
- Small bowl — For mixing your coating ingredients.
- Chef’s knife and cutting board — For mincing garlic and chopping parsley.
- Measuring spoons — For accuracy, especially with the salt and spices.
- Paper towels — Essential for patting the chicken dry. This step cannot be skipped.
- Instant-read thermometer (optional but recommended) — Takes the guesswork out of doneness. Chicken thighs are done at 165°F, but I actually prefer them at 175-180°F for the most tender, fall-apart texture.
I’ve made this recipe with a cheap baking sheet and a wire rack from the dollar store, and it still turned out amazing. The most important piece of equipment is the wire rack — if you don’t have one, consider picking one up. They’re inexpensive and make a huge difference for roasting vegetables and chicken. I’ve had the same set for years, and they’re one of my most-used kitchen tools.
Preparation Method
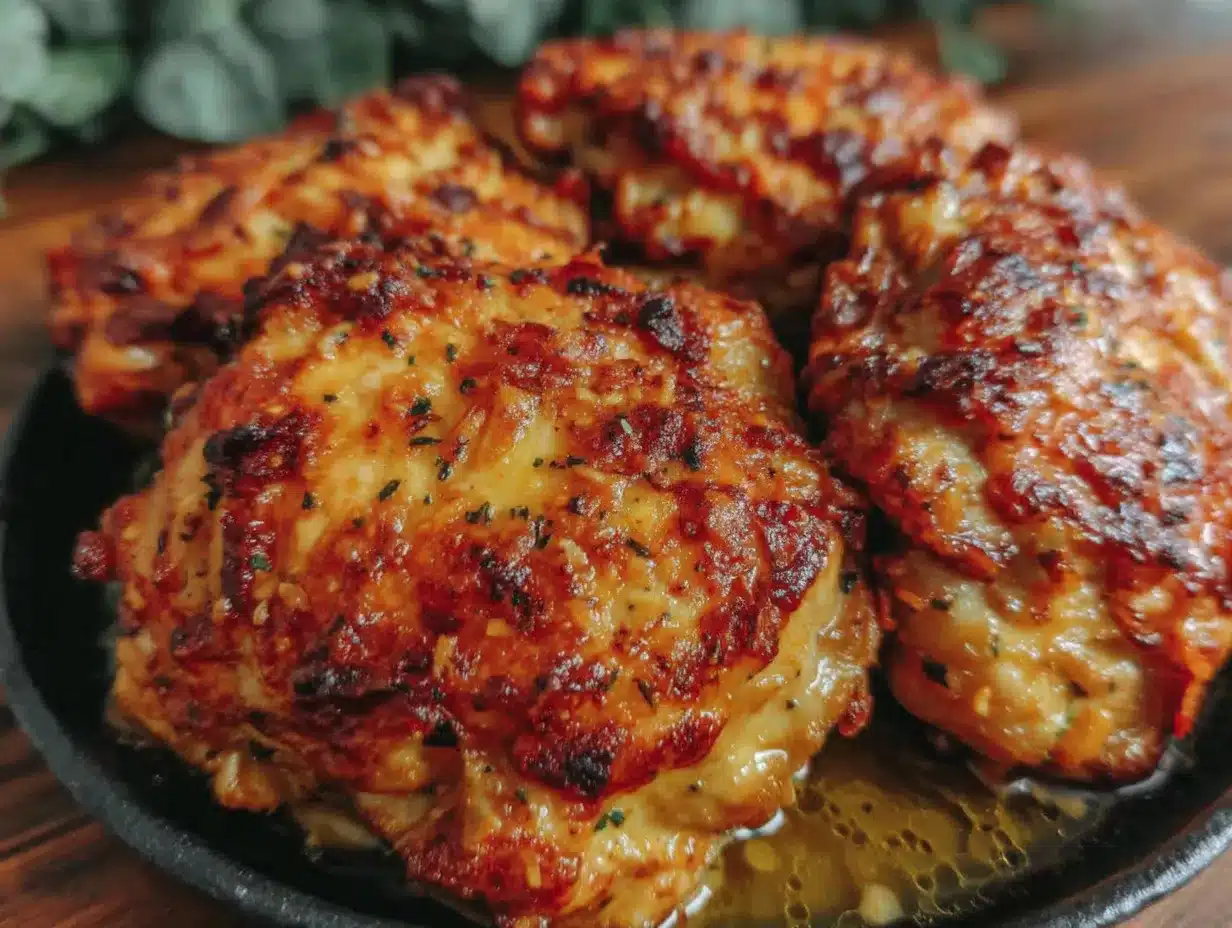
Let’s get cooking. This method is straightforward, but I’ve included all the little details that make the difference between good chicken and unforgettable chicken. Take your time with the prep — it’s only 10 minutes of active work, and the payoff is enormous.
- Preheat your oven to 400°F (200°C). Place your wire rack inside your baking sheet and set it aside. Preheating is important because you want the oven screaming hot when the chicken goes in — that initial blast of heat is what starts crisping the skin immediately.
- Pat the chicken thighs completely dry with paper towels. This is the single most important step for crispy skin. Moisture is the enemy of crispiness. I usually lay the thighs out on a plate and press another paper towel on top, making sure to get the edges and the underside. Don’t rush this — really dry them well. You’ll be amazed at the difference it makes.
- Season the chicken thighs with salt and pepper on both sides. Be generous here. Because the skin will be covered with the Parmesan coating, you want to make sure the meat itself is well-seasoned. I use about 1/2 teaspoon of salt per side for six thighs.
- In a small bowl, combine the grated Parmesan, panko breadcrumbs, minced garlic, melted butter, dried oregano, paprika, and red pepper flakes (if using). Mix everything together with a fork until it looks like a crumbly, slightly wet mixture. It should smell incredible already — that garlic and butter combination is pure magic. If the mixture seems too dry, add another teaspoon of melted butter. If it seems too wet, add a tablespoon more panko.
- Press the coating mixture onto the top and sides of each chicken thigh. Don’t bother coating the bottom — the skin there will crisp up on its own from the heat. Use your fingers to really press the coating into the skin so it adheres well. I find it helps to use one hand for the coating and keep the other hand clean for adjusting the chicken on the rack. It gets a little messy, but that’s part of the fun.
- Place the coated chicken thighs on the wire rack, skin side up, leaving a little space between each piece. This space is important — if the thighs are crowded, they’ll steam instead of roast, and you’ll lose that beautiful crispiness. I usually fit six thighs comfortably on a standard half-sheet pan.
- Bake for 35-40 minutes, or until the internal temperature reaches 175-180°F (80-82°C). The coating should be deep golden brown and the chicken should be bubbling around the edges. I start checking at the 30-minute mark with my instant-read thermometer. Every oven runs a little differently, so trust the temperature more than the time. The smell at this point is absolutely intoxicating — your whole kitchen will smell like a garlic lover’s dream.
- Let the chicken rest on the rack for 5 minutes before serving. This is crucial. The resting time allows the juices to redistribute throughout the meat, so every bite is tender and moist. If you cut into them immediately, all those delicious juices will run out onto the cutting board instead of staying in the chicken. I know it’s hard to wait, but trust me on this.
- Garnish with fresh parsley, extra Parmesan, and a squeeze of lemon juice if desired. The lemon is not just for show — that bright acidity cuts through the richness of the cheese and butter and makes the whole dish taste more balanced. Serve immediately while the coating is still shatteringly crisp.
Troubleshooting Tip: If your coating isn’t as golden as you’d like after 35 minutes, you can turn on the broiler for the last 1-2 minutes. Watch it like a hawk — broilers are aggressive, and you don’t want to burn that beautiful Parmesan crust. I’ve done this many times when I wanted an extra-dark, extra-crunchy exterior.
Cooking Tips & Techniques
After making these Crispy Garlic Parmesan Chicken Thighs more times than I can count, I’ve learned a few things the hard way. Let me save you some trouble.
The Drying Secret: I cannot overstate how important drying the chicken is. The first time I made this recipe, I was in a hurry and skipped this step. The coating slid right off during baking, and I ended up with soggy, sad chicken. Now I actually pat the chicken dry, then let it sit uncovered in the fridge for 15 minutes while I prep the other ingredients. This extra step dries out the skin even more, guaranteeing a shatteringly crisp crust. It’s a game-changer.
Don’t Skip the Wire Rack: I know it’s tempting to just throw the chicken directly on the baking sheet — I’ve done it, and I regretted it. The bottom of the chicken sits in its own rendered fat, and the coating gets soft and greasy. The wire rack elevates the chicken so the hot air can circulate all around it. If you don’t have a wire rack, you can use a few crumpled pieces of aluminum foil to lift the chicken slightly off the pan. It’s not perfect, but it helps.
Garlic Timing: Fresh garlic can burn if it’s exposed to high heat for too long. That’s why we mix it into the coating with the butter and breadcrumbs — the breadcrumbs and cheese act as a buffer, protecting the garlic from direct heat. If you’re worried about burnt garlic (I’ve been there), you can use garlic powder instead. Use 1 teaspoon of garlic powder in place of the fresh garlic. The flavor will be milder but still delicious.
Multitasking Strategy: While the chicken is baking, you have about 35 minutes of hands-off time. This is perfect for making a quick side dish. I usually toss some broccoli or green beans with olive oil and salt, and roast them on a separate sheet pan for the last 15 minutes. Or I make a simple arugula salad with lemon vinaigrette. The chicken and the side finish at the same time, and dinner is ready with no last-minute rush.
My Biggest Failure: The worst batch I ever made was when I used pre-grated Parmesan. The coating turned into a greasy, clumpy mess that refused to stick to the chicken. I was so disappointed. That’s when I learned that pre-grated cheese is coated with cellulose and other anti-caking agents that prevent it from melting smoothly. Freshly grated Parmesan is absolutely worth the extra 30 seconds of effort. Learn from my mistake.
Variations & Adaptations
One of the best things about this recipe is how easily it adapts to different tastes and dietary needs. Here are some of my favorite variations:
1. Lemon Herb Version: Add the zest of one lemon and 2 tablespoons of fresh chopped herbs (thyme, rosemary, and oregano work beautifully) to the coating mixture. The lemon zest brightens the whole dish and makes it feel lighter and more summery. I make this version when I want something that pairs perfectly with a crisp white wine.
2. Spicy Buffalo Style: Increase the red pepper flakes to 1 teaspoon and add 2 tablespoons of hot sauce (I like Frank’s RedHot) to the melted butter before mixing it into the coating. The result is a spicy, tangy, crispy chicken that scratches that buffalo wing itch without the deep-frying. Serve with blue cheese or ranch dressing for dipping.
3. Gluten-Free Adaptation: Use certified gluten-free panko breadcrumbs and make sure your Parmesan is gluten-free (most are, but it’s worth checking). Everything else in the recipe is naturally gluten-free. I’ve made this version for friends with celiac disease, and they couldn’t tell the difference. The gluten-free panko crisps up just as beautifully as the regular kind.
4. Lighter Version: To make this even lighter, use boneless, skinless chicken thighs and reduce the melted butter to 1 tablespoon. The cooking time will be shorter — about 25-30 minutes — and the coating will still get nicely crisp. You lose a little bit of the richness from the skin, but you save on calories and fat. I make this version when I’m in the middle of a health kick but still craving something satisfying.
5. Cheesy Herb Crust: Add 1/4 cup of finely chopped fresh basil and 2 tablespoons of grated Pecorino Romano to the coating mixture. The basil adds a sweet, peppery note that pairs beautifully with the garlic and Parmesan. This is my go-to summer variation when my basil plant is going crazy and I need recipes to use it up.
Personal Variation I Love: I once added a tablespoon of Dijon mustard to the melted butter before mixing it into the coating. The mustard added a subtle tang and helped the coating adhere even better. It was a happy accident — I was out of eggs and thought the mustard might help bind everything together. It worked brilliantly, and now I make it that way half the time. The mustard flavor is very subtle, but it adds a nice complexity.
Serving & Storage Suggestions
These Crispy Garlic Parmesan Chicken Thighs are incredibly versatile when it comes to serving. Here’s how I like to enjoy them:
Serving Temperature and Presentation: Serve the chicken hot, straight from the oven, while the coating is still crisp and the meat is steaming. Arrange the thighs on a platter and sprinkle with fresh parsley and a little extra grated Parmesan. I like to add lemon wedges around the edges of the platter so everyone can squeeze their own. The bright yellow against the golden chicken makes for a beautiful presentation.
What to Serve With It: These chicken thighs pair beautifully with so many sides. I love them with a simple arugula salad dressed with lemon vinaigrette — the peppery greens and bright acidity cut through the richness of the chicken. Roasted vegetables like asparagus, broccoli, or Brussels sprouts are also fantastic. For something more substantial, serve them over creamy polenta, mashed potatoes, or a bed of garlicky sauteed spinach. And let’s be honest, a crusty piece of bread to soak up the pan juices is never a bad idea.
Drink Pairings: A crisp Sauvignon Blanc or a light Pinot Grigio is perfect with the garlic and Parmesan. If you prefer red, go for a light-bodied Pinot Noir. For beer drinkers, a pilsner or a pale ale complements the flavors without overwhelming them.
Storage Instructions: Leftover chicken can be stored in an airtight container in the refrigerator for up to 4 days. The coating will soften slightly as it sits, but the flavor will still be fantastic. To reheat, I recommend placing the chicken on a wire rack over a baking sheet and warming it in a 350°F oven for about 10 minutes. This helps restore some of the crispiness. Avoid the microwave unless you’re in a desperate hurry — it will make the coating soggy.
Freezer Instructions: These chicken thighs freeze beautifully. Let them cool completely, then wrap each thigh individually in plastic wrap and place them in a freezer-safe bag. They’ll keep for up to 3 months. To reheat from frozen, place them on a wire rack over a baking sheet and bake at 350°F for about 20-25 minutes, or until heated through. The coating won’t be quite as crispy as fresh, but it’s still delicious and so convenient.
How Flavors Develop: Honestly, these chicken thighs are even better the next day. The garlic and Parmesan flavors meld together overnight, and the meat becomes even more tender. I often make a double batch specifically for leftovers. Cold, straight from the fridge, they make an incredible lunch — slice them up and toss them over a salad for a protein-packed meal.
Nutritional Information & Benefits
I’m not a nutritionist, but I do care about what I put in my body. Here’s what you need to know about these Crispy Garlic Parmesan Chicken Thighs:
Estimated Nutritional Values (per serving, based on 6 servings):
- Calories: 380-420
- Protein: 32g
- Fat: 26g (of which saturated: 9g)
- Carbohydrates: 6g
- Fiber: 0.5g
- Sugar: 0.5g
- Sodium: 580mg
Health Benefits: Chicken thighs are an excellent source of high-quality protein, which is essential for muscle repair and keeping you feeling full and satisfied. They’re also rich in B vitamins, particularly B6 and B12, which support energy metabolism and brain function. The garlic in this recipe isn’t just for flavor — it contains compounds like allicin that have been linked to immune support and heart health. And while Parmesan is a high-fat cheese, it’s also packed with calcium and protein. A little goes a long way in terms of flavor, so you don’t need much to get that satisfying cheesy hit.
Dietary Considerations: This recipe is naturally low-carb and keto-friendly (just skip the panko or use an almond flour substitute). It’s also gluten-free if you use gluten-free panko. It’s not suitable for a dairy-free or vegan diet, but the variations section has suggestions for adapting it.
Potential Allergens: This recipe contains dairy (butter and Parmesan) and gluten (panko breadcrumbs). If you have sensitivities, please check the substitution suggestions above.
My Personal Wellness Perspective: I believe in eating food that makes you feel good, both physically and emotionally. These Crispy Garlic Parmesan Chicken Thighs hit that sweet spot for me — they’re satisfying and indulgent enough to feel like a treat, but they’re made with real, whole ingredients and baked instead of fried. I don’t believe in “good” foods and “bad” foods. I believe in balance. And this recipe fits beautifully into a balanced, joyful approach to eating.
Conclusion
These Crispy Garlic Parmesan Chicken Thighs have become a staple in my kitchen for good reason. They deliver everything you want from a comfort food dinner — crunch, flavor, juiciness — without the heavy feeling that comes from deep-frying. They’re proof that you don’t need complicated techniques or a long list of ingredients to create something truly memorable. Just good chicken, real cheese, fresh garlic, and a little bit of oven magic.
I hope you make these and love them as much as I do. Don’t be afraid to tweak the recipe to suit your own tastes — add more garlic if you’re a garlic fanatic (I won’t judge), throw in some extra herbs, or dial up the heat with more red pepper flakes. Cooking should be fun and personal. The best recipes are the ones that evolve with the person making them.
When you make these Crispy Garlic Parmesan Chicken Thighs, I’d love to hear about it. Leave a comment below and tell me how they turned out — did you add any twists? What did you serve them with? Did anyone in your household go back for thirds? Your feedback and adaptations inspire me and help other readers discover new ways to enjoy this recipe. And if you share a photo on social media, tag me — I love seeing your beautiful creations.
Until next time, happy cooking. May your oven be hot, your garlic be fresh, and your chicken be gloriously, shatteringly crisp.
Frequently Asked Questions
Can I use chicken breasts instead of thighs?
Yes, you can, but I recommend bone-in, skin-on chicken breasts for the best results. The cooking time will be similar, but start checking the internal temperature at the 30-minute mark. Boneless, skinless breasts will cook much faster (about 20-25 minutes) and won’t be as moist. If you go that route, reduce the oven temperature to 375°F to prevent the coating from burning before the chicken is cooked through.
Why is my coating not sticking to the chicken?
This usually happens for one of three reasons: the chicken wasn’t dried properly, the coating mixture was too dry, or the chicken wasn’t pressed firmly enough into the coating. Make sure you pat the chicken thoroughly dry with paper towels. If your coating mixture seems too dry and crumbly, add another teaspoon of melted butter. And when you’re coating the chicken, really press the mixture into the skin — don’t just sprinkle it on top.
Can I make this recipe ahead of time?
Absolutely. You can prepare the chicken through step 5 (coating the thighs) up to 24 hours in advance. Place the coated thighs on the wire rack, cover loosely with plastic wrap, and refrigerate. When you’re ready to cook, let them sit at room temperature for 15 minutes while the oven preheats, then bake as directed. The coating might darken slightly during refrigeration, but it will still bake up beautifully.
How do I know when the chicken is fully cooked?
The most reliable way is to use an instant-read thermometer. Insert it into the thickest part of the thigh, avoiding the bone. Chicken is safe to eat at 165°F, but for thighs, I prefer 175-180°F — the higher temperature breaks down the connective tissue, making the meat more tender and juicy. If you don’t have a thermometer, pierce the thickest part of the thigh with a knife; the juices should run clear, not pink.
Can I double this recipe for a crowd?
Yes, but don’t crowd the baking sheet. If you’re doubling the recipe, use two baking sheets with wire racks and rotate them halfway through cooking. If you try to fit 12 thighs on one sheet, they’ll steam instead of roast, and you’ll lose that beautiful crispiness. Also, the oven temperature might drop when you add two pans, so expect the cooking time to increase by 5-10 minutes.
Pin This Recipe!
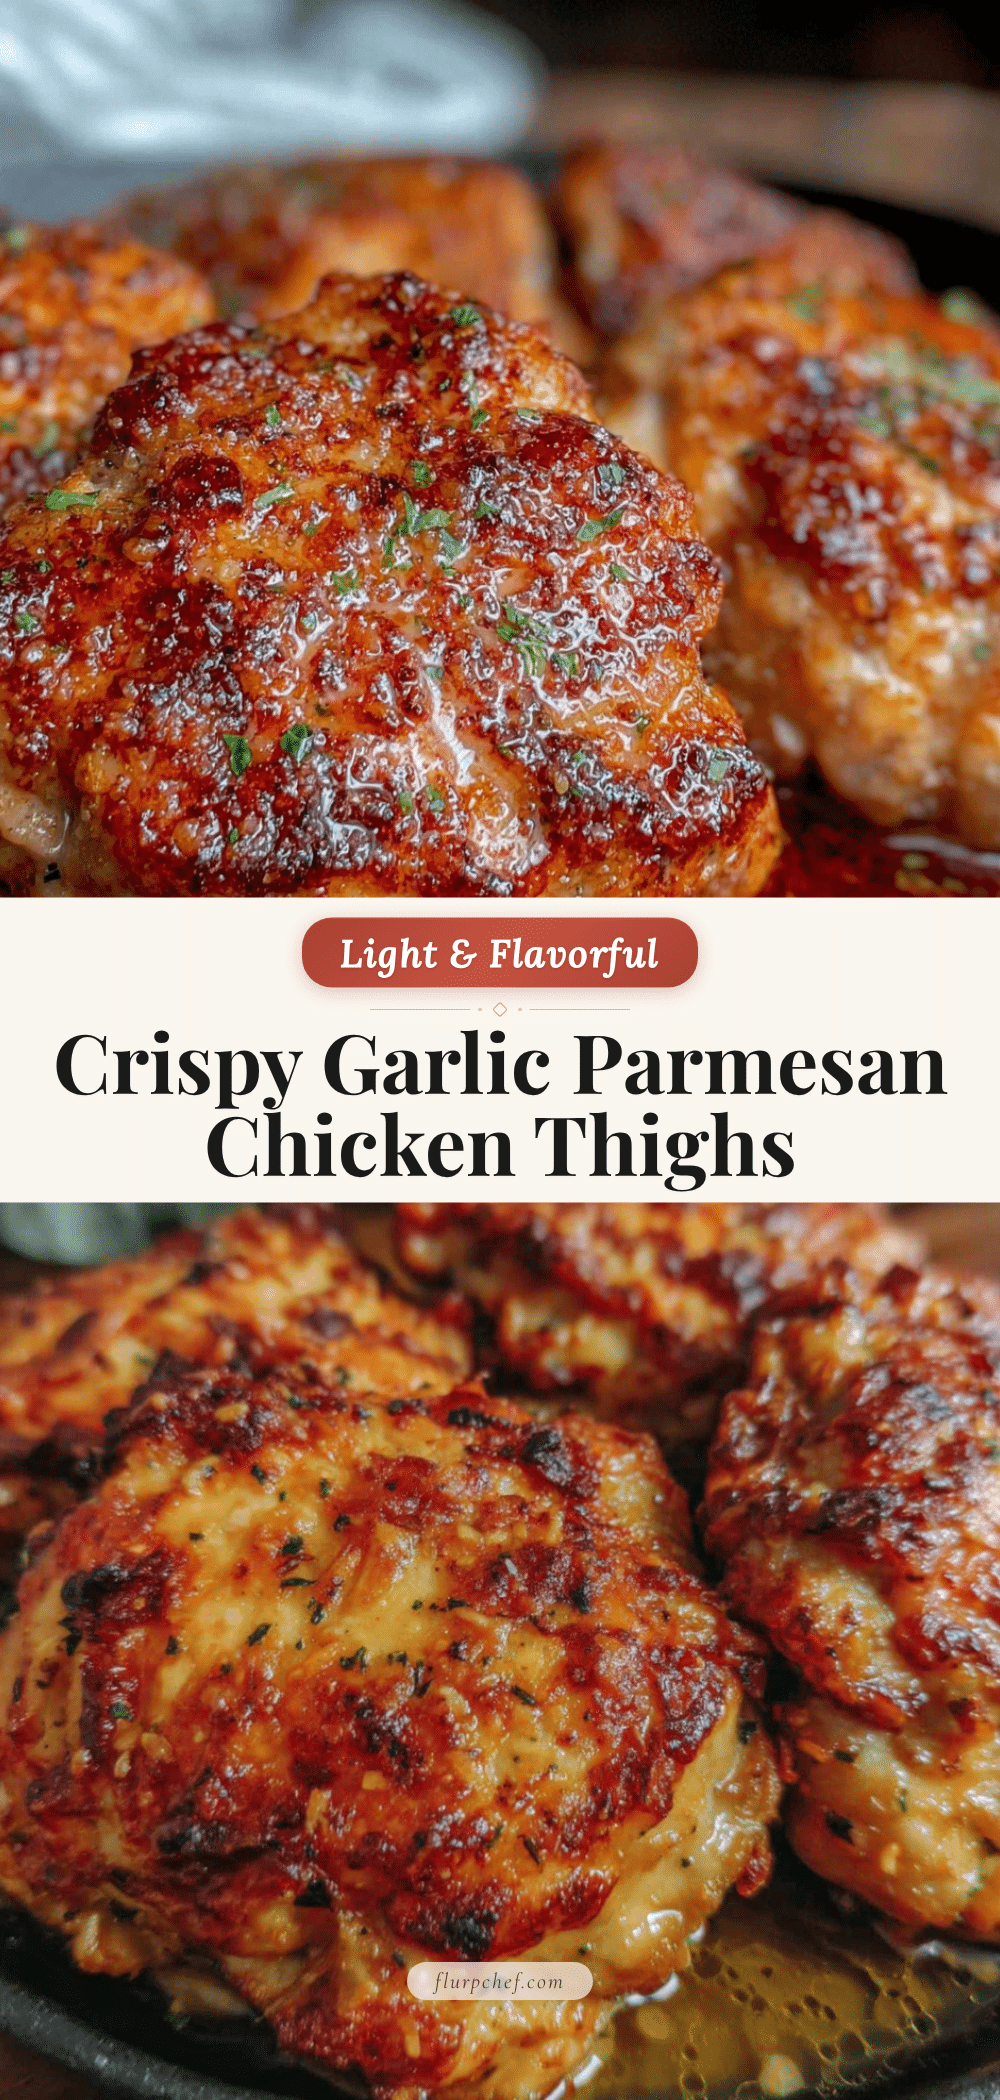
Crispy Garlic Parmesan Chicken Thighs: Easy Light Dinner

These baked chicken thighs feature a shatteringly crisp Parmesan-panko crust with garlic and herbs, delivering all the satisfaction of fried chicken without the grease. Perfect for a quick, healthy weeknight dinner.
- Prep Time: 10 minutes
- Cook Time: 35-40 minutes
- Total Time: 45-50 minutes
- Yield: 6 servings 1x
- Category: Main Course
- Cuisine: American
Ingredients
- 6 bone-in, skin-on chicken thighs (about 2.5 to 3 pounds total)
- 1 tablespoon olive oil
- 1 teaspoon kosher salt
- 1/2 teaspoon black pepper, freshly ground
- 1/2 cup finely grated Parmesan cheese (preferably Parmigiano-Reggiano)
- 1/2 cup panko breadcrumbs
- 4 cloves garlic, minced
- 2 tablespoons unsalted butter, melted
- 1 teaspoon dried oregano
- 1/2 teaspoon paprika
- 1/4 teaspoon red pepper flakes (optional)
- 2 tablespoons fresh parsley, chopped (for garnish)
- Extra grated Parmesan for serving (optional)
- Lemon wedges (for serving)
Instructions
- Preheat your oven to 400°F (200°C). Place a wire rack inside a rimmed baking sheet and set aside.
- Pat the chicken thighs completely dry with paper towels. This is crucial for crispy skin.
- Season the chicken thighs with salt and pepper on both sides.
- In a small bowl, combine the grated Parmesan, panko breadcrumbs, minced garlic, melted butter, dried oregano, paprika, and red pepper flakes (if using). Mix with a fork until crumbly and slightly wet.
- Press the coating mixture onto the top and sides of each chicken thigh, pressing firmly to adhere. Do not coat the bottom.
- Place the coated chicken thighs on the wire rack, skin side up, leaving space between each piece.
- Bake for 35-40 minutes, or until the internal temperature reaches 175-180°F (80-82°C) and the coating is deep golden brown.
- Let the chicken rest on the rack for 5 minutes before serving.
- Garnish with fresh parsley, extra Parmesan, and a squeeze of lemon juice if desired. Serve immediately.
Notes
Pat chicken very dry for crispiest skin. Use freshly grated Parmesan (not pre-grated) for best texture. For extra crispiness, let chicken sit uncovered in fridge for 15 minutes after drying. If coating isn’t golden enough, broil for 1-2 minutes at the end, watching carefully.
Nutrition
- Serving Size: 1 chicken thigh
- Calories: 400
- Sugar: 0.5
- Sodium: 580
- Fat: 26
- Saturated Fat: 9
- Carbohydrates: 6
- Fiber: 0.5
- Protein: 32
Keywords: crispy garlic parmesan chicken thighs, baked chicken thighs, easy chicken dinner, healthy chicken recipe, weeknight dinner, garlic parmesan chicken


