I swore I didn’t do themed food. For years. Every October, I’d watch friends post their mummy hot dogs and spiderweb dips on social media, and I’d just scroll past with a little sigh. It felt gimmicky. Cute, sure, but not really my style. I’m more of a “good cheese and a quiet night” kind of person. So when my friend Claire invited me to her annual Halloween party last year, I showed up with a bottle of wine and zero expectations. Then I saw her spread. It wasn’t a pile of candy corn or a bowl of orange punch. It was a proper charcuterie board, but dark. Moody. There were black cheeses I’d never seen, little skull-shaped crackers, and a jam that looked like it was made from crushed rubies. And the best part? Every single thing on it was for grown-ups. No gummy worms, no sugary nonsense. Just really, really good food that happened to look a little terrifying. I stood there, glass of red wine in hand, and I actually said out loud, “Okay, I get it now.” Claire just smiled. She knew she’d won. That night, I asked her for every detail, and I’ve been making my own version ever since. Honestly, if you’ve been side-eyeing the whole Halloween food trend like I used to, this Spooky Adults-Only Halloween Charcuterie Board is the one that will change your mind. It’s elegant, it’s a little creepy, and it’s exactly what you need for a night that’s more about good conversation than cheap thrills.
Why You’ll Love This Recipe
Let me tell you, this board is a total game-changer for your Halloween plans. It’s the kind of thing that makes people stop and stare before they even take a bite. And when they do take a bite? They don’t stop talking about it. I’ve brought this to two parties now, and both times, someone asked me for the “recipe” before the night was over. It’s that good.
- Adult-Focused & Sophisticated: This isn’t your kid’s Halloween snack. We’re talking aged cheeses, bold meats, and boozy accompaniments that feel special without being fussy.
- Surprisingly Simple to Assemble: No cooking required! It’s all about arranging and styling. You can put this together in under 20 minutes, which leaves you more time to perfect your costume or pour yourself a drink.
- Perfect for Halloween Gatherings: Whether it’s a costume party, a spooky movie night, or just a quiet evening in, this board sets the mood. It’s interactive, shareable, and always a conversation starter.
- Customizable & Flexible: You can swap out any cheese or meat based on what you like or what’s available at your store. The theme is more about the look than strict rules.
- Unbelievably Delicious: The combination of funky blue cheese, salty prosciutto, sweet fig jam, and dark, wine-soaked fruit is just perfect. It’s savory, sweet, and a little bit wicked.
What makes this board different from a regular charcuterie board is the intention. It’s not just thrown together. Every element is chosen to fit the spooky, moody vibe. The black cheese, the blood-red jam, the skull-shaped crackers. It feels curated, like a little piece of art you get to eat. And honestly, that’s what makes it so satisfying to make and to share.
What Ingredients You Will Need
This recipe uses simple, high-quality ingredients to create a board that looks as good as it tastes. The key is to focus on a mix of textures and colors that fit the dark, dramatic theme. You don’t need a million things, just the right ones.
- For the Cheeses:
- Black Wax Cheddar (or Truffle Cheddar): This is your showstopper. The black wax looks incredible on the board. I get mine from a local specialty cheese shop, but you can find it online too. (Adds a dramatic visual element)
- Aged Gouda: The deep, caramel-like flavor is perfect for fall. Look for one with little crunchy crystals for extra texture. (Provides a sweet, nutty contrast)
- Blue Cheese (like Roquefort or Gorgonzola): The veining looks like tiny spider webs. It’s bold, funky, and very adult. (Adds that signature “spooky” look and a sharp flavor)
- Brie or Camembert: A soft, creamy option to balance the harder cheeses. I like to leave it whole and let people cut into it. (Offers a mild, buttery counterpoint)
- For the Meats:
- Prosciutto: Thinly sliced and draped in ribbons. It’s salty and delicate. (Classic charcuterie staple)
- Sopressata or Genoa Salami: Slice it into coins or half-moons. The deep red color looks great against the dark cheeses. (Adds a chewy, savory bite)
- Spicy Capicola: A little heat goes a long way. It wakes up your palate between bites of cheese. (Brings a touch of spice)
- For the Spooky Accompaniments:
- Black Olives: Kalamata or oil-cured. They’re salty, briny, and perfectly on-theme. (Reinforces the color palette)
- Dried Figs or Dates: Their dark, wrinkled skin looks almost mummy-like. Stuff them with a little blue cheese for a killer bite. (Adds natural sweetness)
- Blood Red Jam or Preserves: Fig jam, raspberry preserves, or even a spicy pepper jelly. The deep red color looks like it could be blood. (Essential for the “gory” visual)
- Dark Chocolate: Broken into shards or use dark chocolate-covered almonds. It’s rich, bitter, and fits the mood perfectly. (A touch of indulgence)
- Roasted & Salted Nuts: Marcona almonds or smoked pecans. Their earthy flavor grounds the board. (Adds crunch and saltiness)
- For the Crackers & Bread:
- Skull-Shaped Crackers: You can find these online or at some specialty stores. They’re a fun, thematic base. (The visual hook)
- Black Sesame Crackers or Flatbreads: If you can’t find skull shapes, these are a great alternative. (Keeps the dark theme going)
- Baguette Slices: Toasted or fresh. A neutral base for the stronger flavors. (A reliable classic)
- For the Garnish (Optional but Fun):
- Fresh Rosemary Sprigs: They look like little pine trees or creepy branches.
- Dried Edible Flowers: A pop of deep purple or black adds a gothic touch.
- Whole Star Anise: They look like little creepy stars and smell amazing.
Equipment Needed
You don’t need a ton of fancy equipment to make this board. In fact, the beauty of it is how simple it is to put together. Here’s what I use every time:
- Large Wooden Board or Slate Platter: This is your canvas. A dark slate board looks incredible with the black and red theme. I found mine at a home goods store for about $20. A wooden cutting board works perfectly too.
- Small Bowls or Ramekins: You’ll need these for the jam, olives, and any loose items. I use little black ceramic ramekins I bought for a dollar each.
- Cheese Knives: At least two different ones. One for the soft cheese and one for the hard cheese. It just keeps things neat.
- Small Tongs or Spoons: For serving the olives and nuts. Guests appreciate not having to touch everything.
- Paring Knife: For slicing the baguette or cutting larger pieces of cheese right on the board.
If you don’t have a slate board, don’t worry. A large white platter will create a cool contrast with the dark foods. I’ve even used a clean baking sheet in a pinch when I was hosting a big group. It’s more about the arrangement than the specific board.
Preparation Method
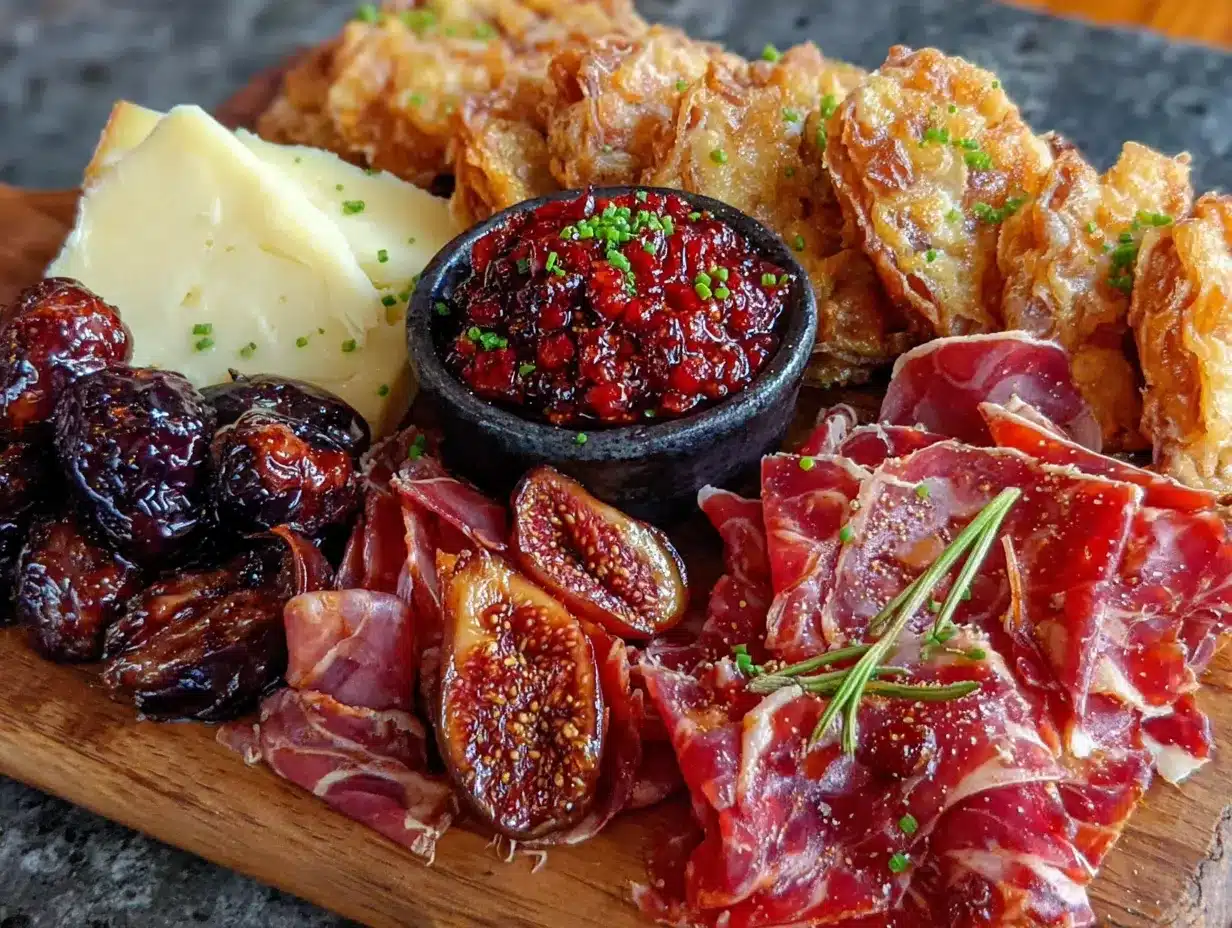
Assembling this board is more about art than science. There’s no right or wrong way to do it, but I’ve learned a few tricks over the years that make it look like you spent hours on it. Trust me, you won’t.
- Start with Your Bowls (2 minutes): Place your small bowls or ramekins on the board first. This is the most important step. Put them in different spots around the board, not all in one corner. I usually put the jam in one, the olives in another, and maybe some nuts in a third. This creates natural “anchors” for the rest of the food to flow around.
- Place the Cheeses (3 minutes): Next, put your cheese wedges down. Space them out evenly. Don’t cluster them all together. I like to put the black wax cheddar right in the middle or at one end because it’s the star. Place the brie somewhere it won’t get squished. Cut a few slices out of the harder cheeses so guests know where to start. It’s a little invitation to dig in.
- Add the Meats (4 minutes): Now for the meats. Don’t just pile them on. Take each slice of prosciutto and fold it into a loose ribbon. You can do this by folding it back and forth on itself. Arrange the salami coins in a little overlapping row or a small pile. The goal is to create texture and height. I like to put the meats near the cheeses they pair best with, but that’s just me being extra.
- Fill in with Crackers and Bread (3 minutes): This is where you start filling the gaps. Place your skull-shaped crackers or black sesame crackers in little clusters around the board. Fan out the baguette slices in a row. Don’t be afraid to overlap things. A full board looks more inviting than a sparse one. I always put a few crackers right next to the blue cheese because that’s a classic combo.
- Add the Accompaniments (3 minutes): Now fill in the remaining spaces with your dried figs, dark chocolate shards, and any extra nuts. Tuck them into little nooks and crannies. This is where the board starts to look really full and abundant. I like to leave a few figs whole and cut a few in half to show the inside.
- Garnish and Final Touches (2 minutes): This is the fun part. Add your fresh rosemary sprigs, star anise, or edible flowers. A little bit of green from the rosemary really makes the dark colors pop. Step back and look at it. If you see a big empty spot, fill it with a few more crackers or a small pile of nuts. The final board should look like a feast.
A quick note on timing: You can prep all your ingredients an hour ahead of time and keep them covered in the fridge. Just don’t assemble the board until 30 minutes before you plan to serve it. Cheese is best at room temperature, so letting it sit out for a bit really improves the flavor.
Cooking Tips & Techniques
I’ve made this board about a dozen times now, and I’ve definitely learned a few things the hard way. Here are my best tips to make your board a hit:
- Don’t Overcrowd the Board: I know I said a full board looks inviting, but there’s a fine line. If you can’t see the board at all, it’s too crowded. You want people to be able to grab things without knocking over a pile of olives. Leave a little breathing room.
- Cut Some Cheese Ahead of Time: This is my biggest tip. Pre-slice a few pieces of your harder cheeses and fan them out. It signals to guests that it’s okay to eat. If you leave a whole wedge of cheddar, people will be polite and not touch it. I learned this after my first board sat untouched for 20 minutes.
- Think About Color Balance: The whole point of this board is the dark, spooky look. But if everything is black and dark red, it can look a little flat. That’s why I use the aged gouda (which is a warm orange) and the brie (which is pale cream). They break up the darkness and make the black cheese stand out even more.
- Serve with a Themed Drink: This board practically begs for a dark red wine like a Cabernet Sauvignon or a Malbec. A dark beer like a stout works great too. For a non-alcoholic option, a blackberry or pomegranate spritzer is perfect. The drinks complete the experience.
- Let Guests Build Their Own Bites: The magic of a charcuterie board is the combination. Don’t instruct people on what to eat together. Just let them explore. The best bite I ever had was a piece of black cheddar with a smear of fig jam and a salty olive on top. Let them discover their own favorites.
One mistake I made early on was using too many strong flavors. I put out a super funky blue cheese, a spicy salami, and some very briny olives all next to each other. It was a bit much. Now I balance strong flavors with mild ones. The brie and the aged gouda are there to give your palate a break.
Variations & Adaptations
This board is incredibly flexible. Here are some ways I’ve switched it up depending on the occasion or what I had on hand:
- Vegetarian Version: Skip the meats entirely and double up on the cheeses and vegetables. Add some marinated artichoke hearts, roasted red peppers, and grilled eggplant slices. The dark colors still work perfectly. I made this for a friend who doesn’t eat meat, and she said it was the best board she’d ever had.
- Gluten-Free Adaptation: Use gluten-free crackers or vegetable chips. Rice crackers work well because they’re neutral. You can also use slices of cucumber or bell pepper as a base for the cheese. It’s lighter and still very tasty.
- Seasonal Twist for Fall: Add some roasted pumpkin seeds, slices of crisp apple, or a small bowl of spiced pumpkin butter. The apple slices go incredibly well with the aged gouda. I did this for a Thanksgiving appetizer, and it was a huge hit.
- Spicy Version: Add some pickled jalapeños, a spicy pepper jelly, and a chorizo-style salami. The heat cuts through the richness of the cheese. My husband loves this version, especially with a cold beer.
- Dessert Board Variation: Swap the meats for more dark chocolate, add some chocolate-covered figs, and use a sweet mascarpone or a honeyed goat cheese. It’s like a deconstructed dessert plate. I’ve served this after dinner instead of cake, and it feels very elegant.
My personal favorite variation is the “Bloody Mary Board.” I add a small bowl of spicy Bloody Mary mix, some celery sticks, pickled okra, and a smoky paprika dusted cheese. It’s a whole vibe for a Halloween brunch.
Serving & Storage Suggestions
This board is best served at room temperature, so take everything out of the fridge about 30 minutes before you plan to assemble it. The flavors really open up when the cheese isn’t cold. I usually set the board out about 15 minutes before guests arrive, so it has time to come to temperature.
For presentation, I like to place the board in the center of the table with small plates and napkins around it. A few small cheese knives and a spoon for the jam are all you need. Don’t forget a separate knife for the blue cheese, or the flavor will transfer to the brie.
Storage: If you have leftovers (which is rare in my house), you can store them separately. Wrap the cheeses in wax paper or cheese paper, not plastic wrap. Plastic wrap makes cheese sweat and get slimy. The meats should be wrapped in parchment paper and stored in an airtight container. The crackers and bread will go stale if left out, so put them in a zip-top bag.
The board itself won’t keep well once assembled. The crackers get soft from the moisture in the cheese and fruit. I recommend only assembling what you think you’ll eat in one sitting. You can always make a smaller board for a second night. The flavors of the cheese actually improve after a day in the fridge, so leftovers are a treat.
For reheating, you don’t really need to. Just let the cheese come to room temperature again. If you have baguette slices that have gone a little stale, you can toast them in the oven at 350°F for about 5 minutes. They crisp right up.
Nutritional Information & Benefits
I’m not going to pretend this is a health food, but there are some surprising benefits to this board. Cheese is a great source of calcium and protein. The aged cheeses like gouda and cheddar are also rich in vitamin K2, which is good for bone health. The nuts provide healthy fats and a little fiber, and the dried figs are packed with potassium and antioxidants.
Here’s an approximate breakdown for a serving (about 2 ounces of cheese, 2 ounces of meat, and a handful of accompaniments):
- Calories: 400-500
- Protein: 20-25g
- Fat: 30-35g
- Carbohydrates: 15-20g
- Fiber: 3-5g
This board is naturally gluten-free if you choose the right crackers, and it’s low in added sugar. The sweetness comes from the fruit and jam. It’s a satisfying, indulgent snack that feels more like a treat than a diet-buster. I personally love that I can enjoy a glass of wine and a few bites of cheese without feeling like I’ve derailed my whole week. It’s about balance, you know?
Potential allergens include dairy (cheese), nuts, and gluten (crackers). If you’re serving guests with allergies, be sure to label the board or offer alternatives. A separate small board with dairy-free cheese and nut-free crackers is a thoughtful touch.
Conclusion
So there you have it. My Spooky Adults-Only Halloween Charcuterie Board is the recipe that turned me from a themed-food skeptic into a full-blown convert. It’s the board that made me realize Halloween food doesn’t have to be about candy corn and artificial colors. It can be dark, moody, and incredibly delicious. It can be for grown-ups who still want to have a little fun.
I love this recipe because it’s so adaptable. You can make it as simple or as elaborate as you want. You can swap in your favorite cheeses or try something new. The theme is just a starting point. The real magic is in the combination of flavors and the joy of sharing it with people you care about. Whether you’re hosting a big party or just having a quiet night in with a scary movie, this board sets the perfect tone.
Now I want to hear from you! Have you tried making a themed charcuterie board before? What’s your favorite spooky ingredient? Drop a comment below and let me know how your board turned out. And if you loved this recipe, share it with a friend who needs a little Halloween inspiration. Trust me, they’ll thank you later.
Happy haunting, and happy eating!
Frequently Asked Questions
Can I make this board ahead of time?
You can prep all the ingredients a day ahead, but I recommend assembling the board no more than an hour before serving. The crackers will get soft if they sit on the board too long, and the cheese is best at room temperature. Just arrange everything on the board about 30 minutes before your guests arrive, and you’ll be golden.
Where can I find black wax cheddar?
Black wax cheddar is becoming more popular, especially around Halloween. I’ve found it at specialty cheese shops, some higher-end grocery stores, and online retailers like Murray’s Cheese or Amazon. If you can’t find it, a dark-colored cheese like a truffle cheddar or a smoked gouda with a dark rind works just as well. The visual impact is still there.
What if I don’t like blue cheese?
No problem at all! You can swap it for another soft-ripened cheese like a Camembert or a triple-cream brie. For a stronger flavor without the funk, try a washed-rind cheese like Taleggio. The key is to have a mix of textures and flavors, so just pick something you love.
How many people does this board serve?
This board as written serves about 6 to 8 people as an appetizer. If you’re serving it as a main course for a light dinner, it will serve 4 to 6. I always err on the side of making too much because leftovers are a treat. You can easily scale it up or down by adding or removing cheeses and meats.
Can I use a different theme for the board?
Absolutely! The base concept of a dark, moody charcuterie board works for any fall or winter occasion. Swap the skull crackers for regular crackers and use a different color palette. For a Thanksgiving board, use orange and gold accents. For a winter solstice party, use silver and white. The technique is the same; just change the theme.
Pin This Recipe!
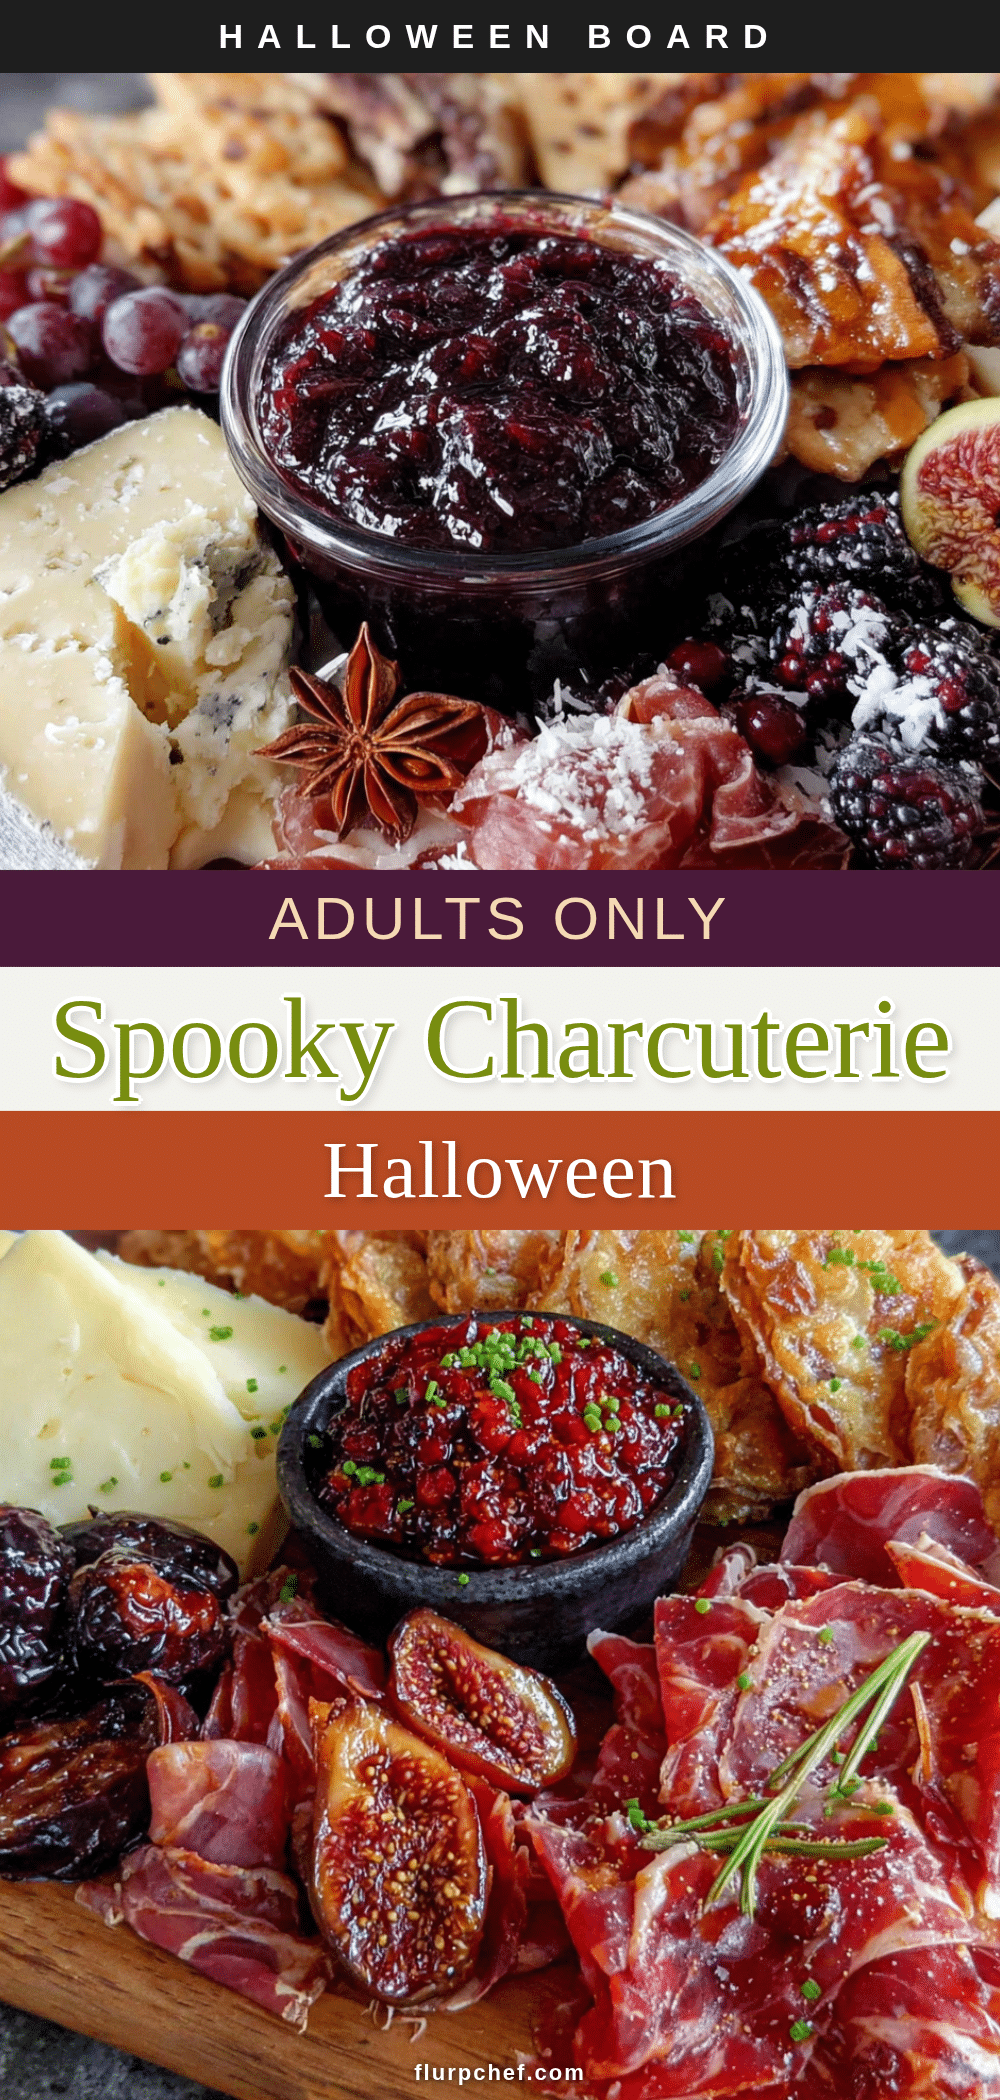
Spooky Adults-Only Halloween Charcuterie Board
A dark, moody, and sophisticated charcuterie board perfect for Halloween gatherings. Featuring black wax cheddar, aged gouda, blue cheese, prosciutto, and blood-red jam, this board is elegant, a little creepy, and entirely for grown-ups.
- Prep Time: 20 minutes
- Cook Time: 0 minutes
- Total Time: 20 minutes
- Yield: 6 to 8 servings
- Category: Appetizer
- Cuisine: American
Ingredients
- Black Wax Cheddar (or Truffle Cheddar)
- Aged Gouda
- Blue Cheese (like Roquefort or Gorgonzola)
- Brie or Camembert
- Prosciutto, thinly sliced
- Sopressata or Genoa Salami, sliced into coins
- Spicy Capicola, thinly sliced
- Black Olives (Kalamata or oil-cured)
- Dried Figs or Dates
- Blood Red Jam or Preserves (fig jam, raspberry preserves, or spicy pepper jelly)
- Dark Chocolate, broken into shards
- Roasted & Salted Nuts (Marcona almonds or smoked pecans)
- Skull-Shaped Crackers
- Black Sesame Crackers or Flatbreads
- Baguette Slices, toasted or fresh
- Fresh Rosemary Sprigs (for garnish)
- Dried Edible Flowers (for garnish)
- Whole Star Anise (for garnish)
Instructions
- Start with Your Bowls: Place small bowls or ramekins on the board first, spaced out in different spots. Fill with jam, olives, and nuts to create natural anchors.
- Place the Cheeses: Space cheese wedges evenly on the board. Put the black wax cheddar in the center or at one end as the star. Cut a few slices out of harder cheeses to invite guests to dig in.
- Add the Meats: Fold prosciutto slices into loose ribbons. Arrange salami coins in overlapping rows or small piles. Place meats near complementary cheeses.
- Fill in with Crackers and Bread: Place skull-shaped or black sesame crackers in clusters around the board. Fan out baguette slices in a row. Overlap items for a full, inviting look.
- Add the Accompaniments: Fill remaining spaces with dried figs, dark chocolate shards, and extra nuts. Tuck them into nooks and crannies. Leave some figs whole and cut others in half.
- Garnish and Final Touches: Add fresh rosemary sprigs, star anise, or edible flowers. Step back and fill any empty spots with more crackers or nuts. The board should look like a feast.
Notes
Prep all ingredients an hour ahead and keep covered in the fridge. Assemble the board 30 minutes before serving to let cheese come to room temperature. Pre-slice some harder cheeses to encourage guests to eat. Balance strong flavors with mild ones like brie or aged gouda. Serve with a dark red wine, stout beer, or blackberry spritzer.
Nutrition
- Serving Size: 1 serving (about 2 o
- Calories: 400500
- Sugar: 812
- Sodium: 8001000
- Fat: 3035
- Saturated Fat: 1518
- Carbohydrates: 1520
- Fiber: 35
- Protein: 2025
Keywords: Halloween charcuterie board, spooky charcuterie, adult Halloween snack, cheese board, Halloween appetizer, charcuterie board recipe, Halloween party food


