I was standing in the frozen food aisle last October, staring at a box of mini pizzas, when the fluorescent lights flickered and hummed—and suddenly I was seven years old, sitting cross-legged on my aunt Carol’s linoleum kitchen floor. She was rolling out crescent dough straight from the tube, and I remember the little *pop* it made when it opened. She wasn’t making anything fancy that day, just hot dogs wrapped in dough, but she called them “mummies” and gave them little mustard eyes. I had completely forgotten about that until that exact moment in the grocery store, surrounded by strangers and freezer fog. My aunt moved to Arizona a few years ago, and we don’t talk much anymore, but I swear I could smell her kitchen—that mix of cheap hot dogs, butter from the dough, and the faint lemon scent of her dish soap. I grabbed a can of crescent rolls without even thinking. Honestly, I almost teared up right there between the frozen peas and the ice cream. Maybe you’ve had a moment like that, where a random food memory just hits you out of nowhere. I bought the hot dogs too, and I made them that same night, hoping to get back even a fraction of that feeling. And you know what? It worked. These cozy mummy hot dogs aren’t just a snack—they’re a time machine wrapped in flaky, buttery dough.
Why You’ll Love This Recipe
Let me tell you, I’ve tested this recipe about six times in the last two weeks. My neighbors probably think I’ve lost my mind, bringing over plates of little mummy hot dogs at all hours. But I wanted to get it just right—the perfect dough-to-hot-dog ratio, the ideal bake time so the crescent dough is golden and flaky but not raw in the middle. I’ve worked in enough home kitchens to know that a recipe needs to be bulletproof, and this one is.
- Quick & Easy: These come together in under 20 minutes. Seriously, from fridge to table in less time than it takes to order takeout. Perfect for those evenings when the kids are hangry and you need something fast.
- Simple Ingredients: You only need three main ingredients—hot dogs, crescent dough, and a little something for the eyes. No fancy grocery trips, no obscure spices. You probably have everything right now.
- Perfect for Halloween: Obviously these are a hit for Halloween parties, but I also make them for movie nights, birthday parties, and even as a fun after-school snack. They’re not just for October!
- Crowd-Pleaser: I’ve served these to kids, adults, picky eaters, and everyone in between. They always disappear. There’s something about the combination of salty hot dog and buttery, flaky dough that just works.
- Unbelievably Delicious: The texture is what gets me—the way the crescent dough gets all crispy on the outside but stays soft and pillowy around the hot dog. It’s comfort food at its most basic, and honestly, most perfect, level.
What makes these different from every other pig-in-a-blanket recipe out there? It’s the little details. I wrap the dough in a specific way so it looks like actual mummy bandages, with little gaps that let the hot dog peek through. And I’ve figured out the exact oven temperature that gives you that gorgeous golden color without burning the thin strips of dough. This isn’t just another version—it’s the version I keep coming back to, and I think you will too.
What Ingredients You Will Need
This recipe uses simple, everyday ingredients that come together to create something that feels way more special than it should. Here’s what you’ll need:
- Hot dogs (8 standard size): I prefer all-beef hot dogs for better flavor, but any kind works. I’ve tested this with turkey dogs and even plant-based options, and they all work great. Just make sure they’re standard size, not the jumbo ones, or the dough-to-dog ratio gets off.
- Crescent roll dough (2 cans, 8 ounces each): This is the non-negotiable ingredient for me. I’ve tried making homemade dough, and while it’s good, it’s not the same. The store-bought stuff has that specific flaky, buttery texture that makes these so addictive. I usually go with Pillsbury, but store brands work too.
- Mustard (for eyes): Yellow mustard is traditional for that spooky mummy look, but you can also use ketchup, sriracha, or even little dots of cream cheese. I’ve even used black sesame seeds for a more elegant version.
- Egg wash (1 egg + 1 tablespoon water, beaten): This is optional but highly recommended. It gives the dough that beautiful golden-brown color and a slight shine. If you don’t have eggs, a little milk or melted butter brushed on top works too.
- Everything bagel seasoning (optional): I tried this on a whim one day, and it was amazing. The sesame seeds and garlic flakes add a little crunch and flavor that takes these to another level.
That’s it. No crazy ingredients, no special trips to a specialty store. This is the kind of recipe you can make on a whim, and that’s exactly why I love it.
Equipment Needed
You don’t need any fancy equipment for this recipe, which is part of its beauty. Here’s what you’ll need:
- Baking sheet (standard half-sheet size): I’ve used both metal and ceramic baking sheets, and both work fine. Just make sure it has a rim so nothing drips off. If you only have a dark non-stick sheet, keep an eye on the bottoms—they can burn faster.
- Parchment paper or silicone baking mat: This is a game-changer. It prevents sticking and makes cleanup a breeze. I’ve forgotten to use it before, and let me tell you, scraping burnt cheese off a baking sheet is not fun.
- Sharp knife or pizza cutter: You’ll need this to cut the crescent dough into strips. A pizza cutter works best because it doesn’t drag the dough, but a sharp knife works too. Dull knives will squish the dough and make it harder to work with.
- Pastry brush (for egg wash): If you don’t have one, you can use a paper towel or just your fingers. I’ve done both, and honestly, the pastry brush gives a more even coating, but it’s not worth buying one just for this.
- Small bowl (for egg wash): Any small bowl works. I use a cereal bowl.
I bought my silicone baking mat at a discount store for like three dollars, and it’s lasted me years. Definitely worth the investment if you bake a lot.
Preparation Method
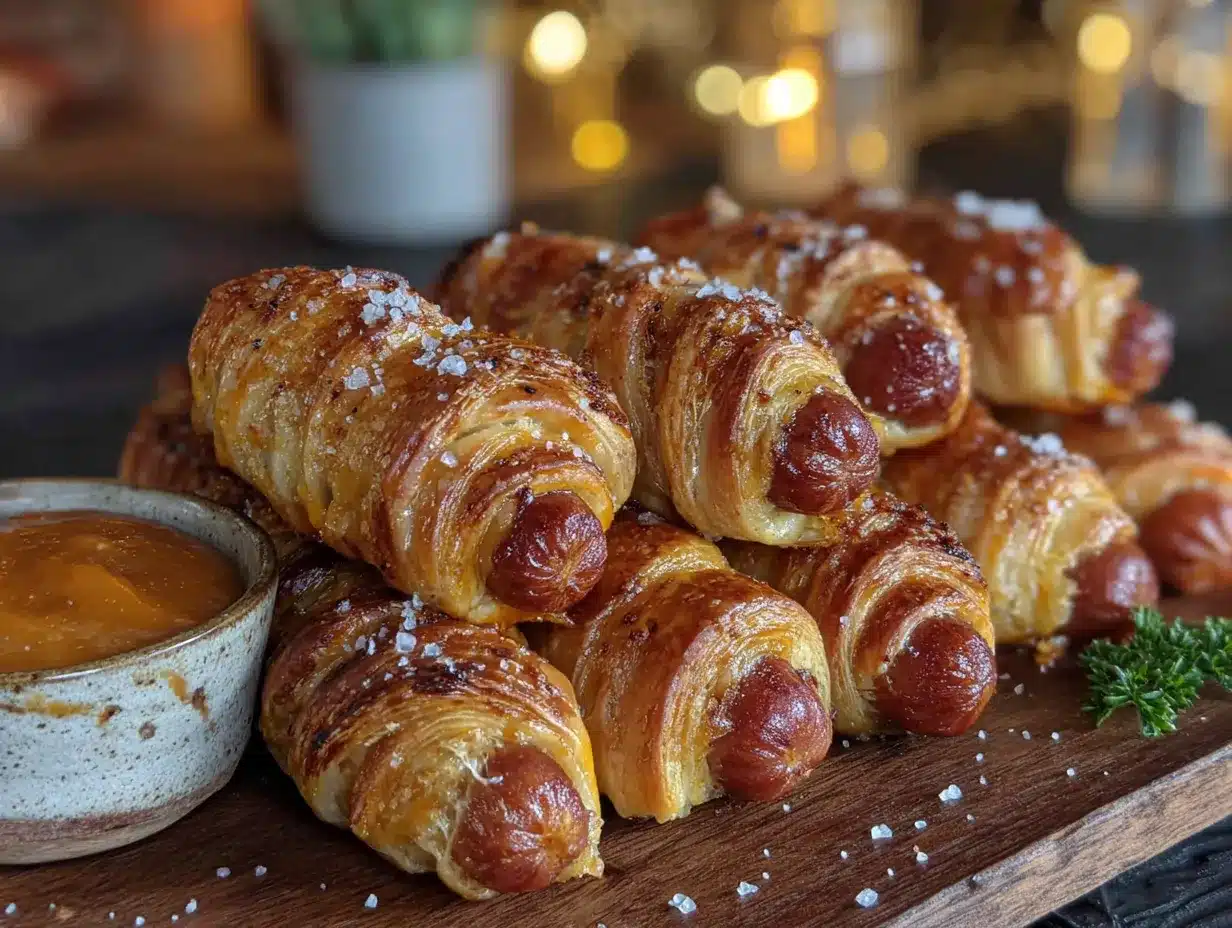
Alright, let’s get to the fun part. Here’s how to make these cozy mummy hot dogs:
- Preheat your oven to 375°F (190°C). Line a baking sheet with parchment paper or a silicone mat. This is important—don’t skip the lining, or you’ll be scrubbing later.
- Unroll the crescent dough. Open the can (that satisfying pop never gets old) and unroll the dough on a clean cutting board. You’ll see it’s perforated into triangles. Press the seams together gently with your fingers to seal them. Don’t press too hard, or the dough will be too thin.
- Cut the dough into strips. Using a sharp knife or pizza cutter, cut each rectangle of dough lengthwise into 4-5 strips, depending on how wide you want your mummy bandages. I usually go with 4 strips per rectangle for a nice, chunky mummy look. The strips should be about 1/2 inch wide.
- Wrap the hot dogs. Take a hot dog and start wrapping a strip of dough around it, starting at one end and working your way to the other. Leave small gaps between the wraps so the hot dog shows through—that’s what makes it look like a mummy! Don’t wrap too tightly, or the dough will tear as it bakes. I usually leave about a 1/4 inch gap between each wrap.
- Place on the baking sheet. Put each wrapped hot dog on the prepared baking sheet, leaving about an inch of space between each one. They don’t spread much, so you can fit all 8 on one standard sheet.
- Add the egg wash. In a small bowl, beat the egg with a tablespoon of water. Brush this mixture over the exposed dough strips. This gives them that beautiful golden color. Don’t skip this step if you want them to look professional!
- Bake for 12-15 minutes. Keep an eye on them around the 12-minute mark. You want the dough to be golden brown and puffy. The hot dogs should be heated through and starting to sizzle a little. Every oven is different—my friend’s oven runs hot, and hers are done in 11 minutes.
- Add the eyes. Let the mummy hot dogs cool for about 2 minutes on the baking sheet. Then, using a toothpick or a small squeeze bottle, add two dots of mustard for eyes. Don’t do this before baking, or the mustard will burn and turn brown. Trust me on this—I learned the hard way.
- Serve immediately. These are best eaten warm, when the dough is still flaky and the hot dog is juicy. They’ll keep for a bit, but the dough does lose its crispness over time.
One thing I always do is taste test one hot dog before wrapping—just to make sure they’re not too salty or anything. I know it sounds silly, but I’ve had a few packages that were way saltier than usual, and it affected the final taste.
Cooking Tips & Techniques
I’ve made this recipe at least a dozen times, and let me tell you, I’ve made every mistake in the book. Here are the tips I wish I’d known from the start:
Don’t overwork the dough. Crescent dough is delicate. The more you handle it, the tougher it gets. When you’re pressing the seams together, do it gently. When you’re cutting strips, use a sharp tool so you’re not dragging through the dough. The first time I made these, I was way too aggressive, and the dough came out dense and chewy instead of light and flaky.
Keep the dough cold. If your kitchen is warm, the dough can get sticky and hard to work with. If that happens, just pop the wrapped hot dogs in the fridge for 10 minutes before baking. This firms up the butter in the dough and helps them hold their shape better. I learned this trick after a particularly hot summer day when my dough turned into a sticky mess.
Leave those gaps. I know it’s tempting to wrap the dough tightly around the whole hot dog, but the gaps are what make them look like mummies. Plus, those exposed bits of hot dog get a little crispy and caramelized, which adds so much flavor. It’s a win-win.
Watch the baking time. The thin strips of dough can burn quickly, especially on the bottom. I always check the bottoms of the first batch to see how they’re doing. If they’re browning too fast, I move the baking sheet to a higher rack in the oven. Every oven is different, so keep an eye on them.
Make ahead tip. You can assemble these up to a day in advance and keep them covered in the fridge. Just add a few extra minutes to the baking time if they’re going in cold. This is a lifesaver for parties—I prep everything the night before and just pop them in the oven when guests arrive.
Variations & Adaptations
One of the best things about this recipe is how easy it is to adapt. Here are some variations I’ve tried and loved:
Spicy Mummies: Before wrapping, brush the hot dogs with a little sriracha or your favorite hot sauce. I tried this on a whim one day, and the spicy-savory combo was incredible. You could also use spicy jalapeño hot dogs if you can find them.
Cheesy Mummies: Cut a slit lengthwise in each hot dog and stuff it with a strip of cheddar or mozzarella cheese before wrapping. The cheese gets all melty and oozes out a little as it bakes. This is my husband’s favorite version.
Vegetarian Mummies: Use your favorite plant-based hot dogs or even cheese sticks wrapped in the dough. I’ve tried both, and the cheese sticks are actually amazing—they get all gooey inside. Just be careful not to overbake them, or the cheese can leak out.
Breakfast Mummies: Swap the hot dogs for breakfast sausages. These are perfect for a Halloween morning or a fun weekend brunch. I’ve even served them with a side of maple syrup for dipping, and it’s surprisingly good.
Everything Bagel Mummies: After brushing with egg wash, sprinkle everything bagel seasoning over the dough. The sesame seeds, garlic, and onion flakes add so much flavor and a nice crunch. This is my go-to variation now.
Serving & Storage Suggestions
These mummy hot dogs are best served warm, straight from the oven. I like to arrange them on a platter with a little bowl of mustard or ketchup for dipping. Sometimes I add a few pretzel sticks or veggie sticks on the side to round things out.
For a Halloween party, I’ll arrange them on a black platter with some fake spiderwebs or plastic spiders scattered around. It’s a simple touch, but it always gets a reaction. You could also serve them with a side of “blood” (aka ketchup or marinara sauce) for dipping.
Storage: If you have leftovers (unlikely, but possible!), store them in an airtight container in the refrigerator for up to 3 days. The dough will soften over time, so they won’t be as crispy as when they were fresh, but they’ll still taste good.
Reheating: The best way to reheat these is in the oven or air fryer. Pop them in a 350°F (175°C) oven for about 5 minutes, or until heated through. The microwave works in a pinch, but the dough will be soft and chewy, not crispy. I’ve reheated them in my air fryer at 350°F for 3 minutes, and they come out almost as good as fresh.
Freezing: You can freeze these either before or after baking. To freeze before baking, assemble the mummies on a parchment-lined baking sheet and freeze until solid (about 2 hours). Then transfer them to a freezer bag. To bake from frozen, just add 5-7 minutes to the baking time. To freeze after baking, let them cool completely, then freeze in a single layer on a baking sheet before transferring to a bag. Reheat from frozen in the oven or air fryer.
Nutritional Information & Benefits
Let’s be real—these mummy hot dogs are a treat, not a health food. But here’s the estimated nutritional breakdown for one mummy hot dog (using standard ingredients):
- Calories: Approximately 280-320
- Protein: 10-12 grams
- Carbohydrates: 22-26 grams
- Fat: 18-22 grams
- Sodium: 700-850 mg
The hot dogs provide a decent amount of protein, and the crescent dough gives you quick energy from carbs. If you’re watching your sodium intake, you can use lower-sodium hot dogs or turkey dogs. For a slightly healthier version, I’ve used whole-wheat crescent dough (yes, it exists!) and turkey hot dogs, and it cuts the calories and fat by about 20%.
These are obviously not something you’d eat every day, but as an occasional treat, they’re absolutely worth it. And honestly, the joy they bring—especially to kids—makes them worth every calorie.
Conclusion
These cozy mummy hot dogs are more than just a Halloween snack. They’re a little piece of nostalgia, a way to connect with childhood memories, and honestly, one of the most satisfying things you can make in under 20 minutes. Every time I make them, I think about my aunt Carol’s kitchen and that feeling of being seven years old, safe and happy and excited about dinner.
I hope you’ll try these and make them your own. Maybe you’ll add cheese, or spice them up, or serve them with a fun dipping sauce. Whatever you do, I’d love to hear about it. Drop a comment below and tell me how yours turned out—did you add any fun twists? Did the kids go crazy for them? I read every comment, and your stories honestly make my day.
So go ahead, grab that can of crescent dough, and make some memories. Your inner child (and your actual children, if you have them) will thank you.
Frequently Asked Questions
Can I use a different type of dough?
Absolutely! While crescent dough gives that classic flaky texture, you can use puff pastry, pizza dough, or even biscuit dough. Just adjust the baking time accordingly—puff pastry will take a few minutes longer, and biscuit dough will be denser and more bread-like.
How do I keep the dough from unraveling?
Make sure you’re wrapping the dough snugly but not too tight. The egg wash also helps seal the ends. If you’re really worried about it, you can tuck the end of the dough strip under the hot dog before placing it on the baking sheet.
Can I make these in an air fryer?
Yes! Air fryer mummy hot dogs are amazing. Cook them at 350°F (175°C) for 8-10 minutes, checking halfway through. They’ll be extra crispy on the outside. Just make sure not to overcrowd the basket—work in batches if needed.
What can I use instead of mustard for the eyes?
You can use ketchup, sriracha, or even little dots of cream cheese or sour cream. For a non-edible option (if you’re just decorating for a party), you can use black gel food coloring or tiny black sesame seeds.
Can I prepare these ahead of time for a party?
Definitely! Assemble the mummies up to 24 hours in advance and keep them covered in the refrigerator. When you’re ready to serve, just bake them straight from the fridge, adding a few extra minutes to the baking time. This is my go-to party strategy.
Pin This Recipe!

Cozy Mummy Hot Dogs with Easy Crescent Dough Wraps

These cozy mummy hot dogs are a nostalgic, fun, and delicious snack made with crescent dough wrapped around hot dogs to look like mummies. Perfect for Halloween parties, movie nights, or any time you need a quick, crowd-pleasing treat.
- Prep Time: 10 minutes
- Cook Time: 15 minutes
- Total Time: 25 minutes
- Yield: 8 servings 1x
- Category: Appetizer
- Cuisine: American
Ingredients
- 8 standard size hot dogs (all-beef recommended)
- 2 cans (8 ounces each) crescent roll dough
- Yellow mustard (for eyes)
- 1 egg (for egg wash)
- 1 tablespoon water (for egg wash)
- Everything bagel seasoning (optional)
Instructions
- Preheat your oven to 375°F (190°C). Line a baking sheet with parchment paper or a silicone mat.
- Unroll the crescent dough on a clean cutting board. Press the perforated seams together gently with your fingers to seal them.
- Using a sharp knife or pizza cutter, cut each rectangle of dough lengthwise into 4-5 strips, about 1/2 inch wide.
- Take a hot dog and start wrapping a strip of dough around it, starting at one end and working to the other. Leave small gaps (about 1/4 inch) between wraps so the hot dog shows through. Do not wrap too tightly.
- Place each wrapped hot dog on the prepared baking sheet, leaving about an inch of space between each one.
- In a small bowl, beat the egg with 1 tablespoon of water. Brush this egg wash over the exposed dough strips.
- Bake for 12-15 minutes, until the dough is golden brown and puffy. Check at 12 minutes to avoid burning.
- Let the mummy hot dogs cool for about 2 minutes on the baking sheet. Then, using a toothpick or small squeeze bottle, add two dots of mustard for eyes.
- Serve immediately.
Notes
For best results, keep the dough cold. If your kitchen is warm, refrigerate the wrapped hot dogs for 10 minutes before baking. You can assemble these up to a day in advance and keep covered in the fridge; add a few extra minutes to baking time if baking from cold. For a spicier version, brush hot dogs with sriracha before wrapping. For cheesy mummies, cut a slit in each hot dog and stuff with cheese before wrapping.
Nutrition
- Serving Size: 1 mummy hot dog
- Calories: 300
- Sugar: 4
- Sodium: 775
- Fat: 20
- Saturated Fat: 7
- Carbohydrates: 24
- Protein: 11
Keywords: mummy hot dogs, crescent dough hot dogs, Halloween appetizer, pig in a blanket, easy snack, kid-friendly


