My neighbor, Mr. Henderson, watched me trying to wrangle three kids and a grocery cart through the parking lot last November. He didn’t say anything at first. Then he just pointed at my cart, chuckled, and said, “You’re making this harder than it needs to be, sweetheart.” He proceeded to tell me about his family’s tradition of making a “grazing board” for their Thanksgiving leftovers—except they served everything in little paper cones. I laughed it off at first, but honestly, that idea stuck with me like a stubborn piece of tape.
Fast forward to last year, and I finally tried my own spin on it for our Friendsgiving gathering. Let me tell you, it was a game-changer. I mean, who knew that sticking turkey, stuffing, and cranberry sauce into a cone could make everyone so happy? The kids loved it because they could walk around and eat without sitting still. The adults loved it because, well, less mess and more conversation. And my wallet? It breathed a sigh of relief because I used up every last bit of leftover turkey and pantry staples.
This Friendsgiving Turkey Charcuterie Cone Board is my take on that idea—budget-friendly, kid-approved, and perfect for a crowd. Maybe you’ve been there, staring at a mountain of leftovers and wondering how to make them exciting again. Or maybe you’re planning your first Friendsgiving and want something fun without breaking the bank. Either way, this recipe is for you. It’s the kind of thing that turns a simple meal into a memory, and honestly, that’s why I keep making it year after year.
Why You’ll Love This Recipe
Let’s face it—feeding a crowd on a budget isn’t always easy. But this Friendsgiving Turkey Charcuterie Cone Board makes it look effortless. I’ve tested this with my own family and at a few potlucks, and it never fails to get rave reviews. Here’s why it works so well:
- Budget-Friendly: You can use leftover turkey or buy a small roasted chicken. Either way, it’s cheap and stretches beautifully.
- Kid-Friendly: The cones make it easy for little hands to grab and go. No plates, no fuss, just happy kids.
- Quick & Easy: This comes together in under 30 minutes if you prep ahead. Perfect for busy hosts.
- Crowd-Pleaser: Both kids and adults love the interactive, fun vibe. It’s a conversation starter.
- Perfect for Friendsgiving: Whether it’s a casual gathering or a holiday party, this board fits right in.
What makes this recipe different from other charcuterie boards? It’s the cones. They add a playful twist that turns a regular snack spread into something memorable. Plus, you can customize each cone to suit picky eaters or dietary needs. It’s comfort food reimagined—fun, affordable, and full of flavor. Honestly, after the first bite, you’ll wonder why you didn’t try this sooner.
What Ingredients You Will Need
This recipe uses simple, budget-friendly ingredients that you can find at any grocery store. Most of them are pantry staples or leftovers from your Thanksgiving dinner. Here’s what you’ll need:
For the Cones
- 8-10 large flour tortillas (or corn tortillas for gluten-free)
- Butter or cooking spray (for toasting)
For the Turkey Filling

- 2 cups cooked turkey, shredded or diced (leftover turkey works great)
- 1/2 cup cranberry sauce (homemade or canned)
- 1/2 cup stuffing (leftover or boxed)
- 1/4 cup gravy (optional, for dipping)
For the Board
- 1 cup cheese cubes (cheddar, gouda, or your favorite)
- 1 cup grapes, washed
- 1/2 cup nuts (almonds, pecans, or walnuts)
- 1/2 cup dried fruit (cranberries, apricots, or raisins)
- 1/2 cup pickles or olives (optional, for a tangy kick)
- Fresh herbs like rosemary or thyme for garnish
Ingredient Tips
I recommend using Mission tortillas for their flexibility—they toast up nicely without cracking. For the turkey, if you don’t have leftovers, grab a rotisserie chicken from the store. It’s cheap and saves time. The cranberry sauce adds sweetness, but you can swap it with a dollop of honey if needed. And for the cheese, go with what your family likes. My kids love cheddar, so that’s my go-to.
Equipment Needed
- Baking sheet (for toasting tortillas)
- Parchment paper (to prevent sticking)
- Large wooden board or platter (or a baking sheet if you don’t have one)
- Muffin tin or small bowls (to hold the cones upright while filling)
- Knife and cutting board
- Small spatula (for spreading fillings)
If you don’t have a wooden board, a large baking sheet lined with parchment works just fine. I’ve used both, and honestly, the baking sheet is easier to clean. For the cones, you can also use paper cones from a craft store, but tortillas are cheaper and taste better. Just make sure you have a muffin tin to hold them steady while you fill them—it’s a lifesaver.
Preparation Method
- Make the cones: Preheat your oven to 375°F (190°C). Cut each tortilla in half, then roll each half into a cone shape. Secure the edge with a toothpick. Place the cones on a baking sheet lined with parchment paper. Lightly brush with melted butter or spray with cooking spray. Bake for 8-10 minutes, or until golden and crispy. Let them cool completely before removing the toothpicks.
- Prepare the filling: While the cones cool, shred or dice the cooked turkey. If you’re using leftover stuffing, warm it up in the microwave for 30 seconds. Set aside the cranberry sauce and gravy in small bowls.
- Assemble the cones: Place the cooled cones in a muffin tin to keep them upright. Start with a spoonful of stuffing at the bottom, then add a layer of turkey. Top with a dollop of cranberry sauce. If you’re using gravy, drizzle a little on top. Repeat with the remaining cones.
- Arrange the board: Place the filled cones on your serving board or platter. Arrange the cheese cubes, grapes, nuts, dried fruit, and pickles around the cones. Garnish with fresh herbs for a pop of color.
- Serve and enjoy: Let everyone grab a cone and fill their plates with the extras. The cones are meant to be eaten by hand, so no forks needed. Serve immediately for the best texture.
Pro tip: If the cones get soggy, you can re-toast them in the oven for 2-3 minutes before serving. Just keep an eye on them so they don’t burn.
Cooking Tips & Techniques
I’ve made this board a few times now, and I’ve learned a thing or two along the way. First, don’t overfill the cones. It’s tempting to pack them full, but they’ll fall apart. A little goes a long way. Second, if you’re short on time, you can use store-bought tortilla chips instead of making cones. It’s not the same, but it works in a pinch.
One mistake I made early on was using cold turkey straight from the fridge. The cones turned out dry and bland. Now I always warm the turkey slightly in the microwave—just 20 seconds—before adding it to the cones. It makes a huge difference. Also, if you’re making this for a crowd, prep the cones a few hours ahead and store them in an airtight container. Just add the fillings right before serving.
For multitasking, I like to toast the cones while I prep the other ingredients. That way, everything’s ready at the same time. And if you have picky eaters, set out the fillings separately so they can build their own cones. It’s a fun activity that keeps everyone happy.
Variations & Adaptations
- Vegetarian Option: Swap the turkey with roasted chickpeas or grilled tofu. The stuffing and cranberry sauce still work beautifully.
- Gluten-Free: Use corn tortillas instead of flour. They toast up just as crispy and work perfectly for cones.
- Seasonal Twist: In the summer, add fresh berries or sliced apples to the board. In the fall, sprinkle pumpkin seeds or cinnamon-roasted nuts.
- Spicy Kick: Add a drizzle of hot honey or sriracha to the turkey filling. It gives the cones a nice little heat.
- Cheese Lovers: Swap the grapes for more cheese—try brie, goat cheese, or blue cheese crumbles. It’s decadent and delicious.
I once made a version with leftover ham instead of turkey, and it was a hit. The salty ham paired perfectly with the sweet cranberry sauce. Don’t be afraid to experiment with whatever you have on hand.
Serving & Storage Suggestions
Serve the cones at room temperature or slightly warm. They’re best eaten within an hour of assembling, as the tortillas can get soggy if left too long. If you’re hosting a party, set out the board with the cones and let guests grab them as they please. It’s a great way to keep the party moving.
For storage, keep the cones and fillings separate. Store the toasted cones in an airtight container at room temperature for up to 2 days. The turkey and other fillings should be refrigerated in separate containers. When you’re ready to serve, simply re-toast the cones for 2-3 minutes and assemble as directed. The flavors actually meld together nicely after a day in the fridge, so leftovers are still tasty.
To reheat, pop the assembled cones in a 350°F (175°C) oven for 5 minutes. This crisps up the tortillas and warms the fillings without drying them out. Avoid the microwave—it makes the cones chewy and sad.
Nutritional Information & Benefits
Each cone (with fillings) contains approximately 250-300 calories, depending on the ingredients. Here’s a rough breakdown:
- Protein: 15-20g (from turkey and cheese)
- Carbohydrates: 25-30g (from tortillas and cranberry sauce)
- Fat: 10-12g (from cheese and butter)
- Fiber: 2-3g (from nuts and dried fruit)
This recipe is a good source of protein and healthy fats, especially if you use nuts and cheese. The cranberry sauce adds a touch of sweetness without too much sugar, and the grapes provide natural vitamins. If you’re watching your sodium, opt for low-sodium turkey and unsalted nuts. It’s a balanced snack that fits into most diets, and the kids get a fun, hands-on meal without the sugar crash.
Conclusion
This Friendsgiving Turkey Charcuterie Cone Board is more than just a recipe—it’s a way to bring people together without the stress. It’s budget-friendly, kid-friendly, and honestly, just plain fun. I love how it turns leftovers into something special and how it sparks conversations around the table. Whether you’re hosting a big gathering or a small family dinner, this board is sure to be a hit.
So go ahead and give it a try. Customize it with your favorite fillings, get creative with the board, and don’t forget to take a picture before everyone digs in. I’d love to hear how it turns out—leave a comment below or tag me in your photos. Happy Friendsgiving, friends!
Frequently Asked Questions
Can I make the cones ahead of time?
Yes, you can toast the cones up to 2 days in advance. Store them in an airtight container at room temperature, and fill them just before serving.
What if I don’t have leftover turkey?
No problem! Use a rotisserie chicken from the store. It’s affordable and works perfectly in this recipe.
Can I use gluten-free tortillas?
Absolutely. Corn tortillas are a great gluten-free option. Just make sure they’re pliable enough to roll into cones without cracking.
How do I keep the cones from getting soggy?
Toast them until golden and crispy, and don’t add wet fillings like gravy until right before serving. You can also line the inside of the cones with a lettuce leaf to create a barrier.
Can I make this vegetarian?
Yes! Swap the turkey with roasted chickpeas, grilled tofu, or even extra cheese. The stuffing and cranberry sauce still work beautifully.
Pin This Recipe!
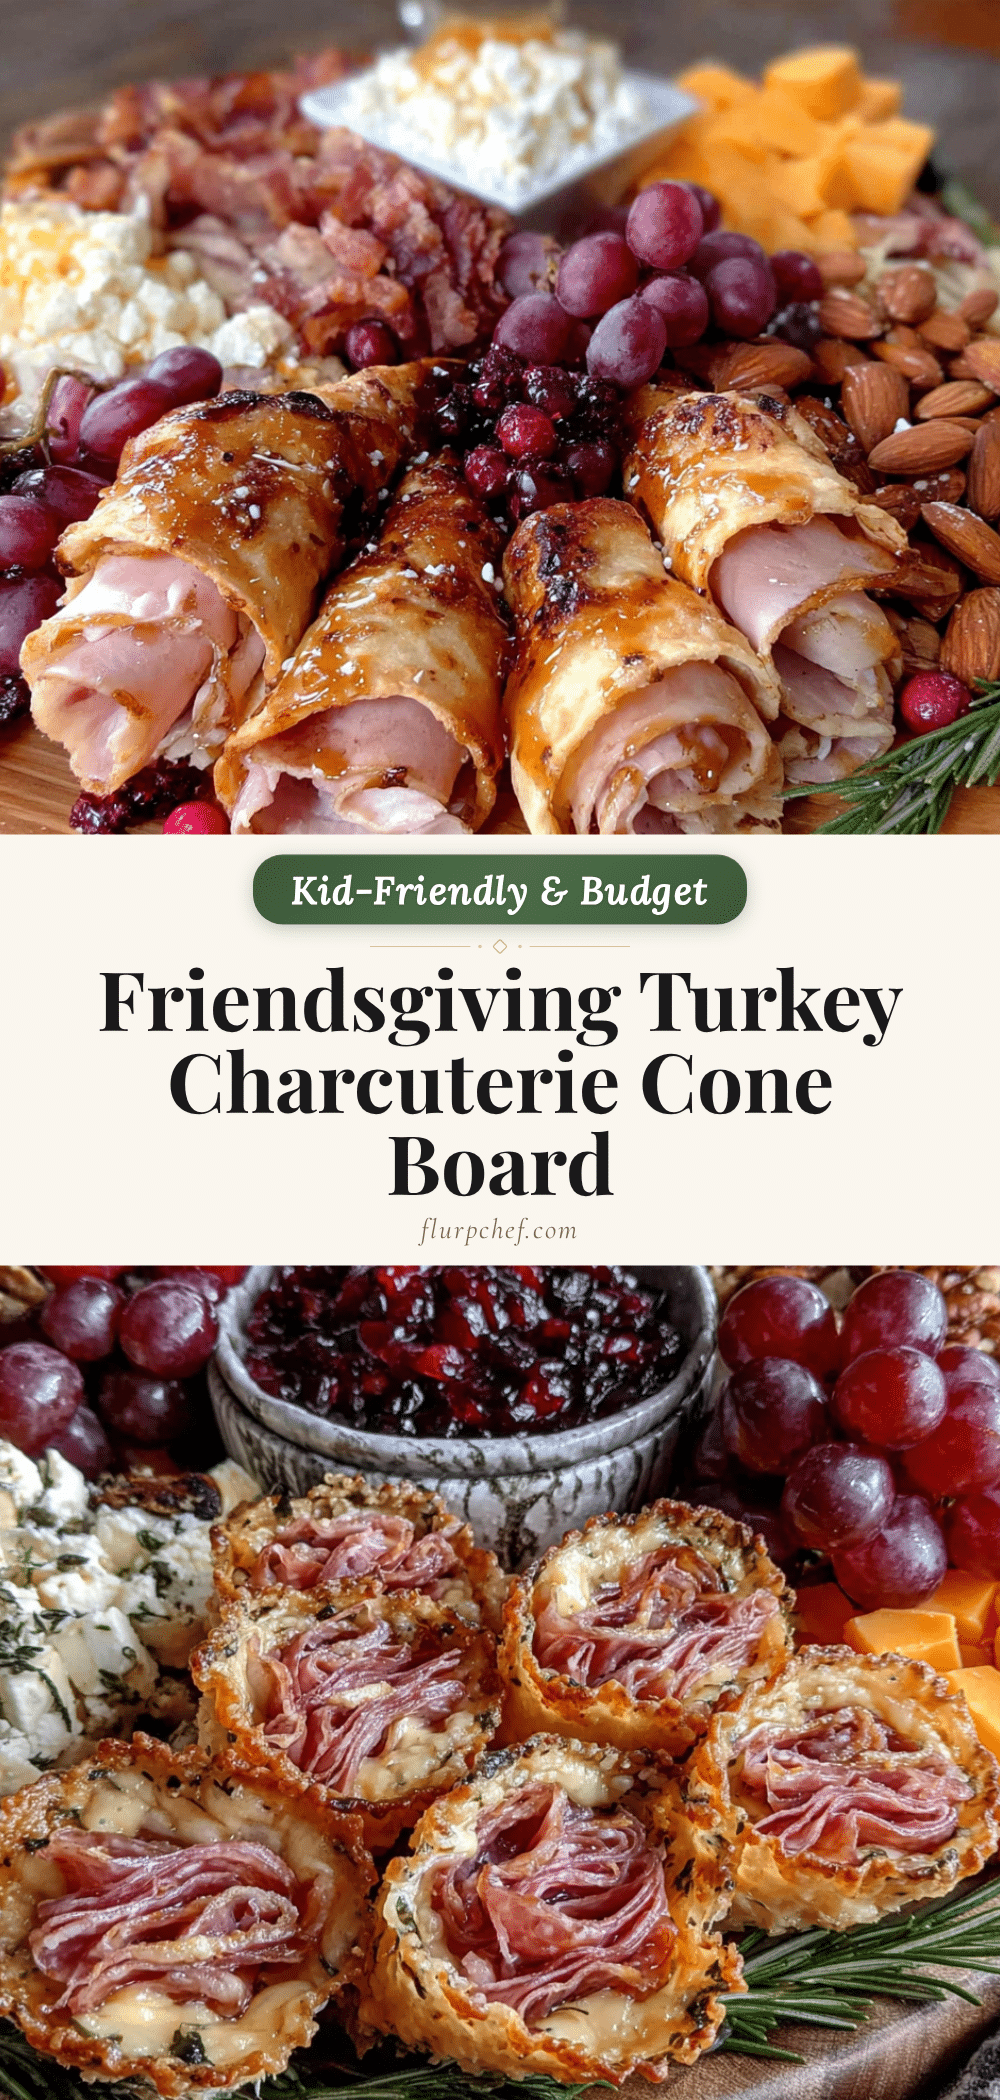
Friendsgiving Turkey Charcuterie Cone Board – Easy Budget-Friendly Fun

A fun, budget-friendly Friendsgiving recipe featuring turkey, stuffing, and cranberry sauce served in crispy tortilla cones on a charcuterie board. Perfect for crowds and kids.
- Prep Time: 15 minutes
- Cook Time: 10 minutes
- Total Time: 25 minutes
- Yield: 8-10 servings 1x
- Category: Appetizer
- Cuisine: American
Ingredients
- 8–10 large flour tortillas (or corn tortillas for gluten-free)
- Butter or cooking spray (for toasting)
- 2 cups cooked turkey, shredded or diced
- 1/2 cup cranberry sauce
- 1/2 cup stuffing
- 1/4 cup gravy (optional, for dipping)
- 1 cup cheese cubes (cheddar, gouda, or your favorite)
- 1 cup grapes, washed
- 1/2 cup nuts (almonds, pecans, or walnuts)
- 1/2 cup dried fruit (cranberries, apricots, or raisins)
- 1/2 cup pickles or olives (optional)
- Fresh herbs like rosemary or thyme for garnish
Instructions
- Make the cones: Preheat oven to 375°F (190°C). Cut each tortilla in half, then roll each half into a cone shape. Secure the edge with a toothpick. Place cones on a baking sheet lined with parchment paper. Lightly brush with melted butter or spray with cooking spray. Bake for 8-10 minutes, until golden and crispy. Let cool completely before removing toothpicks.
- Prepare the filling: While cones cool, shred or dice the cooked turkey. Warm leftover stuffing in the microwave for 30 seconds. Set aside cranberry sauce and gravy in small bowls.
- Assemble the cones: Place cooled cones in a muffin tin to keep them upright. Start with a spoonful of stuffing at the bottom, then add a layer of turkey. Top with a dollop of cranberry sauce. If using gravy, drizzle a little on top. Repeat with remaining cones.
- Arrange the board: Place filled cones on a serving board or platter. Arrange cheese cubes, grapes, nuts, dried fruit, and pickles around the cones. Garnish with fresh herbs.
- Serve and enjoy: Let everyone grab a cone and fill their plates with extras. Serve immediately for best texture.
Notes
If cones get soggy, re-toast in oven for 2-3 minutes before serving. Don’t overfill cones. Warm turkey slightly before adding to cones. Cones can be toasted up to 2 days ahead and stored in an airtight container.
Nutrition
- Serving Size: 1 cone with fillings
- Calories: 275
- Sugar: 8
- Sodium: 450
- Fat: 11
- Saturated Fat: 4
- Carbohydrates: 28
- Fiber: 2.5
- Protein: 17
Keywords: Friendsgiving, turkey, charcuterie board, cone, budget-friendly, kid-friendly, Thanksgiving leftovers


