It was 11:47 PM on a rainy Tuesday, and I was hit with a craving for something so specific it almost hurt. I wanted mashed potatoes—the creamy, buttery, soul-hugging kind my mom used to make. But I didn’t have any potatoes. I had a head of cauliflower that was staring at me from the crisper drawer, a bunch of chives that were starting to wilt, and a stubborn refusal to order takeout. So, in a moment of what I’ll call inspired desperation, I decided to see if cauliflower could be tricked into being something it’s not. Honestly, I was half-expecting a watery, sad pile of steamed vegetables. Instead, what came out of my food processor that night was a bowl of pure, unexpected comfort. It was creamy, it was savory, and it was so good I ate it straight from the bowl while standing in my pajamas. That’s the thing about late-night cooking—the rules get a little looser, and sometimes, you stumble onto something magical. This comforting healthy cauliflower mash with chives was born from a lack of options and a whole lot of hope, and it has since become my go-to for those nights when only a warm, cozy bowl will do.
Why You’ll Love This Recipe
Let’s be real for a second. Cauliflower mash has a reputation for being the “healthy” option that tastes like a compromise. I used to think that too, until I figured out the right tricks. This isn’t that version. This is the cauliflower mash that makes you forget you’re eating vegetables.
- Comfort in a Bowl: It delivers the same creamy, buttery satisfaction as traditional mashed potatoes, but without the heavy feeling afterward.
- Simple Ingredients: You probably have a head of cauliflower, some garlic, and a few pantry staples right now. No fancy trips to the store needed.
- Quick & Easy: From start to finish, this comes together in under 30 minutes. Perfect for a weeknight when you just need something good, fast.
- Crowd-Pleaser: I’ve served this to people who swear they hate cauliflower, and they went back for seconds. It’s that convincing.
- Unbelievably Delicious: The secret is in the technique—a little bit of cream cheese (trust me on this) and a good steaming method create a texture that’s silky and rich, not watery or grainy.
This recipe isn’t just a healthier alternative; it’s the kind of side dish that steals the show. It’s comfort food reimagined—lighter, faster, but with the same soul-soothing satisfaction that makes you close your eyes after the first bite.
What Ingredients You Will Need
This recipe uses simple, wholesome ingredients to deliver bold flavor and satisfying texture without the fuss. Most of these are pantry staples, but a few key choices make all the difference.
- 1 large head of cauliflower (about 2 lbs or 900g), cut into florets (the fresher, the better—look for tight, white florets without brown spots)
- 2 tablespoons unsalted butter (adds richness; you can use vegan butter if needed)
- 2 ounces cream cheese, softened (this is the secret to the creamy texture—I prefer Philadelphia for consistent results)
- 1/4 cup milk (whole milk gives the best creaminess, but 2% or unsweetened almond milk works too)
- 2 cloves garlic, minced (fresh garlic is non-negotiable here; it adds a warmth that powdered garlic just can’t match)
- 1/4 cup fresh chives, finely chopped (plus extra for garnish—don’t skip these, they add a mild oniony pop that brightens everything)
- 1/2 teaspoon salt (plus more to taste—I use kosher salt for better control)
- 1/4 teaspoon black pepper (freshly ground is best)
- Optional: 1 tablespoon sour cream (for extra tang and creaminess—it’s a game-changer if you have it on hand)
Ingredient Tips: For the best texture, make sure your cauliflower is very dry before steaming. If you’re using frozen cauliflower, thaw it completely and squeeze out as much moisture as you can with a clean kitchen towel—otherwise, you’ll end up with a watery mash. I’ve also found that letting the cream cheese come to room temperature prevents lumps from forming.
Equipment Needed
You don’t need a fancy kitchen to make this recipe, which is part of its charm. Here’s what you’ll need:
- Large pot or Dutch oven: For steaming the cauliflower. A regular pot with a steamer basket works perfectly.
- Steamer basket: If you don’t have one, you can boil the cauliflower, but steaming preserves more flavor and prevents waterlogging.
- Food processor or high-speed blender: This is the key to getting that silky-smooth texture. I’ve used both my Cuisinart and my Nutribullet with great results.
- Sharp knife and cutting board: For breaking down the cauliflower and mincing the garlic.
- Rubber spatula: For scraping down the sides of the food processor—trust me, you’ll need this.
- Small skillet: For sautéing the garlic in butter. It adds a depth of flavor that raw garlic just can’t provide.
Budget-Friendly Alternatives: If you don’t own a food processor, you can use a potato masher for a chunkier, more rustic texture. It won’t be as smooth, but it’ll still be delicious. I’ve also made this with an immersion blender straight in the pot—just be careful not to splatter hot cauliflower everywhere (learned that one the hard way).
Preparation Method
- Prepare the cauliflower: Remove the leaves and tough core from the cauliflower, then cut it into evenly sized florets. Try to make them all about the same size—this ensures even cooking. Rinse them well and let them drain in a colander.
- Steam the cauliflower: Fill your large pot with about 1 inch (2.5 cm) of water and bring it to a boil. Place the florets in a steamer basket, cover the pot, and reduce the heat to medium. Steam for 12-15 minutes, or until a fork slides into the thickest part of a floret with no resistance. Sensory cue: You’ll know it’s ready when the kitchen smells like a warm, earthy hug and the florets are a vibrant, pale yellow.
- Dry the cauliflower: This step is crucial. Carefully transfer the steamed florets to a clean kitchen towel or a few layers of paper towels. Let them sit for 2-3 minutes to release excess steam and moisture. If you skip this, your mash will be watery. Personal tip: I once forgot this step and ended up with a soup-like disaster. Never again.
- Sauté the garlic: While the cauliflower is cooling, melt the butter in a small skillet over medium heat. Add the minced garlic and cook for 30-60 seconds until fragrant—just until it starts to turn golden. Don’t let it burn, or it will taste bitter. Remove from heat immediately.
- Blend the mash: Transfer the dried cauliflower florets to a food processor. Add the sautéed garlic and butter, the softened cream cheese, milk, salt, and pepper. Note: If you’re using the optional sour cream, add it now. Process for 30-45 seconds, scraping down the sides halfway through, until the mixture is completely smooth and creamy. Sensory cue: It should look like a thick, velvety cloud—no chunks allowed.
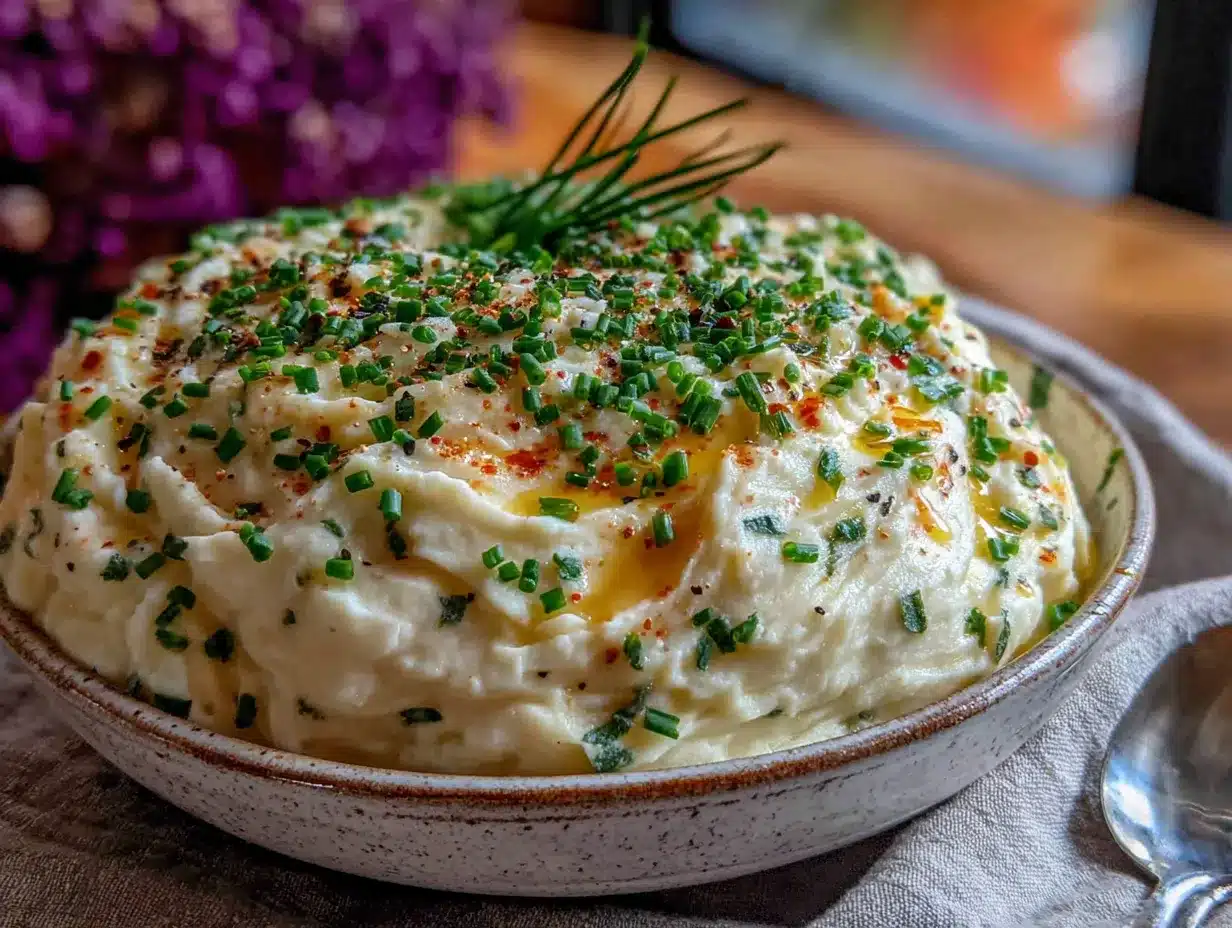
- Fold in the chives: Transfer the mash to a serving bowl and gently fold in the chopped chives with a rubber spatula. Reserve a small pinch of chives for garnish. Taste and adjust the salt and pepper if needed.
- Serve immediately: Spoon the mash into bowls, top with a pat of butter (if you’re feeling indulgent), and sprinkle with the reserved chives. Serve hot.
Cooking Tips & Techniques
I’ve made this cauliflower mash more times than I can count, and I’ve learned a few things the hard way. Here are my best tips for getting it perfect every time.
- Don’t skip the drying step. I cannot stress this enough. Cauliflower is basically a sponge, and if you don’t let it dry after steaming, you’ll end up with a watery mash. Spread the florets on a baking sheet and let them sit for 5 minutes if you have the time.
- Use room-temperature cream cheese. Cold cream cheese won’t blend smoothly and will leave little white flecks in your mash. Let it sit on the counter for 20 minutes before you start cooking.
- Don’t over-process. If you blend the cauliflower for too long, it can turn gummy. Stop as soon as it’s smooth and creamy.
- Season in layers. Add a pinch of salt to the steaming water, another pinch when you sauté the garlic, and then adjust at the end. This builds depth of flavor that you can’t get from just seasoning at the end.
- Keep it warm. If you’re making this ahead of time, keep the mash warm in a slow cooker on the “warm” setting, or reheat it gently on the stovetop with a splash of milk to loosen it up.
Variations & Adaptations
This recipe is wonderfully flexible. Here are a few ways to make it your own:
- Vegan Version: Swap the butter for vegan butter or olive oil, use vegan cream cheese (Kite Hill is my favorite), and replace the milk with unsweetened oat or almond milk. It’s still incredibly creamy.
- Cheesy Cauliflower Mash: Add 1/4 cup (25g) of grated Parmesan or sharp cheddar cheese along with the cream cheese. It adds a savory, umami kick that’s irresistible.
- Roasted Garlic Twist: Instead of sautéing the garlic, roast a whole head of garlic in the oven until it’s soft and caramelized, then squeeze the cloves into the food processor. It gives the mash a sweet, mellow garlic flavor that’s completely different from the sautéed version.
- Spicy Kick: Add 1/4 teaspoon of cayenne pepper or a dash of hot sauce along with the milk. The heat pairs beautifully with the cool chives.
- Herb Explosion: Swap half the chives for fresh parsley, dill, or tarragon. Each herb brings its own personality—dill makes it feel very Eastern European, while tarragon adds a subtle licorice note.
Serving & Storage Suggestions
This cauliflower mash is a team player. It pairs beautifully with almost any main dish, but here are a few of my favorite ways to serve it:
- As a side dish: Serve it alongside roasted chicken, grilled steak, or pan-seared salmon. It’s also incredible with a simple roast chicken and some pan gravy.
- As a base: Use it as a bed for saucy dishes like mushroom stroganoff, braised short ribs, or even a hearty lentil stew.
- Topped with something crunchy: A sprinkle of toasted breadcrumbs, crispy bacon bits, or fried shallots adds a wonderful textural contrast.
Storage: Store leftovers in an airtight container in the refrigerator for up to 4 days. The flavors actually meld together overnight and become even better.
Reheating: The microwave works in a pinch, but the best way to reheat is on the stovetop over low heat. Add a splash of milk or water and stir constantly until warmed through. This helps restore the creamy texture.
Freezing: You can freeze this mash for up to 3 months. Portion it into freezer-safe bags or containers. Thaw overnight in the refrigerator, then reheat gently on the stovetop. Note that the texture may be slightly less creamy after freezing, so you might want to stir in a little extra butter or milk when reheating.
Nutritional Information & Benefits
This comforting healthy cauliflower mash with chives is a nutritional powerhouse disguised as comfort food. Here’s a rough estimate per serving (based on 4 servings):
- Calories: 175
- Fat: 12g
- Carbohydrates: 12g
- Fiber: 5g
- Protein: 6g
Health Benefits: Cauliflower is packed with vitamin C, vitamin K, and fiber, making it great for digestion and immune health. It’s also naturally low in carbs, which makes this dish a fantastic option for those following a low-carb or keto lifestyle. The chives add a boost of antioxidants and a subtle amount of vitamin A. Plus, by swapping out potatoes, you’re cutting the calories and carbs by more than half while still getting that same comforting, creamy experience.
Dietary Considerations: This recipe is naturally gluten-free. For a dairy-free version, follow the vegan variation above. It’s also low-carb and keto-friendly, with only about 6g of net carbs per serving.
Conclusion
This comforting healthy cauliflower mash with chives has become a staple in my kitchen for a reason. It’s the recipe that proves you don’t have to sacrifice flavor for health, and that sometimes the best dishes come from late-night experiments in a quiet kitchen. Whether you’re looking for a lighter side dish for a holiday table or just need a warm, comforting bowl on a cold night, this mash delivers every single time. I love how forgiving it is—you can tweak it, add to it, and make it your own without fear of messing it up. So go ahead, give it a try. And if you come up with your own variation, I’d love to hear about it in the comments. Happy cooking, friends!
Frequently Asked Questions
Can I use frozen cauliflower for this recipe?
Yes, you can! Just make sure to thaw it completely and squeeze out as much moisture as possible with a clean kitchen towel before steaming. Frozen cauliflower tends to hold more water, so this step is extra important to avoid a watery mash.
Why is my cauliflower mash watery?
The most common culprit is not drying the cauliflower after steaming. Cauliflower is naturally high in water content, and if you don’t let it sit on a towel for a few minutes after cooking, that excess moisture will end up in your mash. Another tip: don’t boil the cauliflower—steaming is better because it keeps the florets from absorbing extra water.
Can I make this cauliflower mash ahead of time?
Absolutely. You can make it up to 2 days in advance and store it in the refrigerator. When you’re ready to serve, reheat it gently on the stovetop with a splash of milk to restore the creamy texture. It’s a great make-ahead side dish for holiday meals.
What can I use instead of cream cheese?
If you don’t have cream cheese, you can use 2 tablespoons of butter or a dollop of sour cream. For a dairy-free option, try a vegan cream cheese or a spoonful of coconut cream. The texture will be slightly different, but it will still be delicious.
How do I make this cauliflower mash extra smooth?
The key is using a high-speed blender or food processor and processing it for a full 45 seconds, scraping down the sides halfway through. Make sure your cauliflower is very tender before blending—if it’s even a little undercooked, you’ll end up with a grainy texture. Also, don’t be shy with the butter or cream cheese; they’re what give it that silky mouthfeel.
Pin This Recipe!
Easy Healthy Cauliflower Mash with Fresh Chives
This creamy, buttery cauliflower mash is a comforting and healthy alternative to mashed potatoes. Made with simple ingredients and ready in under 30 minutes, it’s a crowd-pleasing side dish that proves healthy eating doesn’t mean sacrificing flavor.
- Prep Time: 10 minutes
- Cook Time: 15 minutes
- Total Time: 25 minutes
- Yield: 4 servings 1x
- Category: Side Dish
- Cuisine: American
Ingredients
- 1 large head of cauliflower (about 2 lbs or 900g), cut into florets
- 2 tablespoons unsalted butter
- 2 ounces cream cheese, softened
- 1/4 cup milk (whole milk preferred, or 2% or unsweetened almond milk)
- 2 cloves garlic, minced
- 1/4 cup fresh chives, finely chopped (plus extra for garnish)
- 1/2 teaspoon salt (plus more to taste)
- 1/4 teaspoon black pepper (freshly ground)
- Optional: 1 tablespoon sour cream
Instructions
- Prepare the cauliflower: Remove the leaves and tough core from the cauliflower, then cut it into evenly sized florets. Rinse them well and let them drain in a colander.
- Steam the cauliflower: Fill a large pot with about 1 inch (2.5 cm) of water and bring it to a boil. Place the florets in a steamer basket, cover the pot, and reduce the heat to medium. Steam for 12-15 minutes, or until a fork slides into the thickest part of a floret with no resistance.
- Dry the cauliflower: Carefully transfer the steamed florets to a clean kitchen towel or a few layers of paper towels. Let them sit for 2-3 minutes to release excess steam and moisture.
- Sauté the garlic: While the cauliflower is cooling, melt the butter in a small skillet over medium heat. Add the minced garlic and cook for 30-60 seconds until fragrant, just until it starts to turn golden. Remove from heat immediately.
- Blend the mash: Transfer the dried cauliflower florets to a food processor. Add the sautéed garlic and butter, the softened cream cheese, milk, salt, and pepper. If using the optional sour cream, add it now. Process for 30-45 seconds, scraping down the sides halfway through, until the mixture is completely smooth and creamy.
- Fold in the chives: Transfer the mash to a serving bowl and gently fold in the chopped chives with a rubber spatula. Reserve a small pinch of chives for garnish. Taste and adjust the salt and pepper if needed.
- Serve immediately: Spoon the mash into bowls, top with a pat of butter (if desired), and sprinkle with the reserved chives. Serve hot.
Notes
For the best texture, make sure your cauliflower is very dry before steaming. If using frozen cauliflower, thaw it completely and squeeze out as much moisture as possible with a clean kitchen towel. Let the cream cheese come to room temperature to prevent lumps. Don’t over-process the mash or it can become gummy. Season in layers for depth of flavor. Store leftovers in an airtight container in the refrigerator for up to 4 days. Reheat gently on the stovetop with a splash of milk. Can be frozen for up to 3 months.
Nutrition
- Serving Size: 1 serving (about 1 c
- Calories: 175
- Sugar: 4
- Sodium: 380
- Fat: 12
- Saturated Fat: 7
- Carbohydrates: 12
- Fiber: 5
- Protein: 6
Keywords: cauliflower mash, healthy side dish, low-carb, keto, gluten-free, vegetarian, comfort food, easy recipe


