My neighbor Mark asked why I couldn’t just cook the chicken and the vegetables in the same pan. I was making my usual complicated weeknight dinner routine—chicken in one skillet, green beans in another, a third pot for rice. I started to explain why that wouldn’t work, something about cooking times and moisture levels and the risk of soggy vegetables. Then I stopped. Honestly, I had no good reason. I just always did it that way.
So I tried it. I threw some chicken thighs into a hot pan, seared them until the skin turned that deep golden color you dream about, then added green beans and cherry tomatoes right alongside them. I finished it all with a garlic butter sauce that came together in the same pan. The power went out halfway through—okay, not really, but I did have to stop and answer the door for a package delivery while the garlic started to brown a little more than I planned. It was fine. Better than fine.
That first bite had this unexpected balance. The chicken was juicy, the vegetables were tender but not mushy, and that garlic butter sauce tied everything together without being heavy. Mark was right. I mean, he was completely right. And I’ve been making this light & savory one-pan garlic butter chicken thighs recipe ever since. Maybe you’ve been there, doing things the hard way because you never questioned them. Let me tell you—this is the easier way. And it tastes better, too.
Why You’ll Love This Recipe
This isn’t just another chicken recipe. After testing this dish about seven times (someone had to eat all that chicken), I can say with confidence that this version hits differently. Here’s what makes it special:
- Quick & Easy: From start to table in under 35 minutes. Perfect for those evenings when you’re staring at the fridge wondering what’s for dinner.
- Simple Ingredients: You probably have garlic, butter, chicken thighs, and a few vegetables in your kitchen right now. No fancy trips to specialty stores.
- Perfect for Busy Weeknights: One pan means minimal cleanup. That’s a win in my book.
- Crowd-Pleaser: My picky-eating nephew actually asked for seconds. That never happens.
- Light Yet Satisfying: The garlic butter sauce feels indulgent, but the fresh vegetables and lean cooking method keep it from being heavy.
What makes this recipe different from the rest? It’s the technique. By searing the chicken first and then finishing everything together, you get that crispy skin and tender meat without drying anything out. The garlic butter sauce comes together naturally from the pan drippings—no extra steps, no separate bowls. It’s comfort food reimagined. Lighter, faster, but with the same soul-soothing satisfaction that makes you close your eyes after the first bite. Perfect for impressing guests without stress, or turning a simple Tuesday into something memorable.
What Ingredients You Will Need
This recipe uses simple, wholesome ingredients to deliver bold flavor and satisfying texture without the fuss. Most of these are pantry staples, which makes this dish perfect for last-minute cooking.
For the Chicken
- 4 bone-in, skin-on chicken thighs (about 1.5 pounds total) — The bone keeps the meat juicy, and the skin gets beautifully crispy. I prefer organic chicken from a trusted brand like Bell & Evans when I can find it.
- 1 teaspoon salt — I use fine sea salt for even seasoning.
- 1/2 teaspoon black pepper — Freshly ground tastes best.
- 1/2 teaspoon garlic powder — Adds an extra layer of savory flavor (adds depth).
- 1 tablespoon olive oil — For searing the chicken. Avocado oil works too.
For the Vegetables
- 1 cup green beans, trimmed — Fresh green beans hold up well to roasting. In summer, swap in fresh asparagus instead.
- 1 cup cherry tomatoes — They burst during cooking and create a natural sauce. Look for firm, ripe tomatoes.
- 1 medium zucchini, sliced into half-moons — Adds lightness and soaks up the garlic butter beautifully.
- 1/2 teaspoon salt — For seasoning the vegetables.
- 1/4 teaspoon red pepper flakes (optional) — Adds a gentle warmth without being spicy.
For the Garlic Butter Sauce
- 4 tablespoons unsalted butter — I recommend Kerrygold for its rich flavor. Use dairy-free butter if needed.
- 6 cloves garlic, minced — Fresh garlic is non-negotiable here. Pre-minced jarred garlic won’t give the same result.
- 2 tablespoons fresh lemon juice — Adds brightness that cuts through the richness.
- 2 tablespoons chicken broth — Helps deglaze the pan and creates more sauce. Use vegetable broth if needed.
- 2 tablespoons fresh parsley, chopped — For garnish and freshness.
Equipment Needed
You don’t need a professional kitchen for this one. Here’s what you’ll need:
- A large oven-safe skillet — I use a 12-inch cast iron skillet. It holds heat beautifully and gives the chicken that perfect crust. If you don’t have cast iron, a stainless steel skillet works great too.
- Tongs — For flipping the chicken without piercing the skin. Trust me, trying to use a fork will only release those precious juices.
- A sharp knife — For mincing garlic and trimming green beans. I’ve been using the same Wusthof chef’s knife for years, and it makes prep work so much faster.
- Cutting board — Wood or plastic, whatever you have.
- Measuring spoons — For the seasonings and butter.
If you don’t have an oven-safe skillet, you can transfer the chicken and vegetables to a baking dish after searing. Just add a few extra minutes to the cooking time. Budget-friendly tip: a Lodge cast iron skillet costs around $25 and will last forever. I still use the one my grandmother passed down.
Preparation Method
Let’s get cooking. This comes together faster than you think, so have everything prepped and ready before you start.
- Preheat your oven to 400°F (200°C). This gives it time to come to temperature while you work on the stovetop.
- Pat the chicken thighs dry with paper towels. This is crucial for crispy skin. Wet skin steams instead of sears. Season both sides with salt, pepper, and garlic powder. Let them sit at room temperature for 10 minutes while you prep the vegetables.
- Heat olive oil in your oven-safe skillet over medium-high heat. When the oil shimmers and moves easily around the pan, it’s ready. Place the chicken thighs skin-side down in the skillet. Listen for that satisfying sizzle—if it doesn’t sizzle, the pan isn’t hot enough.
- Sear the chicken for 5-6 minutes without moving them. I know it’s tempting to peek, but leave them alone. The skin will release naturally when it’s properly browned. Flip using tongs and cook for another 3 minutes on the other side. The chicken should look deeply golden and smell incredible.
- Remove the chicken to a plate. Don’t wipe out the pan—those browned bits at the bottom are pure flavor.
- Add the green beans, cherry tomatoes, and zucchini to the same skillet. Sprinkle with salt and red pepper flakes if using. Toss them in the rendered chicken fat for about 2 minutes, just until they start to soften slightly.
- Nestle the chicken thighs back into the skillet, skin-side up, among the vegetables. They should be sitting on top of or nestled between the vegetables, not buried.
- Transfer the skillet to the preheated oven. Roast for 15-18 minutes, or until the chicken reaches an internal temperature of 165°F (74°C) and the vegetables are tender. The tomatoes should be starting to burst and release their juices.
- While the chicken roasts, make the garlic butter sauce. In a small saucepan over low heat, melt the butter. Add the minced garlic and cook for 30 seconds until fragrant—don’t let it brown or it will turn bitter. Stir in the lemon juice and chicken broth. Let it simmer gently for 1 minute, then remove from heat.
- Remove the skillet from the oven. Pour the garlic butter sauce evenly over the chicken and vegetables. The sizzling sound is pure magic. Let it rest for 5 minutes before serving—this lets the juices redistribute and the sauce soak into everything.
- Sprinkle with fresh parsley and serve directly from the skillet. One pan, minimal dishes, maximum flavor.
Cooking Tips & Techniques
After making this dish more times than I care to count, I’ve picked up a few tricks that make a real difference.
Don’t skip the drying step. That first time I made this, I was in a hurry and didn’t pat the chicken dry. The skin turned out pale and rubbery instead of crispy. Now I even let the seasoned chicken sit uncovered in the fridge for 15 minutes if I have time. That extra drying makes a huge difference.
Watch your garlic. I learned this the hard way. Burnt garlic tastes bitter and will ruin your sauce. Keep the heat low when making the garlic butter, and pull it off the heat as soon as it becomes fragrant. If you’re multitasking (like I usually am), set a timer for 30 seconds.
Use a meat thermometer. Chicken thighs are forgiving, but you still want to hit that 165°F mark. I use an instant-read thermometer from Thermapen that gives me a reading in 3 seconds. No more cutting into chicken to check if it’s done.
Let the pan do the work. When searing, resist the urge to move the chicken around. The Maillard reaction—that browning that creates flavor—needs direct contact with hot metal. Moving the chicken interrupts that process. Trust the sizzle.
Variations & Adaptations
This recipe is flexible. Here are some ways to make it your own:
- Make it dairy-free: Swap the butter for a high-quality vegan butter or use olive oil mixed with a splash of coconut cream for richness. I tried this with Miyoko’s vegan butter and it worked beautifully.
- Change up the vegetables: In spring, use asparagus and peas. In fall, try butternut squash cubes and Brussels sprouts. Just adjust cooking times based on density—harder vegetables need a head start.
- Go boneless: Use boneless, skinless chicken thighs and reduce the roasting time to 12-14 minutes. The skin won’t be crispy, but the meat will still be juicy and flavorful.
- Add some heat: Double the red pepper flakes or add a sliced jalapeño along with the vegetables. My husband loves this version.
- Make it a complete meal: Add small potatoes or chickpeas to the vegetable mix. They’ll roast alongside the chicken and soak up all that garlic butter goodness.
Serving & Storage Suggestions
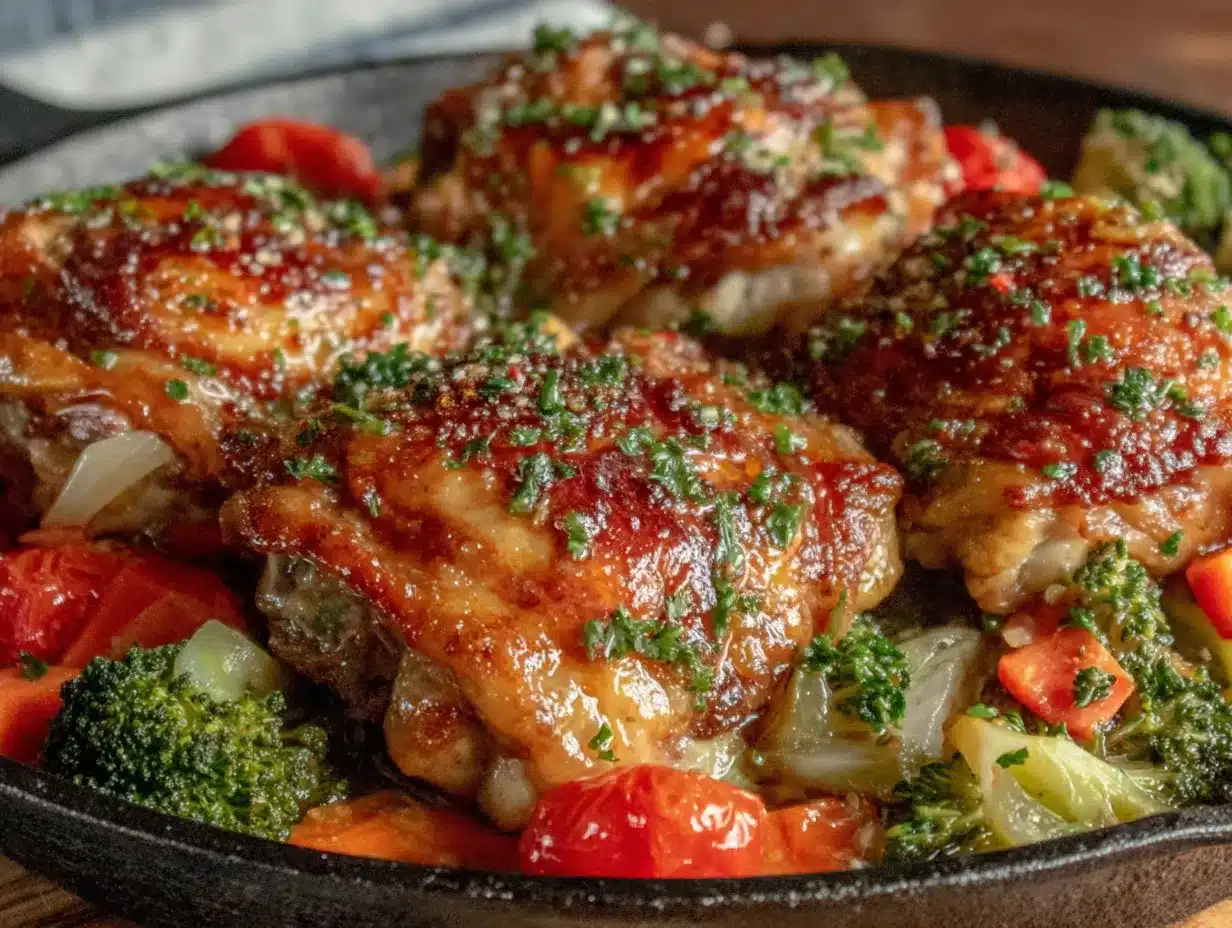
Serve this dish hot, straight from the skillet. The visual is stunning—golden chicken, bright green beans, burst tomatoes, and that glossy garlic butter sauce. I like to spoon extra sauce over everything right before serving.
This pairs beautifully with crusty bread to soak up every drop of sauce. A side of rice, quinoa, or cauliflower rice also works well. For a low-carb option, serve it over a bed of arugula that wilts slightly from the warmth.
Storage: Leftovers keep in an airtight container in the refrigerator for up to 3 days. The flavors actually deepen overnight—the garlic butter seeps into everything beautifully.
Reheating: The best way is in a skillet over medium heat with a splash of chicken broth to rehydrate the sauce. Microwave works in a pinch but won’t revive the crispy skin. I don’t recommend freezing this dish, as the vegetables will become mushy when thawed.
Nutritional Information & Benefits
Per serving (based on 4 servings, using all sauce):
- Calories: 385
- Protein: 32g
- Fat: 26g
- Carbohydrates: 8g
- Fiber: 3g
- Sugar: 4g
This dish fits beautifully into a balanced eating plan. Chicken thighs provide high-quality protein and essential B vitamins. The vegetables add fiber, vitamins A and C, and antioxidants. Garlic offers anti-inflammatory properties and supports immune health. Using butter in moderation adds fat-soluble vitamin absorption without making the dish heavy.
If you’re watching your calorie intake, you can reduce the butter to 2 tablespoons and still get plenty of flavor. For a lower-fat option, remove the chicken skin before eating—though I think that’s a tragedy worth avoiding.
Conclusion
This light & savory one-pan garlic butter chicken thighs recipe has become my go-to for so many reasons. It’s quick enough for a busy Tuesday, impressive enough for company, and light enough that you don’t feel weighed down afterward. That neighbor Mark still brings it up whenever I see him.
I love how this dish proves that simple ingredients, treated with care, can create something truly special. You don’t need complicated techniques or exotic ingredients. Just good chicken, fresh vegetables, and a garlic butter sauce that ties everything together.
I’d love to hear how this turns out for you. Did you try a different vegetable combination? Add your own twist? Drop a comment below and let me know. And if you make this for someone special, watch their face after that first bite—it’s worth it every single time. Happy cooking!
Frequently Asked Questions
Can I use chicken breasts instead of thighs?
Yes, but be careful. Chicken breasts cook faster and can dry out. Use boneless, skinless breasts and reduce the roasting time to 12-15 minutes. Check for doneness at 160°F, then let them rest—they’ll come up to 165°F while resting.
What if I don’t have an oven-safe skillet?
No problem. Sear the chicken in any skillet, then transfer everything to a baking dish or sheet pan for roasting. Add 5 minutes to the cooking time to account for the heat transfer.
Can I prep this ahead of time?
Absolutely. Season the chicken and chop the vegetables up to a day in advance. Store them separately in the fridge. When you’re ready to cook, just pull everything out and start searing. The whole process takes about 25 minutes from there.
How do I know when the chicken is done without a thermometer?
Cut into the thickest part of the thigh. The juices should run clear, not pink. The meat should feel firm but not hard when pressed. A meat thermometer is more reliable, but this method works in a pinch.
Can I make this in an air fryer?
Yes, but you’ll need to cook in batches. Preheat the air fryer to 375°F. Cook the chicken for 12-15 minutes, then add the vegetables for the last 5 minutes. Make the garlic butter sauce on the stovetop while everything cooks. The texture will be slightly different but still delicious.
Pin This Recipe!

Light & Savory One-Pan Garlic Butter Chicken Thighs

Juicy bone-in, skin-on chicken thighs are seared to golden perfection and roasted alongside fresh green beans, cherry tomatoes, and zucchini, all finished with a luscious garlic butter sauce. This quick and easy one-pan meal delivers big flavor with minimal cleanup, perfect for busy weeknights.
- Prep Time: 10 minutes
- Cook Time: 25 minutes
- Total Time: 35 minutes
- Yield: 4 servings 1x
- Category: Main Course
- Cuisine: American
Ingredients
- 4 bone-in, skin-on chicken thighs (about 1.5 pounds total)
- 1 teaspoon fine sea salt
- 1/2 teaspoon freshly ground black pepper
- 1/2 teaspoon garlic powder
- 1 tablespoon olive oil
- 1 cup green beans, trimmed
- 1 cup cherry tomatoes
- 1 medium zucchini, sliced into half-moons
- 1/2 teaspoon salt
- 1/4 teaspoon red pepper flakes (optional)
- 4 tablespoons unsalted butter
- 6 cloves garlic, minced
- 2 tablespoons fresh lemon juice
- 2 tablespoons chicken broth
- 2 tablespoons fresh parsley, chopped
Instructions
- Preheat your oven to 400°F (200°C).
- Pat the chicken thighs dry with paper towels. Season both sides with salt, pepper, and garlic powder. Let them sit at room temperature for 10 minutes while you prep the vegetables.
- Heat olive oil in your oven-safe skillet over medium-high heat. When the oil shimmers, place the chicken thighs skin-side down in the skillet.
- Sear the chicken for 5-6 minutes without moving them. Flip using tongs and cook for another 3 minutes on the other side. The chicken should look deeply golden.
- Remove the chicken to a plate. Do not wipe out the pan.
- Add the green beans, cherry tomatoes, and zucchini to the same skillet. Sprinkle with salt and red pepper flakes if using. Toss them in the rendered chicken fat for about 2 minutes, just until they start to soften slightly.
- Nestle the chicken thighs back into the skillet, skin-side up, among the vegetables.
- Transfer the skillet to the preheated oven. Roast for 15-18 minutes, or until the chicken reaches an internal temperature of 165°F (74°C) and the vegetables are tender.
- While the chicken roasts, make the garlic butter sauce. In a small saucepan over low heat, melt the butter. Add the minced garlic and cook for 30 seconds until fragrant. Stir in the lemon juice and chicken broth. Let it simmer gently for 1 minute, then remove from heat.
- Remove the skillet from the oven. Pour the garlic butter sauce evenly over the chicken and vegetables. Let it rest for 5 minutes before serving.
- Sprinkle with fresh parsley and serve directly from the skillet.
Notes
Pat the chicken dry for crispy skin. Watch the garlic carefully to avoid burning. Use a meat thermometer for perfect doneness. Let the pan do the work when searing—don’t move the chicken. For dairy-free, use vegan butter or olive oil with coconut cream. Leftovers keep in the fridge for up to 3 days; reheat in a skillet with a splash of broth.
Nutrition
- Serving Size: 1 serving (1 chicken
- Calories: 385
- Sugar: 4
- Sodium: 780
- Fat: 26
- Saturated Fat: 12
- Carbohydrates: 8
- Fiber: 3
- Protein: 32
Keywords: one-pan chicken, garlic butter chicken, chicken thighs, easy weeknight dinner, one skillet meal, healthy chicken recipe


