It was 11:17 PM on a drizzly Tuesday in late September, and I had a very specific craving for something warm, buttery, and full of chocolate. I didn’t have the energy for a full batch of cookies—honestly, who needs 36 cookies staring at them from the counter at midnight?—but I had a single stick of butter and a desperate idea. I wanted that first bite of a cookie that’s still slightly warm, where the chocolate is melty and the edges are just this side of crispy. So I did what any reasonable person would do at that hour: I experimented with a tiny batch, hoping my late-night impulse wouldn’t lead to disappointment.
The result was so good I actually texted my sister a photo at midnight, which she did not appreciate until the next morning. But that’s the thing about small batch baking—it feels less like a project and more like a secret. You’re not committing to a week’s worth of desserts. You’re just making enough to satisfy that cozy fall feeling, maybe with a cup of tea or a glass of cold milk. I mean, let’s be real, there’s something magical about a kitchen that smells like butter and sugar on a cool autumn evening.
These perfect small batch chocolate chip cookies have become my go-to for those quiet moments when you want something homemade without the fuss. They’re crisp on the edges, chewy in the middle, and packed with just the right amount of chocolate chips. Maybe you’ve been there—standing in your kitchen, craving a cookie but not wanting to commit to a massive batch. This one’s for you. It’s the kind of recipe that makes you feel like you’ve discovered a little secret, and honestly, I keep making them because they never disappoint.
Why You’ll Love This Recipe
Let me tell you why these cookies have earned a permanent spot in my fall baking rotation. After testing this recipe at least a dozen times—sometimes with melted butter, sometimes with chilled, and once with a disastrous amount of salt that I’d rather not discuss—I can confidently say this version hits every note perfectly.
- Quick & Easy: From start to finish, these cookies take about 20 minutes. No chilling required, which is huge when you’re hit with a sudden craving on a Tuesday night.
- Simple Ingredients: You probably have everything in your kitchen right now. No need for specialty flours or fancy extracts—just basic baking staples.
- Perfect for Cozy Fall Evenings: These cookies pair beautifully with a hot cup of apple cider or a pumpkin spice latte. They’re the ideal companion for a crisp autumn night.
- Crowd-Pleaser: Even though it’s a small batch, don’t be surprised if these disappear within minutes. The texture and flavor are exactly what you want in a chocolate chip cookie.
- Unbelievably Delicious: The secret is in the technique—melting the butter creates a chewier texture, and a sprinkle of flaky sea salt at the end takes these cookies from good to unforgettable.
What makes this recipe different from the rest? It’s the balance. I’ve tested versions with brown sugar only, white sugar only, and every ratio in between. This specific blend gives you that deep caramel flavor from the brown sugar while the white sugar helps create those beautiful crispy edges. It’s not just another chocolate chip cookie recipe—it’s your best version for those moments when you want something special without the hassle.
These cookies are the kind that make you close your eyes after the first bite. They’re comfort food reimagined—faster, simpler, but with the same soul-soothing satisfaction. Perfect for impressing yourself on a quiet evening or sharing with someone who deserves a warm, homemade treat.
What Ingredients You Will Need
This recipe uses simple, wholesome ingredients to deliver bold flavor and satisfying texture without the fuss. Most of these are pantry staples, but I’ll share a few tips I’ve learned from making these cookies countless times.
- Unsalted butter, melted (4 tablespoons or 57g): Melting the butter is key here—it creates a chewier cookie with a deeper flavor. I prefer using unsalted so I can control the salt level, but if you only have salted butter, just reduce the added salt by a pinch.
- Light brown sugar, packed (¼ cup or 50g): This gives the cookies their signature chewiness and that warm, caramel-like flavor. Make sure you pack it firmly into the measuring cup for accuracy.
- Granulated sugar (2 tablespoons or 25g): The white sugar helps create those crispy edges that contrast so beautifully with the soft center.
- Large egg yolk (1): Using just the yolk instead of the whole egg reduces moisture, which means less spreading and a thicker, more satisfying cookie. Save the egg white for breakfast or a quick omelet.
- Vanilla extract (½ teaspoon): Pure vanilla extract makes a difference here. I’ve tried imitation vanilla, and honestly, the flavor just isn’t as warm and rich.
- All-purpose flour (¾ cup or 96g): Spoon and level your flour—don’t scoop directly from the bag, or you’ll end up with dry, dense cookies. Trust me, I learned this the hard way.
- Baking soda (¼ teaspoon): This helps the cookies spread just enough and gives them a nice lift.
- Salt (¼ teaspoon): Salt balances the sweetness and enhances the chocolate flavor. Don’t skip it!
- Chocolate chips (½ cup or 85g): I recommend using a mix of semi-sweet and dark chocolate chips for a more complex flavor. Ghirardelli and Guittard are my go-to brands, but any good-quality chip works beautifully.
- Flaky sea salt (for topping, optional but highly recommended): A tiny sprinkle right when the cookies come out of the oven elevates them to something truly special.
For a seasonal twist, try swapping half the chocolate chips for chopped toasted pecans or walnuts. In summer, you could add some dried cherries or even a few white chocolate chips for a different vibe. The beauty of this small batch is that it’s easy to experiment without wasting ingredients.
Equipment Needed
You don’t need much for this recipe, which is part of its charm. Here’s what you’ll want to have on hand:
- Mixing bowls: One medium bowl for the wet ingredients and one small bowl for the dry. I use a set of nesting glass bowls that are easy to clean.
- Whisk: For combining the sugars and butter. A fork works in a pinch, but a whisk makes it much easier.
- Rubber spatula: For folding in the chocolate chips and scraping down the bowl. A wooden spoon also works, but the spatula gets every last bit.
- Baking sheet: A small quarter-sheet pan is perfect for six cookies. If you only have a full-size sheet, that’s fine too—just make sure it’s not warped, or your cookies might spread unevenly.
- Parchment paper or silicone baking mat: This prevents sticking and makes cleanup a breeze. I’ve used both, and honestly, parchment paper is my favorite because it’s disposable and always reliable.
- Cookie scoop or tablespoon: A 1.5-tablespoon scoop gives you perfectly uniform cookies. If you don’t have one, just use a regular tablespoon and try to make them roughly the same size.
- Cooling rack: Not strictly necessary, but it helps the cookies cool evenly and keeps them from getting soggy on the bottom.
I’ve made these cookies with just a fork and a baking sheet when I was traveling, and they still turned out great. The equipment is flexible—don’t let a missing tool stop you from making these.
Preparation Method
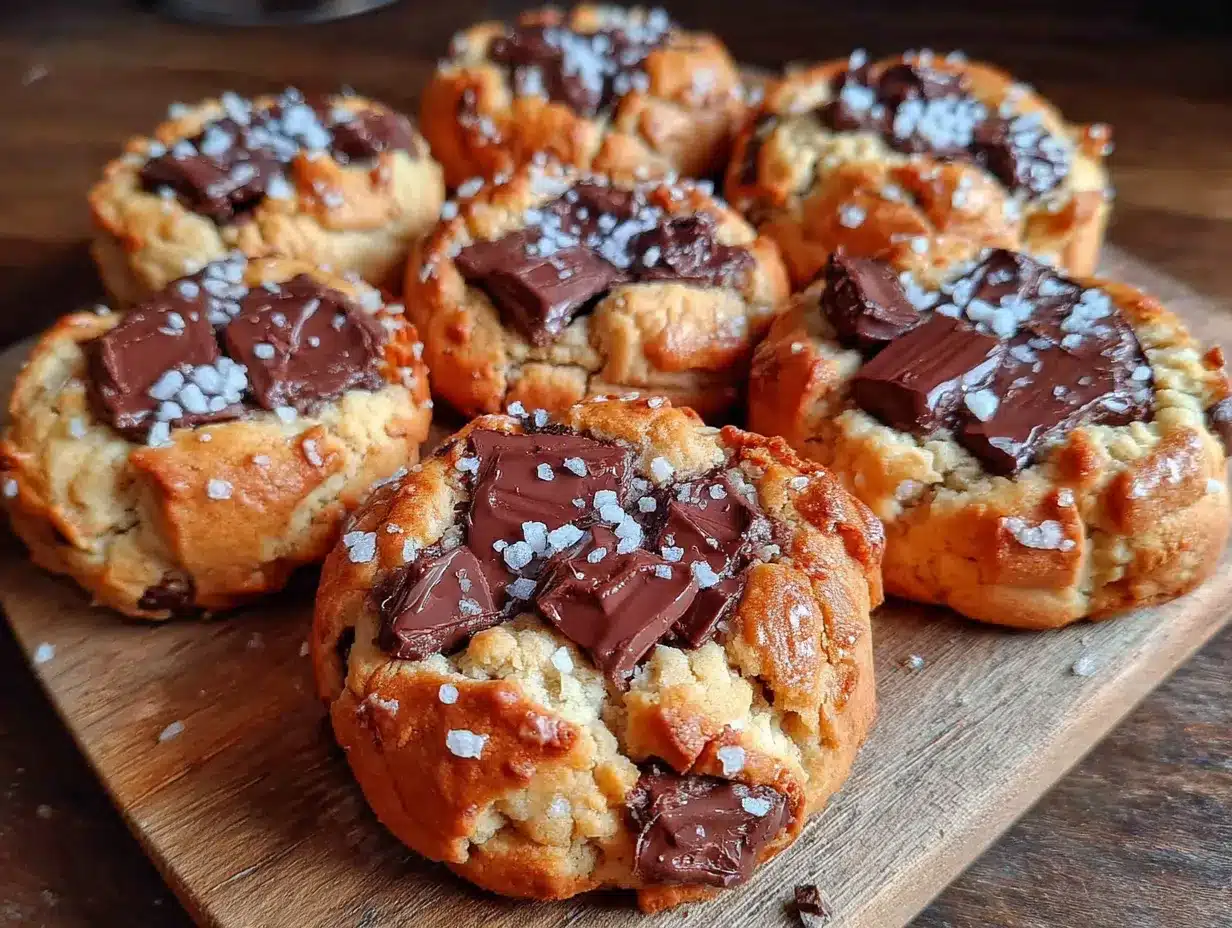
- Preheat your oven to 350°F (175°C) and line a small baking sheet with parchment paper. This ensures the cookies bake evenly and don’t stick.
- Melt the butter in a small microwave-safe bowl for about 30 seconds, or until fully melted. Let it cool for a minute—you don’t want it hot enough to cook the egg yolk when you mix everything together.
- In a medium mixing bowl, combine the melted butter, brown sugar, and granulated sugar. Whisk vigorously for about 30 seconds until the mixture looks smooth and slightly thickened. This step is important—it helps dissolve the sugar and creates a better texture.
- Add the egg yolk and vanilla extract to the sugar-butter mixture. Whisk until everything is well combined and the mixture looks glossy. It should smell amazing at this point.
- In a separate small bowl, whisk together the flour, baking soda, and salt. Make sure the baking soda is evenly distributed—nobody wants a pocket of baking soda in their cookie.
- Add the dry ingredients to the wet ingredients and fold together with a rubber spatula until just combined. Be careful not to overmix; stop as soon as you no longer see streaks of flour. Overmixing develops the gluten and makes the cookies tough.
- Fold in the chocolate chips gently, reserving a few to press into the tops of the cookies later. This gives them that bakery-style look.
- Scoop the dough into 6 equal portions (about 1.5 tablespoons each) and place them on the prepared baking sheet, spacing them about 2 inches apart. These cookies spread, so give them room.
- Press a few extra chocolate chips into the tops of each dough ball. This is a small step that makes a big visual difference.
- Bake for 10-12 minutes, or until the edges are golden brown and the centers look slightly underdone. The cookies will continue to bake on the hot sheet after you take them out, so don’t wait until they look fully done in the oven.
- Remove from the oven and immediately sprinkle with flaky sea salt if using. Let the cookies cool on the baking sheet for 5 minutes, then transfer to a cooling rack.
- Let them cool for at least 10 minutes before serving—if you can wait that long. I usually cave after about 7 minutes and burn my tongue, but it’s always worth it.
Cooking Tips & Techniques
After making these cookies more times than I care to count, I’ve picked up a few tricks that make a real difference. Let me share what I’ve learned.
Don’t skip the butter cooling step. I once added the sugars to butter that was still hot, and the cookies spread into flat, greasy discs. Let the melted butter sit for a minute or two before adding the other ingredients. This small pause prevents the sugar from melting too quickly and helps maintain the right texture.
Weigh your ingredients if you can. I know, I know—it sounds fussy. But flour is notoriously inconsistent when measured by volume. One cup of flour can weigh anywhere from 120 to 150 grams depending on how you scoop it. Using a kitchen scale takes the guesswork out and gives you consistent results every time. I bought a $15 scale years ago, and it’s been a game-changer for my baking.
Watch the oven like a hawk. Every oven runs differently, and those last two minutes can make or break your cookies. Start checking at the 9-minute mark if your oven runs hot. The cookies are done when the edges are set and golden, but the centers still look soft and slightly puffy. They’ll set as they cool.
Let the dough rest if you have time. While this recipe works without chilling, letting the dough rest in the fridge for 30 minutes (or up to 24 hours) deepens the flavor. The flour fully hydrates, and the sugars develop a more complex caramel note. It’s not necessary, but it’s a nice option for when you’re planning ahead.
Use a cookie scoop for even sizing. Uniform cookies bake more evenly. I learned this after years of making some cookies that were burnt and others that were raw. A simple scoop costs a few dollars and makes a noticeable difference.
One mistake I still make sometimes is overmixing the dough. When I’m in a hurry, I tend to stir more aggressively, which develops the gluten and makes the cookies tough. Mix until the flour just disappears, then stop. Your cookies will thank you.
Variations & Adaptations
One of the best things about this small batch recipe is how easy it is to adapt. Here are some variations I’ve tried and loved:
Double Chocolate Chip Cookies: Replace 1 tablespoon of flour with 1 tablespoon of unsweetened cocoa powder. The cookies come out rich and fudgy, almost like a brownie in cookie form. I made these for a friend who’s a chocoholic, and she said they were the best cookies she’d ever had.
Gluten-Free Version: Swap the all-purpose flour with a 1:1 gluten-free baking flour blend. I’ve tested this with Bob’s Red Mill and King Arthur brands, and both work well. Add an extra tablespoon of flour if the dough seems too wet. The texture is slightly more delicate, but the flavor is still fantastic.
Vegan Adaptation: Use vegan butter (I like Miyoko’s or Earth Balance) and replace the egg yolk with 1 tablespoon of aquafaba (the liquid from a can of chickpeas) mixed with 1 teaspoon of cornstarch. The cookies won’t be quite as chewy, but they’re still delicious. My vegan neighbor couldn’t tell the difference.
Seasonal Add-Ins: In the fall, try adding ¼ teaspoon of cinnamon and ⅛ teaspoon of nutmeg to the dry ingredients. You can also swap half the chocolate chips for chopped toasted pecans or dried cranberries. It gives the cookies a cozy, harvest-time feel that’s perfect for autumn gatherings.
Bigger Batch: If you need more cookies, simply double or triple the recipe. The ratios scale perfectly, and you can bake them in batches or freeze the extra dough. I often make a double batch and freeze half the dough balls for later—they bake straight from frozen, just add a minute or two to the baking time.
Serving & Storage Suggestions
These cookies are best served warm, when the chocolate is still melty and the edges are perfectly crisp. I like to enjoy them with a glass of cold milk or a hot cup of chai tea. For a fall-themed treat, try them with warm apple cider or a pumpkin spice latte—the combination is pure comfort.
If you’re serving these at a gathering, arrange them on a wooden board or a simple white plate. A light dusting of powdered sugar or a drizzle of melted chocolate makes them look extra special, though honestly, they’re beautiful on their own.
Storing leftovers (if there are any): Keep the cookies in an airtight container at room temperature for up to 3 days. To maintain their texture, add a slice of bread to the container—it absorbs excess moisture and keeps the cookies soft. Replace the bread slice every day if you’re storing them longer.
Freezing instructions: You can freeze the baked cookies in a freezer-safe bag for up to 3 months. Thaw at room temperature for about 15 minutes, then warm them in a 300°F oven for 5 minutes to restore the crispy edges. Alternatively, freeze the raw dough balls on a baking sheet, then transfer them to a freezer bag. Bake from frozen, adding 2-3 minutes to the baking time.
I’ve noticed that these cookies actually taste even better the next day. The flavors meld together, and the texture becomes perfectly balanced—still chewy, but with a slightly deeper flavor. If you can resist eating them all at once, you’re in for a treat.
Nutritional Information & Benefits
Here’s the estimated nutritional breakdown for one cookie (based on 6 cookies per batch):
| Nutrient | Amount per Cookie |
|---|---|
| Calories | 245 |
| Total Fat | 13g |
| Saturated Fat | 8g |
| Cholesterol | 55mg |
| Sodium | 195mg |
| Total Carbohydrates | 30g |
| Dietary Fiber | 1g |
| Sugars | 19g |
| Protein | 3g |
While these cookies are certainly a treat, they do offer some benefits. The dark chocolate provides antioxidants and a small amount of iron, while the butter contains fat-soluble vitamins like A and E. Using dark chocolate chips instead of milk chocolate can reduce the sugar content slightly and add more depth of flavor.
If you’re watching your sugar intake, you can reduce the granulated sugar by 1 tablespoon without significantly affecting the texture. The cookies will be slightly less crispy on the edges, but still delicious. For a lower-calorie option, try using sugar-free chocolate chips, though the texture will be slightly different.
As with any indulgence, moderation is key. This small batch recipe is designed to satisfy your craving without leaving you with a week’s worth of cookies. It’s about enjoying a perfect moment without overdoing it.
Conclusion
These perfect small batch chocolate chip cookies have become my favorite fall baking project for good reason. They’re simple enough for a weeknight craving but special enough to share with someone you care about. The crispy edges, chewy centers, and melty chocolate create a combination that’s hard to beat, especially when the weather turns cool and you’re craving something warm and comforting.
I hope you give this recipe a try and make it your own. Maybe you’ll add a pinch of cinnamon, swap in white chocolate chips, or double the batch for a weekend gathering. The beauty of this recipe is its flexibility—it’s a starting point that invites experimentation. I’d love to hear how your cookies turn out, so drop a comment below and share your variations. Did you try the flaky salt? Add some nuts? I’m always looking for new ideas.
Happy baking, and here’s to cozy fall evenings filled with warm cookies and good company. You’ve got this!
Frequently Asked Questions
Can I use salted butter instead of unsalted?
Yes, you can. Just reduce the added salt in the recipe to ⅛ teaspoon to avoid overly salty cookies. The flavor will be slightly different, but still delicious.
Do I have to chill the dough?
No, this recipe works without chilling. However, if you have 30 minutes to spare, chilling the dough deepens the flavor and helps the cookies spread less. It’s optional but recommended if you have the time.
Can I make these cookies gluten-free?
Absolutely. Use a 1:1 gluten-free baking flour blend. I’ve had good results with Bob’s Red Mill and King Arthur brands. Add an extra tablespoon of flour if the dough seems too wet.
How do I know when the cookies are done baking?
The edges should be golden brown and set, while the centers still look slightly soft and underdone. They’ll continue baking on the hot sheet for a few minutes after you take them out. Don’t wait until the centers look fully done, or they’ll be overbaked.
Can I freeze the cookie dough?
Yes! Scoop the dough into balls and freeze them on a baking sheet. Once frozen, transfer to a freezer bag. Bake from frozen, adding 2-3 minutes to the baking time. You’ll have fresh cookies whenever the craving strikes.
Pin This Recipe!
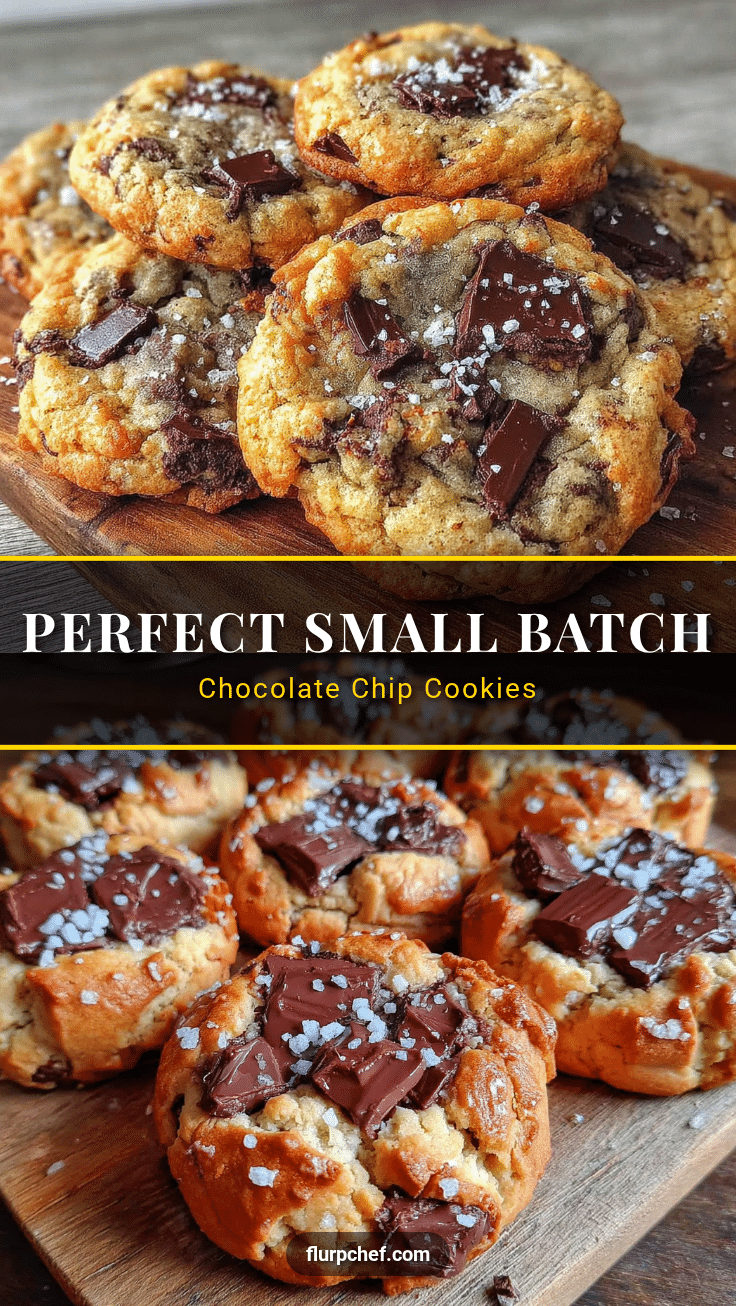
Perfect Small Batch Chocolate Chip Cookies for Cozy Fall Baking

These perfect small batch chocolate chip cookies are crisp on the edges, chewy in the middle, and packed with just the right amount of chocolate chips. They’re the ideal companion for a crisp autumn night, satisfying your craving without committing to a massive batch.
- Prep Time: 10 minutes
- Cook Time: 12 minutes
- Total Time: 22 minutes
- Yield: 6 cookies 1x
- Category: Dessert
- Cuisine: American
Ingredients
- 4 tablespoons (57g) unsalted butter, melted
- 1/4 cup (50g) light brown sugar, packed
- 2 tablespoons (25g) granulated sugar
- 1 large egg yolk
- 1/2 teaspoon vanilla extract
- 3/4 cup (96g) all-purpose flour
- 1/4 teaspoon baking soda
- 1/4 teaspoon salt
- 1/2 cup (85g) chocolate chips (mix of semi-sweet and dark recommended)
- Flaky sea salt for topping (optional)
Instructions
- Preheat your oven to 350°F (175°C) and line a small baking sheet with parchment paper.
- Melt the butter in a small microwave-safe bowl for about 30 seconds, or until fully melted. Let it cool for a minute.
- In a medium mixing bowl, combine the melted butter, brown sugar, and granulated sugar. Whisk vigorously for about 30 seconds until smooth and slightly thickened.
- Add the egg yolk and vanilla extract to the sugar-butter mixture. Whisk until well combined and glossy.
- In a separate small bowl, whisk together the flour, baking soda, and salt.
- Add the dry ingredients to the wet ingredients and fold together with a rubber spatula until just combined. Do not overmix.
- Fold in the chocolate chips gently, reserving a few to press into the tops of the cookies later.
- Scoop the dough into 6 equal portions (about 1.5 tablespoons each) and place them on the prepared baking sheet, spacing them about 2 inches apart.
- Press a few extra chocolate chips into the tops of each dough ball.
- Bake for 10-12 minutes, or until the edges are golden brown and the centers look slightly underdone.
- Remove from the oven and immediately sprinkle with flaky sea salt if using. Let the cookies cool on the baking sheet for 5 minutes, then transfer to a cooling rack.
- Let them cool for at least 10 minutes before serving.
Notes
For best results, let the melted butter cool for a minute before adding sugars. Weigh ingredients for consistency. Watch the oven closely; cookies are done when edges are golden but centers still soft. Dough can be chilled for 30 minutes to deepen flavor. Store in an airtight container at room temperature for up to 3 days. Freeze baked cookies or raw dough balls for up to 3 months.
Nutrition
- Serving Size: 1 cookie
- Calories: 245
- Sugar: 19
- Sodium: 195
- Fat: 13
- Saturated Fat: 8
- Carbohydrates: 30
- Fiber: 1
- Protein: 3
Keywords: small batch chocolate chip cookies, fall baking, easy cookie recipe, chewy cookies, crispy edges


