My husband swore he hated chocolate lava cake. For three whole years of marriage, he dodged it at restaurants, wrinkled his nose at bakery versions, and insisted the gooey center was “just undercooked batter.” I let it slide because, honestly, who argues about dessert preferences? Then last Tuesday, I made a single ramekin of this keto version just to test the recipe for a friend, and I found him standing at the kitchen counter at 9 PM, spoon already in hand, muttering something about “needing to verify the texture.” He finished the entire thing before I could even take a photo. I mean, I just stood there with my phone out, watching him scrape the last bit of chocolate from the ceramic. He didn’t even offer me a bite. That’s when I knew this recipe was something special.
The thing is, I’d been trying to perfect a keto-friendly lava cake for months. The first batch turned out like chocolate hockey pucks. The second one was a soupy mess that never set. But this version? It hit that sweet spot where the outside bakes into a tender, cakey shell while the center stays rich and molten. And it doesn’t taste like a compromise at all. No weird aftertaste, no grainy texture from alternative flours. It just tastes like pure, indulgent chocolate. Maybe you’ve been there too, searching for a low-carb dessert that actually delivers on flavor without making you feel like you’re eating cardboard. Honestly, I think this might be the one.
What makes this recipe stick with me isn’t just that it converted a lava cake skeptic. It’s that it takes ten minutes from start to finish, uses ingredients I always have on hand, and makes me feel like I’m getting away with something. You know that feeling when something this good shouldn’t be this easy? That’s this cake. And now I make it every time I need a quick dessert that feels fancy but requires zero effort.
Why You’ll Love This Recipe
Let me tell you why this keto chocolate lava cake has become my go-to dessert for everything from weeknight cravings to dinner parties. I’ve tested this recipe more times than I care to admit, and every single batch has confirmed what I already suspected: this is the best low-carb lava cake out there.
- Quick & Easy: Comes together in under 10 minutes, perfect for those sudden chocolate emergencies or last-minute dinner guests. I’ve made this while talking on the phone and it still turned out perfect.
- Simple Ingredients: No fancy grocery trips needed. You likely already have almond flour, cocoa powder, butter, eggs, and a low-carb sweetener in your kitchen. I keep these staples on hand specifically for this recipe.
- Perfect for Keto Dieters: With only 3 grams of net carbs per serving, this fits seamlessly into a keto or low-carb lifestyle without sacrificing the dessert experience.
- Crowd-Pleaser: Every single person I’ve served this to has asked for the recipe, including my non-keto friends and family. It’s that good.
- Unbelievably Delicious: The contrast between the tender almond flour cake and the molten chocolate center is next-level comfort food. You won’t believe it’s sugar-free.
What makes this recipe different from the rest is the technique. I spent weeks tweaking the ratio of almond flour to cocoa powder to get that perfect structure that holds up during baking but collapses into gooeyness when you break through the surface. The secret is using melted butter instead of oil, which gives the cake a richer mouthfeel and helps the edges set properly while keeping the center liquid. I’ve tried versions with coconut flour, and honestly, they just don’t compare. Almond flour is the key to that tender, almost fudgy texture that makes you close your eyes after the first bite.
This recipe isn’t just good for a keto dessert. It’s the kind of dessert that makes you forget it’s healthy. It’s comfort food reimagined, lighter on carbs but with the same soul-soothing satisfaction. Perfect for impressing someone special without spending hours in the kitchen, or turning a regular Tuesday night into something memorable.
What Ingredients You Will Need
This recipe uses simple, wholesome ingredients to deliver bold chocolate flavor and that signature molten center without the sugar crash. Most of these are pantry staples if you already bake keto-friendly desserts.
For the Lava Cake Batter
- 1/4 cup (28g) blanched almond flour (I recommend Bob’s Red Mill for finest texture)
- 2 tablespoons (10g) unsweetened cocoa powder (use Dutch-processed for deeper flavor)
- 3 tablespoons (36g) powdered erythritol or monk fruit sweetener (adds sweetness without carbs)
- 1/4 teaspoon baking powder
- Pinch of salt (enhances chocolate flavor)
- 3 tablespoons (42g) unsalted butter, melted
- 1 large egg, at room temperature
- 1 teaspoon vanilla extract
- 2 tablespoons (30ml) heavy cream or full-fat coconut milk
- 1 ounce (28g) sugar-free dark chocolate chips or chopped chocolate (for the molten center)
Ingredient Selection Tips
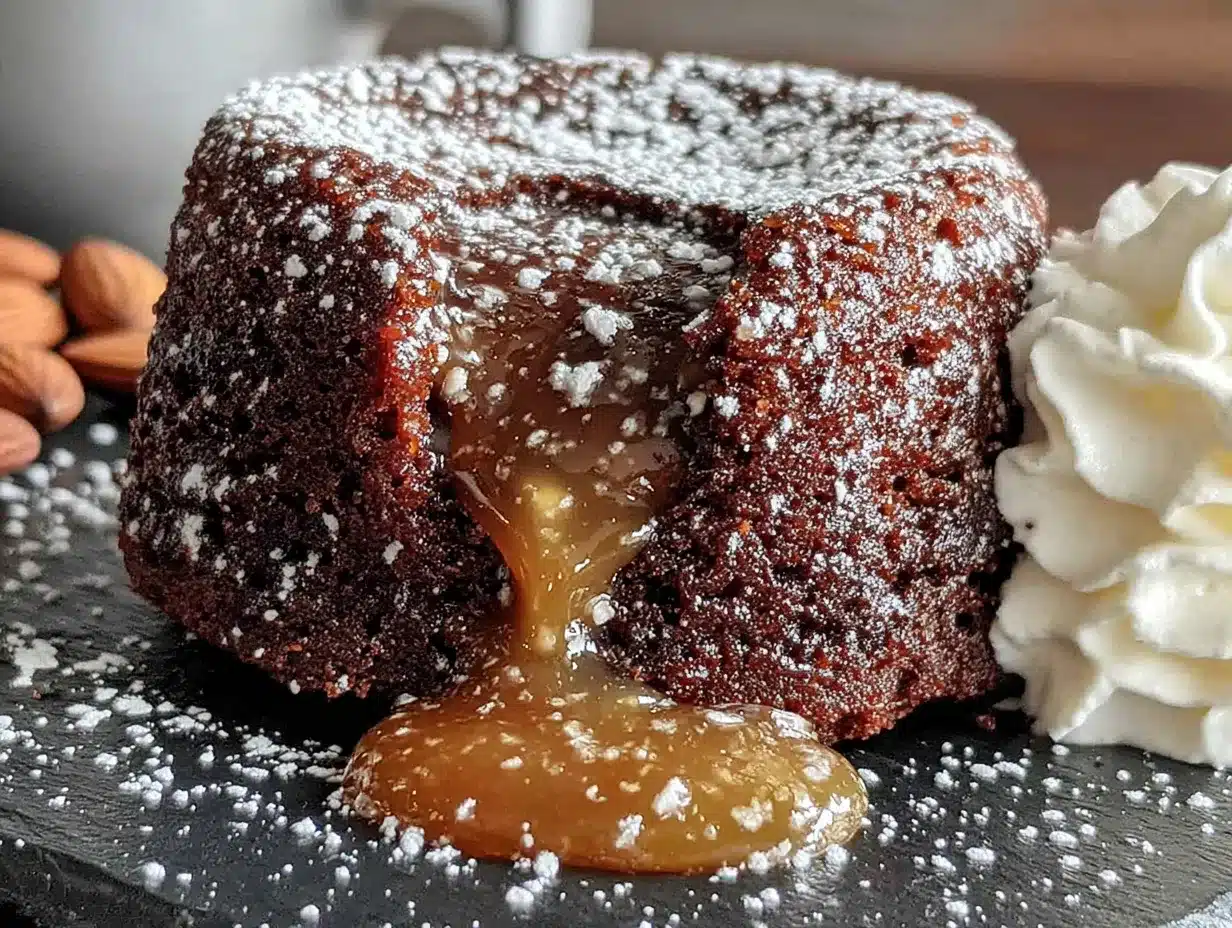
When choosing almond flour, always go for blanched almond flour rather than almond meal. The finer texture of blanched almond flour creates a smoother cake that doesn’t feel grainy. I’ve tested this with both, and the difference is noticeable. For the sweetener, powdered erythritol works best because it dissolves more easily than granular versions. If you use granular, you might end up with a slightly gritty texture. Trust me on this one, I learned the hard way.
For the chocolate center, use a good quality sugar-free chocolate bar chopped into small pieces. Chocolate chips work too, but they sometimes hold their shape better and don’t melt as smoothly. I prefer Lily’s brand for their creamy melt and clean taste. If you’re dairy-free, swap the butter for coconut oil and use full-fat coconut milk instead of heavy cream. The flavor will be slightly different, but the texture stays remarkably similar.
The egg needs to be at room temperature for proper emulsification. Cold eggs can cause the batter to seize up, especially when mixed with melted butter. Just leave it on the counter for 15 minutes before starting, or place it in a bowl of warm water for 5 minutes if you’re in a hurry.
Equipment Needed
You don’t need much for this recipe, which is part of what makes it so great for spontaneous dessert cravings.
- Two 6-ounce (180ml) ramekins or oven-safe cups (I use classic white ceramic ones)
- Small mixing bowl
- Whisk or fork
- Measuring spoons
- Baking sheet (to catch any drips)
- Microwave or small saucepan for melting butter
If you don’t have ramekins, you can use a muffin tin. Just grease the cups well and reduce the baking time by about 2 minutes. I’ve also used small oven-safe glass bowls in a pinch, and they work fine. The key is using something that’s roughly the same volume so the baking time stays accurate. My first attempt at this recipe was in a giant mug, and the proportions were all wrong. Stick to smaller vessels for that perfect lava effect.
For the butter, I prefer melting it in the microwave in 15-second bursts rather than on the stove. It’s faster and means fewer dishes to wash. Just keep an eye on it so it doesn’t splatter everywhere.
Preparation Method
Follow these steps carefully for the perfect molten center every time. The timing is crucial here, so set a timer and don’t wander off.
- Preheat your oven to 400°F (200°C) and place a baking sheet on the middle rack. The baking sheet catches any overflow and makes cleanup easier. I learned this after a messy incident with chocolate dripping onto the heating element.
- Grease two 6-ounce ramekins thoroughly with butter or coconut oil. Make sure you get the sides and bottom completely coated. This step is non-negotiable for easy unmolding. Sprinkle a tiny bit of cocoa powder inside and tap out the excess, which helps the cake release even better.
- Melt the butter in a small microwave-safe bowl, about 30 seconds total in 15-second bursts. Set it aside to cool slightly while you prepare the dry ingredients.
- In a small mixing bowl, whisk together the almond flour, cocoa powder, powdered sweetener, baking powder, and salt. Make sure there are no lumps, especially from the cocoa powder. I use a fork for this, and it works perfectly.
- Add the melted butter, egg, vanilla extract, and heavy cream to the dry ingredients. Whisk until just combined. Don’t overmix, or the cake will become dense and tough. The batter should be thick but smooth, similar to a brownie batter consistency.
- Divide half the batter evenly between the two prepared ramekins. Use a small spoon or spatula to spread it slightly up the sides, creating a little well in the center.
- Place 1/2 ounce (14g) of chopped sugar-free chocolate in the center of each ramekin, pressing it gently into the batter. This is the lava part, so don’t skimp here. I’ve tried using chocolate spread instead, but it doesn’t create the same dramatic molten effect.
- Top with the remaining batter, spreading it carefully to cover the chocolate completely. Make sure the edges are sealed so the chocolate doesn’t escape during baking.
- Place the ramekins on the preheated baking sheet and bake for exactly 9-11 minutes. The edges should look set and slightly puffed, but the center should still jiggle when you gently shake the ramekin. Start checking at 9 minutes if your oven runs hot.
- Remove from the oven and let cool for exactly 1 minute. This is critical. If you wait too long, the residual heat will continue cooking the center and you’ll lose the lava effect. If you unmold too soon, the cake might collapse.
- Run a thin knife around the edges of each ramekin to loosen the cake. Place a plate upside down on top of the ramekin, then carefully flip it over. Give it a gentle tap on the bottom, and lift the ramekin slowly. The cake should release cleanly onto the plate.
- Serve immediately while the center is still warm and flowing. Dust with a little cocoa powder or powdered sweetener if desired.
Your kitchen will smell incredible at this point. The chocolate aroma mixed with the warm almond flour creates this cozy, bakery-like atmosphere that makes the whole process worth it.
Cooking Tips & Techniques
After making this recipe at least twenty times, I’ve collected some tips that make the difference between a good lava cake and a spectacular one.
Don’t overbake. This is the number one mistake people make. The lava effect depends entirely on the center remaining undercooked while the edges set. If you’re nervous, err on the side of underbaking. You can always pop it back in for another minute if needed, but you can’t undo an overcooked center. I once forgot to set a timer and ended up with a fully cooked chocolate muffin. Delicious, but not what we’re going for here.
Room temperature ingredients matter. Cold eggs and cold cream can cause the melted butter to seize up, creating a lumpy batter that doesn’t bake evenly. Take everything out of the fridge 20 minutes before you start. I keep my eggs on the counter for baking anyway, so this is just part of my routine now.
Use a kitchen scale for accuracy. Almond flour can be tricky to measure by volume because it settles differently in the cup. Weighing your ingredients ensures consistent results every time. I learned this after a batch where I accidentally packed the almond flour too tightly and the cake turned out dry.
Grease those ramekins generously. There’s nothing more disappointing than a perfectly baked lava cake that won’t come out of the dish. I use butter and then dust with cocoa powder, which also adds a nice touch of flavor to the outside of the cake.
Work quickly when assembling. The batter contains baking powder, which starts activating as soon as it hits the wet ingredients. Once your batter is mixed, get it into the oven within 5 minutes for the best rise.
Test for doneness with a gentle jiggle. Instead of using a toothpick (which would ruin the lava center), gently shake the ramekin. The edges should be firm, but the center should wobble like Jell-O. That’s your sweet spot.
Variations & Adaptations
One of the best things about this recipe is how easily it adapts to different tastes and dietary needs. Here are some variations I’ve tried and loved.
Dairy-Free Version: Swap the butter for coconut oil or vegan butter, and use full-fat coconut cream instead of heavy cream. The chocolate center should be dairy-free as well. I’ve made this for a friend with dairy sensitivity, and she couldn’t tell the difference. The coconut oil adds a subtle flavor that actually complements the chocolate nicely.
Nut-Free Option: Replace the almond flour with sunflower seed flour or tigernut flour. Keep in mind that sunflower seed flour can turn green when combined with baking powder due to a chemical reaction, so add a teaspoon of lemon juice to prevent this. I’ve tested this with tigernut flour and it works beautifully, though the texture is slightly denser.
Mocha Lava Cake: Add 1/2 teaspoon of instant espresso powder to the dry ingredients. The coffee enhances the chocolate flavor without making it taste like coffee. This is my personal favorite variation, especially when I need an extra little pick-me-up with dessert.
Peanut Butter Lava Cake: Place a teaspoon of sugar-free peanut butter in the center along with the chocolate. The combination of peanut butter and molten chocolate is absolutely divine. Just make sure the peanut butter isn’t too runny, or it might leak out during baking.
Coconut Flour Version: If you prefer coconut flour, use only 1 tablespoon plus 1 teaspoon, and increase the egg to 2 large eggs. Coconut flour is much more absorbent than almond flour, so the ratios change significantly. I don’t recommend this as a direct swap, but it works if you adjust properly.
Spiced Chocolate Version: Add 1/4 teaspoon of cinnamon and a pinch of cayenne pepper to the dry ingredients. The warmth of the spices cuts through the richness of the chocolate and adds unexpected depth. Perfect for fall or winter evenings.
Serving & Storage Suggestions
This lava cake is best served warm, straight from the oven. The contrast between the warm cake and the flowing center is what makes it magical. But here’s how to handle different situations.
Serving Temperature: Serve immediately after unmolding. The cake should be warm, almost hot, with the center still flowing. If it cools down too much, the center will set and you’ll lose the lava effect. I usually have my plates ready before the cake comes out of the oven.
Presentation Ideas: Dust the top with a light sprinkle of cocoa powder or powdered erythritol. Add a few fresh raspberries or strawberries on the side for a pop of color and acidity that cuts through the richness. A dollop of whipped cream (sugar-free, of course) takes this to another level. I sometimes add a sprig of mint for that fancy restaurant look.
Complementary Beverages: A cup of black coffee or espresso pairs beautifully with the chocolate. For a treat, try it with a warm mug of almond milk latte. The bitterness of the coffee balances the sweetness of the cake perfectly.
Storage Instructions: Lava cakes are really meant to be eaten fresh, but if you have leftovers, you can store the baked cakes (before unmolding) in the refrigerator for up to 2 days. Cover the ramekins with plastic wrap. To reheat, place them in a 350°F (175°C) oven for 5-7 minutes. The center won’t be as lava-like, but it will still be delicious.
Freezer Option: You can freeze the unbaked batter in the ramekins. Wrap each ramekin tightly in plastic wrap and then foil. Freeze for up to 1 month. To bake from frozen, add 3-4 minutes to the baking time. I’ve done this for last-minute dessert emergencies, and it works like a charm.
Flavor Development: The cake itself tastes best fresh, but interestingly, the chocolate center becomes even more intense after sitting for a few minutes. The flavors meld together and deepen. If you can wait 2-3 minutes after baking before serving, you’ll notice a richer chocolate taste.
Nutritional Information & Benefits
Here’s the nutritional breakdown for one serving (one lava cake), based on the ingredients listed:
| Nutrient | Amount Per Serving |
|---|---|
| Calories | 245 |
| Total Fat | 22g |
| Saturated Fat | 11g |
| Cholesterol | 115mg |
| Sodium | 85mg |
| Total Carbohydrates | 8g |
| Dietary Fiber | 5g |
| Net Carbs | 3g |
| Sugar | 1g |
| Protein | 7g |
This keto lava cake is not just low in carbs, it also provides some nutritional benefits. Almond flour is rich in vitamin E, magnesium, and healthy monounsaturated fats that support heart health. Cocoa powder contains antioxidants called flavonoids, which may help reduce inflammation and improve blood flow. The egg adds high-quality protein and important nutrients like choline for brain health.
This recipe is naturally gluten-free, grain-free, and sugar-free. It’s suitable for keto, low-carb, and diabetic-friendly diets. The only potential allergen is tree nuts from the almond flour, so keep that in mind if you’re serving someone with nut allergies. I’ve included a nut-free variation above if needed.
From a wellness perspective, this dessert proves that eating low-carb doesn’t mean giving up indulgence. It’s portion-controlled, satisfying, and won’t spike your blood sugar. I feel good about serving this to my family because it’s made with real, whole ingredients rather than processed junk.
Conclusion
This keto chocolate lava cake has become a staple in my kitchen for good reason. It’s quick, simple, and delivers that rich, chocolatey satisfaction without the sugar crash. Whether you’re following a keto diet or just looking for a healthier dessert option, this recipe hits all the right notes.
I love how versatile this recipe is. You can dress it up for a dinner party or whip it up on a random Tuesday when the chocolate craving hits. The fact that it takes only 10 minutes from start to finish means there’s no excuse not to treat yourself. And honestly, after watching my husband eat an entire ramekin in silence, I know this recipe works.
I’d love to hear how your lava cakes turn out. Did you try any of the variations? Did you add your own twist? Drop a comment below and let me know. Share this recipe with someone who needs a good keto dessert in their life. And if you make it, tag me in your photos. Happy baking, and remember, the center should always jiggle.
Frequently Asked Questions
Can I make this lava cake in the microwave?
Yes, you can. Grease a microwave-safe mug, pour in the batter, and microwave on high for 45-60 seconds. The timing depends on your microwave wattage, so start checking at 45 seconds. The texture won’t be quite as refined as the oven version, but it works in a pinch.
Why did my lava cake turn out completely cooked?
This usually happens from overbaking. The oven temperature might be too high, or you left it in too long. Next time, reduce the baking time by 1-2 minutes and check for that jiggle in the center. Remember, the residual heat continues cooking the cake even after you take it out.
Can I use coconut flour instead of almond flour?
You can, but you’ll need to adjust the recipe significantly. Coconut flour is much more absorbent, so use only 1 tablespoon plus 1 teaspoon and add an extra egg. The texture will be slightly different, but it still works. I recommend sticking with almond flour for the best results.
How do I know when the lava cake is done baking?
Gently shake the ramekin. The edges should look set and slightly puffed, but the center should wobble like Jell-O. Don’t use a toothpick to test, because you’ll puncture the molten center and ruin the lava effect. Trust the jiggle test.
Can I prepare the batter ahead of time?
Yes, you can assemble the batter in the ramekins and refrigerate for up to 24 hours before baking. Just cover them with plastic wrap. When you’re ready to bake, add 2-3 minutes to the baking time since the batter will be cold. This is great for dinner parties when you want to minimize last-minute work.
Pin This Recipe!
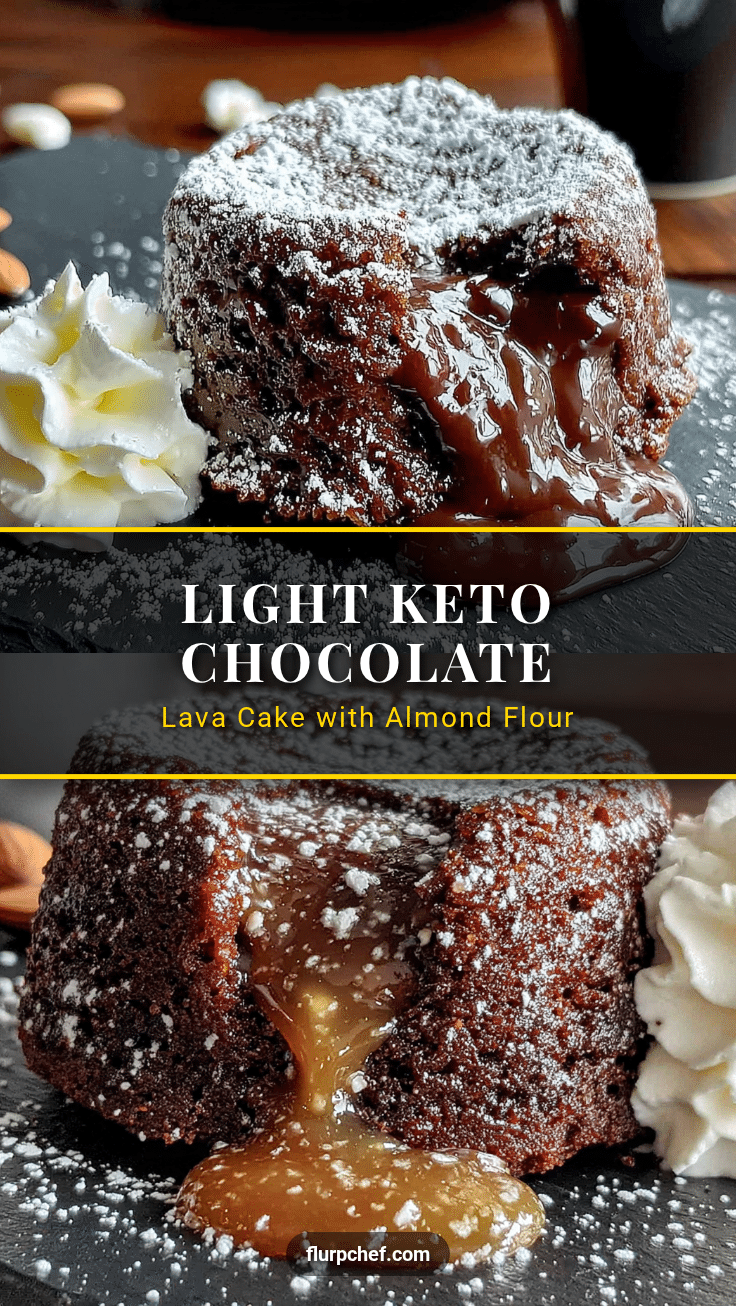
Best Keto Chocolate Lava Cake: Easy 10-Minute Recipe
A quick and easy keto-friendly chocolate lava cake that delivers a rich, molten center with only 3 grams of net carbs per serving. Perfect for satisfying chocolate cravings without the sugar crash.
- Prep Time: 5 minutes
- Cook Time: 10 minutes
- Total Time: 15 minutes
- Yield: 2 servings 1x
- Category: Dessert
- Cuisine: American
Ingredients
- 1/4 cup (28g) blanched almond flour
- 2 tablespoons (10g) unsweetened cocoa powder (Dutch-processed preferred)
- 3 tablespoons (36g) powdered erythritol or monk fruit sweetener
- 1/4 teaspoon baking powder
- Pinch of salt
- 3 tablespoons (42g) unsalted butter, melted
- 1 large egg, at room temperature
- 1 teaspoon vanilla extract
- 2 tablespoons (30ml) heavy cream or full-fat coconut milk
- 1 ounce (28g) sugar-free dark chocolate chips or chopped chocolate
Instructions
- Preheat your oven to 400°F (200°C) and place a baking sheet on the middle rack.
- Grease two 6-ounce ramekins thoroughly with butter or coconut oil. Sprinkle a tiny bit of cocoa powder inside and tap out the excess.
- Melt the butter in a small microwave-safe bowl, about 30 seconds total in 15-second bursts. Set aside to cool slightly.
- In a small mixing bowl, whisk together the almond flour, cocoa powder, powdered sweetener, baking powder, and salt until no lumps remain.
- Add the melted butter, egg, vanilla extract, and heavy cream to the dry ingredients. Whisk until just combined. The batter should be thick but smooth.
- Divide half the batter evenly between the two prepared ramekins. Spread it slightly up the sides, creating a little well in the center.
- Place 1/2 ounce (14g) of chopped sugar-free chocolate in the center of each ramekin, pressing it gently into the batter.
- Top with the remaining batter, spreading it carefully to cover the chocolate completely. Make sure the edges are sealed.
- Place the ramekins on the preheated baking sheet and bake for exactly 9-11 minutes. The edges should look set and slightly puffed, but the center should still jiggle when gently shaken.
- Remove from the oven and let cool for exactly 1 minute.
- Run a thin knife around the edges of each ramekin to loosen the cake. Place a plate upside down on top of the ramekin, then carefully flip it over. Give it a gentle tap on the bottom, and lift the ramekin slowly.
- Serve immediately while the center is still warm and flowing. Dust with a little cocoa powder or powdered sweetener if desired.
Notes
Don’t overbake. The lava effect depends on the center remaining undercooked while the edges set. Use room temperature ingredients for best results. Grease ramekins generously for easy unmolding. Work quickly once batter is mixed. Test for doneness with a gentle jiggle instead of a toothpick.
Nutrition
- Serving Size: 1 lava cake
- Calories: 245
- Sugar: 1
- Sodium: 85
- Fat: 22
- Saturated Fat: 11
- Carbohydrates: 8
- Fiber: 5
- Protein: 7
Keywords: keto chocolate lava cake, low-carb dessert, sugar-free lava cake, almond flour lava cake, easy keto dessert, 10-minute dessert