My husband had claimed to hate pot pie for fifteen years. Fifteen years. Every time I’d mention making one—usually on a cold, rainy Tuesday when the idea of a flaky crust bubbling over with creamy filling sounded like the only reasonable thing in the world—he’d make this face. You know the face. The one that says “I’ll eat it because I love you, but I will not enjoy it.” And honestly, I believed him. He’s not a picky eater, but he has his lines, and pot pie was apparently one of them.
Then came the Wednesday after Thanksgiving last year. The fridge was groaning under the weight of leftover turkey, mashed potatoes, and about three different casseroles from my mother-in-law. I was tired of reheating plates of the same thing. I wanted something that felt like a real meal but didn’t require another trip to the store. So I grabbed a skillet, threw in some butter and onions, and started building what I called “just a creamy turkey thing” so he wouldn’t get suspicious. I didn’t even bother with a top crust—just a few biscuits I had in the freezer, dropped right on top.
The smell started filling the house, that cozy, buttery, thyme-and-gravy smell that makes you feel like everything is going to be okay. I called him for dinner, and he walked in, looked at the skillet, and said nothing. Then he took a bite. Then another. Then he asked for seconds. I didn’t say a word, but I caught him scraping the edges of the pan later that night when he thought I wasn’t looking. That’s the thing about this Cozy Leftover Turkey Pot Pie Skillet—it doesn’t argue with you. It just sits there, golden and bubbling, waiting to prove you wrong.
This recipe stayed with me because it solved a real problem. It turned the mountain of Thanksgiving leftovers into something that felt brand new, something worth looking forward to. And it only takes about thirty minutes, which matters when you’re already tired of cooking. Maybe you’ve been there, staring at a fridge full of turkey and wondering what to do with it. Let me tell you—this skillet is the answer you didn’t know you needed.
Why You’ll Love This Recipe
I’ve tested this recipe about six times since that first post-Thanksgiving night, tweaking the sauce consistency, the seasoning balance, and the biscuit placement. Here’s why I keep coming back to it—and why I think you will too.
- Quick & Easy : From fridge to table in under 30 minutes. No rolling dough, no fussing with a double crust, no waiting for anything to chill. This is weeknight cooking at its finest.
- Simple Ingredients : You probably have everything in your kitchen right now, especially if you’ve recently cooked a turkey. Butter, flour, broth, milk, frozen vegetables, and leftover turkey. That’s it.
- Perfect for Leftover Season : Whether it’s the day after Thanksgiving, a post-Christmas dinner, or even a random Tuesday when you roasted a chicken, this skillet turns leftovers into something you actually want to eat.
- Crowd-Pleaser : My husband is living proof. This dish has converted at least three pot pie skeptics that I know of. The creamy filling and soft, buttery biscuit topping are hard to resist.
- Unbelievably Delicious : The texture is everything—silky gravy, tender turkey, soft vegetables, and those golden biscuits soaking up all that flavor on top.
What makes this recipe different from the rest? It’s the technique. Most pot pie recipes call for a complicated crust or a long simmering time. This one uses a simple stovetop method with a roux-based sauce that comes together in minutes, then gets topped with refrigerator biscuits that bake right on top. No par-baking, no blind baking, no fuss. It’s comfort food reimagined—faster, easier, but with the same soul-soothing satisfaction.
This isn’t just good. It’s the kind of dinner that makes you close your eyes after the first bite, because it tastes like home but without the hours of work.
What Ingredients You Will Need
This recipe uses simple, wholesome ingredients to deliver bold flavor and satisfying texture without the fuss. Most of these are pantry staples, especially if you’ve just cooked a big holiday meal.
For the Filling
- Unsalted butter, 4 tablespoons (adds richness and helps create the roux base)
- Yellow onion, 1 medium, diced (provides aromatic depth)
- Carrots, 2 medium, diced (adds sweetness and color)
- Celery, 2 stalks, diced (classic flavor base)
- All-purpose flour, 1/3 cup (thickens the sauce to the perfect consistency)
- Chicken or turkey broth, 2 cups (I prefer low-sodium so I can control the salt level)
- Whole milk, 1 cup (adds creaminess; 2% works too but whole milk gives the best texture)
- Frozen peas, 1 cup (no need to thaw—they cook perfectly in the sauce)
- Frozen corn kernels, 1/2 cup (adds sweetness and texture)
- Cooked leftover turkey, 3 cups, shredded or diced (dark meat and white meat both work great)
- Fresh thyme, 1 teaspoon, chopped (or 1/2 teaspoon dried—adds that classic pot pie flavor)
- Salt, 1 teaspoon, plus more to taste
- Black pepper, 1/2 teaspoon, freshly ground
- Garlic powder, 1/2 teaspoon (optional but recommended for extra depth)
For the Topping
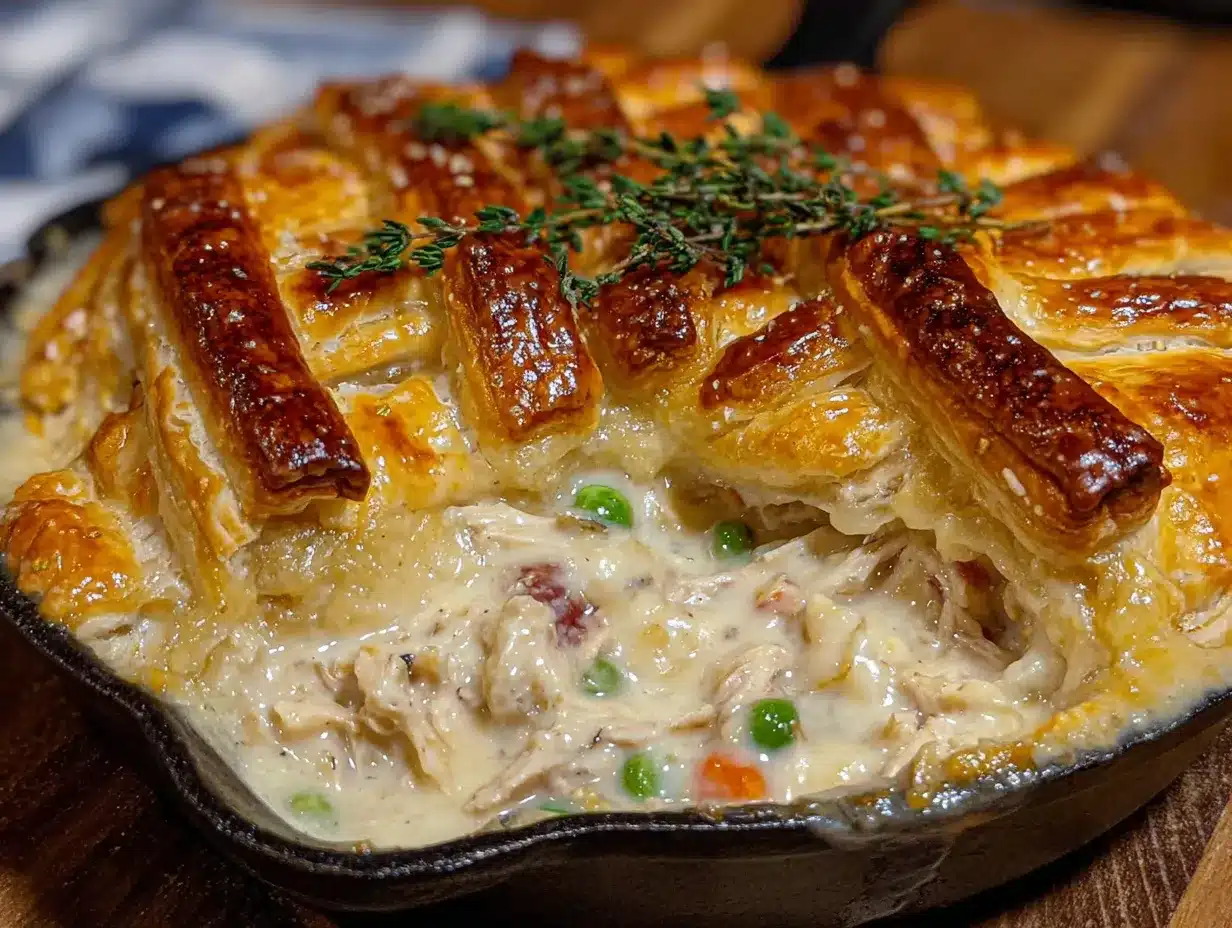
- Refrigerated biscuit dough, 1 can (8 biscuits), such as Pillsbury Grands or store brand (I’ve tried homemade biscuits too, and they work beautifully—just make sure they’re dropped rather than rolled)
- Egg, 1 large, beaten with 1 tablespoon water (for an optional golden wash on top of the biscuits)
- Flaky sea salt, a pinch (for sprinkling on top before baking)
Ingredient Tips: For the best texture, I recommend using a good-quality low-sodium broth—I personally like Swanson or Kitchen Basics. If you’re using homemade turkey stock, even better. For the biscuits, the flaky, layered kind works best because they puff up nicely and create those craggy edges that soak up the gravy. If you’re gluten-free, use a gluten-free all-purpose flour blend for the roux and gluten-free biscuit dough. I’ve tested this with King Arthur Measure for Measure flour and it worked perfectly.
For the turkey, both white and dark meat work well. I actually prefer a mix—the dark meat adds richness to the filling, while the white meat gives it that classic pot pie texture. If you don’t have leftover turkey, rotisserie chicken is an excellent substitute.
Equipment Needed
You don’t need much for this recipe, which is part of why I love it. Here’s what you’ll need:
- Large oven-safe skillet : 10-12 inches, preferably cast iron or stainless steel. I use my trusty 12-inch cast iron skillet—it holds heat beautifully and goes straight from stovetop to oven without any fuss. If you don’t have an oven-safe skillet, you can transfer the filling to a 9×13 baking dish before adding the biscuits.
- Wooden spoon or silicone spatula : For stirring the roux and scraping up any browned bits from the bottom of the pan.
- Cutting board and chef’s knife : For dicing the vegetables.
- Measuring cups and spoons : For accurate ingredient measurements.
- Small bowl : For whisking the egg wash if you’re using it.
- Pastry brush : Optional, for brushing the egg wash onto the biscuits.
If you’re using a baking dish instead of a skillet, any 9×13 baking dish will work. I’ve even made this in a deep-dish pie plate when my skillet was otherwise occupied. The key is having enough surface area for the biscuits to spread and brown nicely. Budget-friendly tip: a well-seasoned cast iron skillet from a thrift store costs about $10 and will last a lifetime.
Preparation Method
Let me walk you through this step by step. It’s simpler than you think, and I’ve included all the little details that make the difference between a good pot pie and a great one.
- Preheat your oven to 400°F (200°C). Position the rack in the middle of the oven. This gives the biscuits room to rise and brown evenly without burning on the bottom.
- Melt the butter in your large oven-safe skillet over medium heat. Let it foam and then settle—about 1 minute. You want it hot but not browning. I’ve learned this the hard way: burned butter means a burned roux, and a burned roux means starting over.
- Add the diced onion, carrots, and celery. Cook for 5-6 minutes, stirring occasionally, until the vegetables have softened and the onion is translucent. The carrots should be just starting to get tender. You’ll smell that sweet, savory aroma filling your kitchen—that’s the good stuff.
- Sprinkle the flour over the vegetables. Stir constantly for 1-2 minutes. This cooks the raw flour taste out and creates a roux that will thicken your sauce perfectly. The mixture will look pasty and clumpy at first—that’s normal. Keep stirring until it’s smooth and golden, about 2 minutes.
- Slowly pour in the broth while whisking constantly. I say slowly because if you dump it all in at once, you’ll get lumps. Pour in a steady stream, whisking the whole time, until the mixture is smooth. It will thicken almost immediately—that’s the roux doing its job.
- Add the milk, salt, pepper, garlic powder, and fresh thyme. Whisk until everything is combined and the sauce is smooth. Let it come to a gentle simmer—you’ll see small bubbles breaking the surface. Cook for 2-3 minutes, stirring occasionally, until the sauce has thickened enough to coat the back of a spoon.
- Stir in the frozen peas, frozen corn, and shredded leftover turkey. Fold everything together gently until the turkey is evenly distributed and the vegetables are coated in the sauce. The mixture will look thick and creamy—exactly what you want. Turn off the heat.
- Arrange the biscuit dough on top of the filling. Open the can of biscuits and separate them. Place them evenly over the surface of the filling—don’t press them down, just let them rest on top. They’ll spread and puff as they bake. I like to leave a little space between each biscuit so they brown on the sides too.
- Brush the biscuits with the egg wash (optional but recommended). This gives them that beautiful golden-brown, glossy finish. Sprinkle a pinch of flaky sea salt over the top for that extra little crunch and flavor pop.
- Bake for 15-18 minutes, until the biscuits are golden brown and the filling is bubbling around the edges. The filling should be visibly bubbling—that’s how you know it’s hot all the way through. If the biscuits are browning too quickly but the filling isn’t bubbling yet, tent the skillet loosely with foil and continue baking.
- Let it rest for 5 minutes before serving. I know, I know—you want to dig in immediately. But this rest time lets the filling set up a bit so it doesn’t run all over your plate. Trust me, it’s worth the wait.
Sensory cues to watch for: When the roux is ready, it should smell nutty and look like wet sand. When the sauce is thick enough, it should coat the back of a spoon and leave a clear trail when you run your finger through it. When the biscuits are done, they should be golden brown on top and sound hollow when tapped.
Cooking Tips & Techniques
After making this recipe more times than I care to count, I’ve picked up a few tricks that make it foolproof. Let me share them so you don’t have to learn the hard way like I did.
Don’t skip the roux cooking time. The first time I made this, I was in a hurry and only cooked the flour for about 30 seconds before adding the liquid. The result? A sauce that tasted like raw flour. Cooking the roux for a full 1-2 minutes gets rid of that raw taste and gives you a silky, smooth sauce. Patience here pays off.
Use room temperature milk. Cold milk can cause the sauce to seize up and become lumpy. If you forget to take the milk out of the fridge, microwave it for about 20 seconds—just enough to take the chill off. I’ve made this mistake on a cold morning and ended up with a lumpy sauce that I had to whisk furiously to save.
Don’t overfill the skillet. Leave at least an inch of space at the top of the skillet. The filling will bubble up as it bakes, and you don’t want it spilling over into your oven. Trust me, cleaning burnt gravy off the bottom of the oven is not how you want to spend your evening.
Timing is everything. Start the filling, get it simmering, then pop the biscuits on top and into the oven. While it bakes, you can make a quick salad or set the table. The whole process takes about 30 minutes from start to finish, and most of that is hands-off baking time.
For extra crispy biscuits, brush them with melted butter halfway through baking. It adds richness and helps them brown more evenly. I learned this from a friend who’s a pastry chef, and it’s been my secret weapon ever since.
Common mistake to avoid: Don’t stir the filling once the biscuits are on top. I know it’s tempting to check on it, but stirring will break up the biscuits and make them soggy. Let them do their thing.
Variations & Adaptations
One of the best things about this recipe is how flexible it is. Here are some variations I’ve tried and loved:
Vegetarian Version: Swap the turkey for 2 cups of diced mushrooms (cremini or portobello work great) and add an extra cup of mixed vegetables like green beans or diced potatoes. Sauté the mushrooms with the onions until they release their liquid and start to brown—this adds that savory, umami flavor that makes up for the missing meat.
Gluten-Free Adaptation: Use a gluten-free all-purpose flour blend for the roux (I’ve had great results with King Arthur Measure for Measure). For the topping, use gluten-free biscuit dough or make your own with a gluten-free biscuit mix. The filling will be just as creamy and delicious.
Dairy-Free Option: Substitute the butter with olive oil or a plant-based butter, and use unsweetened almond milk or oat milk instead of whole milk. Oat milk gives the creamiest texture—I’ve tested this with both and oat milk wins every time. The flavor is slightly different but still incredibly satisfying.
Herb Variations: Not a fan of thyme? Try rosemary, sage, or a mix of Italian herbs. I once made this with fresh sage from my garden and it was absolutely divine—earthy and aromatic, perfect for fall. You can also add a bay leaf to the sauce while it simmers (just remove it before adding the biscuits).
Chicken Version: This works beautifully with leftover rotisserie chicken or any cooked chicken. In fact, I often roast a chicken specifically so I can make this skillet the next day. It’s that good.
My personal favorite variation: Add 1/2 cup of shredded sharp cheddar cheese to the sauce right before adding the turkey. It melts into the gravy and adds this incredible savory depth that takes the whole dish to another level. I discovered this by accident when I was out of milk and used cream cheese instead—now I do it on purpose.
Serving & Storage Suggestions
This skillet is best served warm, straight from the oven. The contrast between the hot, creamy filling and the fluffy biscuits is what makes it so special. I like to serve it in shallow bowls so the filling doesn’t spill everywhere, with a simple green salad on the side dressed with a tangy vinaigrette to cut through the richness.
What to serve with it: A crisp green salad with a lemon vinaigrette is perfect. You could also serve it with roasted green beans or steamed broccoli for extra vegetables. If you’re feeling indulgent, a side of cranberry sauce (leftover from Thanksgiving, perhaps) adds a lovely sweet-tart contrast.
Storage: Leftovers keep well in an airtight container in the refrigerator for up to 3 days. The biscuits will soften slightly, but the flavor is still fantastic. I actually think the filling tastes even better the next day after the flavors have had time to meld.
Reheating: The best way to reheat is in the oven at 350°F (175°C) for about 10-15 minutes, until the filling is hot and bubbly. You can also reheat individual portions in the microwave for 1-2 minutes, but the biscuits won’t be as crispy. If you’re reheating in the microwave, I recommend removing the biscuits and reheating them separately on a plate for about 30 seconds.
Freezing: You can freeze the filling (without the biscuits) for up to 3 months. Let it cool completely, then transfer to a freezer-safe container. When you’re ready to use it, thaw overnight in the refrigerator, reheat on the stovetop, then top with fresh biscuits and bake as directed. The biscuits don’t freeze well, so always add them fresh.
Flavor development note: The filling gets even better after a day in the fridge. The flavors meld together and deepen, so don’t be afraid to make this a day ahead. Just reheat and add the biscuits before serving.
Nutritional Information & Benefits
Here’s the approximate nutritional breakdown for one serving (based on 6 servings):
- Calories: 385
- Protein: 28g
- Carbohydrates: 32g
- Fat: 16g
- Saturated Fat: 8g
- Fiber: 4g
- Sugar: 6g
- Sodium: 780mg
Health benefits: This dish is packed with protein from the turkey, which helps keep you full and satisfied. The carrots and peas provide vitamin A and fiber, while the onions and celery add antioxidants and anti-inflammatory compounds. Using low-sodium broth helps keep the salt content in check.
Dietary considerations: This recipe is nut-free and egg-free (unless you use the egg wash). For gluten-free or dairy-free adaptations, see the variations section above. It’s also a great way to use up leftover turkey in a way that feels like a treat rather than a chore.
Personal wellness perspective: I love that this recipe turns leftover turkey into something that feels nourishing and comforting without being heavy. It’s the kind of meal that fills you up without weighing you down, perfect for those chilly evenings when you want something warm and satisfying.
Conclusion
This Cozy Leftover Turkey Pot Pie Skillet has become my go-to solution for the days after a big holiday meal. It’s quick, it’s forgiving, and it turns leftovers into something you actually look forward to eating. The creamy filling, the tender vegetables, the golden biscuits—it all comes together in about 30 minutes with minimal effort.
What I love most about this recipe is how adaptable it is. You can swap in whatever vegetables you have on hand, use chicken instead of turkey, or make it dairy-free without sacrificing flavor. It’s the kind of recipe that grows with you, that changes based on what’s in your fridge and what you’re craving.
I honestly think this is one of those recipes that will become a staple in your kitchen, especially during the holiday season. It’s the dish you’ll turn to when you’re tired of reheating the same leftovers, when you want something that feels special but doesn’t require a trip to the store.
So go ahead—grab that skillet, raid your fridge, and make this tonight. And when you do, come back and let me know how it turned out. Did you add cheese? Swap the vegetables? Use homemade biscuits? I’d love to hear about your version. Drop a comment below or tag me in your photos—I can’t wait to see what you create!
Frequently Asked Questions
Can I use frozen mixed vegetables instead of fresh?
Absolutely! Frozen mixed vegetables (peas, carrots, corn, green beans) work perfectly in this recipe. Just add them straight from the freezer—no need to thaw. They’ll cook perfectly in the sauce.
Can I make this without an oven-safe skillet?
Yes. If you don’t have an oven-safe skillet, cook the filling on the stovetop, then transfer it to a 9×13 baking dish. Top with the biscuits and bake as directed. The baking time might be slightly longer since the dish won’t be preheated.
How do I prevent the biscuits from getting soggy?
Make sure the filling is thick enough before adding the biscuits—it should coat the back of a spoon. Also, don’t overcrowd the biscuits; leave a little space between each one so they can brown properly. Baking at 400°F helps them set quickly.
Can I use homemade biscuit dough instead of refrigerated?
Definitely. Homemade drop biscuits work beautifully. Just prepare your favorite biscuit recipe, drop spoonfuls of dough onto the filling, and bake as directed. You may need to add a few minutes to the baking time if the biscuits are larger.
How long do leftovers last in the refrigerator?
Leftovers will keep in an airtight container in the refrigerator for up to 3 days. The biscuits will soften, but the flavor is still fantastic. Reheat in the oven at 350°F for best results, or in the microwave for a quick option.
Pin This Recipe!
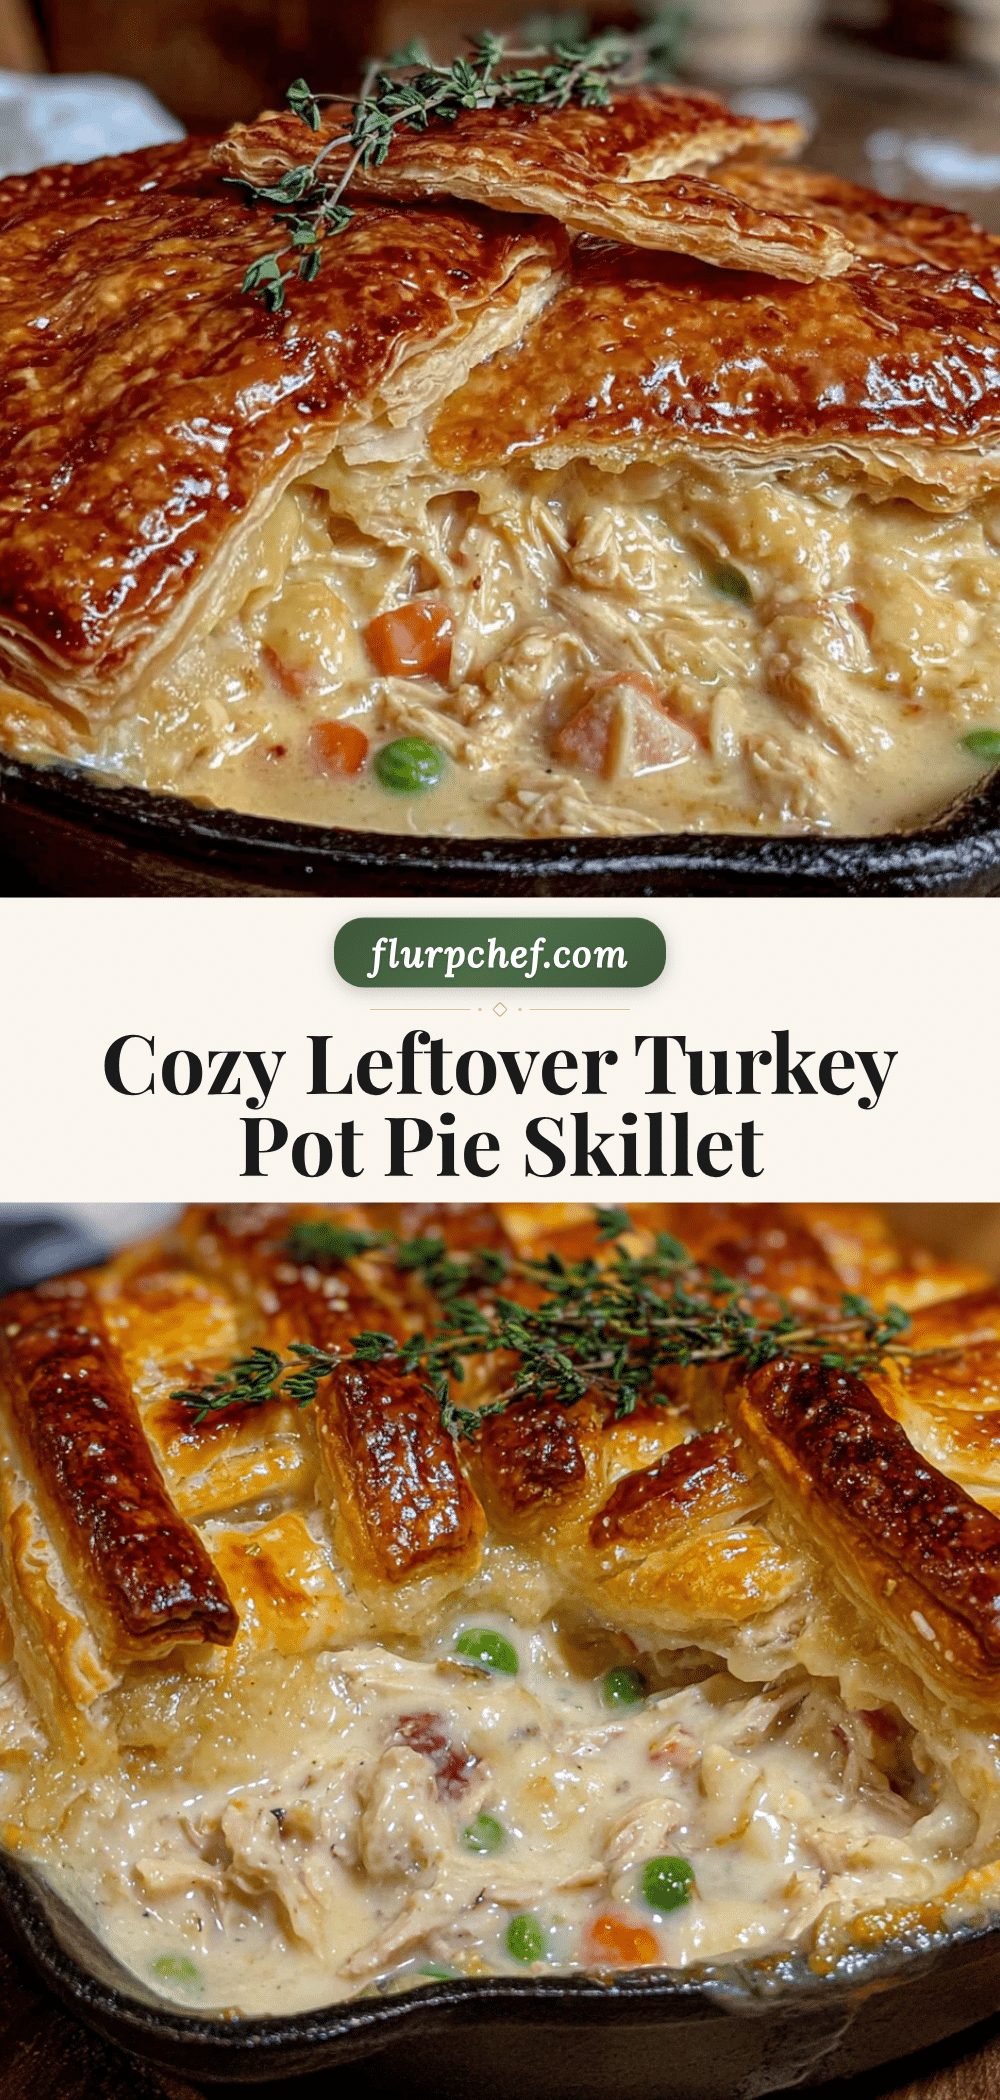
Cozy Leftover Turkey Pot Pie Skillet: Easy 30-Min Recipe

This quick and easy skillet pot pie transforms leftover turkey into a creamy, comforting meal with a golden biscuit topping, ready in just 30 minutes. Perfect for using up holiday leftovers or any night you crave cozy comfort food.
- Prep Time: 10 minutes
- Cook Time: 20 minutes
- Total Time: 30 minutes
- Yield: 6 servings 1x
- Category: Main Course
- Cuisine: American
Ingredients
- 4 tablespoons unsalted butter
- 1 medium yellow onion, diced
- 2 medium carrots, diced
- 2 stalks celery, diced
- 1/3 cup all-purpose flour
- 2 cups chicken or turkey broth (low-sodium preferred)
- 1 cup whole milk (2% works, but whole milk gives best texture)
- 1 cup frozen peas (no need to thaw)
- 1/2 cup frozen corn kernels
- 3 cups cooked leftover turkey, shredded or diced
- 1 teaspoon fresh thyme, chopped (or 1/2 teaspoon dried)
- 1 teaspoon salt, plus more to taste
- 1/2 teaspoon black pepper, freshly ground
- 1/2 teaspoon garlic powder (optional)
- 1 can (8 biscuits) refrigerated biscuit dough (such as Pillsbury Grands)
- 1 large egg, beaten with 1 tablespoon water (for egg wash, optional)
- Flaky sea salt, a pinch (for sprinkling)
Instructions
- Preheat your oven to 400°F (200°C). Position the rack in the middle of the oven.
- Melt the butter in a large oven-safe skillet over medium heat. Let it foam and settle, about 1 minute.
- Add the diced onion, carrots, and celery. Cook for 5-6 minutes, stirring occasionally, until softened and onion is translucent.
- Sprinkle the flour over the vegetables. Stir constantly for 1-2 minutes to cook out the raw flour taste and create a roux.
- Slowly pour in the broth while whisking constantly to avoid lumps. Whisk until smooth.
- Add the milk, salt, pepper, garlic powder, and fresh thyme. Whisk until combined. Let it come to a gentle simmer and cook for 2-3 minutes, stirring occasionally, until thickened enough to coat the back of a spoon.
- Stir in the frozen peas, frozen corn, and shredded leftover turkey. Fold gently until evenly distributed. Turn off the heat.
- Arrange the biscuit dough on top of the filling, spacing them evenly. Do not press them down.
- Brush the biscuits with the egg wash (optional) and sprinkle with a pinch of flaky sea salt.
- Bake for 15-18 minutes, until the biscuits are golden brown and the filling is bubbling around the edges. If biscuits brown too quickly, tent loosely with foil.
- Let rest for 5 minutes before serving.
Notes
For best results, use room temperature milk to prevent lumps. Don’t skip cooking the roux for 1-2 minutes to avoid raw flour taste. Leave at least an inch of space at the top of the skillet to prevent bubbling over. For extra crispy biscuits, brush with melted butter halfway through baking. The filling can be made a day ahead and refrigerated; add fresh biscuits before baking.
Nutrition
- Serving Size: 1 serving (about 1/6
- Calories: 385
- Sugar: 6
- Sodium: 780
- Fat: 16
- Saturated Fat: 8
- Carbohydrates: 32
- Fiber: 4
- Protein: 28
Keywords: leftover turkey, pot pie, skillet, easy, 30-minute, comfort food, Thanksgiving leftovers, biscuit topping