I was at the hardware store last October, of all places, buying a new putty knife because I’d somehow managed to lose mine mid-caulking project. The line at the register was snaking past the gardening section, and the woman behind me—she had on this absolutely magnificent witch hat, complete with a little crow perched on the brim—just started talking. “You know what’s better than candy corn?” she asked, apropos of absolutely nothing. “A brownie that looks like it’s melting into a puddle of chocolate.” I laughed, thinking she was kidding, but she was dead serious. She pulled a crumpled receipt out of her pocket and started drawing a little figure on it—a mummy with one arm up, dripping into a chocolate pool. “Wrap it in white,” she said, “and use candy eyes. The kids lose their minds.” I stuffed that receipt in my wallet, and honestly, I forgot about it for a few weeks. Then, the night before Halloween, I was scrambling for a treat to bring to the neighbor’s party, and there it was. I made a batch of my go-to brownies, grabbed some white chocolate, and gave it a shot. The first one looked a little lopsided—the mummy’s head fell off—but the second one? Pure magic. I’ve been making them every year since, and let me tell you, they disappear faster than anything else on the dessert table. Maybe you’ve been there, staring at a Pinterest board full of complicated Halloween desserts and thinking, “I don’t have time for this.” These melting witch mummy brownies are your answer.
Why You’ll Love This Recipe
I’ve tested this recipe more times than I care to admit, tweaking the brownie base, the melting technique, and even the angle of the mummy’s wrap. After a few burnt batches and one particularly tragic incident where the candy eyes slid off into the abyss, I finally landed on a version that’s foolproof. These brownies aren’t just cute—they’re genuinely delicious, with a fudgy center and a crackly top that makes the perfect canvas for your mummy creations.
- Quick & Easy: From start to finish, you’re looking at about 45 minutes. The decorating part takes maybe 10 minutes once the brownies are cool. Perfect for a last-minute Halloween party or a classroom treat.
- Simple Ingredients: You probably have everything for the brownies in your pantry right now. The white chocolate and candy eyes are easy to find at any grocery store or online.
- Perfect for Halloween: These are the star of any spooky spread. Kids love them, adults sneak them, and they photograph beautifully for social media.
- Crowd-Pleaser: I’ve brought these to potlucks, office parties, and family gatherings. They always get rave reviews, even from people who swear they don’t like themed desserts.
- Unbelievably Delicious: The combination of rich, fudgy brownie with creamy white chocolate is next-level comfort food. The candy eyes add a fun crunch that kids adore.
What makes this recipe different from the rest? It’s the technique. Instead of trying to pipe intricate mummy wraps that look like a tangled mess, you’ll use a simple zigzag pattern that looks intentional and adorable. Plus, the “melting” effect is achieved by strategically placing the mummy at the edge of the brownie, so it looks like it’s sliding off into a chocolate puddle. It’s clever, not complicated. This isn’t just another Halloween dessert—it’s the kind that makes you close your eyes after the first bite, because it tastes as good as it looks.
What Ingredients You Will Need
This recipe uses simple, wholesome ingredients to deliver bold flavor and satisfying texture without the fuss. Most of these are pantry staples, so you can whip up a batch on a whim.
- For the Brownies:
- 1/2 cup (1 stick) unsalted butter, melted
- 1 cup granulated sugar
- 2 large eggs, room temperature
- 1 teaspoon vanilla extract
- 1/3 cup unsweetened cocoa powder (I prefer Ghirardelli for its deep flavor)
- 1/2 cup all-purpose flour
- 1/4 teaspoon salt
- 1/4 teaspoon baking powder
- Optional: 1/2 cup semi-sweet chocolate chips (for extra fudginess)
- For the Mummy Decorations:
- 1 cup white chocolate melting wafers (like Ghirardelli or Wilton)
- 1 tablespoon coconut oil or vegetable shortening (for thinning the chocolate)
- 24 candy eyes (the small ones work best)
- Optional: Black decorating gel for the witch hat
Ingredient Tips: For the brownies, use good-quality cocoa powder—it makes a real difference in flavor. If you’re out of unsalted butter, salted works fine; just skip the added salt. The white chocolate melting wafers are key here; regular white chocolate chips can seize up and get grainy. I’ve learned that the hard way. For a dairy-free version, use vegan butter and dairy-free white chocolate. The candy eyes are available at most craft stores or online—stock up because you’ll want to make these again.
Equipment Needed
You don’t need a fancy kitchen to pull these off. Here’s what you’ll need:
- 8×8-inch square baking pan (glass or metal both work fine)
- Parchment paper (for easy removal)
- Mixing bowls (one large, one small)
- Whisk or electric mixer
- Spatula
- Small microwave-safe bowl (for melting white chocolate)
- Piping bag or a small zip-top bag (with a tiny corner snipped off)
- Toothpicks (for adjusting candy eyes)
If you don’t have a piping bag, don’t worry—a zip-top bag works just as well. I’ve used both, and honestly, the zip-top bag is easier to control. For the brownies, a good whisk is your best friend; you don’t need a stand mixer. If you’re using a glass pan, reduce the oven temperature by 25°F to prevent over-baking. My first batch came out a little dry because I didn’t adjust, so learn from my mistake.
Preparation Method
Let’s get started. This recipe is straightforward, but I’ll walk you through each step with tips I’ve picked up along the way.
- Preheat and Prep: Preheat your oven to 350°F (175°C). Line your 8×8-inch pan with parchment paper, leaving some overhang on two sides. This makes lifting the brownies out a breeze. Lightly grease the parchment with butter or non-stick spray.
- Melt the Butter: In a large microwave-safe bowl, melt the butter in 30-second intervals until fully melted. Let it cool for a minute—you don’t want it hot enough to cook the eggs.
- Mix the Wet Ingredients: Whisk the sugar into the melted butter until combined. It will look a little grainy, and that’s okay. Add the eggs one at a time, whisking well after each, then stir in the vanilla extract. The mixture should be smooth and glossy.
- Combine Dry Ingredients: In a small bowl, whisk together the cocoa powder, flour, salt, and baking powder. Make sure there are no lumps—cocoa powder loves to clump.
- Mix the Batter: Gradually add the dry ingredients to the wet mixture, stirring with a spatula until just combined. Do not overmix; you want the brownies to be tender. Fold in the chocolate chips if using. The batter will be thick and fudgy.
- Bake: Pour the batter into the prepared pan and spread it evenly. Bake for 20-25 minutes, or until a toothpick inserted in the center comes out with a few moist crumbs. The edges should be set, and the center should look slightly underdone—that’s the secret to fudgy brownies. Let them cool completely in the pan on a wire rack. This is crucial: if you try to decorate warm brownies, the white chocolate will melt into a mess.
- Prepare the White Chocolate: Once the brownies are cool, place the white chocolate wafers and coconut oil in a small microwave-safe bowl. Microwave in 20-second intervals, stirring each time, until smooth and fully melted. Be careful not to overheat—white chocolate burns easily. If it seizes up, add a tiny bit more oil and stir vigorously.
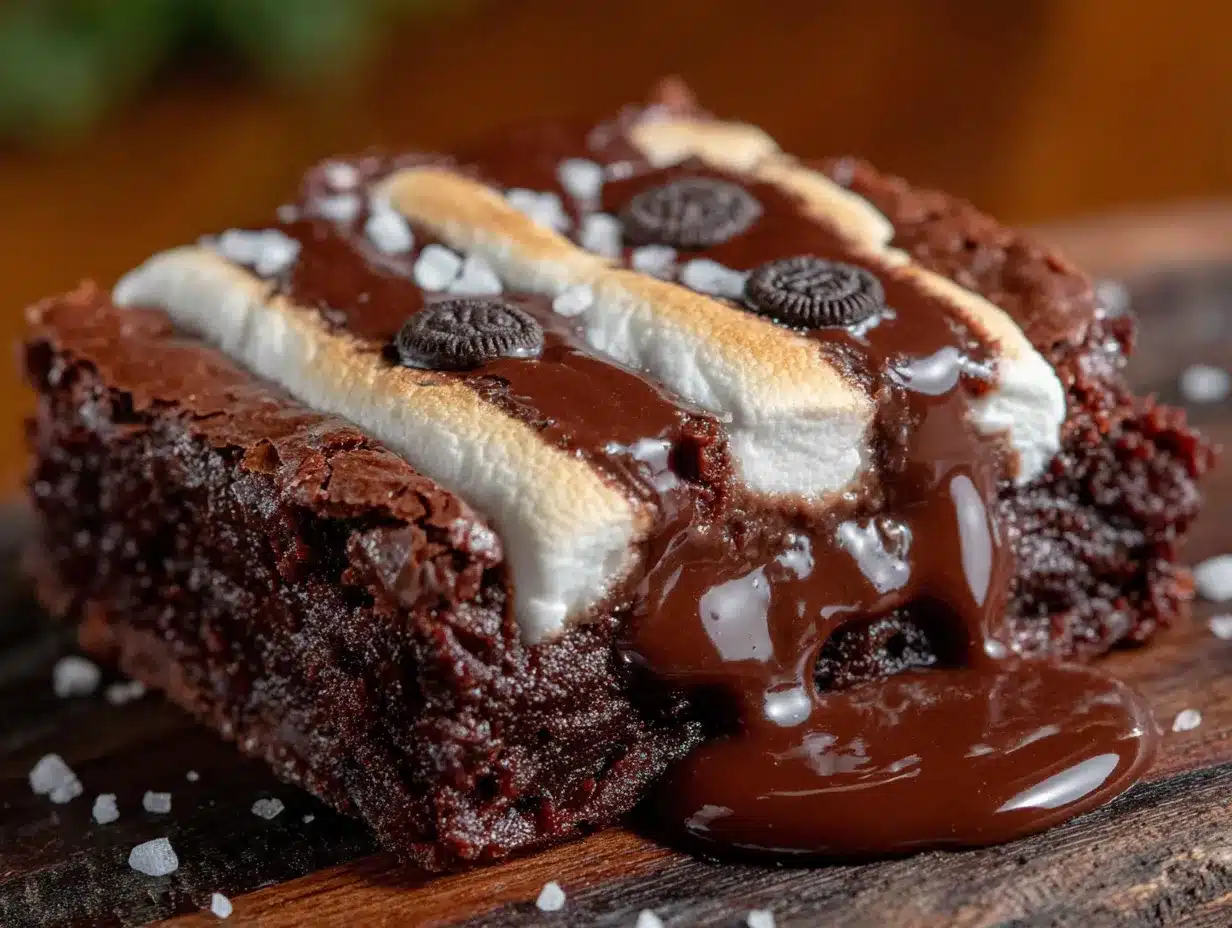
- Cut and Decorate: Lift the brownies out of the pan using the parchment overhang. Cut them into 12 rectangles. For each mummy, take one brownie and place it on a serving plate or parchment-lined tray. Using a small spoon or a piping bag, drizzle a small puddle of melted white chocolate on the plate where the brownie will sit—this is the “melting” effect. Place the brownie on top, slightly off-center, so it looks like it’s sliding into the puddle.
- Create the Mummy Wraps: Transfer the remaining melted white chocolate to a piping bag or zip-top bag with a tiny corner snipped off. Pipe zigzag lines across the brownie, mimicking mummy bandages. Leave a small gap for the eyes. Work quickly before the chocolate sets.
- Add the Eyes: While the white chocolate is still wet, press two candy eyes into the gap. Use a toothpick to adjust them if needed. The mummy should look like it’s peeking out of its wraps.
- Optional Witch Hat: For a witch mummy, use black decorating gel to pipe a small triangle hat on top of the mummy’s head. It’s a cute touch that adds to the Halloween vibe.
- Set and Serve: Let the decorated brownies sit at room temperature for about 15 minutes, or until the white chocolate is set. If you’re in a hurry, pop them in the fridge for 5 minutes. Serve immediately or store as directed below.
Cooking Tips & Techniques
I’ve made more batches of these than I can count, and I’ve learned a few things along the way. Here are my best tips:
- Don’t Overbake: The number one mistake with brownies is overbaking. You want them fudgy, not cakey. Pull them out when the center still looks a little wet—they’ll continue cooking as they cool.
- Cool Completely: I can’t stress this enough. If the brownies are even slightly warm, the white chocolate will melt and slide off. Let them cool for at least an hour.
- Work in Batches: If you’re making a big batch, decorate a few brownies at a time. The white chocolate can start to set in the piping bag, so reheat it in the microwave for 10 seconds if it gets too thick.
- Use a Light Hand: When piping the mummy wraps, less is more. You want to see the brownie peeking through the bandages. If you cover it completely, it looks like a white blob, not a mummy.
- Position the Eyes Early: Place the candy eyes as soon as you finish piping the wraps. If you wait, the chocolate will set, and the eyes won’t stick.
- Practice on Parchment: If you’re nervous about the piping, practice a few zigzags on a piece of parchment paper first. It builds confidence.
Variations & Adaptations
One of the best things about this recipe is how easy it is to customize. Here are some variations I’ve tried and loved:
- Gluten-Free Version: Substitute the all-purpose flour with a 1:1 gluten-free baking blend. I’ve used Bob’s Red Mill with great results. The texture is slightly more tender, but the flavor is spot on.
- Vegan Adaptation: Use vegan butter, a flax egg (1 tablespoon ground flaxseed mixed with 3 tablespoons water), and dairy-free white chocolate. The brownies will be a bit denser, but they’re still delicious.
- Peanut Butter Swirl: Before baking, drop spoonfuls of peanut butter on top of the brownie batter and swirl with a knife. It adds a salty contrast to the sweet white chocolate.
- Different Shapes: Instead of rectangles, use a round cookie cutter to make mummy heads. They’re perfect for mini treats or cupcake toppers.
- Colorful Wraps: Add a drop of green or purple food coloring to the white chocolate for a spooky twist. My kids love the green “zombie” mummies.
- Spice It Up: Add 1/4 teaspoon of cayenne pepper to the brownie batter for a subtle heat that pairs beautifully with the chocolate.
Serving & Storage Suggestions
These brownies are best served at room temperature, so the white chocolate is firm but not hard. Arrange them on a platter with the “melting” puddle facing outward for maximum visual impact. They’re perfect for Halloween parties, school events, or just a fun weekend baking project with the kids.
Storage: Store undecorated brownies in an airtight container at room temperature for up to 3 days. Once decorated, they’re best eaten within 24 hours—the candy eyes can soften over time. If you need to store them longer, keep them in the fridge for up to 5 days, but let them come to room temperature before serving. The white chocolate can bloom (get white streaks) in the fridge, but it’s still safe to eat.
Freezing: You can freeze the undecorated brownies for up to 3 months. Wrap them tightly in plastic wrap and then foil. Thaw at room temperature, then decorate as directed. I’ve done this for holiday prep, and it works like a charm.
Reheating: If you want a warm brownie, microwave it for 10-15 seconds. The white chocolate will soften, but the mummy design will hold up surprisingly well.
Nutritional Information & Benefits
Let’s be real—these are a treat, not a health food. But I believe in enjoying indulgent desserts in moderation, and these brownies are worth every bite. Here’s the approximate nutritional breakdown per serving (1 brownie with decorations):
- Calories: 280
- Fat: 14g
- Carbohydrates: 38g
- Protein: 4g
- Sugar: 28g
- Fiber: 2g
The cocoa powder in the brownies is rich in antioxidants and can help improve mood—bonus! The white chocolate, while not a health food, provides a small amount of calcium. If you’re watching your sugar intake, you can reduce the sugar in the brownie batter by 1/4 cup without sacrificing texture. For a lower-fat option, substitute half the butter with unsweetened applesauce. These brownies are not gluten-free or vegan in their standard form, but see the variations section for adaptations.
Conclusion
These Easy Melting Witch Mummy Brownies are the Halloween treat you didn’t know you needed. They’re fun to make, even more fun to eat, and they always get a reaction. I love how they bring a little bit of whimsy to the holiday without requiring hours of work or a pastry degree. Whether you’re making them for your own family or a big party, they’re guaranteed to be a hit. I encourage you to make them your own—try different colors, add a witch hat, or experiment with the brownie base. The best recipes are the ones that evolve with you. So grab your ingredients, put on your favorite Halloween playlist, and get ready to create something magical. And when you do, I’d love to hear about it—drop a comment below, share a photo, or tell me how you customized yours. Happy Halloween, and happy baking!
Frequently Asked Questions
Can I use a boxed brownie mix for this recipe?
Absolutely! I’ve used boxed mixes plenty of times when I’m short on time. Just follow the package directions and let the brownies cool completely before decorating. The homemade version has a richer flavor, but the boxed version works perfectly for the design.
How do I prevent the white chocolate from seizing?
White chocolate is finicky. Always melt it slowly—use 20-second intervals in the microwave and stir between each. Adding a teaspoon of coconut oil or vegetable shortening helps keep it smooth. If it does seize, add a little more oil and stir vigorously; it might come back together.
Can I make these ahead of time?
Yes! Bake the brownies up to 3 days in advance and store them in an airtight container. Decorate them the day you plan to serve them for the best appearance. The white chocolate can start to soften after 24 hours, so fresh decorations look best.
What if I can’t find candy eyes?
No problem! You can use small white chocolate chips or even M&M’s for the eyes. If you use M&M’s, place them with the “M” facing down for a cleaner look. You can also pipe a small dot of white chocolate and then a smaller dot of dark chocolate on top for a DIY eye.
How do I get the melting effect just right?
The key is to pipe the white chocolate puddle on the plate first, then place the brownie on top so it looks like it’s sliding in. Don’t make the puddle too large—about the size of a silver dollar is perfect. If you want extra drama, add a few white chocolate drips coming off the edge of the brownie.
Pin This Recipe!
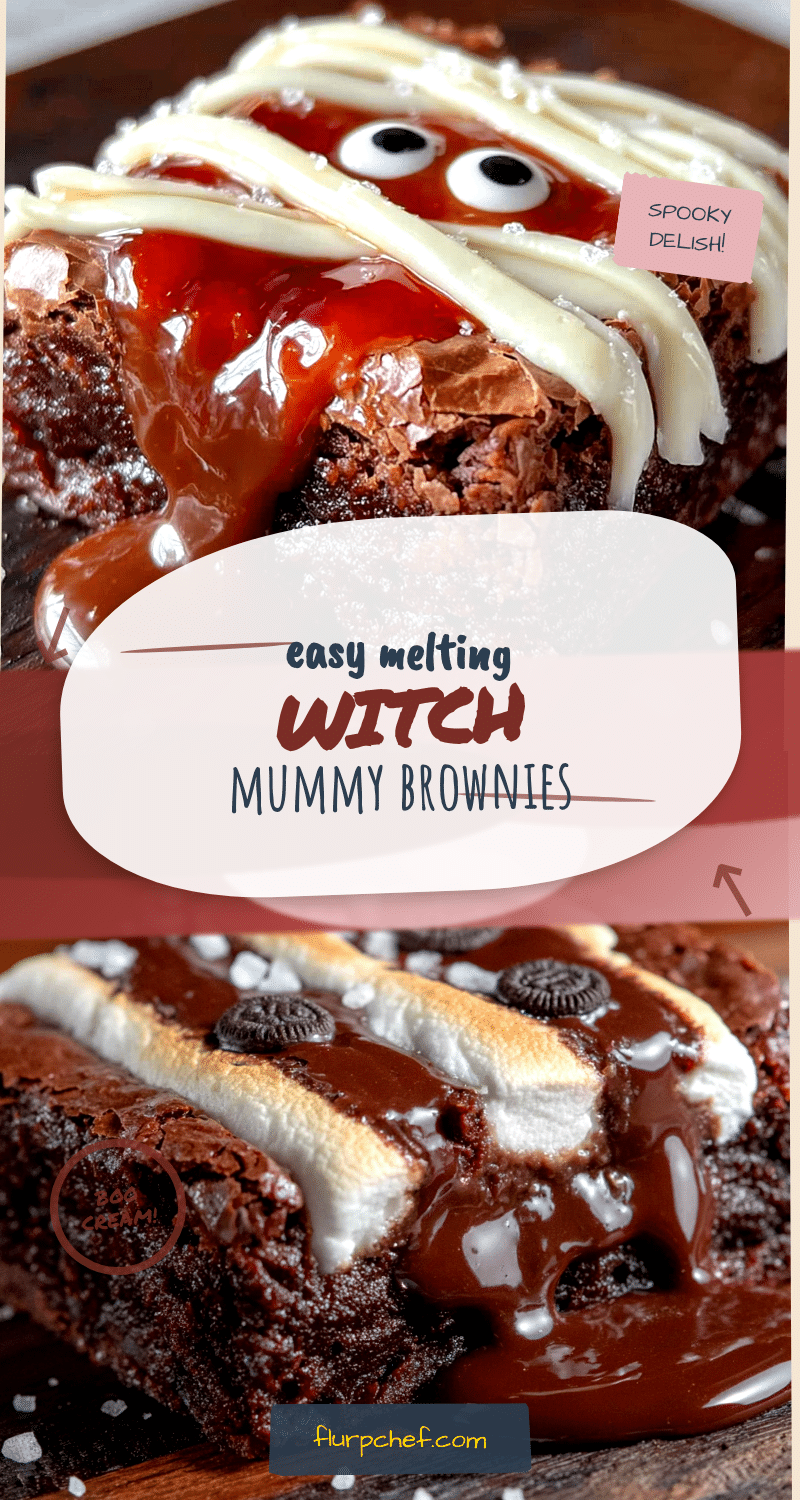
Easy Melting Witch Mummy Brownies: Best Halloween Treat
These fudgy brownies are decorated to look like melting mummies, with white chocolate bandages and candy eyes. A fun and easy Halloween treat that’s perfect for parties and guaranteed to be a hit with kids and adults alike.
- Prep Time: 15 minutes
- Cook Time: 25 minutes
- Total Time: 45 minutes
- Yield: 12 servings 1x
- Category: Dessert
- Cuisine: American
Ingredients
- 1/2 cup (1 stick) unsalted butter, melted
- 1 cup granulated sugar
- 2 large eggs, room temperature
- 1 teaspoon vanilla extract
- 1/3 cup unsweetened cocoa powder
- 1/2 cup all-purpose flour
- 1/4 teaspoon salt
- 1/4 teaspoon baking powder
- 1/2 cup semi-sweet chocolate chips (optional)
- 1 cup white chocolate melting wafers
- 1 tablespoon coconut oil or vegetable shortening
- 24 candy eyes
- Black decorating gel (optional, for witch hat)
Instructions
- Preheat oven to 350°F (175°C). Line an 8×8-inch baking pan with parchment paper, leaving overhang on two sides. Lightly grease the parchment.
- In a large microwave-safe bowl, melt the butter in 30-second intervals. Let cool for 1 minute.
- Whisk sugar into melted butter until combined. Add eggs one at a time, whisking well after each. Stir in vanilla extract until smooth and glossy.
- In a small bowl, whisk together cocoa powder, flour, salt, and baking powder until no lumps remain.
- Gradually add dry ingredients to wet mixture, stirring with a spatula until just combined. Fold in chocolate chips if using. Batter will be thick and fudgy.
- Pour batter into prepared pan and spread evenly. Bake for 20-25 minutes, until a toothpick inserted in center comes out with moist crumbs. Cool completely in pan on a wire rack.
- Once brownies are cool, place white chocolate wafers and coconut oil in a small microwave-safe bowl. Microwave in 20-second intervals, stirring each time, until smooth and fully melted.
- Lift brownies out of pan using parchment overhang. Cut into 12 rectangles.
- For each mummy, place a brownie on a serving plate. Using a small spoon or piping bag, drizzle a small puddle of melted white chocolate on the plate where the brownie will sit. Place the brownie on top, slightly off-center, to create a melting effect.
- Transfer remaining melted white chocolate to a piping bag or zip-top bag with a tiny corner snipped off. Pipe zigzag lines across the brownie to mimic mummy bandages, leaving a small gap for the eyes.
- While white chocolate is still wet, press two candy eyes into the gap. Use a toothpick to adjust if needed.
- Optional: Use black decorating gel to pipe a small triangle witch hat on top of the mummy’s head.
- Let decorated brownies sit at room temperature for about 15 minutes, or until white chocolate is set. Serve immediately or store as directed.
Notes
Don’t overbake the brownies; they should be fudgy. Cool completely before decorating to prevent white chocolate from melting. Work in batches if making a large batch; reheat white chocolate if it thickens. Use a light hand when piping mummy wraps to let brownie peek through. Place candy eyes immediately after piping wraps.
Nutrition
- Serving Size: 1 brownie with decor
- Calories: 280
- Sugar: 28
- Sodium: 120
- Fat: 14
- Saturated Fat: 8
- Carbohydrates: 38
- Fiber: 2
- Protein: 4
Keywords: Halloween brownies, mummy brownies, witch mummy brownies, easy Halloween dessert, fudgy brownies, white chocolate mummies, spooky treats