The pan was scraped clean before the coffee had even finished brewing. My neighbor, who had stopped by to borrow a whisk, ended up standing over the counter with a fork, eating directly from the dish. She didn’t even pretend to be polite about it. That’s when I knew this Easy Pumpkin Dump Cake wasn’t just good—it was the kind of good that makes people forget their manners.
I stumbled onto this recipe by accident, honestly. It was one of those afternoons where I wanted something warm and spiced but had zero energy for a layered cake or fussy frosting. I had a can of pumpkin puree in the pantry, a box of cake mix I’d bought on a whim, and the sudden, desperate need for dessert. I figured, what’s the worst that could happen? Throw it all together, top it with butter, and hope for the best.
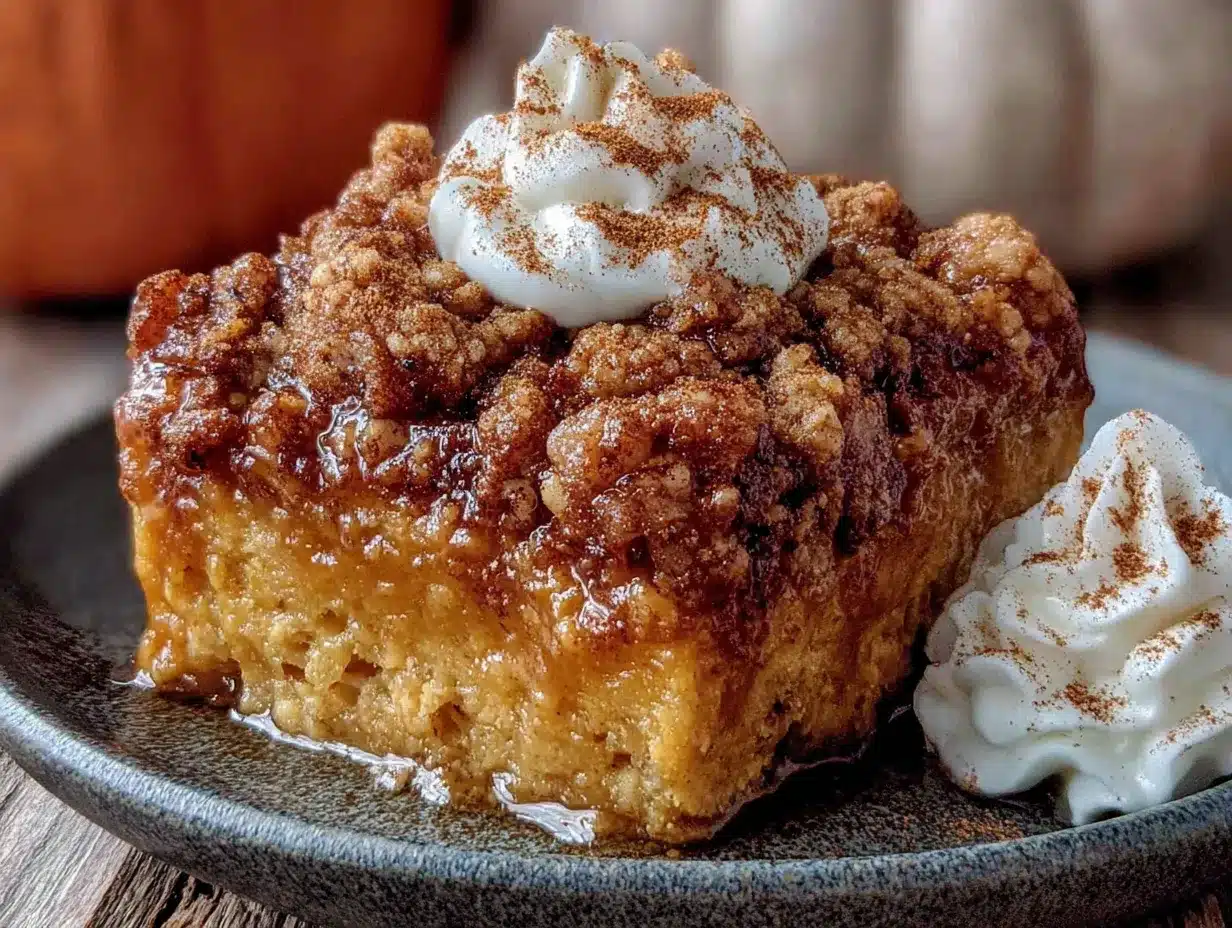
Turns out, the best is exactly what you get. This isn’t a recipe that needs a standing mixer or a pastry bag. It’s the kind of dessert that builds itself in the pan while you sit back and watch. The pumpkin layer turns into a soft, almost pudding-like base, and the cake mix bakes up into a buttery, golden crumble on top. It’s pure, unfussy fall magic in a 9×13 pan.
This Easy Pumpkin Dump Cake has become my go-to for every potluck, every last-minute gathering, and every evening when I just want a slice of something cozy without spending hours in the kitchen. It’s the recipe I trust when I need to show up with something that looks like I tried really hard when I really, really didn’t.
Why You’ll Love This Recipe
Let’s be real for a second. How many dessert recipes promise to be “easy” but still require you to cream butter, chill dough, or wash a million bowls? This one is actually easy. It’s the laziest, most rewarding dessert I know how to make, and I say that with total affection.
- Only 4 Ingredients: You need pumpkin puree, sweetened condensed milk, a box of yellow cake mix, and butter. That’s it. No eggs, no heavy cream, no obscure spices you’ll never use again.
- No Mixing Bowls: You literally dump everything straight into the baking dish. Layer by layer. The pan is your bowl. The cleanup is a two-minute job.
- Perfect for Fall Gatherings: This cake is the star of every Thanksgiving dessert table, every Friendsgiving, and every cozy Sunday dinner. It feeds a crowd without breaking a sweat.
- Foolproof for Beginners: If you can open a can and sprinkle a powder, you can make this cake. It’s the perfect recipe for new bakers or anyone who’s ever been intimidated by a pie crust.
- Comfort Food at Its Core: The texture is incredible—a creamy, spiced pumpkin bottom with a crunchy, buttery top. It’s like pumpkin pie and a crumble had a beautiful, delicious baby.
What makes this Easy Pumpkin Dump Cake different from the hundreds of other versions out there? It’s the ratio. I’ve tested this more times than I care to admit, and I’ve found that using a full can of sweetened condensed milk (not evaporated milk) gives the pumpkin layer a richness that’s almost like a custard. It’s not watery, it’s not bland, and it sets up perfectly every single time. This isn’t just another dump cake—it’s the one.
What Ingredients You Will Need
This recipe uses simple, humble ingredients that come together to create something surprisingly luxurious. You probably have most of these in your pantry right now. Here’s what you need and why each one matters.
For the Pumpkin Layer
- 1 can (15 oz) pumpkin puree: Make sure you grab pure pumpkin, not pumpkin pie filling. The filling has sugar and spices already added, which will throw off the balance. I always reach for Libby’s, but any 100% pure pumpkin brand works great. Look for a can that feels heavy for its size—that means it’s packed tight.
- 1 can (14 oz) sweetened condensed milk: This is the secret weapon. Do not substitute evaporated milk here. Sweetened condensed milk is thick, sweet, and rich, and it gives the pumpkin layer a silky, almost cheesecake-like texture. The caramelized sweetness it brings is what makes this cake so addictive.
- 2 teaspoons pumpkin pie spice: You can absolutely use a store-bought blend (I like McCormick for consistency), but you can also make your own with cinnamon, nutmeg, ginger, and a tiny pinch of cloves. If you only have cinnamon on hand, use 1½ teaspoons of that—it will still be delicious, just a little less complex.
- 1 teaspoon vanilla extract: Pure vanilla is best, but imitation works fine in a pinch. It rounds out the flavors and makes the pumpkin taste warmer somehow.
- ¼ teaspoon salt: Don’t skip this. Salt doesn’t make it salty; it makes the sweet and spice flavors pop. It’s the difference between a good cake and a great one.
For the Topping
- 1 box (15.25 oz) yellow cake mix: This is the magic ingredient. A standard box of Duncan Hines or Betty Crocker yellow cake mix is perfect. You don’t need to mix it with anything—just sprinkle the dry powder right on top of the pumpkin layer. Do not use a butter recipe or extra-moist variety; the classic yellow cake mix gives the best crumbly texture.
- 1 cup (2 sticks) unsalted butter, melted: Real butter is non-negotiable here. Margarine or spreads have too much water and won’t create that signature crunchy, golden crust. Melt it slowly in the microwave or on the stove. The butter soaks through the dry cake mix as it bakes, turning it into a buttery, crispy topping that’s absolutely irresistible.
- Optional: ½ cup chopped pecans or walnuts: If you want a little crunch, scatter some nuts over the cake mix before pouring the butter. It adds a lovely texture and a toasty flavor that pairs beautifully with the pumpkin.
Equipment Needed
The beauty of this recipe is how little equipment it requires. You don’t need a fancy kitchen to pull this off.
- 9×13-inch baking dish: A glass or ceramic dish works best. I use a Pyrex baking dish because it heats evenly and lets me see the bottom layer bubbling. If you only have a metal pan, that’s fine too—just keep an eye on the baking time, as metal conducts heat a little faster.
- Large mixing bowl: Just one, for whisking the pumpkin layer. You could even mix it right in the baking dish if you’re careful, but a bowl gives you more control.
- Whisk or spatula: A whisk works best to get the pumpkin mixture smooth, but a rubber spatula will do the job.
- Measuring cups and spoons: For the spice, vanilla, and salt. If you’re using pre-ground spice blends, a simple teaspoon measure is all you need.
- Small microwave-safe bowl: For melting the butter. You can also melt it in a small saucepan on the stove.
- Cooling rack: Not strictly necessary, but it helps the cake cool evenly so the bottom doesn’t get soggy.
Preparation Method
Alright, let’s get to it. This is the easiest dessert you’ll ever make, I promise. Follow these steps, and you’ll have a showstopper in just over an hour.
- Preheat your oven to 350°F (175°C). While it’s heating up, lightly grease your 9×13-inch baking dish with a little butter or non-stick spray. You don’t need to go crazy—just a thin coating to prevent sticking.
- Make the pumpkin layer. In a large bowl, combine the 15-ounce can of pumpkin puree, the 14-ounce can of sweetened condensed milk, 2 teaspoons of pumpkin pie spice, 1 teaspoon of vanilla extract, and ¼ teaspoon of salt. Whisk everything together until it’s completely smooth and uniform. The mixture should be thick, glossy, and a beautiful deep orange color. Give it a taste—it should be sweet, spiced, and incredibly creamy.
- Spread the pumpkin mixture into the prepared dish. Pour it into the center of the dish, then use your spatula to spread it evenly to all four corners. The layer should be about ½-inch thick. Take your time here—an even layer means even baking.
- Sprinkle the dry cake mix evenly over the top. This is the part that feels weird, but trust the process. Open your box of yellow cake mix and slowly pour the dry powder over the pumpkin layer. Use your hands or a spoon to spread it into an even, complete layer. Don’t leave any gaps, or you’ll end up with bare patches of pumpkin. It should look like a sandy, powdery blanket covering the entire surface.
- Drizzle the melted butter over the cake mix. Melt your 2 sticks of unsalted butter in a small bowl or saucepan. Drizzle it slowly and evenly over the entire surface of the cake mix. Try to cover as much of the dry powder as possible. Some spots will get more butter than others, and that’s okay—those spots will turn into crunchy, golden clusters. If you’re using nuts, sprinkle them on top now.
- Bake for 45-50 minutes. Place the dish on the middle rack of your preheated oven. Bake until the top is deep golden brown and the edges are bubbling with caramelized pumpkin. The center should be set but still have a slight jiggle—like a pumpkin pie. A toothpick inserted into the topping should come out with some moist crumbs, not wet batter. If the top is browning too quickly after 35 minutes, loosely tent it with a piece of aluminum foil.
- Cool for at least 20 minutes before serving. This is the hardest part, I know. But letting it cool allows the pumpkin layer to set up properly. If you cut into it too soon, it will be runny. After 20 minutes, it will be warm, soft, and perfectly sliceable. For cleaner slices, let it cool completely to room temperature.
Cooking Tips & Techniques
I’ve made this Easy Pumpkin Dump Cake more times than I can count, and I’ve learned a few things along the way. Here are my best tips to make sure yours turns out perfect every time.
Don’t stir the layers together. I know it’s tempting to mix everything up once it’s in the pan, but resist the urge. The magic of a dump cake is that the layers stay separate. The pumpkin stays creamy on the bottom, and the cake mix bakes into a crispy, buttery crust on top. If you stir it, you’ll end up with a dense, gummy mess.
Use cold butter if you want a chunkier topping. Here’s a little trick I picked up from a friend who’s a pastry chef. Instead of melting the butter, grate a cold stick of butter over the cake mix using a box grater. Then dot the surface with thin slices of the second stick. This creates little pockets of butter that melt slowly, resulting in a topping that’s part crunchy, part soft, and totally addictive.
Watch your oven closely. Every oven runs a little differently. My old oven used to run hot, and I’d burn the edges before the center was done. If your oven runs hot, check the cake at the 35-minute mark. If the top is already deep brown, cover it with foil and continue baking until the center is set.
Let it rest. I cannot stress this enough. The first time I made this, I cut into it after 10 minutes because I couldn’t wait. The bottom was soupy, and the top fell apart. Let it cool for at least 20 minutes, and you’ll be rewarded with clean, beautiful slices that hold their shape.
Make it ahead. This cake actually gets better after a day in the fridge. The flavors meld together, and the texture becomes even more fudgy and dense. I often make it the night before a gathering, and it’s always a hit.
Variations & Adaptations
One of the best things about this Easy Pumpkin Dump Cake is how easy it is to adapt. Here are some of my favorite ways to change it up.
Spice It Up
If you want a more intense spice flavor, add an extra teaspoon of pumpkin pie spice to the pumpkin layer. You can also add a pinch of cayenne pepper for a subtle, warming heat that pairs beautifully with the sweet pumpkin. I tried this once on a whim, and it was surprisingly good.
Make It Gluten-Free
This is super simple. Just swap the regular yellow cake mix for a gluten-free yellow cake mix. Most brands work perfectly. I’ve used King Arthur Flour’s gluten-free mix with great results. The texture will be slightly more crumbly, but the flavor is just as good.
Add a Cream Cheese Layer
For an extra decadent version, drop spoonfuls of cream cheese mixture over the pumpkin layer before adding the cake mix. Beat 8 ounces of softened cream cheese with ¼ cup of sugar and 1 egg until smooth. Dollop it over the pumpkin, then swirl it in with a knife. The tangy cream cheese cuts through the sweetness beautifully.
Go Nutty
I already mentioned nuts in the ingredients, but I want to emphasize how good they are here. Pecans are my top choice—they toast up in the butter and get wonderfully crunchy. Walnuts are a close second. If you’re feeding a crowd with nut allergies, just leave them out.
Try a Different Cake Mix
Yellow cake mix is classic, but you can experiment. Spice cake mix is amazing for an extra layer of fall flavor. White cake mix gives a slightly lighter, more delicate topping. Even lemon cake mix works in a weird, wonderful way—the citrus cuts through the richness and brightens everything up.
Serving & Storage Suggestions
This cake is incredibly versatile when it comes to serving. Here’s how to make the most of it.
Serving: Serve this Easy Pumpkin Dump Cake warm or at room temperature. It’s fantastic on its own, but a scoop of vanilla ice cream or a dollop of freshly whipped cream takes it to another level. The cold, creamy ice cream melting into the warm, buttery cake is pure heaven. For a special touch, drizzle a little caramel sauce over the top.
Storage: Store any leftovers in an airtight container in the refrigerator for up to 5 days. The cake will become denser and more fudgy as it sits, which is honestly a good thing. I actually prefer it on day two.
Reheating: To reheat, pop a slice in the microwave for 15-20 seconds. It will be warm and soft, just like it came out of the oven. You can also reheat it in a 350°F oven for 5-7 minutes if you’re serving a larger portion.
Freezing: This cake freezes beautifully. Wrap the entire cooled cake (or individual slices) tightly in plastic wrap, then in a layer of aluminum foil. Freeze for up to 3 months. To thaw, leave it in the refrigerator overnight, then reheat as directed. It’s a lifesaver for holiday prep.
Nutritional Information & Benefits
While this is definitely a treat, it’s worth noting that the pumpkin brings some surprising nutritional benefits to the table.
| Nutrient | Amount Per Serving (1/12 of cake) |
|---|---|
| Calories | ~380 |
| Total Fat | 18g |
| Saturated Fat | 11g |
| Carbohydrates | 52g |
| Sugar | 38g |
| Protein | 4g |
| Fiber | 2g |
| Vitamin A | 120% DV |
Pumpkin is packed with Vitamin A, which is great for your eyes and immune system. It’s also a good source of fiber, which helps keep you full. The sweetened condensed milk adds calcium, and the butter… well, the butter adds happiness. This isn’t a health food, but it’s a dessert made with real ingredients that you can feel good about enjoying in moderation.
Dietary Considerations: This recipe is vegetarian. For a gluten-free version, use a gluten-free cake mix. It’s not dairy-free (butter and condensed milk), but you could experiment with vegan butter and coconut condensed milk if needed.
Conclusion
This Easy Pumpkin Dump Cake is more than just a recipe—it’s a fall tradition in the making. It’s the dessert you’ll bring to every gathering, the one people will ask for by name, the one that disappears before the pie even gets sliced. And the best part? It takes almost no effort to make.
I love this recipe because it reminds me that cooking doesn’t have to be complicated to be incredible. Sometimes the simplest things—a can of pumpkin, a box of cake mix, a little butter—come together to create something truly special. It’s the kind of dessert that feels like a hug in a bowl, and honestly, isn’t that what fall is all about?
I’d love to hear how yours turns out. Did you add nuts? Try a different cake mix? Serve it with ice cream? Drop a comment below and let me know. And if you loved this recipe, share it with a friend who needs a little fall comfort in their life. Happy baking!
Frequently Asked Questions
Can I use pumpkin pie filling instead of pumpkin puree?
I wouldn’t recommend it. Pumpkin pie filling has sugar and spices already added, which will make your cake overly sweet and throw off the spice balance. Stick with 100% pure pumpkin puree for the best results.
Can I make this in a smaller dish?
You can, but you’ll need to adjust the baking time. An 8×8-inch dish will work, but the layers will be thicker, so you’ll need to bake it for about 55-60 minutes. Keep an eye on it, and use a toothpick to check for doneness.
Can I use a different flavor of cake mix?
Absolutely! Spice cake mix is a fantastic choice for an extra layer of fall flavor. White cake mix, butter pecan, or even lemon cake mix all work beautifully. Each one gives the cake a slightly different personality.
Why is my dump cake runny in the middle?
This usually happens for two reasons: either it wasn’t baked long enough, or it was cut into too soon. Make sure you’re baking it until the edges are bubbling and the center is set but slightly jiggly. Then let it cool for at least 20 minutes before cutting.
Can I add eggs to this recipe?
You don’t need to! The traditional dump cake method doesn’t use eggs. The sweetened condensed milk acts as a binder and thickener for the pumpkin layer. If you add eggs, it will change the texture and make it more like a traditional cake batter, which defeats the purpose of the dump cake method.
Pin This Recipe!
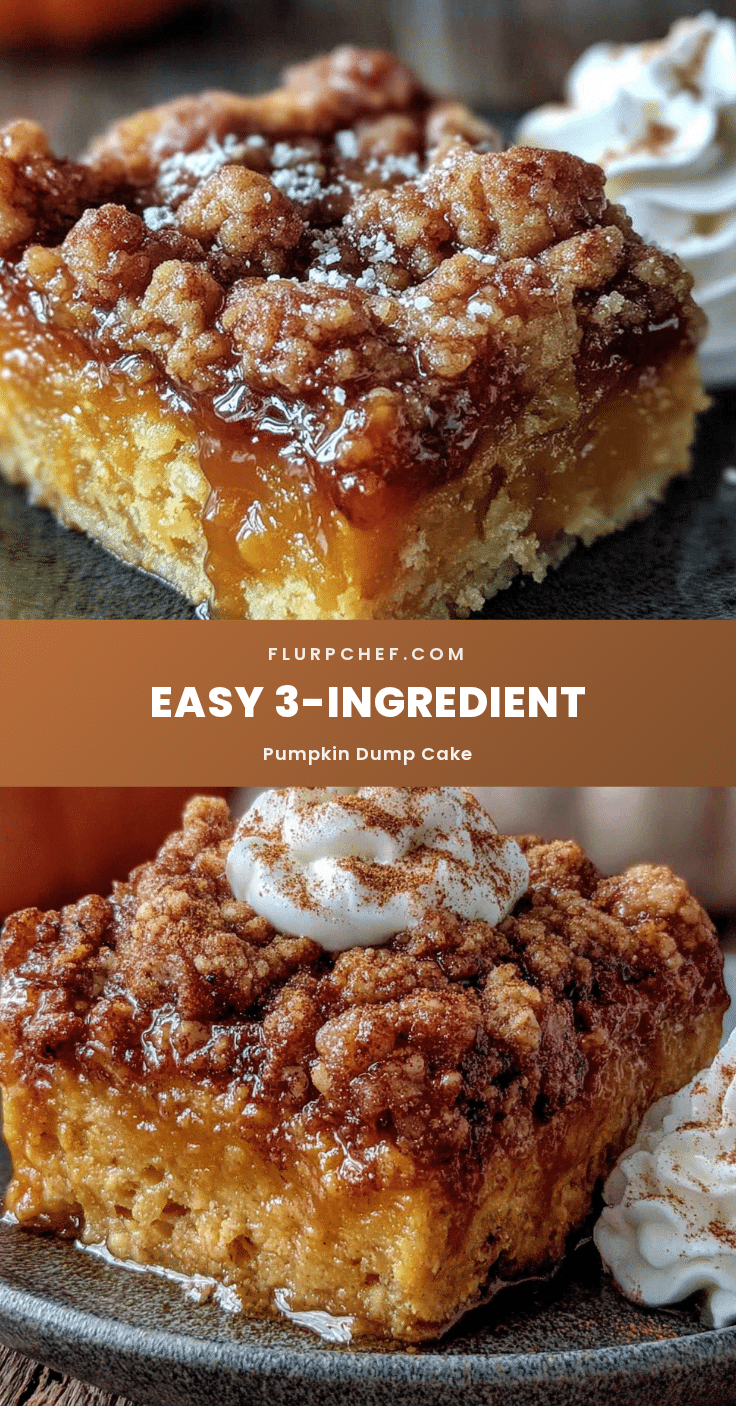
Easy Pumpkin Dump Cake: The Best 4-Ingredient Fall Dessert
This Easy Pumpkin Dump Cake is a simple, 4-ingredient fall dessert with a creamy pumpkin bottom and a buttery, crunchy cake mix topping. It’s perfect for potlucks, Thanksgiving, or any cozy gathering.
- Prep Time: 10 minutes
- Cook Time: 45 minutes
- Total Time: 55 minutes
- Yield: 12 servings 1x
- Category: Dessert
- Cuisine: American
Ingredients
- 1 can (15 oz) pumpkin puree
- 1 can (14 oz) sweetened condensed milk
- 2 teaspoons pumpkin pie spice
- 1 teaspoon vanilla extract
- ¼ teaspoon salt
- 1 box (15.25 oz) yellow cake mix
- 1 cup (2 sticks) unsalted butter, melted
- ½ cup chopped pecans or walnuts (optional)
Instructions
- Preheat your oven to 350°F (175°C). Lightly grease a 9×13-inch baking dish with butter or non-stick spray.
- In a large bowl, combine the pumpkin puree, sweetened condensed milk, pumpkin pie spice, vanilla extract, and salt. Whisk until smooth and uniform.
- Spread the pumpkin mixture evenly into the prepared baking dish.
- Sprinkle the dry cake mix evenly over the pumpkin layer, covering the entire surface.
- Drizzle the melted butter evenly over the cake mix. If using nuts, sprinkle them on top.
- Bake for 45-50 minutes, until the top is deep golden brown and the edges are bubbling. If the top browns too quickly, tent with foil after 35 minutes.
- Cool for at least 20 minutes before serving. Serve warm or at room temperature.
Notes
Do not stir the layers together. Let the cake cool for at least 20 minutes before cutting to allow the pumpkin layer to set. For a chunkier topping, grate cold butter over the cake mix instead of melting it. This cake can be made ahead and tastes even better the next day.
Nutrition
- Serving Size: 1 slice (1/12 of cak
- Calories: 380
- Sugar: 38
- Fat: 18
- Saturated Fat: 11
- Carbohydrates: 52
- Fiber: 2
- Protein: 4
Keywords: pumpkin dump cake, easy pumpkin dessert, 4-ingredient dessert, fall dessert, pumpkin cake


