My sister swore she hated banana bread. For years. Every time I mentioned making a loaf, she’d scrunch up her nose and mutter something about “sad, dense bricks” that her college roommate used to leave on the counter for a week. I let her have her opinion. I mean, honestly, who was I to argue with someone’s deeply held convictions about quick bread? Then one rainy Tuesday evening last fall, I pulled a fresh loaf out of the oven, the kitchen windows all fogged up, and I caught her standing by the counter with a knife in her hand, cutting herself a third slice. She didn’t even look guilty. She just said, “This one’s different.” And honestly? She was right.
This Easy One-Bowl Banana Bread is the recipe that changed her mind, and it might just change yours too. It’s the kind of thing you throw together when the bananas on your counter have gone from yellow to spotted to practically begging for attention. You don’t need a mixer. You don’t need fancy equipment. You just need a bowl, a fork, and maybe ten minutes of your time before the oven does the rest. The texture is tender, the flavor is deep and sweet without being cloying, and the top gets that perfect crackled dome that makes you feel like you actually know what you’re doing. I’ve made it more times than I can count, and it never gets old.
Maybe you’ve been there—staring at a bunch of overripe bananas, knowing you should do something with them but not wanting to commit to a whole production. That’s exactly why this recipe exists. It’s forgiving, it’s fast, and it turns something that looks past its prime into something genuinely wonderful. Let me show you how it’s done.
Why You’ll Love This Recipe
Look, I’ve tested a lot of banana bread recipes over the years. Some were too dry. Some were too dense. Some required pulling out the stand mixer and dirtying every bowl in the kitchen. This one is different, and here’s why it’s become my go-to.
- Quick & Easy: From start to oven in about 10 minutes. No mixer, no complicated steps, just a bowl and a fork. Perfect for those weeknight evenings when you need something homemade but don’t have the energy for a project.
- Simple Ingredients: You probably have everything already. Butter, sugar, eggs, flour, baking soda, salt, and those sad bananas sitting on your counter. No special trips to the store required.
- Perfect for Busy Weeknights: This isn’t a weekend-only bake. It’s the kind of thing you can start after dinner and have warm slices ready before you sit down to watch something. The hands-on time is almost nothing.
- Crowd-Pleaser: I’ve brought this to potlucks, to work, to family gatherings. It disappears every single time. Even people who think they don’t like banana bread end up coming back for seconds.
- Unbelievably Delicious: The secret is in the technique—mashing the bananas really well and using melted butter instead of softened. It creates a loaf that’s moist, tender, and packed with banana flavor without being gummy.
What makes this recipe different from the dozens of others out there? It’s the balance. It’s not too sweet, not too dense, not too anything. It’s just right. And honestly, it’s the kind of recipe that makes you feel like a good baker even on a night when you’re tired and just want something comforting.
What Ingredients You Will Need
This recipe uses simple, humble ingredients to create something genuinely special. The beauty of it is that everything is a pantry staple, and the bananas do most of the heavy lifting in terms of flavor and moisture.
- Overripe Bananas (3 large, about 1 ½ cups mashed): This is non-negotiable. The bananas need to be heavily spotted—almost black—for the best sweetness and texture. Green or yellow bananas won’t mash properly and won’t give you that deep, caramelized banana flavor. I let mine sit on the counter until they look past their prime, then I get excited because I know what’s coming.
- Unsalted Butter (½ cup, melted): Melted butter is the key to the one-bowl method. No waiting for it to soften, no creaming with sugar. Just melt it, let it cool slightly, and you’re good to go. I use unsalted so I can control the salt level, but salted butter works if you reduce the added salt to ¼ teaspoon.
- Granulated Sugar (¾ cup): Regular white sugar gives the bread structure and sweetness. You could use coconut sugar for a deeper flavor, but the texture will be slightly denser. I’ve tested it both ways, and honestly, plain white sugar gives the most reliable result.
- Large Egg (1, at room temperature): The egg binds everything together and adds richness. If you forget to take it out of the fridge ahead of time, just place it in a bowl of warm water for 5 minutes. Quick fix that works every time.
- Vanilla Extract (1 teaspoon): Pure vanilla extract adds warmth and depth. I prefer Nielsen-Massey for its clean flavor, but any good quality extract will do. Avoid imitation vanilla if you can—it makes a difference here.
- All-Purpose Flour (1 ½ cups): Standard all-purpose flour gives the bread a tender crumb. Spoon it into your measuring cup and level it off with a knife—don’t scoop directly from the bag, or you’ll end up with too much flour and a dry loaf.
- Baking Soda (1 teaspoon): This is the leavening agent. Make sure it’s fresh—baking soda loses its power after about 6 months. If you’re not sure, test it by dropping a little into vinegar. If it fizzes vigorously, you’re good.
- Salt (½ teaspoon): Salt balances the sweetness and enhances the banana flavor. Don’t skip it. I use fine sea salt for even distribution.
- Optional Mix-Ins (½ cup): Chocolate chips, chopped walnuts, or pecans are all excellent additions. I usually add dark chocolate chips because, well, chocolate makes everything better. Fold them in gently at the end.
Equipment Needed
One of the best things about this recipe is how little equipment it requires. You genuinely don’t need anything fancy, and I love that about it.
- Large Mixing Bowl: Any medium-to-large bowl will work. I use a sturdy ceramic bowl that doesn’t slide around on the counter. Glass or stainless steel works just as well.
- Fork or Potato Masher: For mashing the bananas. A fork works perfectly, but a potato masher makes it even faster. Either way, you want the bananas completely smooth with no lumps.
- Wooden Spoon or Rubber Spatula: For mixing the batter. A wooden spoon gives you good leverage, but a spatula is great for scraping the sides clean.
- 9×5-inch Loaf Pan: Standard size. If you use an 8×4-inch pan, the bread will be taller and可能需要 a few extra minutes of baking time. I’ve used both, and I slightly prefer the 9×5 for a more even bake.
- Parchment Paper (optional but helpful): Lining the pan makes cleanup a breeze and helps the loaf release cleanly. If you don’t have parchment, just grease the pan well with butter or non-stick spray.
- Cooling Rack: Essential for even cooling. If you don’t have one, you can use the inverted loaf pan to create a makeshift rack, but a real cooling rack is worth the small investment.
Preparation Method
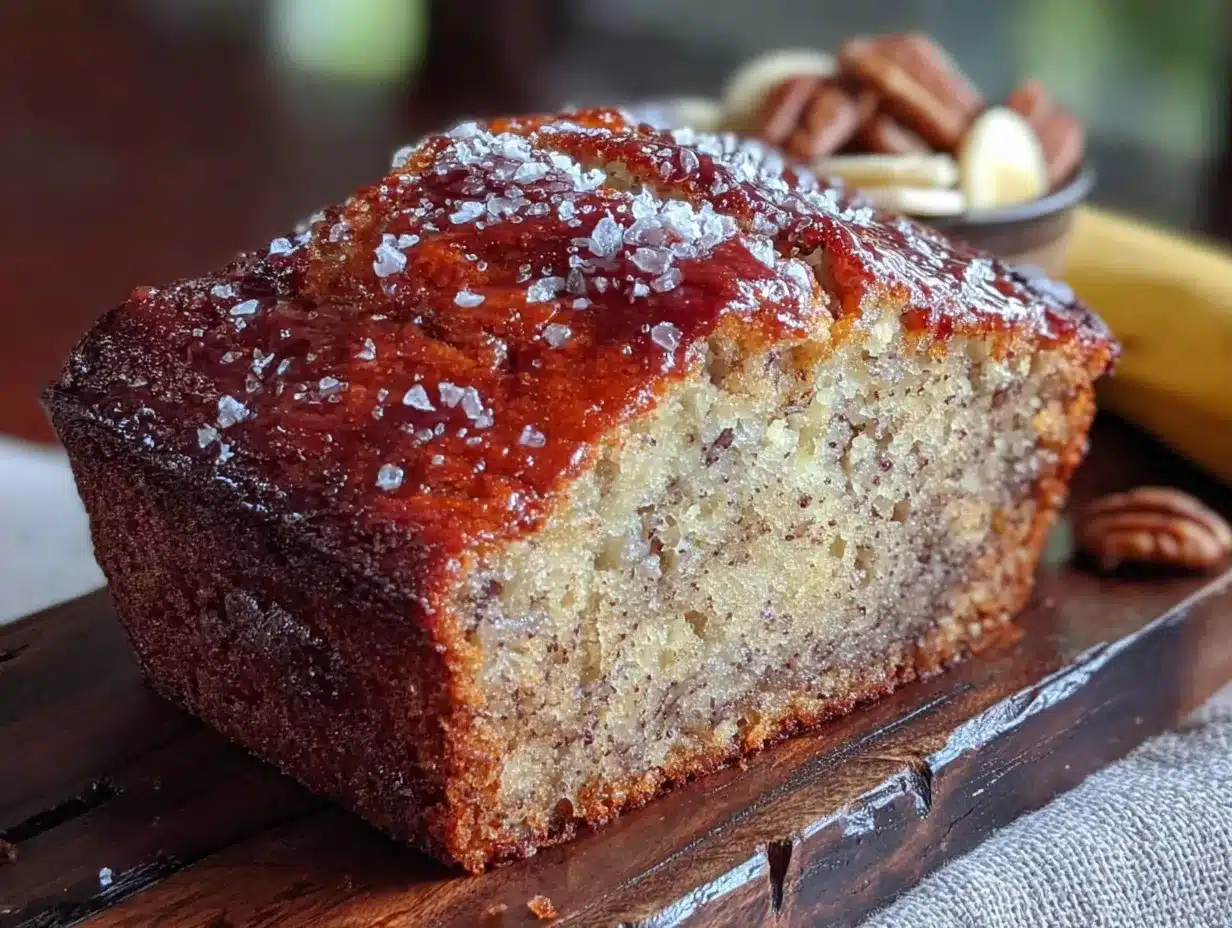
Alright, let’s get to it. This is where the magic happens. Follow these steps, and you’ll have a beautiful loaf of banana bread in just over an hour.
- Preheat your oven to 350°F (175°C). Position the rack in the center of the oven. While it’s heating, grease your 9×5-inch loaf pan with butter or line it with parchment paper, leaving some overhang on the long sides for easy lifting later. I use a little butter on the ends too, just to be safe.
- Mash the bananas in your mixing bowl. Peel the three overripe bananas and place them in the bowl. Using a fork or potato masher, mash them until they’re completely smooth with no large chunks. You want a wet, almost liquidy paste. This should take about 2 minutes. Don’t rush this step—lumpy bananas lead to lumpy bread.
- Add the melted butter and sugar. Pour in the ½ cup of melted butter (make sure it’s not hot—just warm) and ¾ cup of granulated sugar. Stir with your wooden spoon or spatula until everything is well combined. The mixture will look a little grainy from the sugar, and that’s perfectly fine.
- Add the egg and vanilla. Crack the egg directly into the bowl and add the teaspoon of vanilla extract. Stir until the egg is fully incorporated and the batter looks smooth and glossy. This takes about 30 seconds of vigorous stirring. Don’t overmix, but make sure there are no streaks of egg visible.
- Add the dry ingredients. Sprinkle the 1 ½ cups of all-purpose flour, 1 teaspoon of baking soda, and ½ teaspoon of salt over the wet mixture. Use a spoon to gently fold everything together until just combined. A few small streaks of flour are okay—you don’t want to overmix, or the bread will be tough. Stop as soon as the flour disappears.
- Fold in your mix-ins (if using). If you’re adding chocolate chips, nuts, or anything else, gently fold them in now with just a few strokes. Don’t overwork the batter. I usually add about ½ cup of dark chocolate chips, and I reserve a handful to sprinkle on top for a prettier finish.
- Pour the batter into the prepared pan. Scrape every last bit of batter into your greased loaf pan. Use the spatula to spread it evenly. If you reserved some mix-ins for the top, sprinkle them on now. Give the pan a gentle tap on the counter to release any air bubbles.
- Bake for 50-60 minutes. Place the pan in the preheated oven and bake until the top is golden brown and a toothpick inserted into the center comes out clean or with just a few moist crumbs. Start checking at 50 minutes. Every oven runs a little differently—mine usually takes about 55 minutes. The smell in your kitchen will be incredible.
- Cool in the pan for 10 minutes. Set the pan on a cooling rack and let it rest. This helps the bread set and makes it easier to remove. After 10 minutes, use the parchment overhang to lift the loaf out of the pan and transfer it to the rack to cool completely.
- Slice and enjoy. I know it’s tempting to cut into it while it’s still warm, but letting it cool completely (about 1 hour) gives you cleaner slices and a better texture. That said, warm banana bread with a little butter melted on top is a truly beautiful thing. I won’t judge you if you can’t wait.
Cooking Tips & Techniques
After making this recipe more times than I can count, I’ve picked up a few tricks that make a real difference. Here’s what I’ve learned the hard way so you don’t have to.
Don’t overmix the batter. This is the most common mistake I see. Once you add the flour, mix only until it disappears. Overmixing develops the gluten and makes the bread tough and dense. A few lumps are better than a tough loaf. I learned this the hard way when I made a batch for a friend’s birthday and ended up with something closer to a doorstop than a banana bread.
Use room temperature ingredients. The egg and the melted butter should both be at room temperature. If the butter is too hot, it can cook the egg. If the egg is too cold, it can seize the butter. I set everything out about 20 minutes before I start. It’s a small step that makes a big difference in the final texture.
Check your baking soda freshness. This is one of those things you don’t think about until your bread comes out flat and dense. Baking soda loses potency over time. If you can’t remember when you bought it, do the vinegar test. A little fizz means it’s still good. No fizz means it’s time for a new box.
Let the bread cool completely before slicing. I know, I know. The smell is intoxicating, and you want a slice right now. But if you cut into it too soon, the interior will be gummy and the slices will fall apart. Patience pays off here. Give it the full hour on the cooling rack, and you’ll be rewarded with perfect slices every time.
Toast leftover slices for a second life. Day-old banana bread is still delicious, but it’s even better when you toast it. A few minutes in the toaster or under the broiler gives it a crispy edge and a soft, warm center. Add a pat of butter, and it’s like a whole new experience.
Variations & Adaptations
One of the things I love most about this recipe is how adaptable it is. You can change it up based on what you have on hand or what you’re in the mood for. Here are some of my favorite variations.
Chocolate Chip Banana Bread: This is my go-to. Fold in ½ cup of dark chocolate chips (or semi-sweet, if that’s your thing) and sprinkle a few extra on top before baking. The chocolate melts into little pockets of richness throughout the bread. I’ve also used white chocolate chips, and that was pretty great too.
Nutty Banana Bread: Add ½ cup of chopped walnuts or pecans for some crunch. Toast the nuts first in a dry pan for a few minutes to bring out their flavor. It adds a lovely texture contrast to the soft bread. My neighbor swears by pecans, and I have to admit, she’s right.
Gluten-Free Version: Substitute the all-purpose flour with a good quality 1:1 gluten-free flour blend. I’ve used Bob’s Red Mill with great results. The texture will be slightly more tender, but it’s still delicious. No one at my gluten-free friend’s dinner party even noticed the difference.
Vegan Banana Bread: Replace the egg with a flax egg (1 tablespoon ground flaxseed mixed with 3 tablespoons water, let sit for 5 minutes) and use melted coconut oil or vegan butter instead of dairy butter. It works beautifully, though the bread will be a bit more delicate. I’ve made this for vegan potlucks and it always gets eaten up.
Spiced Banana Bread: Add 1 teaspoon of cinnamon and ¼ teaspoon of nutmeg to the dry ingredients. It gives the bread a warm, cozy flavor that’s perfect for fall. Sometimes I add a pinch of cardamom too, just for something different. It’s a subtle change, but it really elevates the whole thing.
Serving & Storage Suggestions
This banana bread is wonderful on its own, but there are a few ways to make it even more special. Here’s how I like to serve and store it.
Serving: I love serving this bread slightly warm with a pat of salted butter melting into the slice. For a more indulgent treat, spread a little cream cheese or even Nutella on top. It’s also fantastic alongside a cup of coffee or tea in the morning. For dessert, a drizzle of honey or a scoop of vanilla ice cream turns it into something truly decadent.
Storage: Once completely cooled, wrap the loaf tightly in plastic wrap or aluminum foil. It will stay fresh at room temperature for up to 4 days. I usually keep it on the counter, wrapped well, and it’s just as good on day 3 as it was on day 1. The flavor actually deepens a little after a day or two.
Freezing: This bread freezes beautifully. Wrap the cooled loaf (or individual slices) tightly in plastic wrap, then again in foil. Place in a freezer bag for extra protection. It will keep for up to 3 months. To thaw, leave it on the counter for a few hours or pop a slice in the microwave for 20 seconds. I always keep a loaf in the freezer for unexpected guests or late-night cravings.
Reheating: For a warm slice, microwave for 15-20 seconds. For a crispier exterior, toast it in a toaster or under the broiler for a minute or two. The toaster method is my favorite—it gives you that perfect contrast between the crunchy edge and the soft center.
One thing I’ve noticed is that the flavors continue to develop over time. The banana flavor becomes more pronounced after a day or two. So if you can resist eating it all at once, you’re in for a treat.
Nutritional Information & Benefits
While this banana bread is definitely a treat, it does have some redeeming qualities. Here’s a rough breakdown per slice (assuming 10 slices per loaf).
- Calories: Approximately 250-280 per slice
- Fat: 11g (mostly from butter, which is fine in moderation)
- Carbohydrates: 36g
- Protein: 4g
- Fiber: 2g
- Sugar: 18g (about half from the bananas and half from added sugar)
Health Benefits: Bananas are a good source of potassium, vitamin B6, and vitamin C. They also provide natural sweetness, which means you can use less refined sugar than in other desserts. The fiber content is modest but helpful for digestion. If you use whole wheat pastry flour instead of all-purpose, you can bump up the fiber even more.
Dietary Considerations: This recipe is vegetarian. For vegan or gluten-free options, see the variations section above. It contains dairy (butter) and gluten (flour), so it’s not suitable for those with allergies to those ingredients unless you make substitutions.
I’m not a nutritionist, and I don’t pretend to be. But I do believe in balance. This banana bread is a comfort food, and it’s meant to be enjoyed. A slice with your morning coffee or as an after-dinner treat is a perfectly reasonable way to live your life.
Conclusion
This Easy One-Bowl Banana Bread has become a staple in my kitchen for good reason. It’s simple, it’s reliable, and it turns something as humble as overripe bananas into something genuinely wonderful. My sister went from hating banana bread to requesting this recipe for her birthday. That’s the kind of power a good recipe has.
I hope you give it a try, and I hope it becomes a staple in your kitchen too. Feel free to customize it with your favorite mix-ins, or leave it plain and simple. Either way, you’re in for a treat. The best part is that it’s forgiving—you don’t need to be a professional baker to get great results. Just a bowl, a fork, and a little bit of time.
If you make this recipe, I’d love to hear about it. Leave a comment below and let me know how it turned out. Did you add chocolate chips? Walnuts? Did you make it for a crowd? Share your experience—I read every comment, and I love hearing how my recipes find their way into your homes. Happy baking!
Frequently Asked Questions
Can I use frozen bananas for this recipe?
Absolutely! Frozen bananas work great. Thaw them completely first, then drain off any excess liquid before mashing. The texture will be slightly softer, but the flavor is just as good. I often freeze bananas when they’re overripe so I always have them on hand.
Why did my banana bread turn out dry?
Dry banana bread usually means either too much flour or overbaking. Make sure you’re measuring your flour correctly—spoon it into the cup and level it off. Also, check your oven temperature with an oven thermometer. And remember, all ovens are different, so start checking for doneness at 50 minutes.
Can I make this recipe into muffins instead?
Yes! This batter works perfectly for muffins. Divide it among a 12-cup muffin tin lined with paper cups. Bake at 350°F (175°C) for 18-22 minutes, or until a toothpick comes out clean. You’ll get about 12 muffins, and they’re perfect for grab-and-go breakfasts.
How do I know when the banana bread is done baking?
The top should be golden brown and cracked. Insert a toothpick or a thin knife into the center—it should come out clean or with just a few moist crumbs attached. If it comes out wet with batter, it needs more time. Also, the edges should pull away slightly from the pan.
Can I reduce the sugar in this recipe?
You can reduce the sugar to ½ cup without major issues, but the bread will be less sweet and slightly denser. If your bananas are very ripe and sweet, you can get away with less sugar. I wouldn’t go below ½ cup, though, as sugar also contributes to the texture and moisture.
PrintEasy One-Bowl Banana Bread: Best No-Mixer Recipe
This Easy One-Bowl Banana Bread is tender, deeply flavorful, and requires no mixer. It’s the perfect way to use overripe bananas and comes together in just 10 minutes before baking.
- Prep Time: 10 minutes
- Cook Time: 55 minutes
- Total Time: 1 hour 5 minutes
- Yield: 10 servings 1x
- Category: Dessert
- Cuisine: American
Ingredients
- 3 large overripe bananas (about 1 ½ cups mashed)
- ½ cup unsalted butter, melted
- ¾ cup granulated sugar
- 1 large egg, at room temperature
- 1 teaspoon vanilla extract
- 1 ½ cups all-purpose flour
- 1 teaspoon baking soda
- ½ teaspoon salt
- ½ cup optional mix-ins (chocolate chips, chopped walnuts, or pecans)
Instructions
- Preheat your oven to 350°F (175°C). Grease a 9×5-inch loaf pan with butter or line with parchment paper, leaving overhang on the long sides.
- Mash the bananas in a large mixing bowl until completely smooth with no large chunks.
- Add the melted butter and sugar; stir until well combined.
- Add the egg and vanilla extract; stir until fully incorporated and the batter is smooth and glossy.
- Sprinkle the flour, baking soda, and salt over the wet mixture. Fold gently until just combined; a few small streaks of flour are okay.
- If using mix-ins, fold them in gently with a few strokes.
- Pour the batter into the prepared pan and spread evenly. Tap the pan gently on the counter to release air bubbles.
- Bake for 50-60 minutes, or until the top is golden brown and a toothpick inserted into the center comes out clean or with a few moist crumbs.
- Cool in the pan for 10 minutes, then lift the loaf out using the parchment overhang and transfer to a cooling rack to cool completely.
- Slice and enjoy. For best texture, let cool completely (about 1 hour) before slicing.
Notes
Don’t overmix the batter once flour is added to avoid tough bread. Use room temperature ingredients for best texture. Check baking soda freshness by testing with vinegar. Let bread cool completely before slicing for clean slices. Toast leftover slices for a crispy exterior.
Nutrition
- Serving Size: 1 slice
- Calories: 265
- Sugar: 18
- Sodium: 280
- Fat: 11
- Saturated Fat: 6
- Carbohydrates: 36
- Fiber: 2
- Protein: 4
Keywords: banana bread, easy banana bread, one-bowl banana bread, no-mixer banana bread, quick bread, overripe bananas


