My niece, who was seven at the time, asked me why I couldn’t just use crescent roll dough instead of making homemade pastry for the hot dogs. I started to explain why that wouldn’t work—something about texture and puff pastry being the only “correct” option. Then I stopped. Honestly, I had no good reason. I was just being stubborn.
It was the Tuesday before Halloween, and I was in full “I need to impress everyone” mode. My kitchen looked like a small explosion had gone off in a grocery store. There was flour on the counter, a half-empty bag of hot dogs on the table, and my niece sitting on a stool, swinging her legs and waiting for me to admit she might be onto something. I grabbed the can of crescent rolls from the fridge, mostly to prove her wrong. Spoiler alert: I was the one who learned a lesson that day.
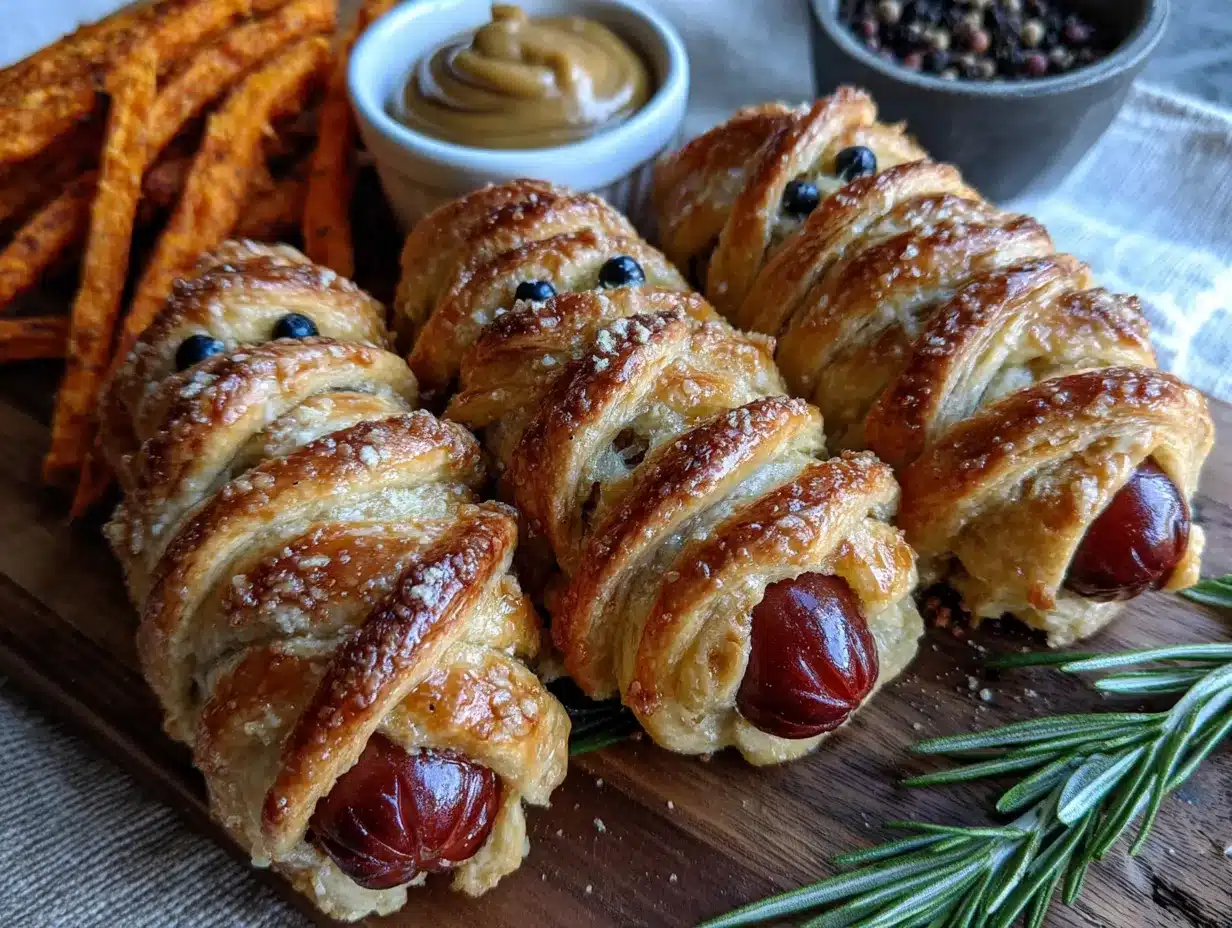
The first batch came out of the oven, and I just stood there staring at them. The dough had puffed up in all the right places, creating these perfect little bandaged ridges that looked exactly like mummy wrappings. My niece didn’t say “I told you so,” but she didn’t have to. The grin on her face said it all. We ended up making three more batches that night because everyone who walked through the door grabbed one before I could even put them on a plate.
Maybe you’ve been there—so focused on doing something the “right” way that you miss the simpler, better version sitting right in front of you. That’s what these Easy Mummy Hot Dogs taught me. They’re not fancy. They’re not complicated. But let me tell you, they disappear faster than any appetizer I’ve ever made. And every time I make them now, I think about that Tuesday night and how sometimes the best ideas come from a seven-year-old who just wanted to help.
Why You’ll Love This Recipe
These Easy Mummy Hot Dogs are the kind of appetizer that makes people stop and smile. They look like you spent an hour wrapping each one by hand, but the secret is how ridiculously simple they actually are. I’ve tested this recipe at three different Halloween parties now, and the results are always the same—the plate empties first, every single time.
- Quick & Easy: From fridge to table in under 20 minutes. You can make a whole tray while the kids are still putting on their costumes.
- Simple Ingredients: You need exactly three main ingredients—hot dogs, crescent roll dough, and mustard for the eyes. That’s it. No fancy grocery store trips required.
- Perfect for Halloween: Whether it’s a school party, a neighborhood gathering, or just a spooky movie night at home, these fit the theme without any stress.
- Crowd-Pleaser: Kids love them because they’re fun. Adults love them because they taste like buttery, flaky goodness wrapped around a classic hot dog.
- Unbelievably Delicious: The crescent dough gets golden and crispy on the outside while staying soft around the hot dog. It’s the perfect texture combination.
What makes these different from every other mummy dog recipe out there? It’s the technique. Most recipes tell you to cut the dough into thin strips, which takes forever and looks messy. I figured out a faster way that gives you cleaner, more consistent wrappings. Plus, I’ll share my trick for getting the mustard eyes to stay put without sliding off. This isn’t just another version—it’s the version I’ve perfected through trial and error so you don’t have to learn the hard way.
There’s something about food that looks like it came from a monster’s kitchen that makes people happy. These Easy Mummy Hot Dogs tap into that playful energy. They’re the kind of appetizer that makes you close your eyes after the first bite, not because it’s fancy, but because it’s exactly what comfort food should be—warm, familiar, and made with a little bit of love and a lot of fun.
What Ingredients You Will Need
This recipe uses simple, everyday ingredients to create something that looks far more impressive than it actually is. Most of these are probably already sitting in your kitchen right now.
For the Mummy Hot Dogs
- 1 package (8 count) hot dogs (I prefer beef hot dogs for richer flavor, but any variety works fine)
- 1 can (8 oz) refrigerated crescent roll dough (Pillsbury is my go-to, but store brands work just as well)
- Mustard for eyes (yellow mustard gives the best contrast, but Dijon works too)
Optional Additions
- Cooking spray or melted butter (for brushing on top to get extra golden crust)
- Sesame seeds or poppy seeds (sprinkle on before baking for added texture)
- Ketchup or ranch dressing (for dipping—because every mummy needs a bath)
Let me talk about the hot dogs for a second. I’ve tried this with turkey dogs, chicken dogs, and even those fancy artisanal sausages from the farmers market. They all work, but there’s something about a classic beef hot dog that just hits different. The saltiness balances perfectly with the buttery crescent dough. If you’re feeding picky eaters, stick with what they already like. Trust me, this isn’t the time to experiment with spicy chorizo or bratwurst—save those for another night.
The crescent roll dough is the real star here. I know some people prefer making homemade dough, and more power to them. But for a recipe that’s supposed to be easy, the canned stuff is your best friend. The key is getting the dough cold enough to work with. If it gets too warm, it gets sticky and tears easily. Pop it in the fridge for five minutes before you start if your kitchen is warm.
For the mustard eyes, yellow mustard gives you that classic Halloween look. The bright yellow stands out against the golden brown dough. If you want a subtler look, Dijon mustard works, but it blends in more. I’ve also seen people use small dots of ketchup or even candy eyes if you want to go full-on cutesy. My niece prefers the mustard because she says it makes the mummies look “grumpy but cute.”
Equipment Needed
You don’t need any special equipment for these Easy Mummy Hot Dogs. That’s part of what makes them so great. Here’s what you’ll need:
- Baking sheet (a standard half-sheet pan works perfectly)
- Parchment paper or silicone baking mat (trust me on this—it saves you from scrubbing later)
- Sharp knife or pizza cutter (for cutting the dough into strips)
- Small bowl (for the mustard eyes, or you can just pipe straight from the bottle)
- Pastry brush (optional, for brushing with butter or cooking spray)
- Toothpicks (helpful for holding the dough ends in place if they try to unroll)
I’ve made these without parchment paper before, and let me tell you, it’s not worth it. The cheese and dough can stick, and you end up with half your mummy stuck to the pan. Spend the extra thirty seconds to line your baking sheet. Your future self will thank you.
If you don’t have a pizza cutter, a sharp knife works fine. Just make sure it’s sharp enough to cut through the dough cleanly. Dull knives squish the dough and make the strips uneven. I learned this the hard way when my first batch looked like they’d been attacked by a toddler with scissors.
Preparation Method
Let me walk you through exactly how to make these Easy Mummy Hot Dogs. I’ve broken it down step by step so you don’t miss anything.
- Preheat your oven to 375°F (190°C). Line your baking sheet with parchment paper or a silicone mat. This gives you a non-stick surface that makes cleanup a breeze.
- Unroll the crescent roll dough onto a clean cutting board or countertop. You’ll see it’s already perforated into triangles. Press the seams together gently with your fingers to create one large rectangle of dough. Don’t press too hard—you just want to seal the perforations, not flatten the dough completely.
- Cut the dough into thin strips. Using a sharp knife or pizza cutter, slice the dough lengthwise into strips about 1/4 to 1/2 inch wide. You should get around 8 to 10 strips per can of dough. The strips don’t need to be perfectly even—slightly uneven strips actually look more like real mummy bandages.
- Wrap the hot dogs. Take one strip of dough and start wrapping it around a hot dog at a slight angle. Leave a small gap at the top for the “face” area where you’ll add the eyes. Overlap the dough slightly as you wrap to create that bandaged mummy look. Tuck the end of the dough under the last wrap to secure it. Repeat with the remaining hot dogs and dough strips.
- Place the wrapped hot dogs on the prepared baking sheet, leaving about 1 inch of space between each one. They won’t spread much, but you want air to circulate around them for even browning.
- Optional: Brush with melted butter or spray with cooking spray. This step isn’t strictly necessary, but it gives you a gorgeous golden-brown crust that makes the mummies look even more appetizing. If you’re skipping this, they’ll still brown nicely on their own.
- Bake for 12 to 15 minutes, or until the dough is golden brown and puffed. Keep an eye on them after the 10-minute mark—ovens vary, and you don’t want burnt mummies. The hot dogs are already cooked, so you’re really just baking the dough.
- Let them cool for 2 to 3 minutes on the baking sheet. This is important because the dough is hot and the mustard eyes will slide off if you add them too soon. I learned this the hard way when my first batch looked like crying mummies with mustard tears running down their faces.
- Add the mustard eyes. Using a toothpick or the tip of a knife, dab two small dots of mustard on the exposed hot dog area at the top of each mummy. You can make them look grumpy by angling the dots downward, or surprised by making them round and wide. Get creative with it.
- Serve immediately while they’re still warm. These are best fresh out of the oven when the dough is crispy on the outside and soft on the inside.
A quick tip: if the dough strips start getting too warm and sticky while you’re wrapping, just pop them in the fridge for a few minutes. Cold dough is much easier to work with. I keep a second baking sheet in the fridge so I can rotate batches if I’m making a large quantity.
Cooking Tips & Techniques
After making these Easy Mummy Hot Dogs at least a dozen times, I’ve picked up a few tricks that make the process smoother and the results better.
Don’t over-wrap the hot dogs. I know it’s tempting to use every inch of dough, but three to four wraps around each hot dog is plenty. Too much dough means a higher dough-to-hot-dog ratio, and you end up with more bread than meat. The mummies should look wrapped, not swallowed by their bandages.
Leave a gap for the face. This sounds obvious, but I’ve definitely made mummies where the dough covered the entire hot dog, leaving no room for eyes. Leave about half an inch of exposed hot dog at the top. That’s where the personality comes from.
Use room temperature hot dogs. Cold hot dogs straight from the fridge make the dough cold and harder to work with. Let them sit on the counter for 5 to 10 minutes before wrapping. This small step makes a noticeable difference in how easily the dough wraps around them.
Watch the edges of the dough. The thinnest parts of the strips tend to brown faster and can burn if you’re not paying attention. If you notice the edges getting too dark before the centers are done, you can tent the baking sheet loosely with foil for the last few minutes.
I once forgot to leave the gap for the eyes on an entire batch. I was rushing because the doorbell was ringing and kids were already arriving. I ended up having to poke holes through the dough with a toothpick and squirt mustard into them. They looked like mummies with weird skin conditions. Honestly, the kids still devoured them, but it taught me to slow down and follow the steps.
Make ahead tip: You can wrap the hot dogs up to 24 hours in advance and keep them covered in the fridge. Just add an extra minute or two to the baking time since they’ll be starting from cold. This is a lifesaver if you’re hosting a party and want to minimize last-minute work.
Variations & Adaptations
One of the best things about this recipe is how easy it is to customize. Here are some variations I’ve tried and loved.
Cheesy Mummy Dogs
Before wrapping the hot dog, cut a slit lengthwise down the center and stuff it with a strip of cheddar cheese or a string cheese stick. The cheese melts as it bakes and creates a gooey surprise inside. Just be careful—the cheese gets hot and can burn your mouth if you bite in too fast.
Spicy Mummy Dogs
Swap the regular hot dogs for spicy ones, or brush the dough with a mixture of melted butter and hot sauce before baking. I’ve used sriracha and buffalo sauce both with great results. The spicy version was a hit at my friend’s adult Halloween party—the kids didn’t touch them, which meant more for the grown-ups.
Vegetarian Option
Use vegetarian or plant-based hot dogs instead of traditional ones. Most brands work well, though some are softer and can break apart more easily when you’re wrapping them. Handle them gently and you’ll be fine. My sister-in-law is vegetarian, and she says these are the only “hot dogs” she actually looks forward to eating.
Gluten-Free Adaptation
Look for gluten-free crescent roll dough or puff pastry sheets. The texture is slightly different—a bit more crumbly—but the taste is still great. You can also use gluten-free flour tortillas cut into strips if you can’t find the dough. Brush them with butter before baking to help them crisp up.
Breakfast Mummy Dogs
Use breakfast sausage links instead of hot dogs and serve them with maple syrup for dipping. I made these for a Halloween-themed brunch once, and they were gone before the pancakes were even done. The sweet and savory combination works surprisingly well.
Serving & Storage Suggestions
These Easy Mummy Hot Dogs are best served warm, right after the mustard eyes go on. The contrast between the warm, flaky dough and the cool mustard is part of what makes them so satisfying.
For presentation, arrange them on a platter with the mustard eyes facing outward so everyone can see the faces. I like to scatter some black olives around the plate to look like creepy bugs or spider eggs. It’s a small touch, but it adds to the Halloween vibe. You can also serve them standing up in a cup for a “mummy graveyard” effect.
As for dipping sauces, the possibilities are endless. Ketchup is the classic choice, but ranch dressing, barbecue sauce, honey mustard, or even queso all work beautifully. I usually put out three or four different sauces so people can mix and match.
Storage: If you somehow have leftovers, store them in an airtight container in the refrigerator for up to 3 days. The dough will soften as it sits, so they won’t be as crispy as when they were fresh.
Reheating: The best way to reheat them is in the oven or air fryer. Pop them in a 350°F (175°C) oven for 5 to 7 minutes, or in the air fryer at 350°F for 3 to 4 minutes. The microwave works in a pinch, but the dough gets chewy and loses its crispiness. I don’t recommend it unless you’re really in a hurry.
The flavors actually hold up pretty well over time. I’ve eaten these cold straight from the fridge the next day, and they’re still good—not great, but good. The hot dog flavor stays strong, and the dough softens into something almost like a dinner roll.
Nutritional Information & Benefits
Let’s be real—these Easy Mummy Hot Dogs are a treat, not a health food. But here’s the estimated nutritional breakdown per serving (one mummy dog):
- Calories: Approximately 180-220
- Protein: 7-9 grams
- Carbohydrates: 14-18 grams
- Fat: 11-14 grams
- Sodium: 500-650 mg
The hot dogs provide a decent amount of protein, which helps keep everyone full and satisfied. The crescent dough adds carbohydrates for quick energy—perfect for fueling a night of trick-or-treating or party activities.
If you’re watching your sodium intake, look for low-sodium hot dogs or turkey dogs, which typically have less salt. You can also use reduced-fat crescent roll dough to cut down on the fat content. Every little bit helps.
These are not gluten-free in their standard form, but as I mentioned earlier, you can adapt them with gluten-free dough. They also contain dairy if you use the butter brushing option, but the base recipe is dairy-free without it.
Personally, I don’t make these for their nutritional value. I make them because they bring joy to a Halloween table. Sometimes food is about more than vitamins and macros—sometimes it’s about watching a kid’s face light up when they see a mummy on their plate. That’s the real benefit right there.
Conclusion
These Easy Mummy Hot Dogs have become a non-negotiable part of my Halloween tradition. They’re the recipe I bring to every party, the one friends text me asking for, and the one that makes me feel like I’ve got this whole hosting thing figured out. And honestly, they couldn’t be simpler.
I love that this recipe proves you don’t need fancy skills or expensive ingredients to create something memorable. A can of dough, a pack of hot dogs, and a squeeze of mustard—that’s all it takes to make a plate full of little monsters that everyone will fight over. My niece still reminds me every year about the time she “taught me how to make mummies.” And you know what? She’s not wrong.
I’d love to hear how yours turn out. Did you try any fun variations? Did your kids help with the wrapping? Drop a comment below and let me know. And if you’re looking for more Halloween dessert recipes to complete your spooky spread, I’ve got plenty of ideas. Until then, happy haunting and happy eating!
Frequently Asked Questions
Can I make these mummy hot dogs ahead of time?
Yes! You can wrap the hot dogs up to 24 hours in advance and keep them covered in the fridge. Just add an extra minute or two to the baking time since they’ll be starting from cold. I wouldn’t recommend baking them fully ahead of time because they lose their crispiness.
What can I use instead of crescent roll dough?
Puff pastry sheets work beautifully, though they’re slightly richer and flakier. You can also use refrigerated pizza dough, pie crust, or even flour tortillas cut into strips. Each option gives a different texture, so feel free to experiment based on what you have on hand.
How do I keep the dough from unrolling while baking?
Make sure you tuck the end of the dough strip firmly under the last wrap. If it’s still coming loose, you can use a toothpick to secure it—just remember to remove the toothpick before serving. Placing the wrapped hot dogs seam-side down on the baking sheet also helps keep everything in place.
Can I freeze these mummy hot dogs?
You can freeze them either before or after baking. To freeze before baking, wrap the hot dogs and place them on a baking sheet in the freezer until solid, then transfer to a freezer bag. Bake from frozen, adding 3 to 5 minutes to the cooking time. To freeze after baking, let them cool completely, then freeze in a single layer. Reheat in the oven or air fryer.
What dipping sauces go best with these?
Ketchup is the classic choice, but ranch dressing, honey mustard, barbecue sauce, and queso are all fantastic. For a spooky touch, you can color ranch dressing green or purple with food coloring. I’ve also seen people serve them with warm marinara sauce for a pizza-inspired twist.
Pin This Recipe!
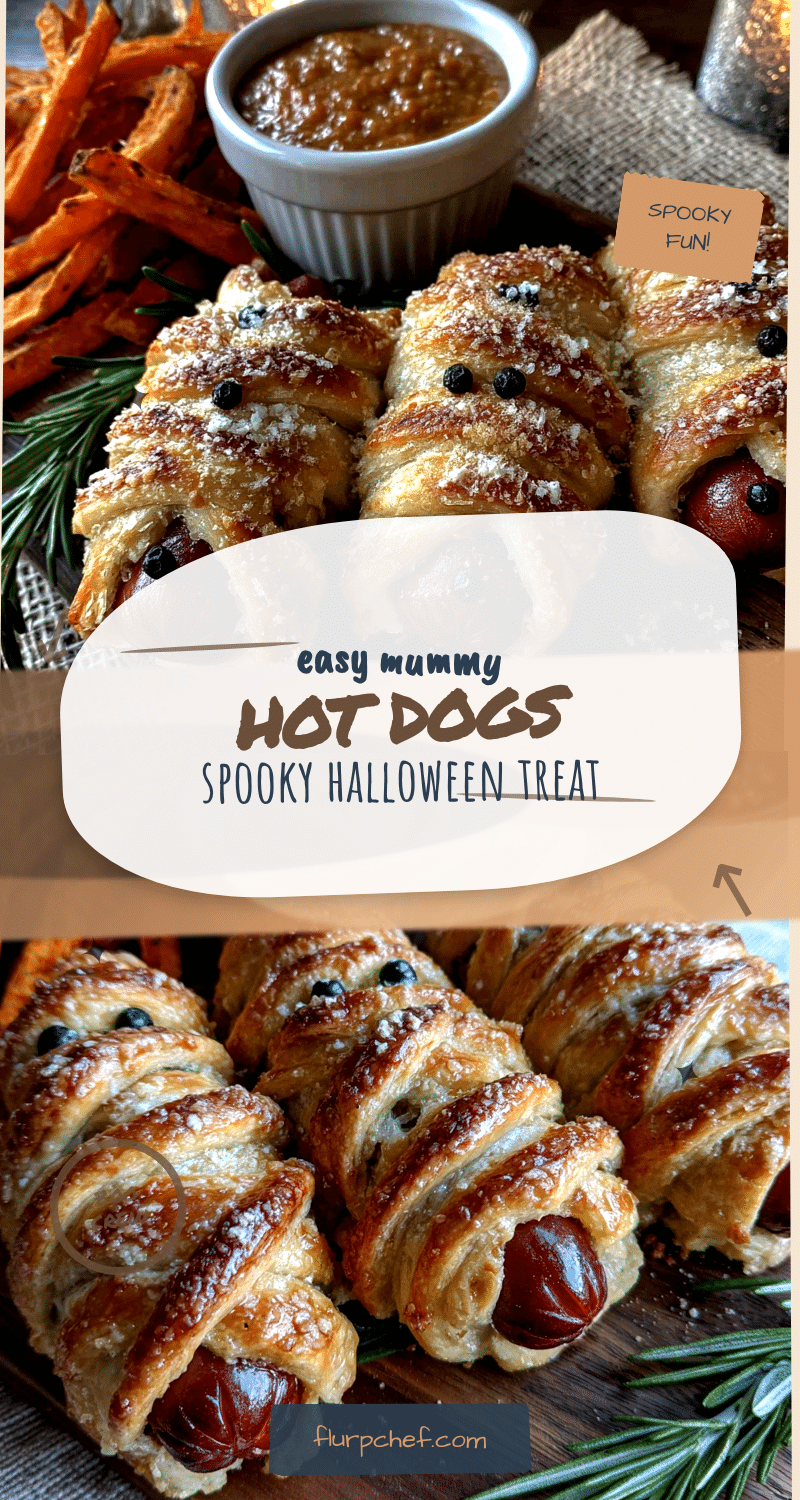
Easy Mummy Hot Dogs: Best Halloween Appetizer

These Easy Mummy Hot Dogs are the perfect Halloween appetizer—quick, simple, and fun. Made with just three main ingredients, they look impressive but come together in under 20 minutes, making them a crowd-pleaser for parties and spooky movie nights.
- Prep Time: 10 minutes
- Cook Time: 12-15 minutes
- Total Time: 22-25 minutes
- Yield: 8 servings 1x
- Category: Appetizer
- Cuisine: American
Ingredients
- 1 package (8 count) hot dogs (beef hot dogs recommended)
- 1 can (8 oz) refrigerated crescent roll dough (e.g., Pillsbury)
- Mustard for eyes (yellow mustard recommended)
- Cooking spray or melted butter (optional, for brushing)
- Sesame seeds or poppy seeds (optional, for sprinkling)
- Ketchup or ranch dressing (optional, for dipping)
Instructions
- Preheat your oven to 375°F (190°C). Line your baking sheet with parchment paper or a silicone mat.
- Unroll the crescent roll dough onto a clean cutting board or countertop. Press the seams together gently with your fingers to create one large rectangle of dough.
- Cut the dough into thin strips about 1/4 to 1/2 inch wide using a sharp knife or pizza cutter. You should get around 8 to 10 strips per can of dough.
- Take one strip of dough and start wrapping it around a hot dog at a slight angle. Leave a small gap at the top for the ‘face’ area. Overlap the dough slightly as you wrap. Tuck the end of the dough under the last wrap to secure it. Repeat with the remaining hot dogs and dough strips.
- Place the wrapped hot dogs on the prepared baking sheet, leaving about 1 inch of space between each one.
- Optional: Brush with melted butter or spray with cooking spray for a golden-brown crust.
- Bake for 12 to 15 minutes, or until the dough is golden brown and puffed. Keep an eye on them after the 10-minute mark.
- Let them cool for 2 to 3 minutes on the baking sheet before adding the mustard eyes.
- Using a toothpick or the tip of a knife, dab two small dots of mustard on the exposed hot dog area at the top of each mummy to create eyes.
- Serve immediately while warm.
Notes
For best results, use room temperature hot dogs and cold dough. If dough gets too warm and sticky, refrigerate for a few minutes. Leave a gap at the top for the eyes. For make-ahead, wrap hot dogs up to 24 hours in advance and refrigerate; add 1-2 minutes to baking time. To freeze, wrap and freeze before baking, then bake from frozen adding 3-5 minutes.
Nutrition
- Serving Size: 1 mummy hot dog
- Calories: 180220
- Sugar: 24
- Sodium: 500650
- Fat: 1114
- Saturated Fat: 46
- Carbohydrates: 1418
- Fiber: 1
- Protein: 79
Keywords: mummy hot dogs, Halloween appetizer, easy Halloween recipe, crescent roll hot dogs, spooky snacks, kid-friendly Halloween food


