Maggie wasn’t trying to impress anyone. I’d stopped by to drop off a book I’d borrowed—some novel she’d insisted would change my life—and the smell of peanut butter and something warm and toasty hit me before I even got through the front door. She was standing at her kitchen counter, hands covered in a sticky mixture, looking like she’d just walked in from pulling weeds in the garden. “Oh, these are just something I throw together when the weather turns,” she said, barely looking up. “The kids inhale them.”
I stood there, honestly a little stunned. The kitchen was a mess—flax seeds scattered across the counter, a half-empty jar of honey with sticky drips running down the side, oats everywhere. Maggie didn’t seem to notice or care. She just kept rolling these little balls between her palms, dropping them onto a sheet pan like it was the most ordinary thing in the world. And maybe for her, it was. But for me, that moment changed everything about how I thought about snacks.
She finally handed me one—warm, slightly crumbly, absolutely perfect—and I think I made some kind of noise that wasn’t quite words. “Told you,” she said, and went back to rolling. That’s the thing about these spring-ready peanut butter oat energy bites. They don’t announce themselves. They don’t need to. The combination of creamy peanut butter, sweet honey, and that satisfying oat texture does all the talking. I asked for the recipe, expecting some complicated list of specialty ingredients. Nope. Seven things, most of which she already had in her pantry. I’ve been making them ever since, especially when the first hints of spring start showing up and I want something that feels fresh but still satisfying.
Why You’ll Love These Spring-Ready Peanut Butter Oat Energy Bites
Let me tell you, I’ve tested a lot of energy ball recipes over the years. Some were too dry, some fell apart, and some just didn’t taste good enough to justify the effort. These spring-ready peanut butter oat energy bites are different. They’ve become my go-to for so many reasons, and I think you’ll feel the same way once you try them.
- Quick & Easy: You can have these made in under 10 minutes, no joke. No oven, no stovetop, no complicated techniques. Just mix, roll, and eat. Perfect for those days when you need something fast.
- Simple Ingredients: You probably already have most of these in your kitchen right now. Oats, peanut butter, honey—these are pantry staples. No special trips to fancy grocery stores required.
- Perfect for Spring: When the weather starts warming up, the last thing I want is to turn on my oven. These no-bake bites are ideal for picnics, afternoon hikes, or just grabbing on your way out the door to enjoy the sunshine.
- Crowd-Pleaser: I’ve brought these to potlucks, playdates, and even work meetings. Kids love them, adults love them, and people always ask for the recipe. They’re that good.
- Unbelievably Delicious: The texture is what gets me every time. Soft, chewy, with just the right amount of crunch from the oats and any mix-ins you add. It’s comfort food that happens to be good for you.
What makes these different from every other energy bite recipe out there? It’s the balance. I spent weeks tweaking the ratios—too much honey and they’re sticky messes, too little and they won’t hold together. Too much peanut butter and they’re greasy, too little and they’re bland. This version? It’s the Goldilocks of energy bites. Plus, I add a touch of vanilla and a pinch of salt that makes the flavors really pop. Trust me, you’ll taste the difference.
These aren’t just snacks. They’re the kind of thing that makes you feel like you’ve got your act together, even on chaotic days. And honestly, isn’t that what we all need sometimes?
What Ingredients You Will Need
This recipe uses simple, wholesome ingredients to deliver big flavor and satisfying texture without any fuss. Most of these are pantry staples, which means you can whip up a batch whenever the craving strikes—no planning ahead required.
For the Base Mixture
- 1 cup rolled oats (not quick oats—they get too mushy. I prefer Bob’s Red Mill Old-Fashioned Rolled Oats for their texture)
- 1/2 cup creamy peanut butter (natural peanut butter works, but make sure it’s well-stirred. I like Skippy Natural for consistent results)
- 1/3 cup honey (local honey is lovely here, but any honey works. For a vegan option, use maple syrup—it’ll be slightly thinner but still delicious)
- 1/2 teaspoon vanilla extract (pure vanilla, not imitation, makes a real difference in depth of flavor)
- 1/4 teaspoon salt (just a pinch to balance the sweetness and bring out the peanut butter flavor)
For Texture and Nutrition
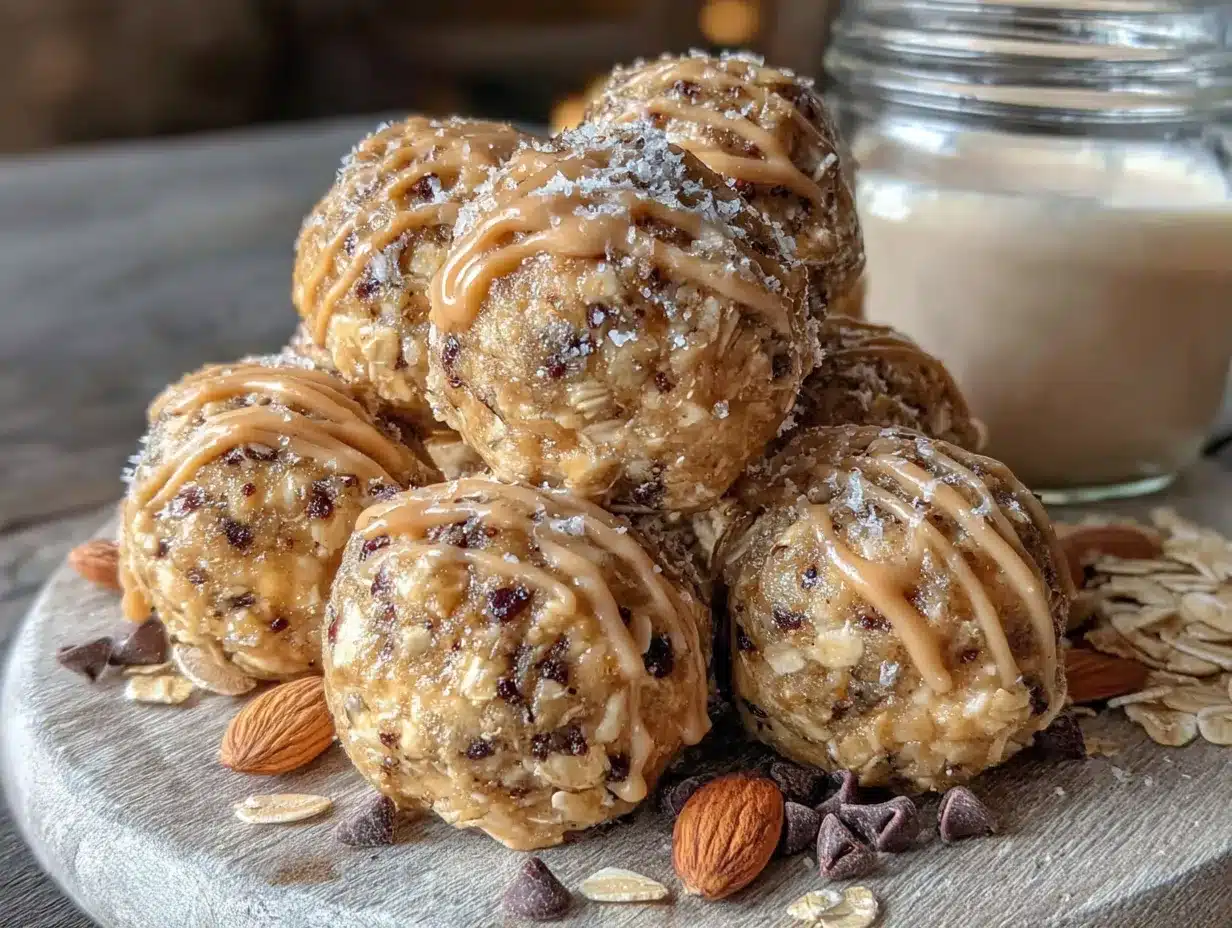
- 1/4 cup ground flaxseed (adds omega-3s and helps bind everything together. You can substitute chia seeds if that’s what you have)
- 1/4 cup mini chocolate chips (optional but highly recommended—they add little bursts of sweetness. Use dark chocolate chips for a less sweet option)
- 2 tablespoons unsweetened shredded coconut (adds a lovely chewiness and tropical hint. Omit if you’re not a coconut fan)
Ingredient Selection Tips
When choosing your peanut butter, look for one that’s not too oily on top. If your natural peanut butter has separated, stir it really well before measuring—otherwise, your energy bites might end up greasy. For the oats, I’ve tested this with both old-fashioned and quick oats, and old-fashioned gives you that nice chewy texture that makes these bites so satisfying. Quick oats work in a pinch, but the texture is softer and less interesting.
If you’re making these for spring, consider adding some seasonal mix-ins. Dried cranberries or chopped dried apricots are lovely this time of year. I’ve also made a version with a tablespoon of lemon zest mixed in, and it was surprisingly bright and fresh—perfect for those first warm days.
Equipment Needed
- Large mixing bowl (any size works, but you want enough room to stir without ingredients flying everywhere)
- Measuring cups and spoons (for accuracy—eyeballing these ingredients can throw off the texture)
- Rubber spatula or wooden spoon (for mixing the sticky dough)
- Baking sheet or plate (to hold the rolled energy bites while they set)
- Parchment paper or wax paper (keeps the bites from sticking to your pan)
- Small cookie scoop (optional but makes portioning so much easier and gives you uniform bites)
That’s it. Nothing fancy, nothing expensive. I’ve made these in a friend’s beach house with a plastic bowl and a fork, and they turned out perfectly. If you don’t have a cookie scoop, just use your hands—it’s actually kind of therapeutic rolling them. Just make sure your hands are slightly damp so the mixture doesn’t stick to you too much.
Preparation Method
These spring-ready peanut butter oat energy bites come together in minutes, but following the steps in order makes a big difference in the final texture. Here’s exactly how I do it.
- Prep your workspace. Line a baking sheet or large plate with parchment paper. This gives you a place to put your rolled bites so they don’t stick or make a mess. Set it aside for now.
- Combine the dry ingredients. In your large mixing bowl, add 1 cup rolled oats, 1/4 cup ground flaxseed, 1/4 cup mini chocolate chips (if using), and 2 tablespoons shredded coconut. Give them a quick stir with your spatula so everything is evenly distributed. This step matters—if you dump the wet ingredients in first, you’ll end up with clumps of dry oats that never quite mix in.
- Add the wet ingredients. To the same bowl, add 1/2 cup creamy peanut butter, 1/3 cup honey, 1/2 teaspoon vanilla extract, and 1/4 teaspoon salt. Don’t worry if it looks like a mess at first—it will come together.
- Mix thoroughly. Start stirring with your rubber spatula or wooden spoon. The mixture will be thick and a little stubborn at first. That’s normal. Keep folding it over itself, scraping the bottom and sides of the bowl. After about a minute of vigorous mixing, it should start coming together into a cohesive, slightly sticky dough. If it seems too dry, add a teaspoon more honey. If it’s too wet, add a tablespoon more oats.
- Let it rest. Here’s a trick I learned from making these so many times: let the mixture sit for 5 minutes before rolling. This gives the oats time to absorb some moisture from the peanut butter and honey, making the dough easier to work with and giving you a better texture in the final bites. Use this time to wash your hands and get ready to roll.
- Portion the mixture. Using a small cookie scoop or a tablespoon, scoop out even portions of the dough. I aim for about 1 tablespoon per bite—enough to be satisfying but small enough that you can pop a couple without feeling guilty. You should get about 18-20 bites from this recipe.
- Roll into balls. Take each portion and roll it between your palms gently but firmly. If the mixture sticks to your hands, dampen your palms slightly with water. Roll until you have a smooth, round ball. Place each one on your prepared baking sheet as you go.
- Chill (optional but recommended). Pop the baking sheet into the refrigerator for at least 30 minutes. This helps the energy bites firm up and hold their shape. You can eat them right away, but they’ll be softer and more likely to squish. Chilled, they have that perfect energy bite texture.
Sensory cues to watch for: When you’re mixing, the dough should feel like a thick, slightly sticky cookie dough. It should hold together when you squeeze a bit between your fingers. If it crumbles apart, add a touch more honey. If it leaves a greasy residue on your hands, you might need a few more oats. The smell at this stage is incredible—warm peanut butter and honey with a hint of vanilla. It’s hard not to just eat the dough straight from the bowl.
Cooking Tips & Techniques
I’ve made these spring-ready peanut butter oat energy bites probably fifty times now, and I’ve learned a few things the hard way. Let me save you some trouble.
The biggest mistake people make is using peanut butter that’s too runny. If your natural peanut butter has separated and you don’t stir it well, the oil will make your energy bites greasy and they won’t hold together. I learned this the hard way when I made a batch for a road trip and ended up with a bag of crumbles. Not fun. Always stir your peanut butter thoroughly before measuring, or use a commercial brand that’s already emulsified.
Another common issue is overmixing. I know, it sounds counterintuitive—you want everything combined, right? But if you mix too aggressively for too long, the oats break down and your energy bites become dense and pasty. Mix just until everything comes together, then stop. You want some texture from the oats.
Here’s a timing trick that changed everything for me: make the dough first, then clean up your kitchen while it rests. The 5-minute rest is crucial, but it’s also the perfect amount of time to wash your measuring cups and put ingredients away. By the time you’re done, the dough is ready to roll. It makes the whole process feel faster and less messy.
If you’re making these with kids, let them do the rolling. It’s messy and wonderful, and they’re more likely to eat something they helped make. Just expect some oddly shaped bites and a lot of sticky fingers. It’s worth it.
For consistent results every time, use a scale if you have one. I know, I know—we’re not baking bread here. But measuring oats by volume can be inconsistent depending on how tightly they’re packed. 100 grams of oats is always 100 grams of oats. Same for peanut butter. If you’re a perfectionist like me, it’s worth the extra step.
Variations & Adaptations
One of the best things about this recipe is how adaptable it is. I’ve tried dozens of variations, and honestly, most of them have been delicious. Here are some of my favorites.
Spring Berry Version
Swap the chocolate chips for 1/4 cup dried cranberries or chopped dried strawberries. Add a tablespoon of lemon zest to the mixture. The result is bright, tangy, and perfect for spring picnics. I made this version for Easter brunch last year and they disappeared before the deviled eggs.
Vegan Option
Replace the honey with maple syrup or agave nectar. Use vegan chocolate chips if you want that chocolate hit. Everything else is already plant-based. The texture will be slightly softer because maple syrup is thinner than honey, so you might need to add an extra tablespoon of oats to compensate. Chill them well before serving.
Nut-Free Version
Substitute sunflower seed butter or tahini for the peanut butter. Sunflower seed butter works beautifully, though the color will be a bit darker. Just be aware that sunflower seed butter can react with baking soda if you ever use it in baked goods, but since these are no-bake, you’re totally fine. Tahini gives a more savory, sophisticated flavor—try it with dried figs instead of chocolate chips for a grown-up version.
Extra Protein Version
Add 2 tablespoons of vanilla or chocolate protein powder to the dry ingredients. You’ll need to increase the honey by about a tablespoon to compensate for the dryness. This version is great for post-workout snacks or for anyone who needs a little more staying power in their snacks.
Seasonal Spice Version
Add 1/2 teaspoon of cinnamon and a pinch of nutmeg to the mixture. This works beautifully in the fall, but honestly, I make it year-round. The warmth of the spices complements the peanut butter in a way that feels cozy and familiar. Add some chopped pecans for extra crunch.
Serving & Storage Suggestions
These spring-ready peanut butter oat energy bites are incredibly versatile when it comes to serving. Here’s how I like to enjoy them.
At room temperature: Straight from the counter, these are soft and chewy with a satisfying texture. They’re perfect for grabbing on your way out the door for a morning walk or packing in a lunchbox. I keep a container on my kitchen counter during spring weekends, and they never last more than a day or two.
Chilled: Straight from the fridge, they’re firmer and almost fudge-like in texture. This is my preferred way to eat them, especially on warmer days. The cold temperature makes the chocolate chips (if you added them) extra snappy, and the peanut butter flavor is more pronounced. Try them this way at least once—you might never go back.
Storage instructions: Keep your energy bites in an airtight container in the refrigerator for up to two weeks. Yes, two weeks—if they last that long. I’ve never had a batch survive more than five days in my house. You can also store them at room temperature for 3-4 days, but they’ll be softer and more prone to falling apart in warm weather.
Freezing: These freeze beautifully. Place the rolled bites on a baking sheet and freeze until solid (about an hour), then transfer them to a freezer-safe bag or container. They’ll keep for up to three months. I love having a stash in the freezer for busy mornings when I need breakfast on the go. Just grab a few and let them thaw for 10 minutes, or eat them frozen—they’re like little peanut butter ice cream bites.
How flavors develop: Honestly, these get better after a day in the fridge. The flavors meld together, the oats soften slightly, and everything becomes more cohesive. If you can resist eating them all on day one, you’ll be rewarded on day two. I sometimes make a double batch specifically so I can have some on day two and freeze the rest.
Nutritional Information & Benefits
Per serving (1 energy bite, based on 20 bites per batch):
- Calories: 112
- Fat: 6g
- Carbohydrates: 13g
- Fiber: 2g
- Sugar: 8g
- Protein: 4g
These numbers are estimates and will vary based on your specific ingredients and portion sizes.
Health benefits worth noting: Rolled oats are a fantastic source of soluble fiber, which helps keep you full and supports heart health. The ground flaxseed adds omega-3 fatty acids and even more fiber—good for digestion and inflammation. Peanut butter provides protein and healthy monounsaturated fats that give you lasting energy without the crash you get from processed snacks. Honey offers natural sweetness along with antioxidants and antibacterial properties.
Dietary considerations: These energy bites are naturally dairy-free and can easily be made vegan and gluten-free (use certified gluten-free oats). They contain peanuts and are not suitable for those with peanut allergies. If you’re watching your sugar intake, you can reduce the honey to 1/4 cup, though the texture will be drier and they might not hold together as well.
I love that these snacks actually make me feel good. They give me energy without the sugar spike, and they satisfy my afternoon cravings without derailing my healthy eating goals. That’s a win in my book.
Conclusion
These spring-ready peanut butter oat energy bites have become a staple in my kitchen for good reason. They’re quick, they’re simple, and they deliver on flavor every single time. Whether you’re packing them for a spring hike, sending them in lunchboxes, or just keeping a stash in your fridge for those moments when hunger strikes, they never disappoint.
What I love most about this recipe is how forgiving it is. You can tweak it based on what you have in your pantry, adjust the sweetness to your liking, or add whatever mix-ins sound good to you. It’s a recipe that invites experimentation, and that’s rare in a world of rigid baking rules. Make it your own—that’s the whole point.
I’d love to hear how yours turn out. Did you add something unexpected? Did your kids help roll them? Did you find a new favorite variation? Drop a comment below and let me know. And if you share them on social media, tag me—I want to see your spring-ready energy bites in action. Happy snacking, friends!
Frequently Asked Questions
Can I use quick oats instead of rolled oats?
Yes, you can, but the texture will be different. Quick oats are more finely processed, so they absorb moisture faster and create a softer, less chewy energy bite. Rolled oats give you that satisfying texture that makes these bites feel more substantial. If all you have is quick oats, go ahead and use them—just know the final result will be a bit more uniform and less textured.
How do I keep the mixture from sticking to my hands?
This is probably the most common question I get. The easiest solution is to slightly dampen your hands with water before rolling. Not soaking wet—just a light mist. The moisture creates a barrier between the sticky dough and your skin. You can also lightly oil your hands with a drop of coconut oil or cooking spray. Another trick: chill the dough for 10-15 minutes before rolling, which firms it up and makes it less sticky.
Can I make these without honey?
Absolutely. Maple syrup is the best substitute—use the same amount (1/3 cup). Agave nectar also works well. Keep in mind that liquid sweeteners are thinner than honey, so your mixture might be slightly looser. If that happens, add an extra tablespoon of oats to firm it up. For a sugar-free option, you can try using date paste, though the texture will be different and the bites will be less sweet.
How long do these actually last?
In the refrigerator, these energy bites stay fresh for up to two weeks in an airtight container. At room temperature, they’ll last 3-4 days, but I don’t recommend leaving them out in warm weather because the peanut butter can become oily. In the freezer, they’ll keep for up to three months. I’ve never had a batch last long enough to test the limits, honestly—they disappear too fast in my house.
Can I add protein powder to these?
Yes, and I do it all the time. Add 2 tablespoons of your favorite protein powder to the dry ingredients. Because protein powder absorbs moisture, you’ll need to add an extra tablespoon of honey or a splash of milk to keep the mixture from becoming too dry. Vanilla or chocolate protein powder works best flavor-wise. I’ve also used unflavored collagen peptides, which dissolve easily and don’t affect the taste at all.
Pin This Recipe!
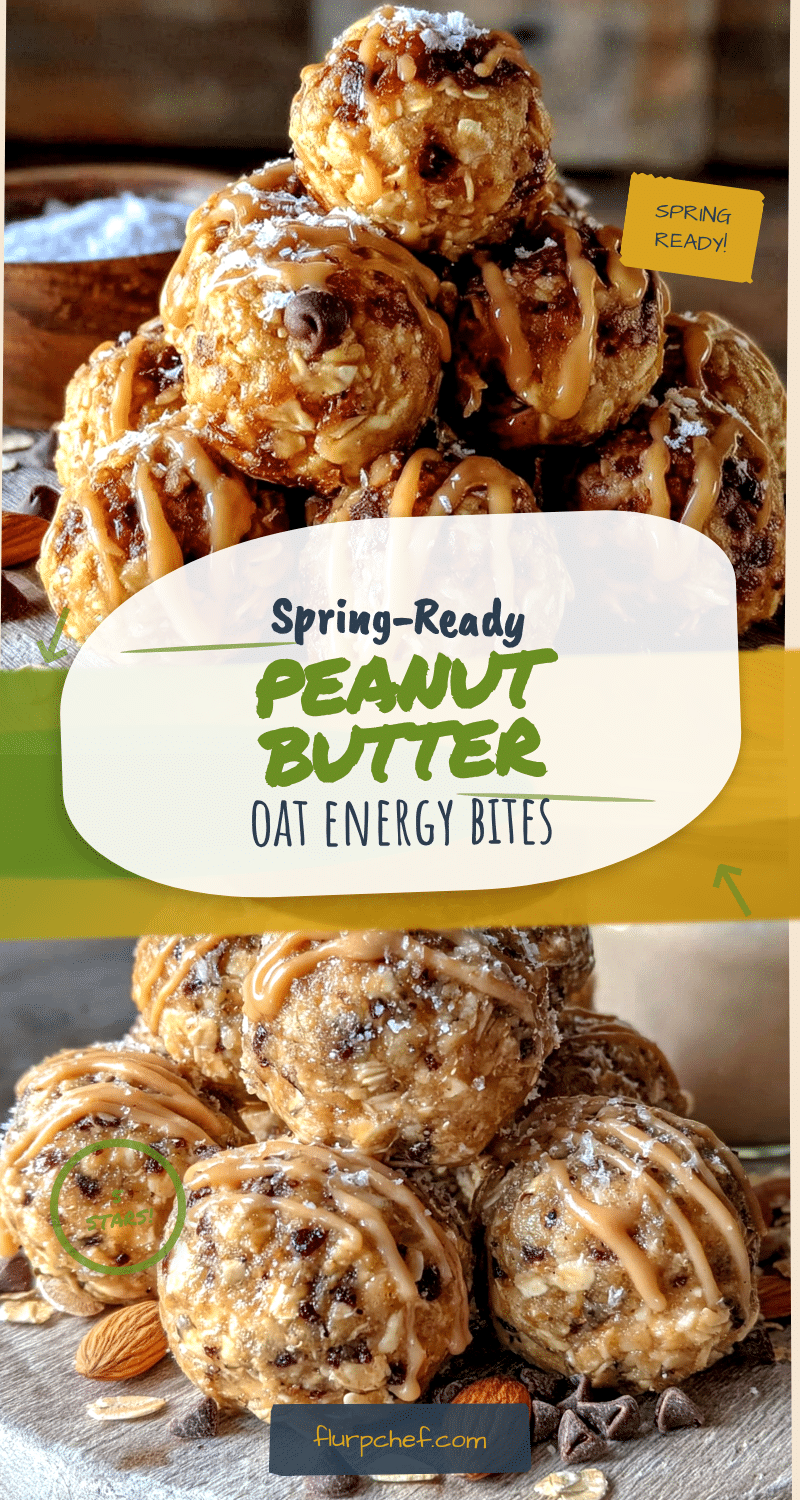
Spring-Ready Peanut Butter Oat Energy Bites

These no-bake energy bites combine creamy peanut butter, sweet honey, and hearty oats for a quick and satisfying snack. Perfect for spring picnics, hikes, or a grab-and-go treat.
- Prep Time: 10 minutes
- Cook Time: 0 minutes
- Total Time: 40 minutes (includes 30 minutes chilling)
- Yield: 18-20 bites 1x
- Category: Snack
- Cuisine: American
Ingredients
- 1 cup rolled oats (not quick oats)
- 1/2 cup creamy peanut butter (well-stirred if natural)
- 1/3 cup honey
- 1/2 teaspoon vanilla extract (pure vanilla recommended)
- 1/4 teaspoon salt
- 1/4 cup ground flaxseed
- 1/4 cup mini chocolate chips (optional)
- 2 tablespoons unsweetened shredded coconut (optional)
Instructions
- Line a baking sheet or large plate with parchment paper.
- In a large mixing bowl, combine 1 cup rolled oats, 1/4 cup ground flaxseed, 1/4 cup mini chocolate chips (if using), and 2 tablespoons shredded coconut. Stir to distribute evenly.
- Add 1/2 cup creamy peanut butter, 1/3 cup honey, 1/2 teaspoon vanilla extract, and 1/4 teaspoon salt to the bowl.
- Mix thoroughly with a rubber spatula or wooden spoon until a cohesive, slightly sticky dough forms. If too dry, add a teaspoon more honey; if too wet, add a tablespoon more oats.
- Let the mixture rest for 5 minutes to allow oats to absorb moisture.
- Using a small cookie scoop or tablespoon, portion the dough into about 18-20 equal portions (about 1 tablespoon each).
- Roll each portion between your palms into a smooth ball. If sticky, dampen hands slightly with water.
- Place the rolled bites on the prepared baking sheet.
- Refrigerate for at least 30 minutes to firm up before serving. Enjoy chilled or at room temperature.
Notes
For best texture, use old-fashioned rolled oats. If using natural peanut butter, stir well before measuring to avoid greasy bites. Let the mixture rest for 5 minutes before rolling for easier handling. Energy bites can be stored in an airtight container in the refrigerator for up to 2 weeks or frozen for up to 3 months.
Nutrition
- Serving Size: 1 energy bite
- Calories: 112
- Sugar: 8
- Sodium: 85
- Fat: 6
- Saturated Fat: 1.5
- Carbohydrates: 13
- Fiber: 2
- Protein: 4
Keywords: energy bites, peanut butter, oat, no-bake, spring, healthy snack, gluten-free option, vegan option


