It was 11:47 PM on a Tuesday that felt like it had lasted a week. I had this craving for a chocolate chip cookie—the kind with crispy edges and a gooey, soft center that practically melts in your mouth. But here’s the thing: I had no butter. Well, I had butter, but it was the last stick, and I was supposed to use it for my kid’s school lunch sandwich the next morning. So, I stood there in my quiet kitchen, staring into the fridge like it held the secrets of the universe. Then I saw it—a half-used stick of butter that had been sitting out on the counter all day. It was soft, almost melting, and I thought, “Well, this is either going to be a disaster or a miracle.” I grabbed it, tossed it into a pan, and let it sizzle and foam until it turned this gorgeous, nutty brown color. The smell—oh, that smell—filled the whole house. My husband shuffled in, half-asleep, and asked if I was baking at midnight. I just shrugged and said, “The cookies called to me.” That night, I made the best batch of chocolate chip cookies I’ve ever had, and honestly, I haven’t gone back to regular butter since. Maybe you’ve been there—standing in your kitchen at an ungodly hour, desperate for something sweet, and making do with what you’ve got. Well, these cookies are that moment, perfected. They’re the kind of recipe that stays with you because it’s just so simple and so good. And the best part? The kids devour them, and they don’t cost a fortune to make.
Why You’ll Love This Recipe
Let me tell you why these brown butter chocolate chip cookies have become the unofficial cookie of our house. I’ve tested this recipe more times than I can count, and every single batch has been a hit. It’s not just another cookie recipe—it’s the one you’ll come back to again and again.
- Quick & Easy: From start to finish, these cookies come together in under 30 minutes. No chilling required (unless you want to, but we’ll get to that later). Perfect for those after-school cravings or a last-minute dessert for a potluck.
- Simple Ingredients: You probably have everything you need in your pantry right now. No fancy flours or exotic extracts. Just butter, sugar, eggs, flour, and chocolate chips. That’s it.
- Kid-Approved & Budget-Friendly: This is the part I’m most proud of. These cookies are made with affordable ingredients that stretch your grocery budget. And the kids? They go absolutely wild for them. I’ve had neighbors’ kids knock on my door asking for “the brown butter ones.”
- Crowd-Pleaser: I brought a batch to a family reunion, and they were gone in ten minutes. My aunt, who’s a self-proclaimed cookie snob, asked for the recipe. That’s when I knew I had something special.
- Unbelievably Delicious: The brown butter adds this deep, nutty, almost caramel-like flavor that regular butter just can’t match. It’s comfort food reimagined—familiar but somehow better. The texture is spot-on: crisp edges, chewy centers, and melty pockets of chocolate.
What makes this recipe different from the rest? It’s the little things. The way I brown the butter just until it smells like toasted nuts. The ratio of brown sugar to white sugar that gives the perfect chew. And the trick of letting the dough rest for a few minutes before baking—it makes the flavors meld together like magic. This isn’t just another chocolate chip cookie. It’s your new go-to.
What Ingredients You Will Need
This recipe uses simple, wholesome ingredients that you probably already have in your kitchen. The star of the show is the brown butter, which transforms these cookies from good to absolutely unforgettable. Here’s what you’ll need:
For the Cookie Dough:
- 1 cup (2 sticks) unsalted butter – This is the key ingredient. You’ll be browning it, so don’t use salted butter—it can throw off the flavor. I prefer Land O’Lakes for its consistent quality.
- 1 ½ cups packed light brown sugar – Brown sugar gives the cookies that soft, chewy texture and a hint of molasses flavor. Pack it firmly into the measuring cup for accuracy.
- ½ cup granulated sugar – White sugar helps the cookies spread and gives them those crispy edges. It balances the richness of the brown sugar perfectly.
- 2 large eggs – Room temperature eggs mix in more evenly and create a smoother dough. If you forget to take them out early, place them in a bowl of warm water for 5 minutes.
- 1 tablespoon vanilla extract – Pure vanilla extract is worth the splurge here. It enhances the nutty flavor of the brown butter. I use Nielsen-Massey, but any good brand works.
- 3 cups all-purpose flour – Spoon and level the flour—don’t scoop directly from the bag, or you’ll end up with dry cookies. A kitchen scale (360 grams) is even more accurate.
- 1 teaspoon baking soda – This helps the cookies rise and spread just the right amount.
- ½ teaspoon baking powder – Adds a little extra lift for a tender crumb.
- 1 teaspoon salt – Salt balances the sweetness and brings out the flavor of the brown butter. I use fine sea salt.
- 2 cups semisweet chocolate chips – I like Ghirardelli for their rich flavor and melt-in-your-mouth texture. You can also use milk chocolate or dark chocolate chips depending on your preference. For a budget-friendly option, store-brand chocolate chips work just fine.
Optional Add-Ins:
- 1 cup chopped nuts – Walnuts or pecans add a nice crunch. Toast them lightly in the oven for extra flavor.
- Flaky sea salt – Sprinkle a pinch on top of each cookie before baking for a sweet-salty finish. It takes these cookies to another level.
Substitution Guidance:
- For a dairy-free version, use vegan butter (like Miyoko’s) and dairy-free chocolate chips. The brown butter flavor will be slightly different, but still delicious.
- If you’re out of brown sugar, mix 1 cup of granulated sugar with 1 tablespoon of molasses. Let it sit for a few minutes before using.
- For a gluten-free option, swap the all-purpose flour with a 1-to-1 gluten-free baking flour blend. I’ve tried Bob’s Red Mill, and it works perfectly.
Equipment Needed
You don’t need any fancy gadgets to make these cookies, which is part of their charm. Here’s what you’ll need:
- A medium saucepan – For browning the butter. Use a light-colored pan so you can see the color change as it cooks.
- Large mixing bowls – One for the wet ingredients and one for the dry. I prefer glass or stainless steel bowls.
- Whisk – For mixing the wet ingredients and incorporating the brown butter.
- Rubber spatula – For folding in the chocolate chips and scraping down the sides of the bowl.
- Measuring cups and spoons – Accurate measurements are key for baking. I recommend using dry measuring cups for flour and sugar and liquid measuring cups for vanilla.
- Baking sheets – Two standard half-sheet pans work well. Line them with parchment paper for easy cleanup.
- Cookie scoop or tablespoon – For portioning the dough evenly. A #40 scoop (about 1.5 tablespoons) is perfect for medium-sized cookies.
- Cooling rack – Let the cookies cool completely before storing them. This prevents them from getting soggy.
If you don’t have a cookie scoop, you can use two spoons to drop the dough onto the baking sheet. It’s a little messier, but it works. And if you don’t have a cooling rack, just let the cookies cool on the baking sheet for a few minutes before transferring them to a plate.
Preparation Method
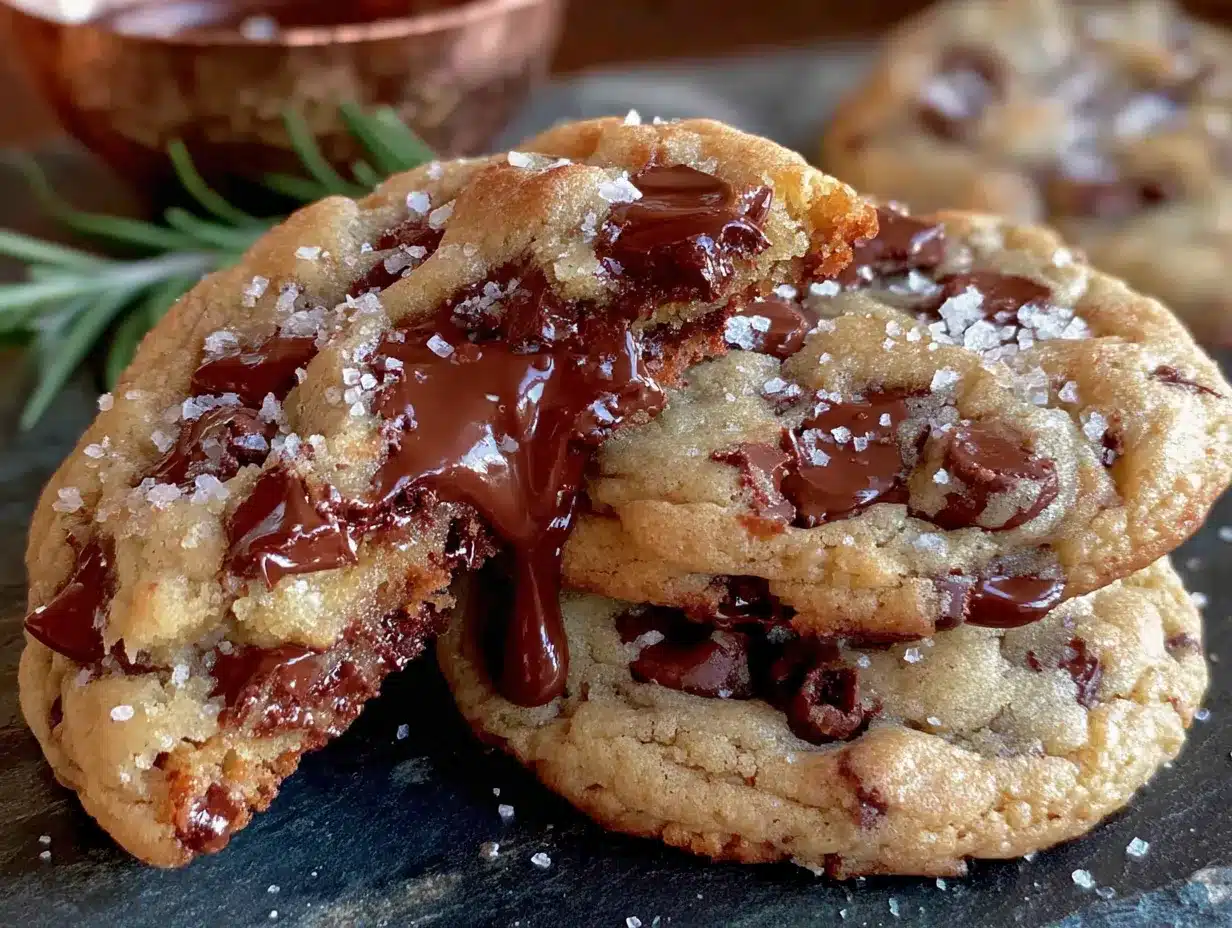
Alright, let’s get baking! Follow these steps carefully, and you’ll have the best brown butter chocolate chip cookies you’ve ever tasted.
- Brown the butter: Place the 1 cup of unsalted butter in a medium saucepan over medium heat. Let it melt completely, then continue cooking, stirring occasionally with a rubber spatula. After about 5-7 minutes, the butter will start to foam and bubble. Watch closely—it will turn from pale yellow to a deep golden brown, and you’ll smell a nutty aroma. Once you see brown specks forming at the bottom of the pan, remove it from the heat immediately. Pour the browned butter into a large mixing bowl to stop the cooking process. Let it cool for 10 minutes. (Be careful not to burn it—if it smells bitter, you’ve gone too far.)
- Mix the wet ingredients: Add the 1 ½ cups packed light brown sugar and ½ cup granulated sugar to the cooled brown butter. Whisk until well combined—the mixture will look like wet sand. Add the 2 large eggs and 1 tablespoon vanilla extract, and whisk vigorously for about 1 minute until the mixture is smooth and slightly thickened. This step is important for creating that chewy texture.
- Combine the dry ingredients: In a separate bowl, whisk together the 3 cups all-purpose flour, 1 teaspoon baking soda, ½ teaspoon baking powder, and 1 teaspoon salt. Make sure there are no lumps.
- Mix the dough: Gradually add the dry ingredients to the wet mixture, stirring with a rubber spatula until just combined. Be careful not to overmix—stop as soon as you no longer see streaks of flour. Overmixing will make the cookies tough.
- Fold in the chocolate chips: Gently fold in the 2 cups semisweet chocolate chips until they’re evenly distributed throughout the dough. If you’re using nuts, fold them in now as well.
- Let the dough rest: Cover the bowl with plastic wrap and let the dough rest at room temperature for 10-15 minutes. This allows the flour to fully hydrate and the flavors to meld. While the dough rests, preheat your oven to 375°F (190°C) and line two baking sheets with parchment paper.
- Portion the dough: Use a cookie scoop or tablespoon to drop rounded balls of dough onto the prepared baking sheets, spacing them about 2 inches apart. For evenly sized cookies, aim for about 1.5 tablespoons of dough per cookie. I usually get about 24 cookies from this recipe.
- Bake: Bake the cookies for 10-12 minutes, or until the edges are golden brown and the centers look slightly underbaked. They will continue to cook on the baking sheet after you remove them from the oven. For soft, chewy cookies, bake for 10 minutes. For crispier cookies, bake for 12 minutes.
- Cool: Let the cookies cool on the baking sheet for 5 minutes before transferring them to a cooling rack. This allows them to set without breaking. If you’re using flaky sea salt, sprinkle it on top while the cookies are still warm.
- Enjoy: Serve warm or at room temperature. These cookies are best eaten the day they’re made, but they’ll stay fresh for up to 5 days in an airtight container.
Cooking Tips & Techniques
I’ve made this recipe more times than I can count, and I’ve learned a few tricks along the way. Here are my best tips for perfect brown butter chocolate chip cookies every time.
- Don’t skip browning the butter: I know it feels like an extra step, but it’s what makes these cookies special. The nutty flavor is irreplaceable. Just watch it closely—once it starts turning brown, it can burn in seconds. If you’re nervous, use a light-colored pan so you can see the color change clearly.
- Use room temperature eggs: Cold eggs can seize the brown butter and make the dough lumpy. If you forget to take them out early, place them in a bowl of warm water for 5 minutes. They’ll come to room temperature quickly.
- Measure flour correctly: This is the most common mistake in baking. Spoon the flour into your measuring cup and level it off with a knife. Don’t scoop directly from the bag—you’ll end up with too much flour, and your cookies will be dry and crumbly.
- Let the dough rest: I know it’s tempting to bake right away, but letting the dough rest for 10-15 minutes makes a big difference. It allows the flour to absorb the liquid, which creates a more tender cookie. Plus, the flavors have time to meld together.
- Chill the dough for thicker cookies: If you prefer thicker, puffier cookies, chill the dough for 30 minutes before baking. This solidifies the butter, which prevents the cookies from spreading too much. I do this when I want a bakery-style cookie.
- Bake one sheet at a time: If you bake two sheets at once, the heat circulates unevenly, and the cookies may not bake evenly. If you’re in a rush, rotate the sheets halfway through baking.
- Underbake slightly: This is the secret to soft, gooey cookies. Take them out when the edges are golden but the centers still look soft and puffy. They will continue to cook on the hot baking sheet. I’ve learned this the hard way—overbaked cookies are sad cookies.
Variations & Adaptations
One of the best things about this recipe is how versatile it is. You can tweak it to suit your taste or dietary needs. Here are some variations I’ve tried and loved.
- Double Chocolate Chip Cookies: Replace ¼ cup of the flour with ¼ cup of unsweetened cocoa powder. Use white chocolate chips or dark chocolate chips for a rich, decadent cookie. My kids love this version—they call them “chocolate cookies with chocolate.”
- Gluten-Free Version: Swap the all-purpose flour with a 1-to-1 gluten-free baking flour blend. I’ve used Bob’s Red Mill and King Arthur Flour, and both work well. Add an extra tablespoon of milk to the dough to help it come together, as gluten-free flours tend to be drier.
- Vegan Version: Use vegan butter (like Miyoko’s) and replace the eggs with flax eggs (1 tablespoon ground flaxseed mixed with 3 tablespoons water per egg). Let the flax mixture sit for 5 minutes to thicken. The cookies will be slightly less chewy, but still delicious.
- Nutty Crunch: Fold in 1 cup of toasted walnuts or pecans along with the chocolate chips. To toast the nuts, spread them on a baking sheet and bake at 350°F (175°C) for 5-7 minutes until fragrant. Let them cool before adding to the dough.
- Spiced Cookies: Add 1 teaspoon of cinnamon, ½ teaspoon of nutmeg, and ¼ teaspoon of cloves to the dry ingredients. These are perfect for fall or winter—they taste like a warm hug.
- Mini Cookies: Use a teaspoon to portion the dough and bake for 7-9 minutes. These are great for lunchboxes or parties. I made a batch for my daughter’s class party, and they were gone in minutes.
Serving & Storage Suggestions
These cookies are perfect on their own, but here are some ideas for serving and storing them.
- Serving Temperature: Serve warm for the best experience—the chocolate chips will be melty and gooey. If you’re serving them at room temperature, pop them in the microwave for 10-15 seconds to warm them up.
- Presentation: Arrange the cookies on a rustic wooden board or a simple white platter. A sprinkle of flaky sea salt on top adds a touch of elegance. For a party, stack them in a mason jar tied with a ribbon—they make great gifts.
- Complementary Dishes: Pair these cookies with a cold glass of milk, a scoop of vanilla ice cream, or a cup of hot coffee. For a dessert platter, serve them alongside fresh berries and a drizzle of caramel sauce.
- Storage: Store the cookies in an airtight container at room temperature for up to 5 days. Place a slice of bread in the container to keep them soft—the cookies will absorb the moisture from the bread. (Replace the bread every day for best results.)
- Freezing: You can freeze the baked cookies for up to 3 months. Place them in a single layer in a freezer-safe bag or container. To thaw, let them sit at room temperature for 15 minutes. You can also freeze the raw dough—portion it into balls, place them on a baking sheet, and freeze until solid. Then transfer the dough balls to a freezer bag. Bake from frozen, adding 2-3 minutes to the baking time.
- Flavor Development: These cookies actually taste better the next day. The flavors meld together overnight, and the texture becomes even more chewy and tender. I’ve been known to hide a few in the back of the pantry for “emergencies.”
Nutritional Information & Benefits
While these cookies are a treat, they do have some redeeming qualities. Here’s a rough estimate of the nutritional information per cookie (based on 24 cookies):
- Calories: 210
- Fat: 11g
- Saturated Fat: 7g
- Cholesterol: 35mg
- Sodium: 120mg
- Carbohydrates: 28g
- Fiber: 1g
- Sugar: 18g
- Protein: 3g
Health Benefits of Key Ingredients:
- Butter: In moderation, butter provides fat-soluble vitamins like A, D, E, and K. Brown butter has a slightly lower water content, which concentrates its flavor—so you can use less and still get a rich taste.
- Dark Chocolate: Semisweet chocolate chips contain antioxidants called flavonoids, which can support heart health. Plus, they’re a good source of iron and magnesium.
- Eggs: Eggs are packed with protein and essential amino acids. They also contain choline, which supports brain health.
Dietary Considerations:
- This recipe contains gluten, dairy, and eggs. For gluten-free or vegan options, see the variations section above.
- If you’re watching your sugar intake, you can reduce the sugar by ¼ cup without significantly affecting the texture. The cookies will be less sweet but still delicious.
I’m not a nutritionist, but I believe in balance. These cookies are a treat, and they’re meant to be enjoyed. Life is too short to skip dessert!
Conclusion
These brown butter chocolate chip cookies are more than just a recipe—they’re a little moment of joy in a busy day. They’re the cookies I make when I need a pick-me-up, when the kids are having a rough day, or when I just want to fill the house with that amazing nutty aroma. The best part? They’re so simple and budget-friendly that you can make them anytime the craving strikes. I hope you give them a try and make them your own. Maybe you’ll add a pinch of cinnamon, swap in dark chocolate chips, or sprinkle them with flaky sea salt. Whatever you do, I’d love to hear about it. Drop a comment below and let me know how your batch turned out—did the kids approve? Did you sneak one for breakfast? (No judgment here!) And if you loved this recipe, share it with a friend or save it for later. Happy baking, friend—you’ve got this!
Frequently Asked Questions
Can I use salted butter instead of unsalted butter?
You can, but I recommend reducing the added salt in the recipe to ½ teaspoon. Salted butter has varying amounts of salt, so it’s harder to control the flavor. Unsalted butter gives you more control and lets the nutty flavor of the brown butter shine.
Why did my cookies turn out flat?
Flat cookies are usually caused by one of three things: the butter was too warm, the dough wasn’t chilled, or too much sugar was used. Make sure your brown butter has cooled to room temperature before mixing. If your kitchen is warm, chill the dough for 30 minutes before baking.
Can I make the dough ahead of time?
Absolutely! You can prepare the dough and refrigerate it for up to 48 hours. Just wrap it tightly in plastic wrap or store it in an airtight container. When you’re ready to bake, let the dough sit at room temperature for 15 minutes to soften slightly before portioning. The flavor actually improves after resting!
How do I get perfectly round cookies?
Right after the cookies come out of the oven, use a round cookie cutter or a large glass to gently scoot the edges of each cookie into a perfect circle. Do this while the cookies are still warm and soft. It’s a simple trick that makes them look bakery-quality.
Can I use this recipe for cookie bars?
Yes! Press the dough into a greased 9×13-inch baking pan and bake at 350°F (175°C) for 25-30 minutes, or until the edges are golden and a toothpick inserted in the center comes out clean. Let them cool completely before cutting into squares. They’re perfect for potlucks and parties.
Pin This Recipe!
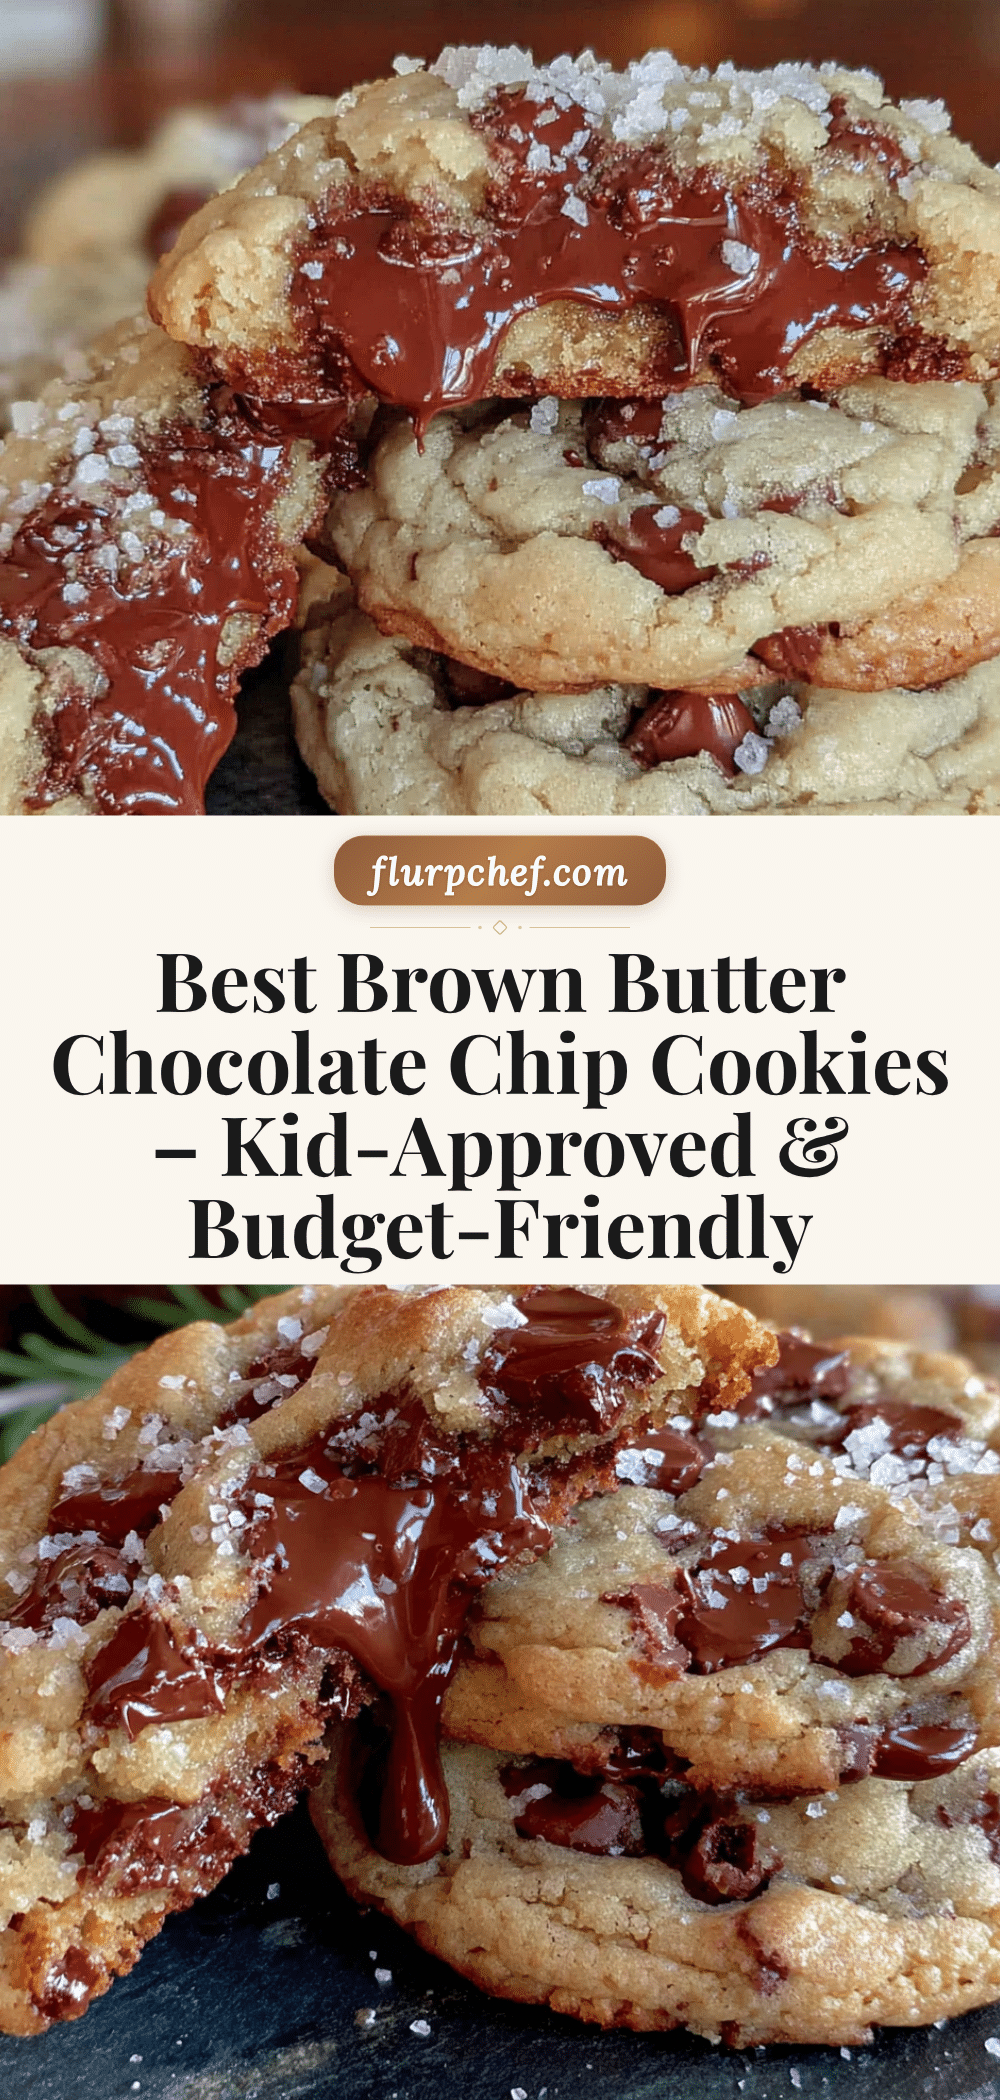
Best Brown Butter Chocolate Chip Cookies – Easy, Kid-Approved

These brown butter chocolate chip cookies have crispy edges, a gooey soft center, and a deep nutty flavor from browned butter. They’re quick, easy, and made with simple ingredients—perfect for after-school cravings or last-minute desserts.
- Prep Time: 15 minutes
- Cook Time: 10-12 minutes per batch
- Total Time: 30 minutes
- Yield: 24 cookies 1x
- Category: Dessert
- Cuisine: American
Ingredients
- 1 cup (2 sticks) unsalted butter
- 1 ½ cups packed light brown sugar
- ½ cup granulated sugar
- 2 large eggs, room temperature
- 1 tablespoon vanilla extract
- 3 cups all-purpose flour, spooned and leveled
- 1 teaspoon baking soda
- ½ teaspoon baking powder
- 1 teaspoon fine sea salt
- 2 cups semisweet chocolate chips
- Optional: 1 cup chopped walnuts or pecans, toasted
- Optional: flaky sea salt for sprinkling
Instructions
- Brown the butter: Place 1 cup unsalted butter in a medium saucepan over medium heat. Melt completely, then cook, stirring occasionally, until it turns deep golden brown and smells nutty (about 5-7 minutes). Remove from heat immediately and pour into a large mixing bowl. Let cool for 10 minutes.
- Mix the wet ingredients: Add 1 ½ cups packed light brown sugar and ½ cup granulated sugar to the cooled brown butter. Whisk until combined (mixture will look like wet sand). Add 2 large eggs and 1 tablespoon vanilla extract; whisk vigorously for about 1 minute until smooth and slightly thickened.
- Combine the dry ingredients: In a separate bowl, whisk together 3 cups all-purpose flour, 1 teaspoon baking soda, ½ teaspoon baking powder, and 1 teaspoon salt.
- Mix the dough: Gradually add dry ingredients to wet mixture, stirring with a rubber spatula until just combined. Do not overmix.
- Fold in the chocolate chips: Gently fold in 2 cups semisweet chocolate chips (and nuts if using) until evenly distributed.
- Let the dough rest: Cover bowl with plastic wrap and let rest at room temperature for 10-15 minutes. Meanwhile, preheat oven to 375°F (190°C) and line two baking sheets with parchment paper.
- Portion the dough: Use a cookie scoop or tablespoon to drop rounded balls (about 1.5 tablespoons each) onto prepared baking sheets, spacing 2 inches apart.
- Bake: Bake for 10-12 minutes, until edges are golden brown and centers look slightly underbaked. For soft cookies, bake 10 minutes; for crispier, bake 12 minutes.
- Cool: Let cookies cool on baking sheet for 5 minutes, then transfer to a cooling rack. Sprinkle with flaky sea salt if desired while still warm.
- Enjoy: Serve warm or at room temperature. Store in an airtight container for up to 5 days.
Notes
For thicker cookies, chill the dough for 30 minutes before baking. Underbake slightly for soft, gooey centers. Cookies taste even better the next day. To keep cookies soft, store with a slice of bread in the container.
Nutrition
- Serving Size: 1 cookie
- Calories: 210
- Sugar: 18
- Sodium: 120
- Fat: 11
- Saturated Fat: 7
- Carbohydrates: 28
- Fiber: 1
- Protein: 3
Keywords: brown butter chocolate chip cookies, easy chocolate chip cookies, kid-approved cookies, budget-friendly cookies, quick cookies


