Introduction
My neighbor Jen wasn’t trying to impress anyone. I’d stopped by to borrow a ladder—ours had mysteriously vanished after a garage sale—and the smell hit me before I even got to her kitchen door. It was nutty, sweet, and almost buttery, but there was something herbal in there too, something that made me stop mid-step on her porch. When she opened the door, she was holding a baking sheet with these tiny, caramelized squash halves that looked like they belonged on a magazine cover. “Oh, these?” she said when I asked, waving her hand like she’d just microwaved a frozen dinner. “Just some honeynut squash I threw together.” She offered me one right off the sheet, still hot, and I honestly almost burned my tongue because I couldn’t wait. That first bite—sweet, savory, with those crispy brown butter edges—stopped me cold. I mean, how does someone just “throw together” something that tastes like a five-star restaurant side dish?
Jen shrugged when I asked for the recipe. “Brown butter, thyme, salt. That’s it.” She made it sound like nothing, but I knew better. There was a trick to getting those edges so caramelized, that nutty depth so pronounced. I watched her make it again the next week—under the guise of returning her ladder—and took mental notes. The casualness was the whole point. She wasn’t measuring or fussing. She was just letting good ingredients do what they do. That’s when I realized this wasn’t just a recipe. It was a philosophy. Simple, honest, and so good it makes you forget you’re eating vegetables. Maybe you’ve been there—standing in someone’s kitchen, watching them make something extraordinary look effortless, and thinking, I need to learn how to do that. Well, here we are. Let’s make some cozy honeynut squash.
Why You’ll Love This Recipe
Let me tell you why this honeynut squash recipe has earned a permanent spot in my fall rotation. I’ve tested it about seven times now—yes, seven—because I wanted to get every detail right before sharing it with you. And honestly, every single time, it disappeared faster than I expected.
- Quick & Easy: From start to finish, this comes together in about 35 minutes. That’s less time than it takes to decide what to order for takeout. Perfect for those weeknights when you want something special but don’t have the energy for a project.
- Simple Ingredients: Honeynut squash, butter, fresh thyme, salt, and pepper. That’s it. You might already have the thyme growing in your garden or sitting in your fridge from last week’s farmers market run.
- Perfect for Fall Gatherings: Whether it’s a cozy Sunday dinner, Thanksgiving, or just a Tuesday that needs a little extra warmth, this dish fits right in. It looks impressive without making you look like you tried too hard.
- Crowd-Pleaser: I’ve served this to kids who “don’t like squash” and adults who asked for seconds. The brown butter does something magical—it makes vegetables taste like candy, but in a sophisticated way.
- Unbelievably Delicious: The combination of sweet, caramelized honeynut squash with nutty, toasty brown butter and fragrant thyme is honestly next-level. Those crispy edges? Pure gold.
What makes this recipe different from all the other roasted squash recipes out there? It’s the technique. Most recipes tell you to just toss everything together and roast. But I learned from watching Jen that the secret is browning the butter first, then brushing it on the squash halfway through. That extra step creates layers of flavor that you just can’t get from pouring melted butter on top. Plus, honeynut squash is naturally sweeter and creamier than butternut—it’s like someone crossed butternut squash with sweet potato and made it cuter. This isn’t just another roasted vegetable side dish. It’s the one that’ll make people ask, “What did you do to this squash?”
This recipe is comfort food reimagined—healthier, faster, but with the same soul-soothing satisfaction. It’s perfect for impressing guests without stress, or turning a simple meal into something memorable. Honestly, it’s the kind of dish that makes you close your eyes after the first bite.
What Ingredients You Will Need
This recipe uses simple, wholesome ingredients to deliver bold flavor and satisfying texture without the fuss. You’ll find most of these in your pantry already, which is exactly how I like to cook.
- Honeynut Squash (4-5 medium): Look for squash that feels heavy for its size with firm, unblemished skin. Honeynut squash is smaller and sweeter than butternut, with a thin skin that’s edible once roasted. I prefer getting mine from the farmers market in early fall when they’re freshest, but most grocery stores carry them now. (adds natural sweetness, creamy texture)
- Unsalted Butter (4 tablespoons, 56g): Always use unsalted so you can control the salt level. I recommend Kerrygold or Plugrà for the richest flavor—their higher butterfat content creates better browning. (adds richness, creates nutty flavor when browned)
- Fresh Thyme (6-8 sprigs): Fresh is non-negotiable here. Dried thyme just doesn’t have the same aromatic quality. Look for bright green leaves with no wilting. Strip the leaves from the stems before using, or leave a few sprigs whole for garnish. (adds earthy, floral notes that complement the sweet squash)
- Kosher Salt (1 teaspoon, 5g): I use Diamond Crystal kosher salt because its flaky texture distributes evenly. If using table salt, reduce to 3/4 teaspoon. (enhances all the flavors, helps caramelization)
- Freshly Ground Black Pepper (1/2 teaspoon, 1g): Skip the pre-ground stuff. Freshly cracked pepper adds a subtle heat that balances the sweetness. (adds mild spice, depth)
- Optional: Maple Syrup (1 tablespoon, 15ml): If your squash isn’t as sweet as you’d like, a light drizzle of pure maple syrup in the last 5 minutes of roasting adds extra caramelization. I only use this with early-season squash. (adds sweetness, helps caramelization)
- Optional: Flaky Sea Salt (for finishing): A sprinkle of Maldon sea salt right before serving adds a lovely crunch and burst of salinity. (adds texture, brightens flavors)
Ingredient Selection Tips: When choosing honeynut squash, look for ones that are about 4-6 inches long with deep orange skin. The deeper the color, the sweeter the flesh. If you can’t find honeynut squash, you can substitute butternut squash cut into 2-inch chunks—just increase the roasting time by 10-15 minutes.
Substitution Guidance: For a dairy-free version, use vegan butter or high-quality olive oil instead of butter. The flavor will be different but still delicious. For a gluten-free option, this recipe is naturally gluten-free—just make sure your spices are certified gluten-free if that’s a concern.
Equipment Needed
You don’t need a fancy kitchen to make this recipe shine. Here’s what I use:
- Baking Sheet (half-sheet, 18×13 inches): A rimmed baking sheet is essential to catch any butter that might spill. I prefer Nordic Ware’s aluminum sheets because they conduct heat evenly and don’t warp. If you don’t have one, any heavy-duty rimmed baking pan will work.
- Parchment Paper or Silicone Baking Mat: This makes cleanup a breeze and prevents the squash from sticking. I’ve forgotten to line my sheet before and spent 15 minutes scrubbing—learn from my mistake.
- Small Skillet or Saucepan: For browning the butter. A light-colored pan helps you see when the butter turns amber. I use a stainless steel skillet, but any small pan works.
- Chef’s Knife: A sharp 8-inch chef’s knife makes cutting the squash much easier. Honeynut squash has thin skin, but it’s still dense.
- Cutting Board: Any sturdy cutting board will do. I use a large wooden one because it’s gentler on my knives.
- Pastry Brush or Spoon: For brushing the browned butter onto the squash. A silicone pastry brush works perfectly, but you can also just use a spoon to drizzle.
- Measuring Spoons: For accuracy with salt and pepper. I have a set of magnetic measuring spoons that stay organized in my drawer.
Budget-Friendly Options: Don’t have a pastry brush? No problem. Just use a regular spoon to drizzle the butter over the squash. The results are the same. And honestly, I’ve used a folded paper towel in a pinch—it works, even if it’s not glamorous.
Preparation Method
Let’s get cooking. I’ve broken this down into clear steps with all the little details I wish someone had told me the first time.
- Preheat your oven to 400°F (200°C). Place a rack in the middle position. Getting the oven fully preheated is important—if you put the squash in too early, it’ll steam instead of caramelize. Give it a full 15-20 minutes to come to temperature.
- Prepare the honeynut squash. Wash the squash well under cold water—you’re eating the skin, so you want it clean. Pat dry with a clean kitchen towel. Using a sharp chef’s knife, carefully cut each squash in half lengthwise. Here’s a tip I learned the hard way: if the squash is rolling around on your cutting board, cut a thin slice off the bottom first to create a flat surface. Much safer! Use a spoon to scoop out the seeds and stringy bits. Don’t throw those seeds away—you can roast them just like pumpkin seeds for a snack.
- Season the squash. Place the squash halves cut-side up on your parchment-lined baking sheet. Sprinkle with kosher salt and freshly ground black pepper. Don’t be shy with the salt—it helps draw out moisture and promotes caramelization. At this point, you can also tuck a few fresh thyme sprigs under the squash for extra flavor.
- Start roasting. Place the baking sheet in the preheated oven and roast for 15 minutes. This initial roasting starts the cooking process and softens the squash slightly before we add the brown butter. Set a timer—it’s easy to get distracted and forget.
- Brown the butter. While the squash is roasting, make the brown butter. Cut 4 tablespoons of unsalted butter into small pieces (this helps it melt evenly). Place in a small skillet or saucepan over medium heat. Stir constantly with a spatula or wooden spoon. First, the butter will melt, then it’ll start to foam. Keep stirring. After about 3-4 minutes, you’ll see brown specks forming at the bottom of the pan, and the butter will smell nutty and toasty. The moment it turns a golden-amber color, remove it from the heat immediately—it can go from perfect to burnt in seconds. Stir in the leaves from 4-5 sprigs of fresh thyme. The thyme will sizzle and release its fragrance. Set aside.
- Brush with brown butter. After 15 minutes, remove the squash from the oven. Using a pastry brush or spoon, generously brush the brown butter mixture over the cut sides of each squash half. Make sure you get some of those browned bits from the bottom of the pan—that’s where all the flavor is. The squash will be hot, so be careful not to burn yourself.
- Finish roasting. Return the squash to the oven and roast for another 15-20 minutes, until the squash is tender when pierced with a fork and the edges are deeply caramelized and slightly crispy. The exact time depends on the size of your squash—smaller ones cook faster. Start checking at 15 minutes. You want the squash to be fork-tender but not mushy, with those gorgeous golden-brown edges that make this dish so special.
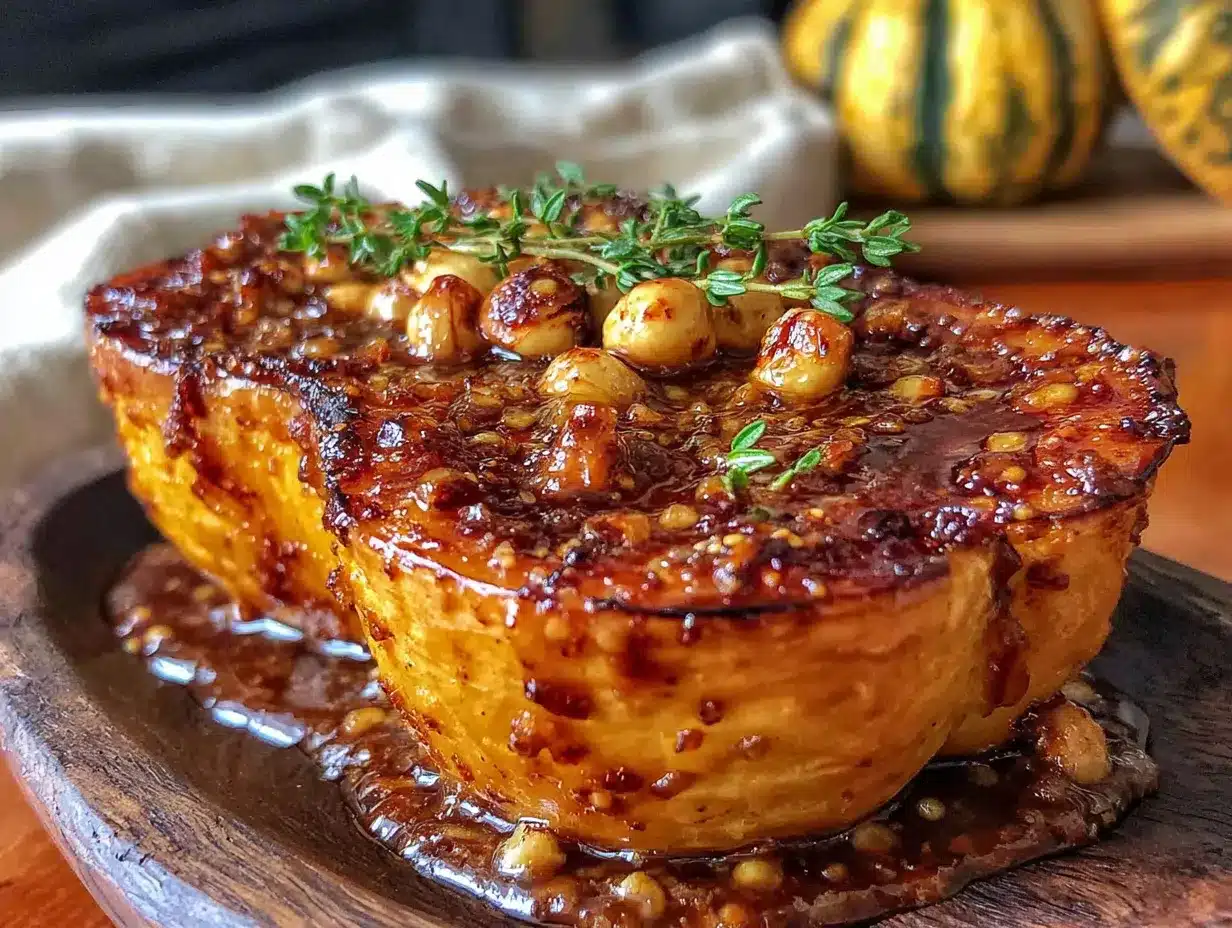
- Garnish and serve. Remove from the oven and let rest for 2-3 minutes. Transfer to a serving platter. Spoon any remaining brown butter from the baking sheet over the squash. Sprinkle with fresh thyme leaves and, if you’re using it, a pinch of flaky sea salt. The contrast of the sweet, caramelized squash with the salty crunch is perfection. Serve warm or at room temperature.
Personal Tip: I always make extra brown butter—it keeps in the fridge for up to a week and is amazing on roasted vegetables, pasta, or even popcorn. Just warm it up gently before using.
Cooking Tips & Techniques
I’ve made this recipe enough times to learn what works and what definitely doesn’t. Here’s what I wish I’d known from the start.
The Brown Butter Trap: The first time I made brown butter, I walked away to answer my phone and came back to a pan of burnt, bitter butter. Don’t do that. Brown butter goes from perfect to ruined in about 30 seconds. Stay at the stove, keep stirring, and watch for that amber color. When you see it, pull it off the heat immediately. If you’re nervous, use a light-colored pan so you can actually see the color change.
Don’t Crowd the Pan: If you’re making a double batch for a crowd, use two baking sheets instead of one. When squash halves are too close together, they steam instead of roast, and you’ll miss out on that caramelization. Give them breathing room—about an inch between each half.
The Thyme Timing: Adding thyme to the brown butter while it’s hot releases the essential oils and infuses the butter beautifully. But if you add it too early, the leaves can burn and turn bitter. I add mine right after I remove the pan from the heat, letting the residual heat do the work. Perfect every time.
My Biggest Failure: I once forgot to line my baking sheet with parchment paper. The brown butter caramelized onto the pan and created a sticky, burned mess that took forever to clean. The squash was fine, but the pan? Not so much. Line your sheet. Trust me on this one.
Multitasking Strategy: While the squash is roasting for its first 15 minutes, make the brown butter. Then while the squash finishes roasting with the brown butter, clean up your cutting board and knife. This way, everything’s done at the same time and your kitchen is clean when you sit down to eat.
Consistency Tip: For even cooking, try to get squash halves that are similar in size. If you end up with one giant and one tiny squash, the small one will be done much faster. Check the smaller ones first and remove them early if needed.
Variations & Adaptations
This recipe is wonderfully flexible. Here are some variations I’ve tried and loved.
Maple-Bourbon Version: Add 1 tablespoon of bourbon and 1 tablespoon of maple syrup to the brown butter after removing it from the heat. The alcohol cooks off during the final roasting, leaving behind a warm, complex sweetness. I made this for a Friendsgiving dinner and it was the first thing to disappear from the table.
Spicy Honey Version: Stir 1 tablespoon of honey and 1/2 teaspoon of red pepper flakes into the brown butter. The heat from the pepper flakes balances the sweetness beautifully. This is my go-to when I want something with a little kick.
Herb Mix-Up: Not a thyme fan? Swap it for fresh rosemary or sage. Rosemary gives a piney, aromatic flavor, while sage adds an earthy, almost peppery note. I’ve even used a combination of all three when I had extra herbs from the garden.
Dairy-Free Adaptation: Use 3 tablespoons of high-quality olive oil instead of butter. Heat the oil with the thyme sprigs for 2-3 minutes to infuse the flavor, then brush it on the squash. The result is lighter but still deliciously herbaceous.
Air Fryer Method: Cut the squash into 1-inch chunks instead of halves. Toss with brown butter, salt, and pepper. Air fry at 375°F (190°C) for 12-15 minutes, shaking halfway through. The edges get incredibly crispy in the air fryer. This is perfect for when you don’t want to heat up the whole oven.
Personal Variation: I once added a sprinkle of cinnamon and a pinch of cayenne to the brown butter on a whim, and honestly, it was incredible. The warmth of the cinnamon and the subtle heat of the cayenne made the squash taste almost like dessert. I’ve been making it that way ever since.
Serving & Storage Suggestions
Serving Temperature: This squash is best served warm, right out of the oven, when the edges are still crispy and the brown butter is glossy. But honestly, it’s also delicious at room temperature—I’ve been known to eat leftovers straight from the fridge.
Presentation: Arrange the squash halves on a wooden board or white platter with the cut sides facing up. Drizzle any remaining brown butter from the baking sheet over the top. Garnish with fresh thyme sprigs and a sprinkle of flaky sea salt. For a pop of color, add a few pomegranate seeds or chopped toasted pecans.
Complementary Dishes: This squash pairs beautifully with roasted chicken, pork tenderloin, or a hearty grain salad. For a vegetarian meal, serve it alongside a lentil stew or stuffed portobello mushrooms. It also works as a side dish for Thanksgiving—I’ve brought it to two Thanksgivings now and it’s always a hit.
Storage Instructions: Store leftover squash in an airtight container in the refrigerator for up to 4 days. The flavors actually meld and deepen overnight, so leftovers are still fantastic. To freeze, place cooled squash in a single layer on a baking sheet and freeze until solid, then transfer to a freezer bag. It keeps for up to 3 months.
Reheating Methods: For best results, reheat in a 350°F (175°C) oven for 8-10 minutes, or until warmed through. The edges won’t be as crispy as fresh, but the flavor is still there. You can also reheat in the microwave for 1-2 minutes—it’s faster, but the texture will be softer. For the air fryer, reheat at 350°F (175°C) for 3-4 minutes to restore some crispiness.
Flavor Development: Here’s a little secret—this squash actually tastes better the next day. The brown butter and thyme flavors have time to meld with the sweetness of the squash, creating an even more complex taste. I sometimes make a double batch just so I have leftovers for lunch.
Nutritional Information & Benefits
Per serving (1 squash half): Approximately 120 calories, 8g fat, 14g carbohydrates, 2g fiber, 6g sugar, 1g protein. These values are estimates and will vary based on exact ingredients and portion sizes.
Health Benefits: Honeynut squash is packed with vitamin A (over 100% of your daily needs per serving), which supports eye health and immune function. It’s also a good source of vitamin C, potassium, and fiber. The brown butter adds healthy fats that help your body absorb the fat-soluble vitamins in the squash. Fresh thyme is rich in antioxidants and has antimicrobial properties—plus, it adds flavor without any extra calories.
Dietary Considerations: This recipe is naturally gluten-free, vegetarian, and can be made dairy-free with a simple substitution. It’s low in added sugar (only if you choose to add maple syrup) and fits well into a balanced diet. For those watching their sodium, you can reduce the salt to 1/2 teaspoon without sacrificing too much flavor.
Potential Allergens: Contains dairy (butter). To make it dairy-free, use olive oil or vegan butter. Always check your spice labels if you have specific allergies.
Personal Wellness Perspective: I love that this recipe lets me eat something that feels indulgent—those brown butter edges are pure luxury—while still being packed with nutrients. It’s the kind of food that makes you feel good about what you’re eating, without making you feel like you’re sacrificing flavor.
Conclusion
This cozy honeynut squash with brown butter and thyme has become my go-to fall side dish for good reason. It’s simple enough for a Tuesday night, impressive enough for Thanksgiving, and so delicious that people who claim they don’t like squash have asked me for the recipe. I’ve made it for family dinners, potlucks, and solo meals when I wanted something that felt special without much effort. Every single time, it delivers.
I hope you’ll make this recipe your own. Maybe you’ll add a pinch of cinnamon like I do, or try the spicy honey version, or discover a variation I haven’t thought of yet. That’s the beauty of a simple recipe—it leaves room for your creativity. The next time you’re at the farmers market and see those cute little honeynut squash, grab a few. You’ll thank yourself later.
If you make this recipe, I’d love to hear about it. Leave a comment below and tell me how it turned out, or share your own twist on it. Did you try the maple-bourbon version? Did your kids actually eat squash? Let me know! And if you’re looking for more cozy fall recipes, check out my roasted Brussels sprouts with balsamic glaze or this creamy butternut squash soup that’s perfect for chilly evenings. Happy cooking!
Frequently Asked Questions
Can I use butternut squash instead of honeynut squash?
Absolutely. Cut the butternut squash into 2-inch chunks and increase the roasting time by 10-15 minutes. The flavor will be slightly less sweet, but it’s still delicious. Just keep in mind that butternut squash has thicker skin, so you’ll want to peel it first.
How do I know when the brown butter is done?
Watch for the butter to turn a golden-amber color and smell nutty and toasty. You’ll also see brown specks forming at the bottom of the pan. The whole process takes about 3-4 minutes over medium heat. Remove it from the heat immediately once it reaches that color—it can burn very quickly.
Can I make this recipe ahead of time?
Yes! You can roast the squash up to 2 days in advance and reheat it in a 350°F oven for 8-10 minutes before serving. The edges won’t be as crispy as fresh, but the flavor is still excellent. I often make this for Thanksgiving prep to free up oven space on the big day.
Do I have to eat the skin of the honeynut squash?
No, but you can. Honeynut squash has thin, tender skin that becomes soft and edible when roasted. Some people love the texture and extra fiber, while others prefer to scoop out the flesh. Try it both ways and see what you prefer.
What can I do with the squash seeds?
Don’t throw them away! Rinse the seeds to remove any stringy bits, pat them dry, toss with a little olive oil and salt, and roast at 350°F for 8-10 minutes. They make a great snack or salad topping. I sometimes add a sprinkle of cinnamon or cayenne for extra flavor.
PrintCozy Honeynut Squash with Brown Butter and Thyme: Easy Side Dish

This easy side dish features sweet, caramelized honeynut squash halves brushed with nutty brown butter and fragrant thyme. Ready in about 35 minutes, it’s perfect for weeknights or fall gatherings.
- Prep Time: 10 minutes
- Cook Time: 30-35 minutes
- Total Time: 40-45 minutes
- Yield: 4 servings 1x
- Category: Side Dish
- Cuisine: American
Ingredients
- 4–5 medium honeynut squash
- 4 tablespoons (56g) unsalted butter
- 6–8 sprigs fresh thyme
- 1 teaspoon (5g) kosher salt
- 1/2 teaspoon (1g) freshly ground black pepper
- 1 tablespoon (15ml) maple syrup (optional)
- Flaky sea salt for finishing (optional)
Instructions
- Preheat your oven to 400°F (200°C). Place a rack in the middle position.
- Wash the honeynut squash well, pat dry, and cut each in half lengthwise. Scoop out seeds and stringy bits.
- Place squash halves cut-side up on a parchment-lined baking sheet. Sprinkle with kosher salt and black pepper. Tuck a few fresh thyme sprigs under the squash if desired.
- Roast for 15 minutes.
- While squash roasts, make the brown butter: Cut 4 tablespoons unsalted butter into small pieces and place in a small skillet over medium heat. Stir constantly until butter melts, foams, and turns golden-amber with brown specks (about 3-4 minutes). Remove from heat immediately and stir in leaves from 4-5 sprigs of fresh thyme.
- After 15 minutes, remove squash from oven. Brush the brown butter mixture generously over the cut sides of each squash half.
- Return squash to oven and roast for another 15-20 minutes, until tender when pierced with a fork and edges are deeply caramelized.
- Remove from oven and let rest 2-3 minutes. Transfer to a serving platter, spoon any remaining brown butter from the baking sheet over the squash, and garnish with fresh thyme leaves and flaky sea salt if using. Serve warm or at room temperature.
Notes
For even cooking, choose squash halves of similar size. Brown butter can burn quickly—watch carefully and remove from heat as soon as it turns amber. Leftovers keep in the fridge for up to 4 days and taste even better the next day.
Nutrition
- Serving Size: 1 squash half
- Calories: 120
- Sugar: 6
- Sodium: 300
- Fat: 8
- Saturated Fat: 5
- Carbohydrates: 14
- Fiber: 2
- Protein: 1
Keywords: honeynut squash, brown butter, thyme, roasted squash, fall side dish, easy side dish, vegetarian, gluten-free


