The pint was empty before I even finished scooping the last bowl. My husband stood there, spoon still in hand, looking at me with that expression I’ve come to recognize — the one that says “please tell me there’s more.” There wasn’t. But honestly, that moment told me everything I needed to know about this Creamy No-Churn Salted Caramel Ice Cream.
I’d been messing around with no-churn ice creams for a while, mostly out of stubbornness. I don’t own an ice cream maker — never have — and I refused to believe that meant I couldn’t have proper homemade ice cream. This particular batch started as a late-night experiment after a particularly salty caramel sauce I’d made for a salted caramel apple blondie bars recipe had turned out way too good to waste. I had leftover sauce, a carton of heavy cream, and absolutely no plan.
The first spoonful caught me off guard. It was creamy — like, really creamy — with that perfect balance of sweet and salty that makes you take another bite before you’ve finished the first one. No ice crystals, no weird texture, no fuss. Just five ingredients and a whisk.
That night, I texted my sister a photo with the caption “I think I cracked the code.” She replied with a single word: “Recipe?” I sent her the method the next morning, and she made it that same afternoon. Her text came through at 9 PM: “Why have I been buying ice cream my whole life?”
That’s the thing about this Creamy No-Churn Salted Caramel Ice Cream — it makes you wonder why you ever bothered with the store-bought stuff. And the best part? You don’t need any fancy equipment or culinary degree to pull it off.
Why You’ll Love This Recipe
Let me be straight with you — I’ve tested this recipe more times than I care to admit. I’ve made it with different cream brands, different caramel sauces, different salt flakes. I’ve accidentally left it in the freezer for three days and it still scooped like a dream. Here’s why this one stands out:
- No Ice Cream Maker Required — Seriously, zero special equipment. Just a mixing bowl, a whisk, and a freezer. That’s it.
- Only 5 Ingredients — Heavy cream, sweetened condensed milk, vanilla extract, salted caramel sauce, and flaky sea salt. You probably have most of these right now.
- Ready in Under 10 Minutes — The active prep time is laughably short. Mix, swirl, freeze. Done.
- Perfect for Any Occasion — Summer BBQ, holiday dessert table, random Tuesday night craving. It fits everywhere.
- Crowd-Pleaser Guaranteed — I’ve served this to kids, grandparents, and picky in-laws. Empty bowls every single time.
- Better Than Store-Bought — The texture is silkier, the flavor is richer, and you control exactly what goes in it.
What makes this different from every other no-churn recipe out there? It’s the caramel ripple technique. Instead of just mixing everything together and hoping for the best, you layer the caramel in strategic pockets throughout the base. This means every single scoop gets that gorgeous salted caramel swirl — not just a sad blob at the bottom of the container.
Honestly, this is the kind of dessert that makes you close your eyes on the first bite. It’s comfort food at its finest — indulgent, nostalgic, and ridiculously easy to make. Whether you’re impressing dinner guests or treating yourself after a long week, this ice cream delivers.
What Ingredients You Will Need
This recipe uses simple, wholesome ingredients to deliver that rich, creamy texture and bold salted caramel flavor. Most of these are pantry staples or easily found at any grocery store.
- 2 cups heavy cream (also called heavy whipping cream — make sure it’s cold from the fridge) (adds richness and creates that silky texture)
- 1 can (14 oz) sweetened condensed milk (this is the magic ingredient that makes no-churn ice cream work) (I prefer Eagle Brand for consistency)
- 1 teaspoon vanilla extract (pure vanilla extract, not imitation — trust me on this) (adds warmth and depth)
- ¾ cup salted caramel sauce (homemade or store-bought — just make sure it’s thick, not runny) (use a good quality one for best flavor)
- 1 teaspoon flaky sea salt (like Maldon or Fleur de Sel) (for that perfect salty finish) (don’t use table salt — it’s too fine and will dissolve unevenly)
Ingredient Selection Tips:
- For the heavy cream, look for one with at least 36% milk fat. Higher fat content means creamier ice cream with fewer ice crystals.
- If you’re making your own salted caramel sauce, let it cool completely before using. Warm caramel will melt the cream base and ruin the texture.
- Store-bought caramel sauce works perfectly — just avoid the super thin “ice cream topping” kind. You want something with a thick, spoonable consistency.
- For the flaky sea salt, don’t skip it. That little crunch of salt against the sweet caramel is what makes this recipe special.
Substitution Guidance:
- Need a dairy-free version? Use full-fat coconut cream (chilled) instead of heavy cream and a dairy-free sweetened condensed milk alternative. The texture will be slightly different but still delicious.
- Want to cut the sugar? You can use a sugar-free sweetened condensed milk, but the texture may be a bit icier.
- No vanilla extract? Try vanilla bean paste or the seeds from half a vanilla bean for a more intense flavor.
- For a different flavor twist, swap the salted caramel sauce with dulce de leche or butterscotch sauce.
Equipment Needed
The beauty of this recipe is how little equipment it requires. Here’s what you’ll need:
- Large mixing bowl — Glass or stainless steel works best. Make sure it’s clean and completely dry.
- Electric hand mixer or stand mixer — You can whisk by hand, but it’ll take about 8-10 minutes of vigorous arm work. A mixer does it in 3-4 minutes.
- Rubber spatula — For folding in the condensed milk and scraping every last bit of cream from the bowl.
- Loaf pan or freezer-safe container — A standard 9×5 inch loaf pan works perfectly. You can also use a 2-quart freezer-safe container with a lid.
- Plastic wrap or parchment paper — To press directly onto the surface of the ice cream before freezing (prevents ice crystals from forming on top).
- Small spoon or knife — For creating the caramel swirls.
If you don’t have a loaf pan, any shallow freezer-safe dish will work. The key is having a wide surface area so the ice cream freezes evenly and quickly. I’ve used a square baking dish before — it works fine, just freeze for slightly less time since it’s shallower.
One tip: make sure your mixing bowl is well-chilled before you start. I pop mine in the fridge for 10 minutes while I gather ingredients — it helps the cream whip up faster and stay stable.
Preparation Method
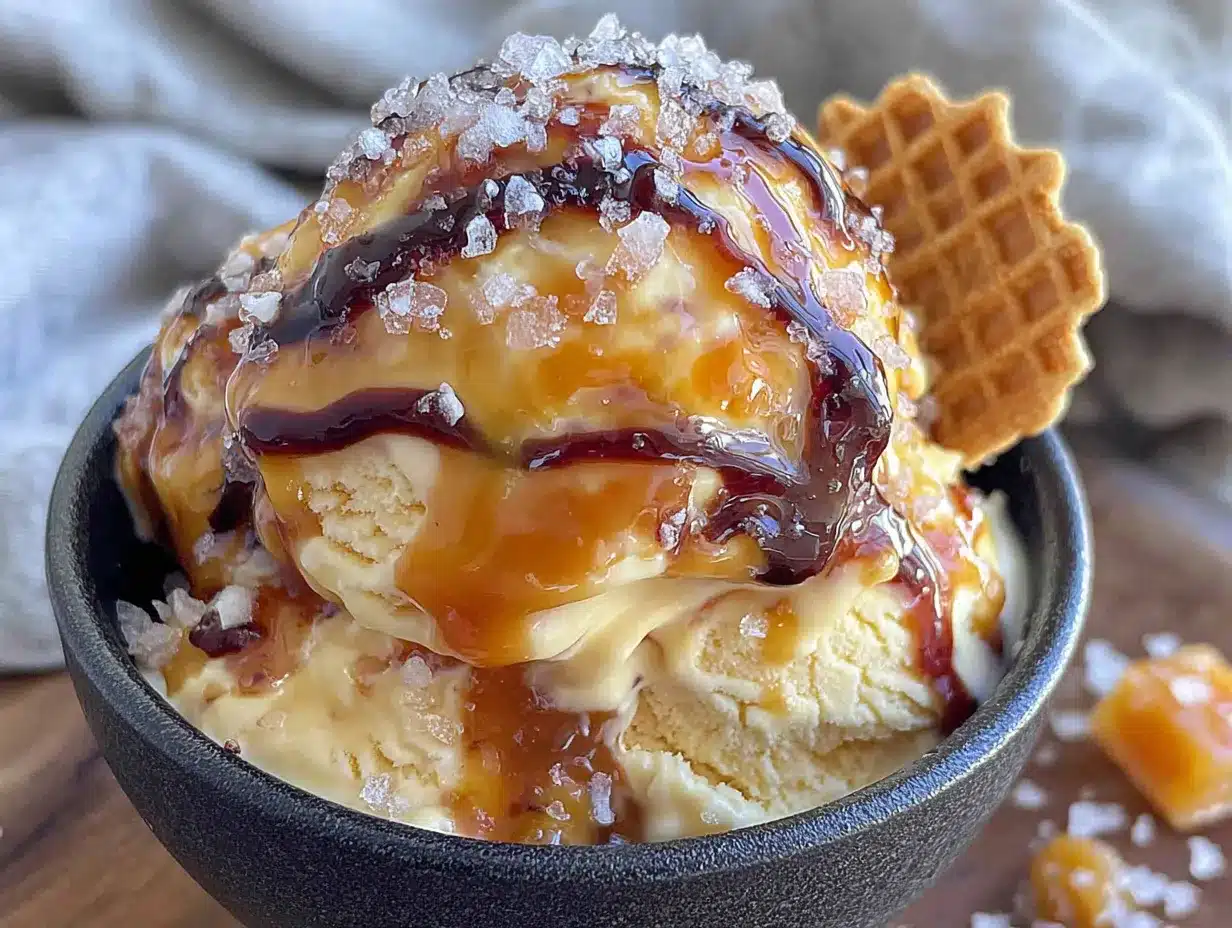
Alright, let’s make some ice cream. This is honestly easier than making a boxed cake mix, and the result is way more impressive.
- Chill your equipment. Place your large mixing bowl and beaters in the fridge for 10-15 minutes before starting. Cold equipment = fluffier whipped cream = creamier ice cream.
- Whip the heavy cream. Pour the cold heavy cream into the chilled bowl. Using an electric hand mixer on medium-high speed, whip the cream until stiff peaks form. This takes about 3-4 minutes with a mixer. You’re looking for peaks that hold their shape when you lift the beaters — not butter, but definitely not liquid. Don’t overwhip or you’ll end up with butter!
- Fold in the sweetened condensed milk. Pour the entire can of sweetened condensed milk and the vanilla extract over the whipped cream. Using a rubber spatula, gently fold everything together. Work slowly and scrape from the bottom up. You want a uniform mixture with no white streaks of cream remaining. This should take about 1-2 minutes of gentle folding.
- Create the first layer. Spread about one-third of the cream mixture evenly into your loaf pan or freezer container. Smooth the top with your spatula.
- Add the caramel swirl. Drizzle about ¼ cup of your salted caramel sauce over the cream layer in a zigzag pattern. Use a small spoon or knife to gently swirl the caramel into the cream — just a few figure-eight motions. Don’t overmix or you’ll lose the distinct caramel ribbons.
- Repeat layers. Add another third of the cream mixture, spreading it gently over the caramel layer. Drizzle another ¼ cup of caramel sauce and swirl it in. Repeat with the final layer of cream and remaining caramel sauce.
- Top with flaky sea salt. Sprinkle the flaky sea salt evenly over the top of the ice cream. Don’t skip this — that salty crunch against the sweet cream is what makes this recipe sing.
- Cover and freeze. Press a piece of plastic wrap directly onto the surface of the ice cream (this prevents ice crystals). Alternatively, you can use parchment paper cut to fit. Place the lid on your container or wrap the whole loaf pan tightly in plastic wrap. Freeze for at least 6 hours, but overnight is best for the perfect scoopable texture.
- Let it sit before scooping. When you’re ready to serve, remove the ice cream from the freezer and let it sit at room temperature for 5-10 minutes. This softens it just enough for easy scooping without melting.
Pro tip from my kitchen: The first time I made this, I was too impatient and tried to scoop it straight from the freezer after only 4 hours. It was still soft and delicious, but not quite that perfect scoopable texture. Give it the full 6-8 hours — your patience will be rewarded.
Cooking Tips & Techniques
After making this recipe more times than I can count, I’ve picked up a few tricks that make a real difference. Let me share what I’ve learned — including the mistakes I’ve made so you don’t have to.
Don’t overwhip the cream. This is the most common mistake. You want stiff peaks that hold their shape, but if you keep going, you’ll end up with butter. The cream should look thick and billowy, like clouds. Stop as soon as the peaks stand up straight when you lift the beaters.
Keep everything cold. Cold cream, cold bowl, cold beaters. I’ve made the mistake of using room-temperature cream once — it took forever to whip and never got as fluffy. The texture of the final ice cream was noticeably denser and icier.
Fold, don’t stir. When combining the whipped cream with the condensed milk, use a gentle folding motion. Stirring aggressively will deflate all that air you just whipped into the cream, resulting in a denser, less creamy ice cream.
Swirl strategically. Instead of just dumping all the caramel on top, layering it throughout ensures every scoop gets that caramel goodness. I’ve tried both methods, and layering is definitely superior.
Watch your freezer temperature. If your freezer is set super cold (below 0°F / -18°C), your ice cream might freeze rock-hard. Let it sit out for 10-15 minutes before scooping. If it’s still too hard, microwave your ice cream scoop under hot water for a few seconds — works like a charm.
Use a warm knife for clean slices. If you’re serving this in a more formal setting (like for a dinner party), run your knife under hot water before cutting slices. It gives you those beautiful, clean edges that look so professional.
One thing I learned the hard way: don’t use homemade caramel sauce that’s too thin. My first attempt had a runny caramel that mostly sank to the bottom of the pan. A thick, spoonable caramel creates those gorgeous ribbons throughout the ice cream.
Variations & Adaptations
This recipe is incredibly versatile, and I’ve experimented with quite a few variations. Here are some of my favorites:
Salted Caramel Chocolate Chunk: Fold in ½ cup of roughly chopped dark chocolate (70% cocoa or higher) along with the condensed milk. The chocolate adds a nice bitterness that balances the sweet caramel. I made this for a party and it disappeared faster than anything else on the dessert table.
Vegan Version: Use full-fat coconut cream (chilled overnight) instead of heavy cream, and a dairy-free sweetened condensed coconut milk. The caramel sauce needs to be dairy-free too — there are some great store-bought options available. The texture is slightly different (a bit icier) but still delicious.
Boozy Salted Caramel: Add 2 tablespoons of bourbon or dark rum to the cream mixture before folding in the condensed milk. The alcohol lowers the freezing point, resulting in a softer, more scoopable ice cream. Plus, bourbon and caramel are a match made in heaven.
Nutty Caramel Crunch: Toast ½ cup of chopped pecans or walnuts and fold them into the cream mixture along with the condensed milk. The toasted nuts add a wonderful crunch and nutty flavor that complements the caramel beautifully.
Espresso Caramel Swirl: Dissolve 1 tablespoon of instant espresso powder in 1 tablespoon of hot water, let it cool, and swirl it into the cream mixture along with the caramel. The coffee flavor deepens the caramel and adds a grown-up twist.
My personal favorite variation? The chocolate chunk version. I made it for a creamy black velvet Oreo dirt cup pudding cups themed dessert night, and everyone kept asking for “that salted caramel ice cream with the chocolate pieces.” It’s been a staple in my freezer ever since.
Serving & Storage Suggestions
Serving Temperature: This ice cream is best served slightly softened — about 5-10 minutes at room temperature after removing from the freezer. It scoops like a dream and melts perfectly on your tongue. For a prettier presentation, scoop into chilled bowls or glasses.
Presentation Ideas: Serve in a waffle cone with an extra drizzle of caramel sauce and a sprinkle of flaky sea salt on top. For a more elegant dessert, scoop into small glass bowls and top with a dollop of whipped cream and a caramel-dipped wafer cookie. You can also layer it with crushed graham crackers for an easy ice cream pie.
Perfect Pairings: This ice cream pairs beautifully with warm desserts — think apple pie, brownies, or a cozy pumpkin cinnamon rolls with brown butter icing. The contrast of warm and cold is absolutely divine. For drinks, a strong coffee or espresso is the perfect companion — the bitterness balances the sweetness.
Storage Instructions: Store in an airtight container in the freezer for up to 2 weeks. After that, the texture starts to get a bit icy. Press plastic wrap directly onto the surface before sealing to prevent freezer burn and ice crystals.
Reheating/Softening Tip: If your ice cream has been in the freezer for more than a few days and feels rock-hard, microwave it for 10-15 seconds on low power (30%) before scooping. This softens it just enough without melting it.
How Flavors Develop: Interestingly, the salted caramel flavor actually deepens after a day or two in the freezer. The salt melds with the caramel, creating a more complex, balanced flavor. So if you can wait a day, the ice cream will taste even better.
Nutritional Information & Benefits
Let’s be real — this is an indulgent dessert. But knowing what’s in it (and what’s not) can help you enjoy it mindfully.
- Estimated per serving (½ cup): 320 calories, 22g fat (14g saturated), 28g carbohydrates, 4g protein, 180mg sodium
- Key ingredients: Heavy cream provides calcium and vitamin A. Sweetened condensed milk adds calcium and protein (though also sugar).
- Dietary considerations: This recipe is naturally gluten-free and contains no eggs. It is not dairy-free, vegan, or low-carb in its standard form.
- Potential allergens: Dairy (milk, cream). The caramel sauce may contain dairy as well, depending on the brand.
- Healthier twist: For a lighter version, you can use half-and-half instead of heavy cream (though the texture will be less creamy) or reduce the caramel sauce to ½ cup.
I personally believe that dessert should be enjoyed without guilt. This ice cream is made with real ingredients — no artificial flavors, preservatives, or stabilizers. When you make it yourself, you know exactly what’s going into your body. And honestly, a small scoop of this is way more satisfying than a bowl of some store-bought stuff that’s full of weird additives.
Conclusion
This Creamy No-Churn Salted Caramel Ice Cream has become my go-to dessert for pretty much every occasion. It’s the recipe I make when I need to impress someone, when I’m craving something sweet, or when I just want to feel like I’ve got my life together (because honestly, making your own ice cream feels pretty accomplished).
The best part? You can make it your own. Add chocolate, nuts, espresso — whatever sounds good to you. That’s the beauty of homemade ice cream. It’s forgiving, it’s flexible, and it always delivers.
I’d love to hear how yours turns out. Did you try a fun variation? Did you serve it with something unexpected? Drop a comment below and let me know — I read every single one, and your ideas might just inspire my next batch. And if you loved this recipe, share it with a friend who needs a little homemade happiness in their life.
Now go make some ice cream. Your future self will thank you.
Frequently Asked Questions
Can I use light cream or half-and-half instead of heavy cream?
I wouldn’t recommend it. Heavy cream has a high fat content (at least 36%) which is what gives no-churn ice cream its creamy, scoopable texture. Light cream or half-and-half will result in a much icier, less satisfying texture. Stick with heavy cream for the best results.
How long does this ice cream last in the freezer?
It’s best within the first 2 weeks. After that, the texture starts to get icy and the flavor may dull slightly. If you need to store it longer, make sure it’s tightly covered with plastic wrap directly on the surface to prevent freezer burn.
Can I make this without an electric mixer?
Yes, but you’ll need some arm strength! Whisking heavy cream to stiff peaks by hand takes about 8-10 minutes of continuous, vigorous whisking. It’s totally doable — just make sure your cream and bowl are very cold, and use a large balloon whisk for best results.
Why did my caramel sink to the bottom?
This usually happens when the caramel sauce is too thin or too warm. Make sure your caramel has cooled completely before adding it to the cream mixture. Also, a thicker caramel sauce will hold its place better. If your caramel is thin, try refrigerating it for 10-15 minutes before swirling it in.
Can I double this recipe?
Absolutely. Just double all the ingredients and use a larger container for freezing. A 9×13 inch baking dish works great for a double batch. The freezing time may increase slightly since there’s more volume to freeze — check after 8 hours and add more time if needed.
Pin This Recipe!
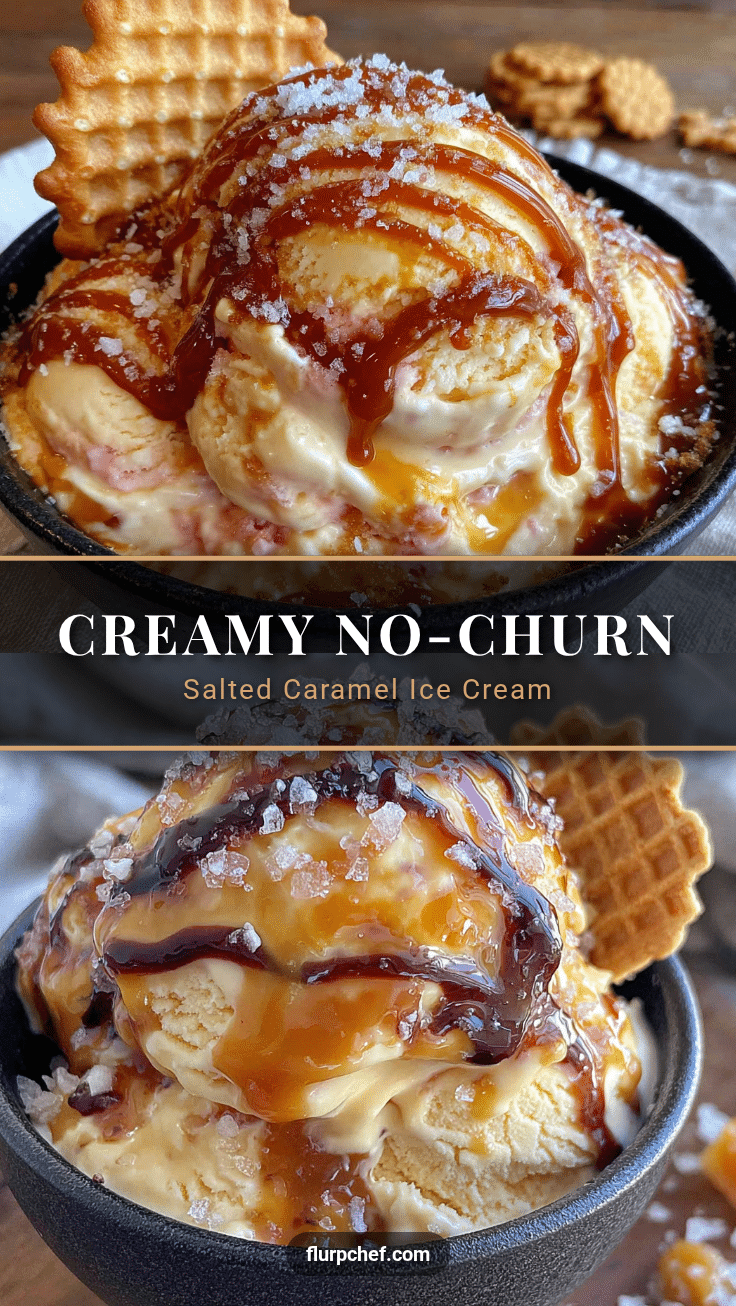
Creamy No-Churn Salted Caramel Ice Cream: Easy 5-Ingredient Recipe

This creamy no-churn salted caramel ice cream requires only 5 ingredients and no ice cream maker. It’s silky, rich, and perfectly balanced with sweet and salty flavors.
- Prep Time: 10 minutes
- Cook Time: 0 minutes
- Total Time: 6 hours 10 minutes (includes freezing time)
- Yield: 8 servings 1x
- Category: Dessert
- Cuisine: American
Ingredients
- 2 cups heavy cream (also called heavy whipping cream, cold)
- 1 can (14 oz) sweetened condensed milk
- 1 teaspoon vanilla extract (pure vanilla extract)
- ¾ cup salted caramel sauce (thick, not runny)
- 1 teaspoon flaky sea salt (like Maldon or Fleur de Sel)
Instructions
- Chill your equipment: Place your large mixing bowl and beaters in the fridge for 10-15 minutes before starting.
- Whip the heavy cream: Pour the cold heavy cream into the chilled bowl. Using an electric hand mixer on medium-high speed, whip the cream until stiff peaks form (about 3-4 minutes).
- Fold in the sweetened condensed milk: Pour the entire can of sweetened condensed milk and the vanilla extract over the whipped cream. Gently fold together with a rubber spatula until uniform.
- Create the first layer: Spread about one-third of the cream mixture evenly into your loaf pan or freezer container.
- Add the caramel swirl: Drizzle about ¼ cup of salted caramel sauce over the cream layer in a zigzag pattern. Gently swirl with a small spoon or knife.
- Repeat layers: Add another third of the cream mixture, drizzle another ¼ cup of caramel sauce, and swirl. Repeat with the final layer of cream and remaining caramel sauce.
- Top with flaky sea salt: Sprinkle the flaky sea salt evenly over the top.
- Cover and freeze: Press plastic wrap directly onto the surface of the ice cream. Freeze for at least 6 hours, preferably overnight.
- Let it sit before scooping: Remove from freezer and let sit at room temperature for 5-10 minutes before scooping.
Notes
For best results, use cold heavy cream and chilled equipment. Don’t overwhip the cream. Use a thick caramel sauce to prevent sinking. Let ice cream sit at room temperature for 5-10 minutes before scooping. Store in an airtight container for up to 2 weeks.
Nutrition
- Serving Size: ½ cup
- Calories: 320
- Sugar: 26
- Sodium: 180
- Fat: 22
- Saturated Fat: 14
- Carbohydrates: 28
- Protein: 4
Keywords: no-churn ice cream, salted caramel ice cream, easy ice cream, 5-ingredient ice cream, homemade ice cream, no ice cream maker


