There used to be a tiny, no-name Peruvian chicken joint tucked into a strip mall off Highway 99 that made the most incredible crispy chicken thighs I have ever had. When they closed their doors during the pandemic, I felt a legitimate pang of grief, I am not kidding. After a dozen tries — some burnt, some soggy, one that set off the smoke detector at 11 PM on a Tuesday — I finally cracked the code.
This is that recipe. These crispy air fryer chicken thighs are my love letter to that little spot, and honestly, they might even be better. You get that same impossibly crackly skin and juicy, tender meat without the deep fryer or the mess. Let me tell you, the first time my kids asked for seconds of chicken skin, I knew I had something special. Maybe you have been there, chasing a flavor from a place you can not get back to.
Why You Will Love This Recipe
This is not just another chicken recipe. After testing this on my family for months, I can promise you it delivers on every front. It is the kind of dinner that makes everyone quiet at the table, and that is the highest compliment in my house.
- Budget-Friendly: Chicken thighs are one of the most affordable cuts of meat. You can feed a family of four for under ten bucks, easy.
- Quick & Easy: From fridge to table in under 30 minutes. No marinating required, though it helps if you have the time.
- Crowd-Pleaser: Even my pickiest eater, who normally picks at dinner, devours these. The crispy skin is like magic for kids.
- Simple Ingredients: You probably have everything in your pantry right now. No fancy trips to a specialty store needed.
- Unbelievably Delicious: The texture is next-level. The skin shatters when you bite into it, and the meat stays ridiculously moist.
What makes this different from every other air fryer chicken recipe out there? It is the technique. I spent weeks figuring out the perfect balance of heat and time to get that skin crispy without drying out the meat. No flipping halfway, no complicated brines. Just smart cooking that works every single time.
This recipe is not just good — it is the kind that makes you close your eyes after the first bite. It is comfort food reimagined, faster and easier, but with the same soul-soothing satisfaction. Perfect for impressing guests without stress, or turning a simple Tuesday night into something memorable.
What Ingredients You Will Need
This recipe uses simple, wholesome ingredients to deliver bold flavor and satisfying texture without the fuss. Most of these are pantry staples, which makes this a perfect last-minute dinner solution.
- Bone-in, skin-on chicken thighs (4-6 thighs, about 2 lbs / 900g) — The bone keeps the meat juicy, and the skin is what gets that incredible crunch. I prefer thighs from a local butcher or a brand like Bell & Evans for consistent quality.
- Olive oil (1 tablespoon / 15ml) — Helps the seasoning stick and encourages browning. You can use avocado oil for a higher smoke point.
- Garlic powder (1 teaspoon) — Adds savory depth without burning. Fresh garlic can burn in the air fryer, so stick with powder here.
- Onion powder (1 teaspoon) — Rounds out the flavor profile beautifully.
- Smoked paprika (1 teaspoon) — My secret weapon. It adds a subtle smokiness that mimics that rotisserie flavor. I recommend the Spanish smoked paprika from Penzeys if you can find it.
- Salt (1 teaspoon) — Use kosher salt for best results. It distributes more evenly than table salt.
- Black pepper (½ teaspoon) — Freshly ground is always better.
- Optional: Baking powder (½ teaspoon) — This is the pro trick for extra crispy skin. It helps dry out the skin and creates tiny bubbles that crisp up perfectly. Make sure it is aluminum-free to avoid a metallic taste.
For substitutions, you can use boneless, skin-on thighs, but reduce the cooking time by about 5 minutes. If you are out of smoked paprika, regular paprika works, but you will lose that smoky depth. Feel free to add a pinch of cayenne if your family likes heat.
Equipment Needed
You do not need much for this recipe, which is part of the beauty. Here is what you will need:
- Air fryer (any size will work, but a basket-style 5.8-quart model is ideal for cooking 4-6 thighs without overcrowding)
- Tongs — For flipping and removing hot chicken. Silicone-tipped ones are great to avoid scratching your air fryer basket.
- Paper towels — Essential for patting the chicken dry. Do not skip this step.
- Mixing bowl — For tossing the chicken with oil and seasonings.
- Meat thermometer — I use an instant-read Thermapen. It takes the guesswork out of cooking chicken perfectly every time.
- Cutting board and knife — For any prep work, though this recipe needs minimal chopping.
If you do not have an air fryer, you can use a convection oven at 400°F (200°C) for about 30-35 minutes. The skin will not be quite as crispy, but it will still be delicious. I have also used a wire rack on a baking sheet in a regular oven with good results, just add a few extra minutes.
Preparation Method
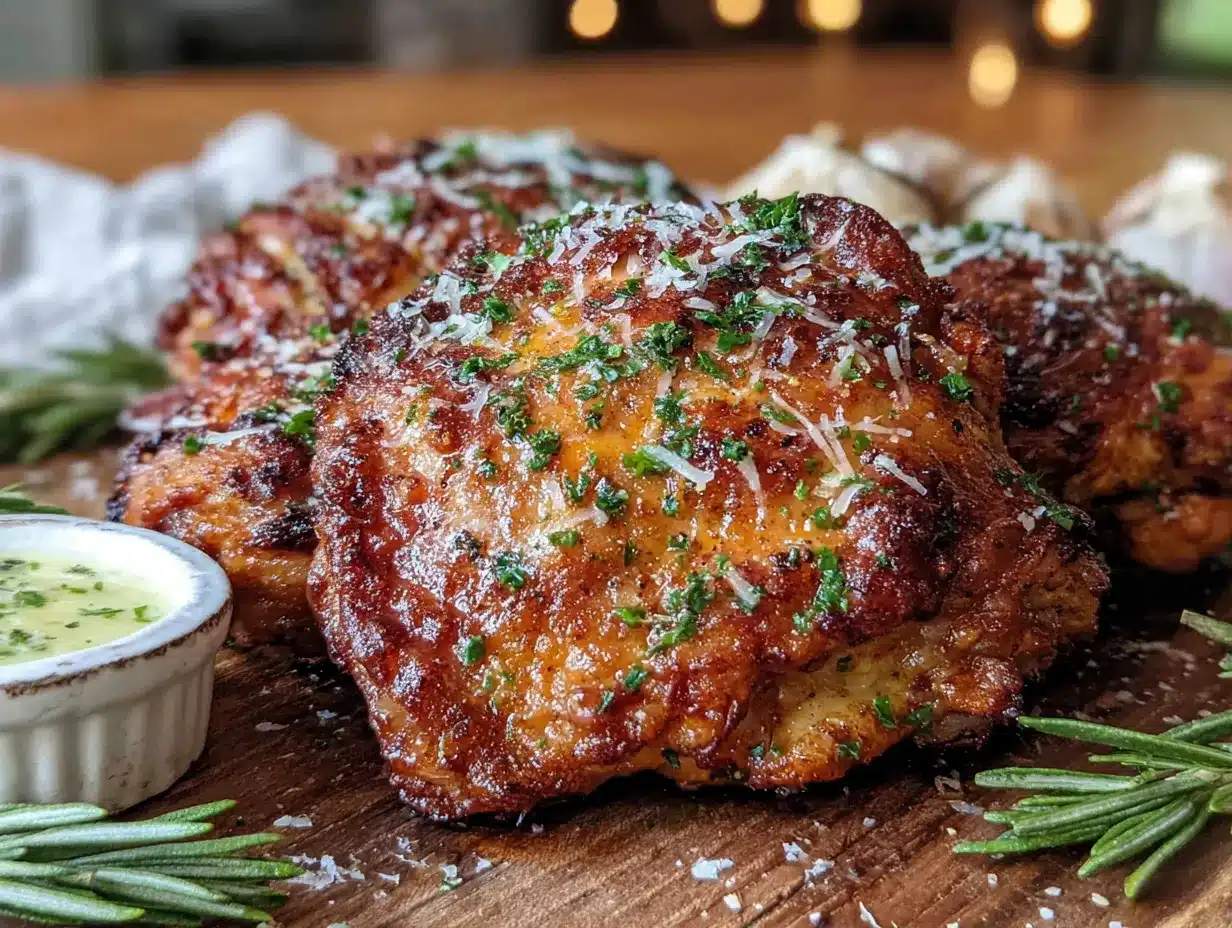
Follow these steps carefully, and you will have the crispiest air fryer chicken thighs of your life. I have learned these tricks through trial and error, so trust the process.
- Pat the chicken thighs completely dry. This is the most important step. Use paper towels and press firmly to remove as much moisture as possible from the skin. Wet skin steams instead of crisps. I usually pat each thigh individually and then let them sit on a plate for 5 minutes while I prep the seasoning.
- Preheat your air fryer to 380°F (193°C). Preheating is crucial for even cooking. Most air fryers take about 3-5 minutes to reach temperature. Do not skip this, or your chicken will cook unevenly.
- In a large mixing bowl, combine the olive oil, garlic powder, onion powder, smoked paprika, salt, pepper, and baking powder (if using). Mix until it forms a paste-like consistency. The baking powder is optional, but it really does make a difference. I learned this trick from a chef friend who uses it on wings.
- Add the chicken thighs to the bowl and toss to coat evenly. Use your hands to massage the seasoning into every nook and cranny, especially under the skin if you can. Getting seasoning under the skin adds so much flavor to the meat itself.
- Place the chicken thighs skin-side down in the air fryer basket. Make sure they are in a single layer with a little space between each piece. Overcrowding traps steam and prevents crisping. If you have to cook in batches, do it. It is worth the extra time.
- Cook at 380°F (193°C) for 18 minutes. Do not flip or open the basket during this time. Let the air fryer work its magic. You will start to smell that incredible aroma around the 10-minute mark, and that is when you know it is working.
- Carefully flip the chicken thighs using tongs. They will be hot and the skin will be starting to crisp. Be gentle so you do not tear the skin. I have definitely lost a few pieces of skin this way, and it is heartbreaking.
- Increase the temperature to 400°F (200°C) and cook for another 5-7 minutes. This final blast of high heat is what gives you that shatteringly crispy skin. Keep an eye on them during this time, as air fryers can vary.
- Check for doneness. The internal temperature should reach 165°F (74°C) when inserted into the thickest part of the thigh, away from the bone. I always check multiple thighs to be safe. If they need more time, add 2-minute increments.
- Let the chicken rest for 5 minutes before serving. This allows the juices to redistribute throughout the meat. I know it is hard to wait, but this step makes a real difference. The skin will also get even crispier as it cools slightly.
A few notes from my kitchen: If you see smoke, do not panic. A little smoke is normal from the fat rendering. Just open a window. Also, if your chicken thighs are particularly large, you may need to add 2-3 minutes to the first cooking stage. Trust your meat thermometer over the timer every time.
Cooking Tips & Techniques
I have made this recipe more times than I can count, and I have learned a few things the hard way. Here are my best tips to ensure success every time.
Patience is key with the skin. The biggest mistake people make is not drying the chicken thoroughly. I once rushed through this step and ended up with soggy, sad skin. Take the extra minute to really blot those thighs dry. It makes all the difference.
Do not overcrowd the basket. I know it is tempting to cram everything in to save time, but overcrowding creates steam, and steam is the enemy of crispy skin. Cook in batches if you need to. The extra 10 minutes is worth it for perfect results.
Use a meat thermometer. I cannot stress this enough. Chicken thighs are forgiving, but you still want to hit that 165°F (74°C) mark. I have had thighs that looked done on the outside but were still pink near the bone. A thermometer takes the guesswork out of cooking.
Let the chicken come to room temperature. If you have time, take the chicken out of the fridge 15-20 minutes before cooking. This helps it cook more evenly. I have forgotten to do this many times, and the chicken still turns out great, but it is a nice touch when you can manage it.
Keep the skin side down first. This allows the fat to render out and baste the meat as it cooks. When you flip it, the skin side gets that final blast of heat to crisp up perfectly. It is a simple technique that delivers professional results.
One thing I learned from a spectacular failure: do not use cooking spray on the air fryer basket. It can damage the non-stick coating and create a sticky residue. A little olive oil on the chicken is all you need.
Variations & Adaptations
This recipe is incredibly versatile, and I have tried several variations over the months. Here are some of my favorites.
Spicy Honey Garlic: Add 1 tablespoon of honey and ½ teaspoon of cayenne pepper to the seasoning mix. Drizzle a little extra honey over the chicken in the last 2 minutes of cooking. My husband requests this version every week. It is sweet, spicy, and utterly addictive.
Lemon Herb: Replace the smoked paprika with 1 teaspoon of dried oregano and ½ teaspoon of dried thyme. Add the zest of one lemon to the seasoning mix. Serve with lemon wedges for squeezing over the top. This is my go-to summer version when I want something lighter.
BBQ Glazed: Cook the chicken as directed, then brush with your favorite BBQ sauce in the last 3 minutes of cooking. Return to the air fryer for the final minutes to caramelize the sauce. My kids go crazy for this version. It is like having BBQ chicken without firing up the grill.
For dietary adaptations, this recipe is naturally gluten-free and low-carb. If you need to avoid dairy, you are in luck because there is no dairy in the base recipe. For a lower sodium option, reduce the salt to ½ teaspoon and add extra herbs and spices for flavor.
I once tried a jerk seasoning variation with allspice, thyme, and scotch bonnet pepper, and it was incredible. Just be careful with the heat level if you are feeding kids.
Serving & Storage Suggestions
These crispy air fryer chicken thighs are best served immediately, straight from the air fryer. The skin is at its peak crispiness within the first 10 minutes. Serve them hot with your favorite sides.
For a complete family meal, I love pairing these with simple roasted vegetables like broccoli or green beans. A side of rice or mashed potatoes soaks up any juices beautifully. For a lighter option, serve over a crisp green salad with a tangy vinaigrette to cut through the richness.
If you have leftovers, store them in an airtight container in the refrigerator for up to 4 days. The skin will soften, but the meat will stay moist. To reheat, pop them back in the air fryer at 375°F (190°C) for 3-4 minutes. This restores some of the crispiness. Avoid microwaving, as it will make the skin rubbery.
You can also freeze cooked chicken thighs for up to 3 months. Wrap each thigh individually in plastic wrap, then place in a freezer bag. Thaw overnight in the refrigerator and reheat in the air fryer. The flavors actually seem to deepen after freezing, which is a nice bonus.
A word of caution: the skin will never be as crispy after refrigeration, but the meat is still incredibly flavorful. I often chop leftover chicken thighs and use them in salads or tacos the next day. It is a great way to stretch your budget even further.
Nutritional Information & Benefits
Chicken thighs are often overlooked in favor of breasts, but they offer some real nutritional benefits. Here is the approximate nutritional breakdown for one serving (one thigh with skin):
| Nutrient | Amount |
|---|---|
| Calories | 250-300 |
| Protein | 22-25g |
| Fat | 18-20g |
| Saturated Fat | 5-6g |
| Carbohydrates | 1-2g |
| Fiber | 0g |
| Sugar | 0g |
| Sodium | 400-500mg |
Chicken thighs are rich in B vitamins, particularly B6 and B12, which support energy metabolism and brain function. They also provide a good amount of selenium, an antioxidant that supports thyroid health. The skin does add fat, but much of it renders out during cooking, especially in the air fryer.
This recipe is naturally low-carb and keto-friendly, making it a great option for those watching their carbohydrate intake. It is also gluten-free and dairy-free, which covers many common dietary restrictions.
From my perspective, chicken thighs are a nutritional powerhouse for families. They provide high-quality protein for growing kids and adults alike, and the fat content helps keep everyone full and satisfied. Plus, the affordability means you can buy higher quality, pasture-raised chicken without breaking the bank.
Frequently Asked Questions
Can I use boneless, skinless chicken thighs?
You can, but the results will be different. Boneless, skinless thighs cook faster, about 12-14 minutes total, and will not get crispy skin. They are still delicious, just a different dish. If you want crispy skin, stick with bone-in, skin-on thighs.
Why is my chicken skin not getting crispy?
Most likely, the chicken was not dried thoroughly before seasoning. Moisture is the enemy of crispiness. Also, make sure you are not overcrowding the basket, which creates steam. Preheating the air fryer and using a little baking powder can also help.
Can I marinate the chicken overnight?
Absolutely. A simple marinade of olive oil, lemon juice, garlic, and herbs works beautifully. Just pat the chicken dry before seasoning and cooking. The longer marination adds even more flavor to the meat.
How do I prevent the air fryer from smoking?
A little smoke is normal from rendered fat. To minimize it, do not use cooking spray, and make sure the chicken is not dripping excess oil. If smoke becomes excessive, reduce the temperature by 10-15 degrees and cook a little longer.
Can I cook frozen chicken thighs in the air fryer?
Yes, but you will need to adjust the cooking time. Add about 5-7 minutes to the first stage and check the internal temperature carefully. The skin will not be as crispy because the frozen chicken releases more moisture as it thaws. For best results, thaw completely first.
Conclusion
These crispy air fryer chicken thighs have become a staple in my kitchen for good reason. They are affordable, incredibly easy to make, and deliver results that taste like they came from a restaurant. The first time I made them, my husband said, “This is the best chicken I have ever had at home,” and I have been making them ever since.
I encourage you to make this recipe your own. Play with the seasonings, try different variations, and find what your family loves. That is the beauty of cooking at home — you get to tailor everything to your taste. And honestly, there is no wrong way to enjoy perfectly crispy, juicy chicken thighs.
If you try this recipe, I would love to hear about it. Leave a comment below and let me know how it turned out. Did your kids ask for seconds? Did you try a fun variation? Share your stories and photos — it makes my day to see these chicken thighs bringing joy to other kitchen tables. Happy cooking, friends!
Pin This Recipe!

Crispy Air Fryer Chicken Thighs: Easy Budget-Friendly Dinner

These crispy air fryer chicken thighs deliver impossibly crackly skin and juicy, tender meat without the deep fryer or the mess. A budget-friendly, quick, and easy dinner that’s a guaranteed crowd-pleaser.
- Prep Time: 10 minutes
- Cook Time: 23-25 minutes
- Total Time: 33-35 minutes
- Yield: 4 servings 1x
- Category: Main Course
- Cuisine: American
Ingredients
- 4–6 bone-in, skin-on chicken thighs (about 2 lbs / 900g)
- 1 tablespoon olive oil (15ml)
- 1 teaspoon garlic powder
- 1 teaspoon onion powder
- 1 teaspoon smoked paprika
- 1 teaspoon kosher salt
- ½ teaspoon freshly ground black pepper
- ½ teaspoon baking powder (aluminum-free, optional)
Instructions
- Pat the chicken thighs completely dry with paper towels. Press firmly to remove as much moisture as possible from the skin. Let them sit on a plate for 5 minutes while you prep the seasoning.
- Preheat your air fryer to 380°F (193°C). Preheating is crucial for even cooking.
- In a large mixing bowl, combine the olive oil, garlic powder, onion powder, smoked paprika, salt, pepper, and baking powder (if using). Mix until it forms a paste-like consistency.
- Add the chicken thighs to the bowl and toss to coat evenly. Use your hands to massage the seasoning into every nook and cranny, especially under the skin if you can.
- Place the chicken thighs skin-side down in the air fryer basket in a single layer with a little space between each piece. Do not overcrowd.
- Cook at 380°F (193°C) for 18 minutes. Do not flip or open the basket during this time.
- Carefully flip the chicken thighs using tongs. Be gentle so you do not tear the skin.
- Increase the temperature to 400°F (200°C) and cook for another 5-7 minutes until the skin is shatteringly crispy.
- Check for doneness. The internal temperature should reach 165°F (74°C) when inserted into the thickest part of the thigh, away from the bone.
- Let the chicken rest for 5 minutes before serving to allow the juices to redistribute.
Notes
Patience is key with the skin. The biggest mistake is not drying the chicken thoroughly. Do not overcrowd the basket to avoid steaming. Use a meat thermometer for perfect doneness. Let chicken come to room temperature 15-20 minutes before cooking for even results. Keep skin side down first to render fat. Do not use cooking spray on the air fryer basket. If you see smoke, a little is normal from fat rendering. For larger thighs, add 2-3 minutes to the first cooking stage.
Nutrition
- Serving Size: 1 chicken thigh
- Calories: 275
- Sodium: 450
- Fat: 19
- Saturated Fat: 5.5
- Carbohydrates: 1.5
- Protein: 23.5
Keywords: air fryer chicken thighs, crispy chicken thighs, budget-friendly dinner, easy chicken recipe, gluten-free chicken, keto chicken


