My husband took a bite of these crispy air fryer parmesan chicken thighs, stopped mid-chew, and just stared at the plate for a second. He didn’t say anything for a solid five seconds, which is basically unheard of in our house. Then he asked if I could make them every single week. Not in a polite, trying-to-be-supportive way, but in a dead-serious, I’m-not-joking kind of way. That was the moment I knew this recipe was different from all the other chicken dinners I’d cycled through over the years.
I’ve been testing air fryer recipes for a while now, looking for that perfect balance between a golden, shatteringly crisp crust and meat that stays juicy on the inside. And honestly, I’ve had my fair share of failures. Chicken that came out dry. Coating that slid right off. That sad, soggy breading situation we’ve all dealt with. This one, though, hit every mark. The parmesan doesn’t just sit on top—it melts into the panko and creates this almost cheesy, crunchy shell that locks all the moisture in.
It’s the kind of recipe you make when you want something that feels a little special on a Tuesday night. No deep frying, no standing over a sputtering pan of oil. Just twenty minutes and chicken thighs that come out looking like they belong on a restaurant menu. I’ve made them three times in the last two weeks, and I’m not even a little embarrassed about it. When something this simple works this well, you stick with it.
Why You’ll Love This Recipe
Let me tell you why these chicken thighs have earned a permanent spot in my weekly rotation. I’ve tested this recipe more times than I care to admit, tweaking ratios and cook times until everything clicked. Here is what makes it stand out.
- Ready in 20 Minutes: From fridge to plate in the time it takes to watch half an episode of something. Perfect for those evenings when you forgot to plan dinner and need a win.
- Pantry-Friendly Ingredients: Parmesan, panko, chicken thighs, and a few seasonings. That is it. No weird specialty items or trips to three different stores.
- Weeknight Hero: Great for busy dinners, meal prep lunches, or even a quick dinner party main. It scales up beautifully.
- Everyone Loves It: Kids inhale these. Adults go back for seconds. I brought them to a potluck once and the tray came back empty in ten minutes.
- Seriously Crispy Without the Oil: The air fryer does something magical here. The parmesan and panko combination gets so crunchy you won’t miss deep frying one bit.
What makes this version different from every other parmesan chicken recipe out there? It is the ratio. Most recipes drown the chicken in too much oil or skip the step that actually makes the coating stick. I figured out that pressing the breading firmly into the meat and giving it a quick spray of oil on top creates that restaurant-style crust without the mess. Plus, using boneless skinless thighs instead of breasts means you get way more flavor and way less risk of dry chicken.
This recipe is comfort food that actually fits into a busy life. It is the kind of thing you make when you want a crispy, satisfying dinner that doesn’t leave you with a greasy kitchen and a sink full of pans. Honestly, after the first bite, you will understand why my husband requested it for life.
What Ingredients You Will Need
This recipe uses simple, everyday ingredients to create something that tastes far more complicated than it is. Here is everything you need and why each one matters.
- Boneless skinless chicken thighs (about 1.5 pounds, or 4-6 thighs): Thighs stay juicier than breasts during the quick air fryer cook time. The extra fat content means tender meat every time. Look for thighs that are similar in size so they cook evenly.
- Panko breadcrumbs (1 cup): Regular breadcrumbs just don’t get as crispy. Panko has that light, flaky texture that turns golden and crunchy in the air fryer. I use the plain variety, not seasoned.
- Freshly grated Parmesan cheese (½ cup, packed): Pre-shredded cheese won’t melt the same way. Grate it yourself from a block for that nutty flavor and better texture. The cheese melts into the panko and creates a savory crust.
- Garlic powder (1 teaspoon): Adds savory depth without burning like fresh garlic would at high heat.
- Onion powder (½ teaspoon): Rounds out the savory flavor profile.
- Paprika (1 teaspoon): For color and a subtle smoky sweetness. You can use smoked paprika for a deeper flavor.
- Dried oregano (½ teaspoon): A little herbaceous note that pairs beautifully with parmesan.
- Salt (½ teaspoon, plus more for seasoning the chicken): Don’t skip salting the chicken directly before breading. It makes a difference.
- Black pepper (¼ teaspoon): Freshly cracked is best.
- Eggs (2 large, beaten): The glue that holds the breading to the chicken. Beating them well ensures even coverage.
- Olive oil spray: A light spritz on top of the breaded chicken helps the coating crisp up without deep frying. Avocado oil spray works too.
- Fresh parsley (for garnish, optional): Adds a pop of color and freshness at the end.
Ingredient Notes and Substitutions
If you want to swap chicken thighs for boneless skinless chicken breasts, go for it. Just adjust the cook time down slightly, maybe 12-14 minutes, and check for doneness. For a dairy-free version, use nutritional yeast in place of parmesan. It won’t be exactly the same, but the umami flavor is surprisingly close. I’ve also made these with almond flour mixed with panko for a lower-carb option, and they turned out great. Just keep the panko ratio higher for texture.
Equipment Needed
You don’t need a lot of fancy tools for this one. Here is what I use.
- Air fryer (any size works, but a basket-style one is easiest): I use a 6-quart model, and it fits about 4-5 thighs in a single layer. If yours is smaller, cook in batches.
- Mixing bowls (two medium bowls): One for the beaten eggs, one for the breadcrumb mixture.
- Tongs: For moving the chicken without messing up the coating.
- Cutting board and knife: For trimming any excess fat from the thighs.
- Measuring spoons and cups: Precision matters here, especially with the parmesan.
- Paper towels: Pat the chicken dry before breading. This step is non-negotiable.
If you don’t own an air fryer yet, I get it. I was skeptical for years. But honestly, it has replaced my oven for most quick dinners. A convection oven works similarly if you set it to 400°F and watch the time closely. You can also bake these on a wire rack set over a baking sheet at 425°F for about 20-25 minutes. The crust won’t be quite as crispy, but it’ll still be good.
I recommend getting a good kitchen scale if you want consistent results. Chicken thighs vary in size, so weighing them helps you adjust cook times. Also, a microplane for grating the parmesan makes a big difference—the fine texture melts better.
Preparation Method

Let me walk you through this step by step. I have made every mistake possible with this recipe so you don’t have to.
- Pat the chicken dry: Take the chicken thighs out of the package and pat them thoroughly dry with paper towels. This is the most important step. Wet chicken won’t hold the breading, and you will end up with a soggy mess. Trust me, I learned this the hard way on attempt number one.
- Season the chicken: Sprinkle both sides of each thigh with a pinch of salt and pepper. Let them sit for about 5 minutes while you prep the breading station. This helps the seasoning penetrate the meat.
- Set up your breading station: In one medium bowl, beat the two eggs until they are uniform in color. In another bowl, combine the panko breadcrumbs, grated parmesan, garlic powder, onion powder, paprika, dried oregano, ½ teaspoon salt, and ¼ teaspoon black pepper. Mix everything together with a fork until the parmesan is evenly distributed.
- Bread the chicken: Take one chicken thigh and dip it into the beaten eggs, letting any excess drip off. Then place it into the breadcrumb mixture. Press the coating firmly onto both sides. I mean really press it in there. Don’t just lightly dust it—you want that crust to adhere. Place the breaded thigh on a plate and repeat with the remaining pieces.
- Preheat the air fryer: Set your air fryer to 400°F (200°C) and let it preheat for about 3 minutes. A hot start ensures the crust begins crisping immediately.
- Arrange the chicken in the basket: Place the breaded thighs in a single layer in the air fryer basket. Do not overcrowd them. They need space for the hot air to circulate. If they are touching, they will steam instead of crisp. Cook in batches if you have to.
- Spray with oil: Lightly spray the tops of the chicken thighs with olive oil spray. This is what gives you that golden, crunchy exterior. Don’t skip this step.
- Air fry: Cook at 400°F (200°C) for 10 minutes. Flip the thighs carefully with tongs, spray the other side lightly with oil, and cook for another 8-10 minutes. The total cook time is about 18-20 minutes. The chicken is done when the internal temperature reaches 165°F (74°C) and the crust is deep golden brown.
- Rest before serving: Let the chicken rest in the air fryer basket (turned off) for 2-3 minutes. This lets the juices redistribute and the crust set. If you cut into them immediately, you will lose all that moisture.
Sensory Cues to Watch For
At the 10-minute mark, the chicken should look pale gold on top. After flipping and cooking another 8 minutes, you are looking for a deep amber color with darker spots where the parmesan has browned. The kitchen will smell nutty and savory—that is the cheese working its magic. When you tap the crust with a fork, it should sound crisp, not soft. If it feels springy, give it another 2 minutes.
Troubleshooting Note: If your chicken thighs are on the thicker side (more than 1 inch), add 2-3 minutes to the total cook time. If they are thinner, check them at 16 minutes. I always use an instant-read thermometer to be safe. Nothing ruins a good meal like undercooked chicken.
Cooking Tips & Techniques
I have messed up this recipe more times than I want to admit. Here is what I learned so you can nail it on the first try.
Don’t skip the drying step: I know it seems fussy, but patting the chicken dry is the difference between a crust that sticks and one that slides off in the air fryer. Moisture is the enemy of crispiness.
Press the breading firmly: When I first made these, I gently dipped the chicken in the breadcrumbs and hoped for the best. The coating fell off in sad little clumps. Now I press the breadcrumb mixture into the chicken with my hands, making sure every bit of surface is covered. It makes a huge difference.
Work in batches: I know it is tempting to cram all the thighs into the basket at once to save time. Don’t do it. Overcrowding drops the temperature inside the air fryer and steams the chicken instead of crisping it. Your thighs need personal space. If you are cooking for a crowd, keep the finished batch warm in a 200°F oven while you cook the rest.
Use a meat thermometer: Air fryer temperatures can vary by as much as 25 degrees between models. Relying solely on time is risky. Insert an instant-read thermometer into the thickest part of a thigh. 165°F is the magic number. Pull them out right at that temp—they will continue cooking slightly from residual heat.
Let them rest: This was my biggest mistake early on. I would pull the chicken out and immediately slice into it, watching all those beautiful juices run out onto the cutting board. Letting the chicken rest for 2-3 minutes keeps it moist and gives the crust time to firm up.
Multitasking tip: While the chicken is air frying, I usually throw together a quick side salad or steam some broccoli. The 20-minute cook time is perfect for getting the rest of the meal ready. If you are making a larger batch, start preheating the oven to 200°F for keeping finished pieces warm.
Variations & Adaptations
One of the best things about this recipe is how easy it is to change up. Here are some variations I have tried and loved.
Spicy version: Add ½ teaspoon of cayenne pepper and ½ teaspoon of red pepper flakes to the breadcrumb mixture. The heat cuts through the richness of the parmesan beautifully. My husband loves this version with a side of ranch dressing for dipping.
Lemon herb twist: Add the zest of one lemon and 2 tablespoons of fresh chopped parsley to the breadcrumb mixture. Squeeze a little lemon juice over the finished chicken before serving. It brightens everything up and feels lighter for spring and summer.
Gluten-free option: Use gluten-free panko breadcrumbs (they work surprisingly well) and make sure your parmesan is labeled gluten-free. The texture will be slightly different, but still crispy and satisfying. I tested this for a friend with celiac and she gave it two thumbs up.
Cheese variation: Swap half the parmesan for finely grated pecorino romano. It has a sharper, saltier flavor that adds another layer of complexity. You could also use asiago for a nuttier taste.
Oven-baked method: If you don’t have an air fryer, place the breaded thighs on a wire rack set over a baking sheet. Bake at 425°F (220°C) for 20-25 minutes, flipping halfway through. The wire rack lets hot air circulate underneath so the bottom stays crispy. Spray both sides with oil before baking.
I have also tried adding a tablespoon of nutritional yeast to the breadcrumb mixture for an extra savory kick. It works especially well if you are cutting back on cheese. The umami flavor is surprisingly close to parmesan.
Serving & Storage Suggestions
These chicken thighs are versatile enough to pair with almost anything. Here is how I like to serve and store them.
Serving temperature and presentation: Serve the chicken hot, right out of the air fryer. The crust is at its crispiest within the first 10 minutes. Arrange the thighs on a platter and sprinkle with fresh chopped parsley and a little extra grated parmesan. A squeeze of lemon over the top brightens everything up.
What to serve with them: I usually pair these with a simple arugula salad dressed with lemon vinaigrette. The peppery greens balance the richness of the chicken. Roasted vegetables like asparagus or broccoli work great too. If you want something carb-heavy, try them with honey garlic glazed boneless chicken thighs for a different flavor profile that still uses the same cut of meat. For a full comfort meal, these are fantastic alongside cheesy ground beef and mushroom pasta—the creamy pasta balances the crispy chicken perfectly.
Storage instructions: Let leftover chicken cool completely before storing. Place in an airtight container and refrigerate for up to 4 days. The crust will soften slightly, but the flavor stays great.
Reheating methods: The air fryer is your best friend here. Reheat at 375°F (190°C) for 3-4 minutes, flipping halfway through. The crust crisps right back up. You can also use a regular oven at 375°F for about 8 minutes. Avoid the microwave—it turns the coating into a sad, rubbery mess.
Freezer tips: You can freeze the breaded, uncooked chicken thighs for up to 3 months. Place them on a baking sheet in a single layer and freeze until solid, then transfer to a freezer bag. Cook directly from frozen, adding 4-5 minutes to the air fryer time. The texture holds up remarkably well.
How flavors develop: Honestly, these are best fresh. The crust is at its peak right after cooking. Leftovers are still delicious, but the magic of that first crispy bite is hard to replicate. That said, the flavors meld together nicely overnight, and the chicken itself stays tender.
Nutritional Information & Benefits
Here is a rough estimate of the nutritional breakdown per serving (based on 4 servings).
Calories: 380 | Protein: 35g | Fat: 22g | Carbohydrates: 12g | Fiber: 1g | Sugar: 1g | Sodium: 580mg
Health benefits of key ingredients: Chicken thighs are a great source of protein, iron, and B vitamins. They actually contain more zinc than chicken breasts, which is good for immune health. Parmesan cheese adds calcium and protein, though it is higher in sodium, so keep that in mind if you are watching your salt intake.
Dietary considerations: This recipe is naturally low-carb and keto-friendly if you swap the panko for almond flour or crushed pork rinds. It is not gluten-free unless you use gluten-free panko. The recipe contains dairy from the parmesan and eggs, so it is not suitable for vegan or dairy-free diets without substitutions.
Potential allergens: This recipe contains dairy (parmesan), eggs, and gluten (panko). If you have allergies, check the labels on your ingredients carefully.
Personal wellness perspective: I love that this recipe lets me enjoy crispy chicken without the heaviness of deep frying. It feels indulgent but fits into a balanced diet. The protein keeps you full for hours, and the portion size is satisfying without being excessive. If you are looking for a lighter option, try serving these over a bed of greens instead of with pasta or potatoes.
Conclusion
These crispy air fryer parmesan chicken thighs have become my go-to answer for the dreaded what’s-for-dinner question. They are fast enough for a weeknight, impressive enough for company, and simple enough that you will actually make them instead of ordering takeout. The crust gets that perfect golden crunch, the meat stays juicy, and the whole thing comes together in twenty minutes flat.
I love that this recipe is forgiving. You can swap the seasoning, change up the cheese, or adjust the cook time based on what you have on hand. It is the kind of recipe that rewards experimentation. If you try a variation I haven’t mentioned, I would love to hear about it. Drop a comment below and tell me how yours turned out, or tag me in your photos if you share them online.
Honestly, cooking should not be stressful. This recipe proves that a little planning and a few simple ingredients can make a dinner that feels special without the fuss. Go ahead and give these a try. I think you will understand why my husband asked for them every week.
Frequently Asked Questions
Can I use chicken breasts instead of thighs?
Absolutely. Boneless skinless chicken breasts work well, but they cook faster and can dry out more easily. Check the internal temperature at 14 minutes and adjust from there. Pound thicker breasts to an even thickness for the best results.
Why is my coating falling off in the air fryer?
This usually happens for one of three reasons: the chicken wasn’t patted dry, the breading wasn’t pressed firmly enough, or the basket was overcrowded. Make sure you dry the chicken thoroughly, press the coating in with your hands, and leave space between each piece.
Can I make these ahead of time for meal prep?
You can bread the chicken up to 24 hours in advance and keep it covered in the fridge. Cook them fresh for the best texture. Leftovers reheat well in the air fryer, but the crust is never quite as crispy as day one.
Do I need to flip the chicken halfway through cooking?
Yes, flipping ensures even browning on both sides. The bottom of the chicken sits against the basket and won’t crisp as well without being turned. Use tongs and flip gently so the coating stays intact.
What dipping sauces go well with these chicken thighs?
Marinara sauce is a classic choice, especially if you are going for a chicken parmesan vibe. Ranch dressing, honey mustard, or a simple garlic aioli all work great. For something different, try a spicy sriracha mayo or a creamy lemon herb sauce.
Pin This Recipe!
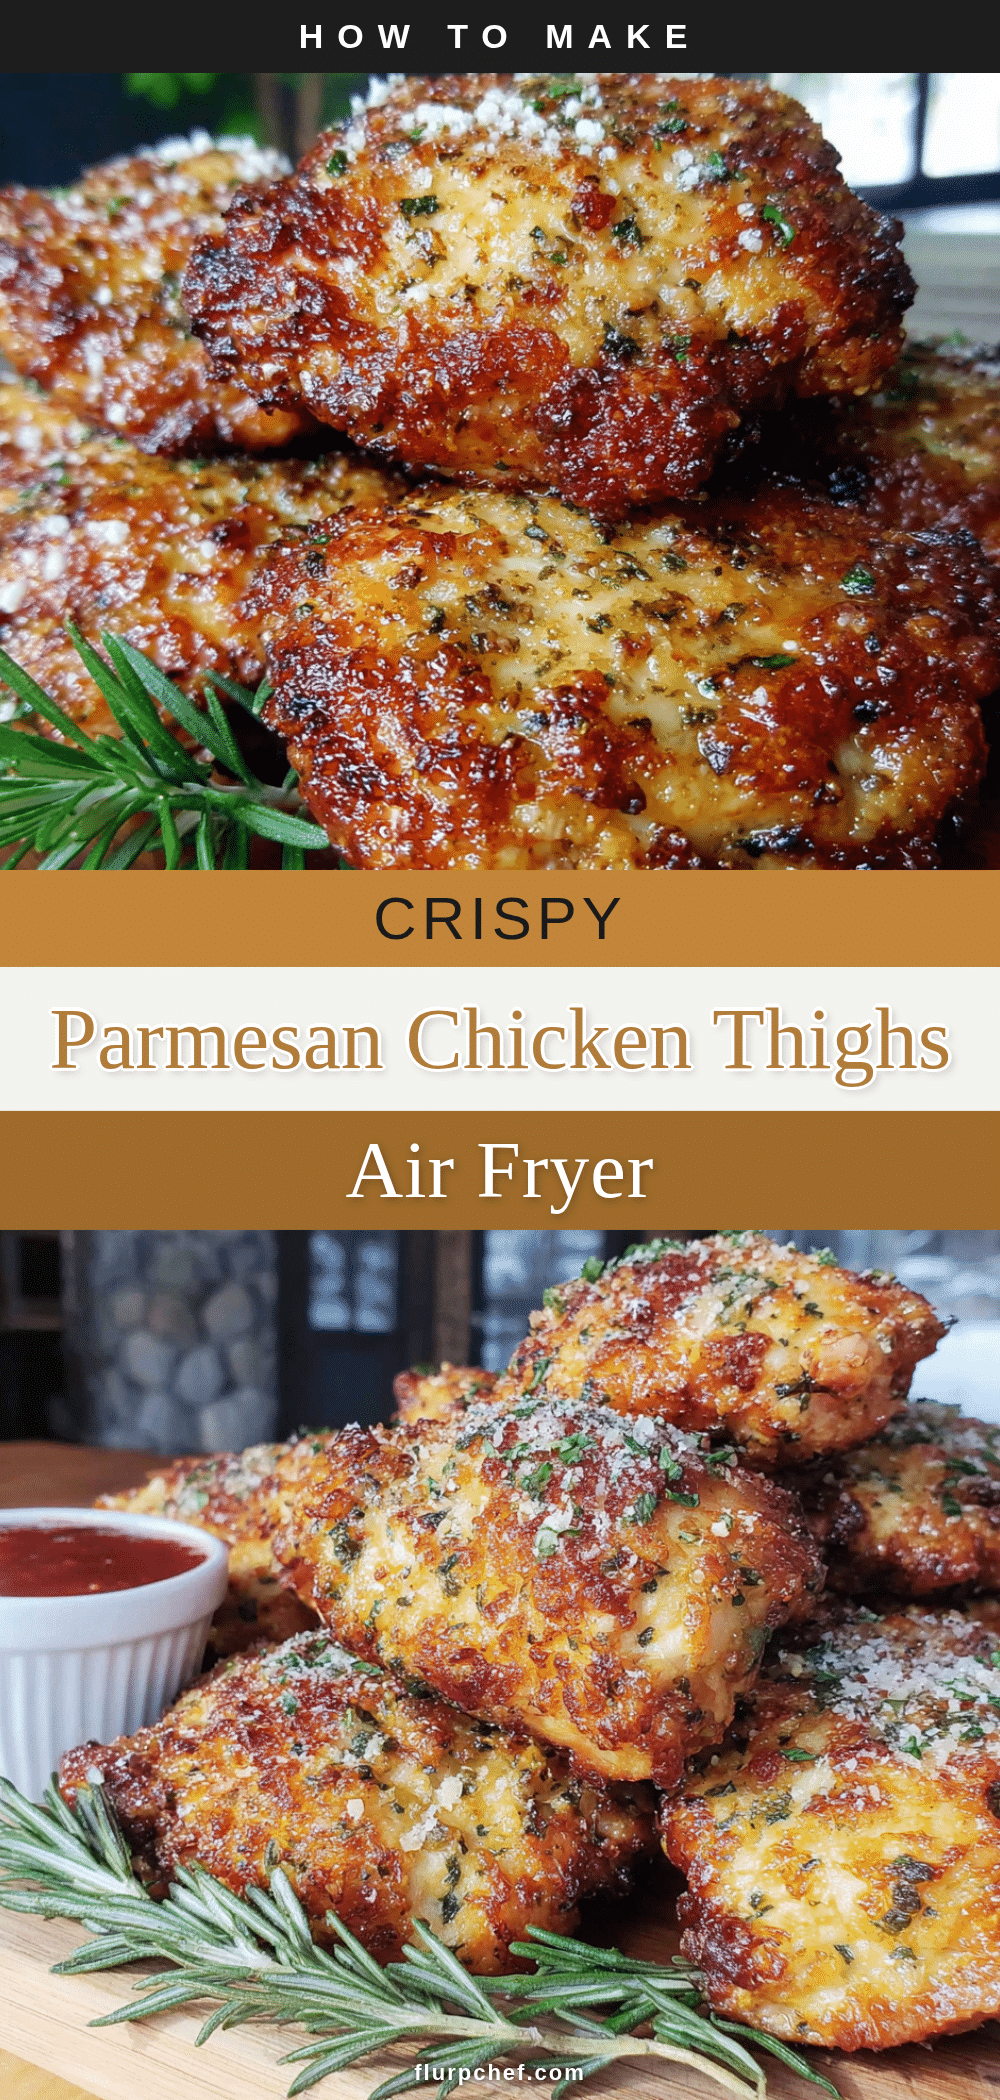
Crispy Air Fryer Parmesan Chicken Thighs – Easy 20-Minute Recipe

These crispy air fryer parmesan chicken thighs are ready in 20 minutes with a golden, crunchy crust and juicy meat. Perfect for busy weeknights, this simple recipe uses pantry-friendly ingredients and delivers restaurant-quality results without deep frying.
- Prep Time: 10 minutes
- Cook Time: 20 minutes
- Total Time: 30 minutes
- Yield: 4 servings 1x
- Category: Main Course
- Cuisine: American
Ingredients
- 1.5 pounds boneless skinless chicken thighs (4–6 thighs)
- 1 cup panko breadcrumbs
- ½ cup freshly grated Parmesan cheese, packed
- 1 teaspoon garlic powder
- ½ teaspoon onion powder
- 1 teaspoon paprika
- ½ teaspoon dried oregano
- ½ teaspoon salt, plus more for seasoning chicken
- ¼ teaspoon black pepper
- 2 large eggs, beaten
- Olive oil spray
- Fresh parsley for garnish (optional)
Instructions
- Pat the chicken thighs dry with paper towels. This is crucial for the breading to stick.
- Season both sides of each thigh with a pinch of salt and pepper. Let sit for 5 minutes.
- In one medium bowl, beat the eggs until uniform. In another bowl, combine panko, Parmesan, garlic powder, onion powder, paprika, oregano, ½ teaspoon salt, and ¼ teaspoon black pepper. Mix well.
- Dip each chicken thigh into the beaten eggs, letting excess drip off. Then coat in the breadcrumb mixture, pressing firmly onto both sides. Place on a plate.
- Preheat air fryer to 400°F (200°C) for 3 minutes.
- Arrange breaded thighs in a single layer in the air fryer basket. Do not overcrowd. Lightly spray tops with olive oil.
- Air fry at 400°F for 10 minutes. Flip thighs, spray the other side with oil, and cook for another 8-10 minutes, until internal temperature reaches 165°F (74°C) and crust is deep golden brown.
- Let chicken rest in the turned-off air fryer for 2-3 minutes before serving. Garnish with fresh parsley if desired.
Notes
Pat chicken dry thoroughly to ensure breading sticks. Press breading firmly into the meat. Do not overcrowd the air fryer basket. Use an instant-read thermometer to check for doneness at 165°F. Let chicken rest for 2-3 minutes after cooking to keep juices in. For thicker thighs, add 2-3 minutes cook time; for thinner, check at 16 minutes. Reheat leftovers in air fryer at 375°F for 3-4 minutes.
Nutrition
- Serving Size: 1 chicken thigh
- Calories: 380
- Sugar: 1
- Sodium: 580
- Fat: 22
- Saturated Fat: 6
- Carbohydrates: 12
- Fiber: 1
- Protein: 35
Keywords: air fryer chicken thighs, parmesan chicken, crispy chicken, easy chicken recipe, 20-minute dinner, weeknight dinner, keto chicken, low-carb chicken


