I ruined chicken wings for three straight years before I figured out how to get them actually crispy at home. Not just edible—I mean properly, shatteringly crisp, the kind that sounds like breaking glass when you bite into them. My early attempts were sad, rubbery affairs that made me question why I even bothered. The skin would come out flabby, the meat would be dry, and I’d sit there staring at a plate of disappointment wondering what I was doing wrong.
Then I got an air fryer as a gift, and everything changed. But even then, it wasn’t automatic. I burned the first batch so badly the smoke alarm went off and my neighbor actually knocked on the door to check if everything was okay. The second batch was better but still not right—the sauce made the skin soggy within minutes. That’s when I started keeping notes, testing different drying methods, adjusting temperatures, and playing with sauce timing until I landed on this version.
These crispy air fryer spicy honey garlic chicken wings are the result of all that trial and error. The skin stays crunchy even after tossing in the sticky-sweet glaze, which honestly felt impossible for a long time. The honey brings warmth, the garlic brings punch, and the chili flakes bring just enough heat to keep things interesting without overwhelming anyone. It’s the kind of recipe that makes you close your eyes after the first bite and forget you ever settled for mediocre wings.
Why You’ll Love This Recipe
Look, I’ve tested a lot of wing recipes over the years, and most of them fall into one of two camps: either they’re crispy but bland, or they’re saucy but sad and limp. These wings refuse to compromise. The air fryer does the heavy lifting, giving you that deep-fried texture without the mess or the guilt. And the sauce? It clings to every ridge and crevice without destroying the crunch you worked so hard to create.
- Quick & Easy: From start to finish, these wings come together in about 30 minutes. No brining, no overnight marinating, no complicated techniques. Just straightforward cooking that delivers every single time.
- Simple Ingredients: You probably already have most of this stuff in your pantry. Honey, soy sauce, garlic, chili flakes—nothing exotic or hard to find. The chicken wings themselves are affordable and easy to source.
- Perfect for Game Day: Whether you’re hosting a Super Bowl party, having friends over for fight night, or just want something special for a weekend snack, these wings steal the show. They disappear faster than anything else on the table.
- Crowd-Pleaser: I’ve served these to kids, picky eaters, and serious wing connoisseurs. Everyone loves them. The sweet-heat balance hits that universal sweet spot that makes people reach for seconds without thinking.
- Unbelievably Delicious: That first bite—crisp skin giving way to juicy meat, followed by that sticky, spicy, garlicky glaze—is pure magic. It’s comfort food that feels special without being fussy.
What makes this version different is the technique. Most recipes tell you to toss the wings in sauce right out of the air fryer, which turns them into a soggy mess. I figured out that letting the wings rest for a few minutes after cooking, then tossing them in a slightly reduced sauce, keeps that crunch intact. It’s a small tweak, but it makes all the difference between good wings and unforgettable ones.
This is the kind of recipe that makes you look forward to Monday night football even when your team is terrible. It’s that good.
What Ingredients You Will Need
This recipe uses simple, everyday ingredients to create something that tastes way more complicated than it actually is. Here’s what you need and why each one matters:
- Chicken Wings (2 lbs / about 900g): I use whole wings separated into flats and drumettes. You can buy them pre-cut or do it yourself with a sharp knife. If you want extra crispy skin, pat them dry with paper towels and let them sit uncovered in the fridge for an hour before cooking. Trust me on this.
- Baking Powder (1 teaspoon): This is the secret to air fryer crispiness. Not baking soda—baking powder. It raises the pH of the skin, helping it brown and crisp up without drying out the meat. Make sure it’s aluminum-free or you’ll get a metallic taste.
- Salt (1 teaspoon): I use kosher salt for better control. It seasons the skin and helps draw out moisture, which is exactly what you want for crispy wings.
- Garlic Powder (½ teaspoon): Adds a subtle savory note to the wings themselves before the sauce even touches them. Don’t skip this.
- Black Pepper (½ teaspoon): Freshly ground if possible. It adds warmth and a little bite.
For the Spicy Honey Garlic Sauce:
- Honey (⅓ cup / 80ml): Use a good-quality honey here. The flavor really comes through. I like local wildflower honey for its complexity, but any liquid honey works.
- Soy Sauce (3 tablespoons): Regular or low-sodium both work. If you’re gluten-free, swap in tamari or coconut aminos. The soy sauce adds that umami depth that balances the sweetness.
- Garlic (4 cloves, minced): Fresh garlic is non-negotiable here. The jarred stuff tastes flat and won’t give you that pungent, aromatic kick that makes this sauce special.
- Rice Vinegar (1 tablespoon): Adds a gentle acidity that cuts through the richness of the honey and wings. Apple cider vinegar works in a pinch.
- Red Pepper Flakes (1 teaspoon, or to taste): This is where the heat comes from. I use 1 teaspoon for a noticeable kick that doesn’t overwhelm. Add more if you like it spicy, less if you’re sensitive.
- Sesame Oil (½ teaspoon): Just a tiny bit for that nutty, toasty aroma. It’s optional but highly recommended.
- Cornstarch (1 teaspoon, mixed with 1 tablespoon water): This slurry thickens the sauce so it clings beautifully to the wings. Don’t skip it unless you want a watery mess.
For Garnish (optional but recommended):
- Sesame Seeds (1 tablespoon): Toasted white or black seeds add visual appeal and a subtle nutty crunch.
- Green Onions (2, sliced): The fresh, sharp flavor cuts through the sticky sweetness perfectly.
I recommend using Frank’s RedHot if you want to add a splash of hot sauce to the mix for extra depth, but it’s not necessary. The chili flakes do the job just fine.
Equipment Needed
You don’t need a professional kitchen to make these wings, but having the right tools makes the process smoother. Here’s what you’ll need:
- Air Fryer: Any brand works. I use a 5.8-quart Cosori, but smaller or larger models are fine. Just don’t overcrowd the basket—work in batches if needed. Overcrowding traps steam and ruins crispiness.
- Large Mixing Bowl: For tossing the wings with the dry seasoning. Stainless steel or glass works best.
- Small Saucepan: For making the glaze. A non-stick pan makes cleanup easier.
- Tongs: For flipping the wings halfway through cooking. Silicone-tipped tongs won’t scratch your air fryer basket.
- Paper Towels: Essential for drying the wings thoroughly. Moisture is the enemy of crispiness.
- Pastry Brush (optional): If you want to brush the sauce on instead of tossing, this gives you more control.
- Cutting Board and Sharp Knife: If you’re separating whole wings yourself.
If you don’t have an air fryer, you can make these in a regular oven at 425°F on a wire rack set over a baking sheet. The texture won’t be quite as good, but it’s a solid backup plan. I’ve done it plenty of times when my air fryer was too small for a big batch.
Preparation Method
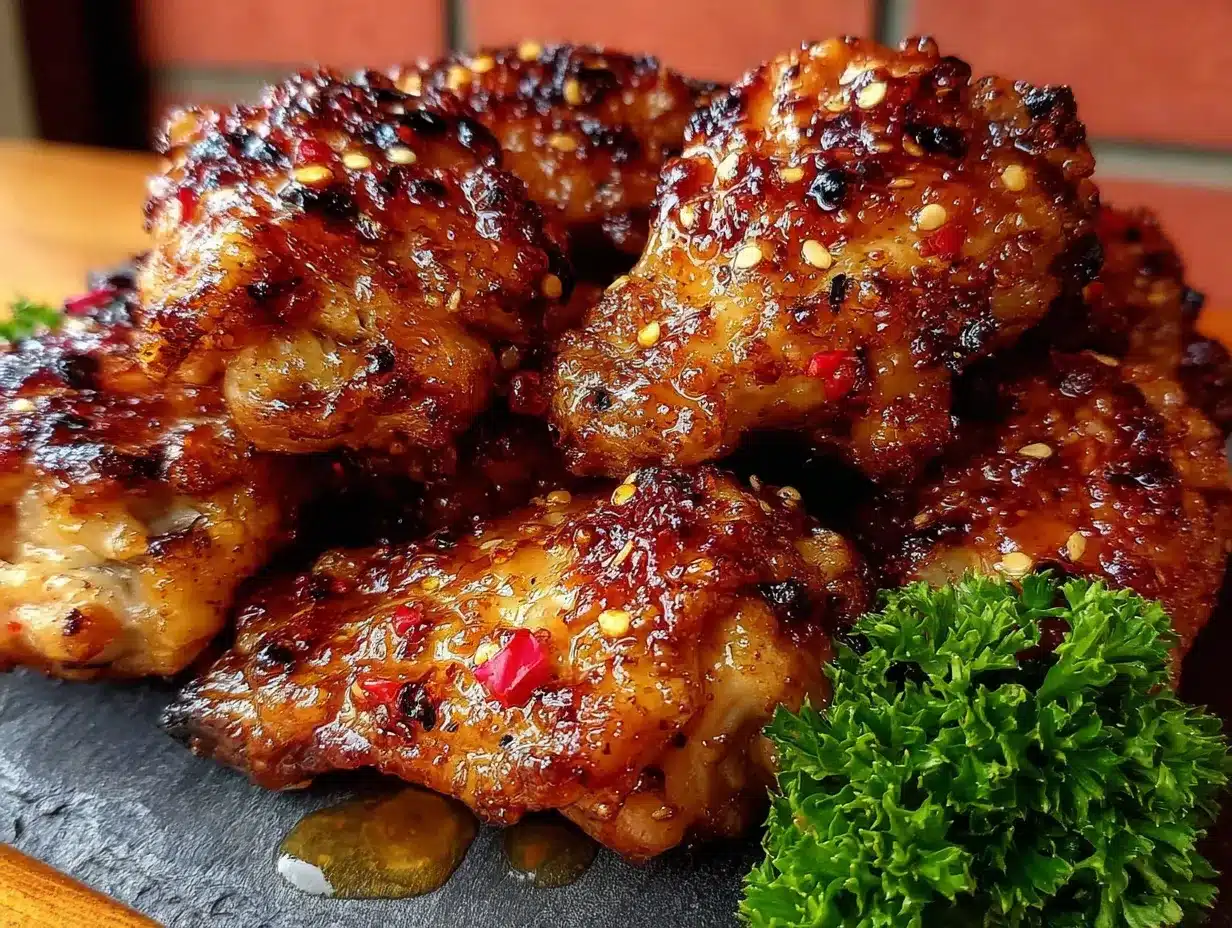
Let me walk you through this step by step. I’ve made these wings dozens of times, so I know exactly where things can go wrong and how to fix them.
- Prep the Wings (10 minutes): Start by patting the chicken wings completely dry with paper towels. I mean completely dry—get into all those little crevices. Any moisture on the skin will steam instead of crisp. If you have time, arrange the wings on a baking sheet and refrigerate uncovered for 1 hour. This dries out the skin even more and guarantees better results. I do this whenever I remember, and it never fails.
- Season the Wings (5 minutes): In a large bowl, whisk together the baking powder, salt, garlic powder, and black pepper. Add the dried wings and toss until every piece is evenly coated. The mixture should look like a light dusting—not clumpy or wet. If it looks clumpy, your wings weren’t dry enough.
- Preheat the Air Fryer (3 minutes): Set your air fryer to 375°F (190°C) and let it preheat for 3 minutes. Preheating ensures even cooking from the start. I forgot to do this once and ended up with unevenly cooked wings. Lesson learned.
- Arrange the Wings in the Basket: Place the wings in a single layer in the air fryer basket. Do not overcrowd. Leave a little space between each wing so the hot air can circulate. If you have more wings than fit, cook them in batches. I usually do 2 batches for 2 pounds of wings.
- Cook the Wings (20-22 minutes): Air fry at 375°F for 10 minutes. Then flip each wing using tongs and cook for another 10-12 minutes. The wings should be golden brown and the skin should look crispy and slightly puffed. Internal temperature should reach 165°F (74°C) at the thickest part. I like to go a little higher—around 175°F—for better texture without drying out.
- Make the Sauce (while wings cook): In a small saucepan, combine honey, soy sauce, minced garlic, rice vinegar, and red pepper flakes. Bring to a gentle simmer over medium heat, stirring occasionally. Let it bubble for 2-3 minutes until slightly thickened. Stir in the cornstarch slurry and cook for another 30 seconds until glossy and thick enough to coat the back of a spoon. Remove from heat and stir in the sesame oil. Taste and adjust—more honey if you want it sweeter, more chili flakes if you want more heat.
- Rest the Wings (5 minutes): This is the step most people skip, and it’s the most important one. Let the cooked wings rest on a wire rack or plate for 5 minutes. This allows the steam to escape and the skin to stay crispy. If you toss them in sauce immediately, the steam will soften the skin almost instantly.
- Toss and Serve (2 minutes): Transfer the rested wings to a clean bowl. Pour about half the sauce over them and toss gently until evenly coated. Add more sauce if you like them extra sticky. Transfer to a serving platter, sprinkle with sesame seeds and green onions, and serve immediately. The sooner you eat them, the crispier they’ll be.
Pro tip: If you’re making a big batch, keep the sauced wings in a warm oven (200°F) on a wire rack while you finish the rest. This keeps them warm without turning them soggy.
Cooking Tips & Techniques
I’ve learned a few things the hard way so you don’t have to. Here are the tips that make the biggest difference:
Dry the wings thoroughly. This is non-negotiable. I cannot stress this enough. The single biggest mistake people make is not drying the wings properly before seasoning. Wet skin steams instead of crisps, and you end up with sad, flabby wings. Use paper towels and really get in there.
Don’t skip the baking powder. It’s not just for texture—it helps the skin brown beautifully. Without it, air fryer wings can look pale and unappetizing. Make sure it’s aluminum-free or you’ll taste it.
Work in batches. I know it’s tempting to cram as many wings as possible into the basket, but overcrowding is a recipe for disaster. The air needs to circulate freely to crisp the skin evenly. Two batches of 10-12 wings each is better than one batch of 24 sad wings.
Let the wings rest before saucing. This was my biggest breakthrough. I used to toss wings in sauce immediately after cooking, and they’d be soggy within minutes. Letting them rest for 5 minutes on a wire rack allows excess steam to escape. The skin stays crunchy even after the sauce goes on.
Reduce the sauce slightly. A thick, glossy sauce clings better and doesn’t make the wings as wet. If your sauce is too thin, it’ll slide right off and pool at the bottom of the bowl. The cornstarch slurry helps, but simmering it for a few extra minutes concentrates the flavor too.
Serve immediately. These wings are at their peak right after saucing. If you let them sit for 30 minutes, the sauce will start to soften the skin. Plan your timing so everyone eats together.
I once served these at a party and made the mistake of saucing them 20 minutes before guests arrived. By the time people grabbed their first wing, the skin was already losing its crunch. Learn from my mistake—sauce right before serving.
Variations & Adaptations
One of the best things about this recipe is how easy it is to customize. Here are some variations I’ve tried and loved:
Extra Spicy: Double the red pepper flakes and add 1 teaspoon of sriracha or gochujang to the sauce. The fermented heat from gochujang adds a depth that regular chili flakes can’t match. I tried this during a particularly boring football game and it was a hit.
Garlic Lovers: Roast 6-8 garlic cloves in the air fryer alongside the wings for the last 10 minutes, then mash them into the sauce. The roasted garlic adds a sweet, mellow richness that’s completely different from raw minced garlic. It’s less punchy but more complex.
Honey Sesame: Increase the sesame oil to 1 tablespoon and add 2 tablespoons of toasted sesame seeds to the final toss. The nutty flavor pairs beautifully with the sweet-spicy glaze. I like to use black and white sesame seeds for visual contrast.
Lemon Pepper Twist: Add 1 teaspoon of lemon zest and ½ teaspoon of cracked black pepper to the dry seasoning. Finish with a squeeze of fresh lemon juice over the sauced wings. It brightens everything up and cuts through the richness.
Baked Version: If you don’t have an air fryer, bake the wings on a wire rack set over a baking sheet at 425°F for 40-45 minutes, flipping halfway. The texture is slightly less crispy but still very good. I’ve done this when feeding a crowd and my air fryer was too small.
Gluten-Free: Use tamari or coconut aminos instead of soy sauce. Everything else is naturally gluten-free. Make sure your baking powder is certified gluten-free if that’s a concern.
Keto-Friendly: Replace the honey with a sugar-free honey substitute or use a monk fruit-based sweetener. The sauce will be slightly less sticky but still delicious. I’ve tested this with Lakanto honey substitute and it worked surprisingly well.
Serving & Storage Suggestions
These wings are best served immediately, but I know that’s not always realistic. Here’s how to handle different situations:
Serving: Arrange the sauced wings on a large platter and garnish with sesame seeds and sliced green onions. Serve with celery sticks, carrot sticks, and a cooling dip like ranch or blue cheese dressing. The cool, creamy dip balances the heat beautifully. For a complete meal, pair these wings with a simple high-protein cold pasta salad for a satisfying contrast in temperature and texture.
Storage: Store leftover wings in an airtight container in the refrigerator for up to 4 days. The sauce will soften the skin over time, so expect them to be less crispy than fresh. They’re still delicious cold or reheated, just not as crunchy.
Reheating: The best way to reheat is in the air fryer at 350°F for 3-4 minutes. This brings back some of the crispiness. You can also reheat in a 375°F oven for 5-7 minutes. Avoid the microwave unless you’re okay with soft, steamy wings. I’ve done it in a pinch and it works, but the texture suffers.
Freezing: You can freeze the cooked, unsauced wings for up to 3 months. Let them cool completely, then freeze in a single layer on a baking sheet. Transfer to a freezer bag once frozen. To serve, reheat in the air fryer at 375°F for 5-6 minutes, then toss in fresh sauce. The sauce doesn’t freeze well, so always make it fresh.
Flavor Development: The flavors actually meld and deepen overnight. Leftover wings cold from the fridge have a more intense, cohesive taste. I sometimes make extra just for next-day cold snacking. Don’t judge—it’s a thing.
Nutritional Information & Benefits
Here’s the approximate nutritional breakdown for 6 wings (about ⅓ of the recipe):
- Calories: 380
- Protein: 28g
- Fat: 18g
- Carbohydrates: 24g
- Fiber: 0g
- Sugar: 20g
- Sodium: 780mg
Chicken wings are a good source of protein and contain essential amino acids. The skin provides some fat-soluble vitamins, though it’s also where most of the fat lives. The honey in the sauce offers natural sugars and trace antioxidants, while garlic is known for its anti-inflammatory properties and potential immune-boosting benefits.
This recipe is naturally dairy-free and can be made gluten-free with a simple soy sauce swap. If you’re watching your sodium, use low-sodium soy sauce and reduce the added salt. The red pepper flakes contain capsaicin, which may help boost metabolism slightly—though honestly, eat these because they taste amazing, not because they’re a health food.
I like to balance these wings with lighter sides like a fresh green salad or crunchy vegetables. They’re indulgent, but they don’t have to derail your whole day.
Frequently Asked Questions
Can I use frozen chicken wings?
Yes, but thaw them completely in the refrigerator first. Pat them very dry before seasoning—frozen wings release a lot of moisture as they thaw. I’ve cooked from frozen before and the texture was noticeably worse.
Why are my wings not crispy?
Most likely one of three things: they weren’t dry enough before cooking, you overcrowded the air fryer basket, or you skipped the baking powder. Check each of these and try again. Also, make sure your air fryer is actually reaching the right temperature—some models run cool.
Can I make the sauce ahead of time?
Absolutely. Make the sauce up to 3 days ahead and store it in an airtight container in the refrigerator. Reheat gently on the stove or in the microwave before tossing with the wings. The flavors actually meld and improve overnight.
How do I make these less spicy?
Reduce or omit the red pepper flakes. You can also add an extra tablespoon of honey to balance the heat. For a completely mild version, skip the chili flakes entirely and add a splash of orange juice for brightness instead.
Can I double this recipe?
Yes, but cook the wings in batches. Don’t try to cram double the wings into the air fryer at once. Make the sauce in a larger saucepan and keep the finished wings warm in a 200°F oven while you finish cooking the rest.
Conclusion
These crispy air fryer spicy honey garlic chicken wings are the recipe I wish I’d had years ago when I was struggling through those sad, rubbery batches. They’re proof that you don’t need a deep fryer or professional training to make restaurant-quality wings at home. The technique is simple, the ingredients are accessible, and the results are genuinely impressive.
What I love most about this recipe is how forgiving it is once you know the key steps. Dry the wings, use baking powder, don’t overcrowd, rest before saucing—follow those rules and you’ll nail it every single time. And once you’ve mastered the basic method, feel free to play with the sauce. Add more heat, more garlic, a splash of lime, whatever calls to you.
If you make these wings, I’d love to hear how they turn out. Drop a comment below and let me know if you added your own twist or kept it classic. And if you’re looking for more air fryer inspiration, check out these crispy air fryer salmon bites with honey sriracha glaze or these crispy garlic parmesan chicken thighs for another easy weeknight win.
Happy cooking, and may your wings always be crispy.
Pin This Recipe!
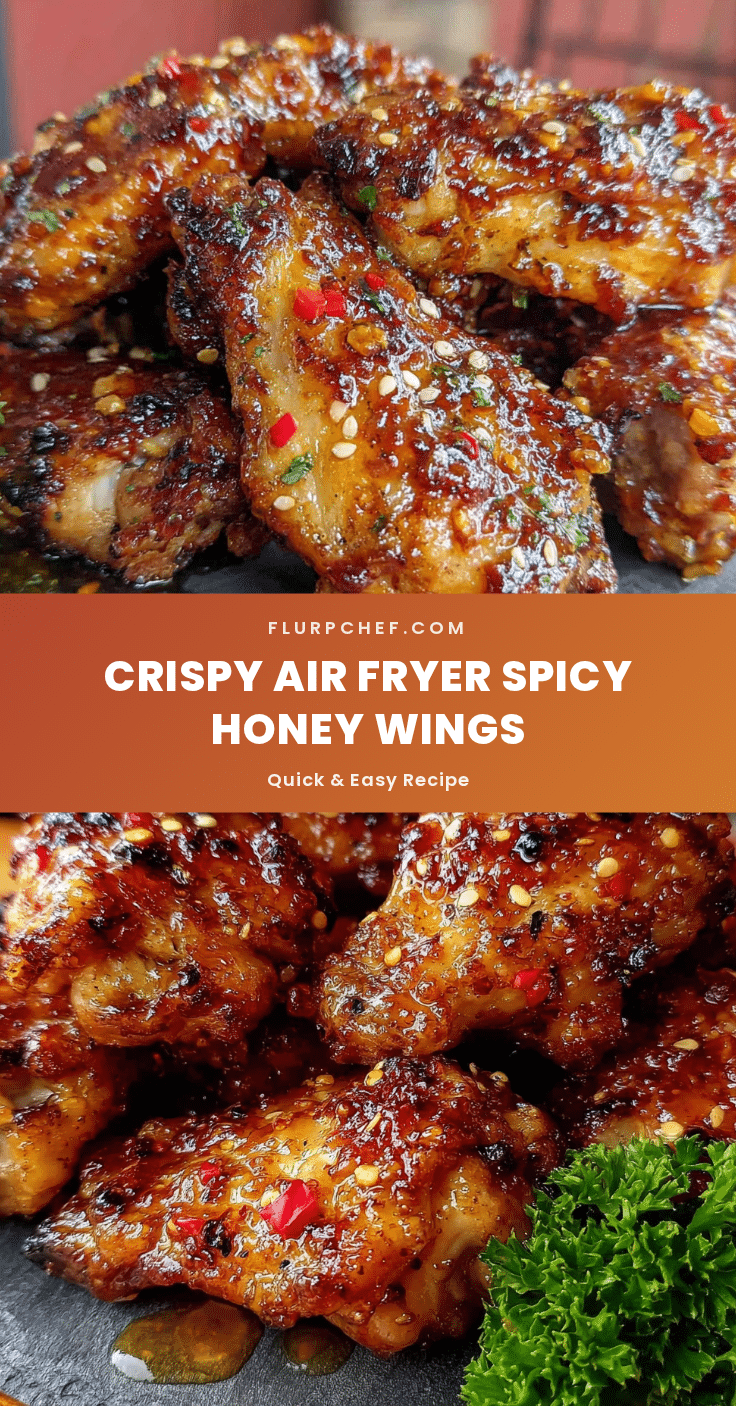
Crispy Air Fryer Spicy Honey Garlic Chicken Wings Recipe
These crispy air fryer spicy honey garlic chicken wings are the result of trial and error, with skin that stays crunchy even after tossing in a sticky-sweet glaze. The honey brings warmth, the garlic brings punch, and the chili flakes bring just enough heat to keep things interesting.
- Prep Time: 15 minutes
- Cook Time: 22 minutes
- Total Time: 37 minutes
- Yield: 4 servings 1x
- Category: Appetizer
- Cuisine: American
Ingredients
- 2 lbs (about 900g) chicken wings, separated into flats and drumettes
- 1 teaspoon baking powder (aluminum-free)
- 1 teaspoon kosher salt
- ½ teaspoon garlic powder
- ½ teaspoon black pepper, freshly ground
- ⅓ cup (80ml) honey
- 3 tablespoons soy sauce (or tamari/coconut aminos for gluten-free)
- 4 cloves garlic, minced
- 1 tablespoon rice vinegar (or apple cider vinegar)
- 1 teaspoon red pepper flakes (or to taste)
- ½ teaspoon sesame oil
- 1 teaspoon cornstarch mixed with 1 tablespoon water (slurry)
- 1 tablespoon sesame seeds (for garnish, optional)
- 2 green onions, sliced (for garnish, optional)
Instructions
- Prep the Wings: Pat the chicken wings completely dry with paper towels. For extra crispiness, arrange on a baking sheet and refrigerate uncovered for 1 hour.
- Season the Wings: In a large bowl, whisk together baking powder, salt, garlic powder, and black pepper. Add dried wings and toss until evenly coated.
- Preheat the Air Fryer: Set air fryer to 375°F (190°C) and preheat for 3 minutes.
- Arrange the Wings: Place wings in a single layer in the air fryer basket, leaving space between each. Cook in batches if needed.
- Cook the Wings: Air fry at 375°F for 10 minutes. Flip each wing and cook for another 10-12 minutes until golden brown and internal temperature reaches 165°F (74°C) or higher.
- Make the Sauce: In a small saucepan, combine honey, soy sauce, minced garlic, rice vinegar, and red pepper flakes. Bring to a gentle simmer over medium heat, stirring occasionally. Cook for 2-3 minutes until slightly thickened. Stir in cornstarch slurry and cook for 30 seconds until glossy. Remove from heat and stir in sesame oil.
- Rest the Wings: Let cooked wings rest on a wire rack or plate for 5 minutes to allow steam to escape and keep skin crispy.
- Toss and Serve: Transfer rested wings to a clean bowl. Pour about half the sauce over them and toss gently until evenly coated. Add more sauce if desired. Transfer to a serving platter, sprinkle with sesame seeds and green onions, and serve immediately.
Notes
Dry the wings thoroughly for maximum crispiness. Do not skip the baking powder. Work in batches to avoid overcrowding. Let wings rest before saucing to maintain crunch. Serve immediately for best texture.
Nutrition
- Serving Size: 6 wings
- Calories: 380
- Sugar: 20
- Sodium: 780
- Fat: 18
- Saturated Fat: 5
- Carbohydrates: 24
- Protein: 28
Keywords: air fryer chicken wings, spicy honey garlic wings, crispy wings, game day appetizer, easy chicken wings


