I figured crispy bacon-wrapped jalapeño poppers were one of those recipes you just follow—stuff, wrap, bake, done. It took about one game day party for that assumption to fall apart completely.
The first batch I made? Soggy bacon. Sad, floppy bacon that looked more like wet string than the golden, shatter-crisp armor I’d pictured. The cream cheese filling had somehow turned into a molten puddle on the baking sheet. Honestly, I stood there staring at the tray thinking, “This is what everyone raves about?” I almost scrapped the whole idea and just put out a bag of chips.
But here’s the thing about a good recipe failure—it forces you to actually learn the why behind the steps. So I went back to the kitchen the next weekend. And the weekend after that. I tested different bacon thicknesses, different oven temperatures, different ways of prepping the jalapeños (because yes, leaving too much membrane will wreck your day). I even tried par-cooking the bacon first, which felt like cheating but turned out to be the secret weapon.
What I landed on is a method that delivers exactly what you want: bacon that crinkles and cracks when you bite into it, a creamy, tangy filling that stays put, and jalapeños that soften just enough to lose their raw bite but keep that gentle, building heat. The first time I pulled a perfect tray out of the oven, my buddy Matt—who is brutally honest about food—grabbed one, took a bite, and just said “Whoa” with his mouth full. That’s the reaction.
These aren’t fussy. They’re not complicated. But they are the version I’d serve to anyone who thinks they’ve had good jalapeño poppers before. Let me show you how to get there.
Why You’ll Love This Recipe
Let me be straight with you—there are about a million ways to make bacon-wrapped jalapeño poppers online. Some are good. Some are fine. Some are the sad, soggy mess I made that first time. Here’s why this version is the one you’ll actually make again and again:
- Crispy bacon, every single time – No more floppy, chewy bacon disasters. A quick par-cook step guarantees the bacon gets shatter-crisp while the jalapeño and filling cook through perfectly.
- No watery filling – Nobody wants cream cheese soup leaking out onto the baking sheet. A simple trick with the cheese mixture keeps it thick, creamy, and contained.
- Customizable heat level – Leave some seeds and membrane for a spicy kick, or remove them all for a mild version that even heat-wary guests will devour. You control the burn.
- Perfect for game day – These hold up beautifully on a buffet table. They stay crispy for a good while, they’re grab-and-go friendly, and they pair dangerously well with cold beer. Throw them on your football charcuterie board for an instant crowd-pleaser.
- Simple ingredients – Cream cheese, cheddar, bacon, jalapeños, and a few seasonings. That’s it. No weird specialty items or expensive grocery runs.
- Make-ahead friendly – Assemble them the night before, keep them in the fridge, and pop them in the oven right before kickoff. You get to actually watch the game instead of slaving in the kitchen.
This recipe is the kind that makes people hover around the baking sheet, reaching for another one before they’ve even finished chewing. It’s comfort food with a little heat, wrapped in bacon—which is basically the flavor trifecta. And honestly? It’s the appetizer that disappears fastest at every party I bring it to.
What Ingredients You Will Need
This recipe uses simple, everyday ingredients that come together to create something genuinely impressive. Here’s what you’ll need and why each one matters:
For the Poppers
- 12 large fresh jalapeño peppers – Look for ones that are firm, smooth-skinned, and about 3-4 inches long. Fat jalapeños are easier to stuff and hold more filling. Avoid any that are soft or have wrinkled skin.
- 8 ounces cream cheese, softened to room temperature – Full-fat cream cheese gives the richest, creamiest result. Let it sit out for about 30 minutes before mixing—cold cream cheese won’t blend smoothly and leaves lumpy pockets in your filling. I use Philadelphia, but any block-style brand works.
- 1 cup shredded sharp cheddar cheese – Sharp cheddar adds tang and depth that mild cheddar just can’t match. Shred it yourself from a block if you can—pre-shredded cheese has anti-caking agents that can make the filling slightly grainy.
- 1/4 cup sour cream – This keeps the filling from getting too dense and adds a subtle tang. Full-fat or reduced-fat both work here.
- 1/2 teaspoon garlic powder – Don’t use fresh garlic here—it can become bitter during baking and adds moisture that makes the filling runny. Garlic powder gives you that savory punch without the risk.
- 1/2 teaspoon onion powder – Adds a mild, sweet backbone to the filling. Same rule as the garlic—powdered, not fresh.
- 1/4 teaspoon smoked paprika – This is my little secret. Smoked paprika adds a subtle smokiness that echoes the bacon and makes the whole thing taste like it cooked over a campfire. Regular paprika works too, but smoked is worth seeking out.
- 1/4 teaspoon salt – Just a pinch to bring everything together. The bacon and cheese already bring plenty of salt, so don’t overdo it.
- 1/8 teaspoon black pepper – Freshly ground if you have it.
- 12 slices thin-cut bacon – This is critical. Do not use thick-cut bacon. Thick bacon takes too long to crisp up and will either be undercooked or will overcook the jalapeño. Thin-cut bacon cooks evenly and gets that perfect shatter-crisp texture. I prefer Wright Brand or Oscar Mayer for consistent thickness.
Optional Garnishes
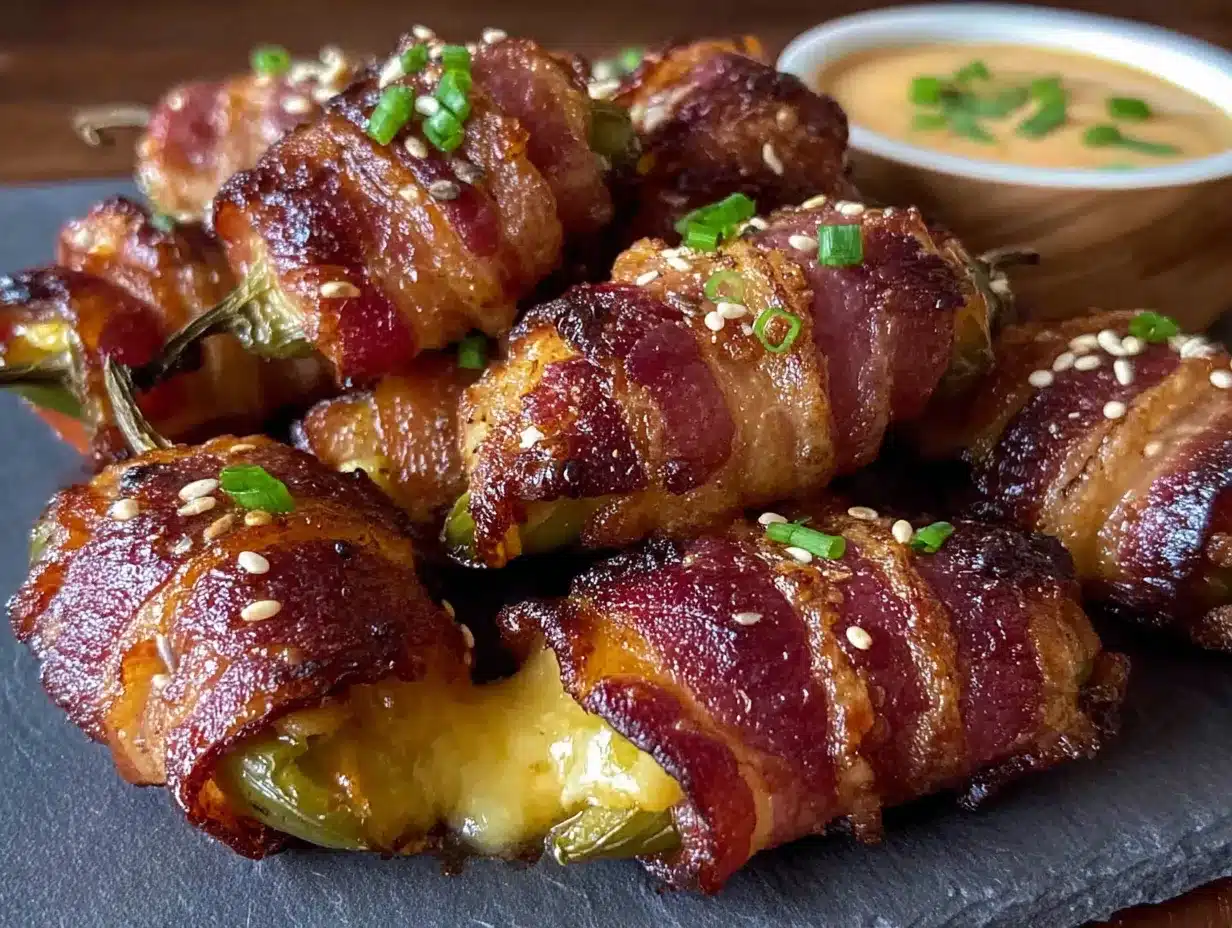
- Fresh chives or green onions, chopped – Adds a pop of color and a mild oniony bite.
- Ranch dressing or blue cheese dip – For dipping, because some people just need ranch with everything.
- Everything bagel seasoning – A sprinkle on top before serving adds crunch and flavor. Trust me on this one.
Equipment Needed
You don’t need a ton of fancy tools for this recipe, which is part of the beauty. Here’s what you’ll want on hand:
- Baking sheet with a wire rack – This is non-negotiable for crispy bacon. The wire rack elevates the poppers so air circulates all around them. Without it, the bottoms get soggy sitting in rendered bacon fat. A standard half-sheet pan works perfectly.
- Small paring knife or jalapeño corer – A sharp paring knife makes quick work of halving and seeding the peppers. You can also use a small melon baller or even a grapefruit spoon for scraping out seeds and membranes.
- Mixing bowl – For combining the filling ingredients. Nothing fancy needed.
- Hand mixer or sturdy spoon – A hand mixer makes the filling ultra-smooth, but a good old-fashioned spoon and some elbow grease works fine if you’ve softened the cream cheese properly.
- Kitchen shears – Cutting bacon with a knife is messy. Kitchen shears let you snip the bacon slices in half cleanly and quickly. Worth the small investment.
- Disposable gloves (optional but recommended) – Jalapeño oils can linger on your hands for hours, and accidentally rubbing your eye later is a special kind of pain. Gloves save you from that mistake. I learned the hard way so you don’t have to.
- Toothpicks – For securing the bacon if needed, though with thin-cut bacon and proper wrapping, you might not need them.
Preparation Method
Alright, let’s get to it. Follow these steps carefully, and you’ll have a tray of perfect poppers that’ll make you the hero of game day.
Step 1: Prep the Jalapeños (10 minutes)
Put on those gloves if you’re using them—seriously, your future self will thank you. Rinse the jalapeños and pat them dry. Cut each one in half lengthwise, right through the stem. Use a small spoon or paring knife to scrape out the seeds and white membranes. The membranes hold most of the heat, so if you want milder poppers, be thorough here. If you like it spicy, leave a little bit of membrane attached.
Pro tip: Don’t cut off the stem entirely—it gives guests a little handle to hold onto. Plus it looks nicer on the tray.
Step 2: Par-Cook the Bacon (8 minutes)
This is the step that separates good poppers from great ones. Preheat your oven to 400°F (200°C). Line a baking sheet with foil (for easy cleanup) and lay the bacon slices out in a single layer. Bake for 6-8 minutes, just until the bacon starts to render some fat and turns slightly translucent but is still very pliable. You want it partially cooked, not crispy. Remove from the oven and let it cool on paper towels.
Why do this? Raw bacon releases too much fat as it cooks, which pools around the poppers and makes everything soggy. Par-cooking removes some of that fat upfront, so the bacon crisps up beautifully during the final bake instead of steaming.
Step 3: Make the Filling (5 minutes)
In a mixing bowl, combine the softened cream cheese, shredded cheddar, sour cream, garlic powder, onion powder, smoked paprika, salt, and pepper. Mix until smooth and well-combined. Taste it—yes, raw cream cheese is safe to eat. Adjust the seasoning if needed. The filling should be creamy, tangy, and savory with a hint of smokiness.
Step 4: Stuff the Jalapeños (10 minutes)
Using a small spoon or a piping bag (a zip-top bag with the corner snipped off works great), fill each jalapeño half with the cream cheese mixture. Don’t overstuff—you want the filling level with the cut edge, not mounded on top. Overfilling leads to overflow and messy poppers. A heaping teaspoon per half is usually perfect.
Step 5: Wrap with Bacon (10 minutes)
Cut the par-cooked bacon slices in half crosswise. Take one half-slice and wrap it around each stuffed jalapeño half, starting at one end and overlapping slightly as you go. The bacon should cover the filling completely and wrap around the pepper. Tuck the end of the bacon under the wrap to secure it. If the bacon seems loose, use a toothpick to hold it in place—but with thin-cut bacon, it usually stays put on its own.
Step 6: Bake to Perfection (20-25 minutes)
Place the wrapped poppers on the wire rack set over your baking sheet, seam-side down. Bake at 400°F (200°C) for 20-25 minutes, until the bacon is deep golden brown and crispy, and the filling is hot and bubbly. Every oven runs a little differently, so start checking at 18 minutes. You’re looking for that perfect bacon crunch—if it’s still pale and soft, give it a few more minutes.
For extra-crispy bacon, switch the oven to broil for the last 1-2 minutes. Watch them closely—broil can go from perfect to burnt in seconds.
Step 7: Rest and Serve (5 minutes)
Let the poppers rest on the rack for 5 minutes before serving. This lets the filling set up slightly so it doesn’t ooze out when bitten into. Transfer to a serving platter, sprinkle with chopped chives or everything bagel seasoning if desired, and watch them disappear.
Cooking Tips & Techniques
After making these poppers more times than I care to count, I’ve collected a few hard-won lessons. Here are the ones that matter most:
Don’t skip the wire rack. I know it’s an extra thing to wash. I know it seems fussy. But the difference between poppers baked directly on a sheet pan versus on a rack is night and day. The rack lets hot air circulate underneath, so the bacon crisps evenly all the way around. Without it, you get soggy bottoms. Period.
Room temperature cream cheese is your friend. Cold cream cheese doesn’t blend well and leaves lumpy pockets in your filling. Set it out 30 minutes before you start. If you forgot, microwave it in 10-second bursts until soft—just don’t melt it.
Watch your bacon thickness. I mentioned this in the ingredients section, but it bears repeating: thin-cut bacon only. Thick-cut bacon looks appealing, but it takes too long to cook through and will either be underdone or will overcook the jalapeño into mush. Thin-cut hits that sweet spot every time.
Don’t crowd the pan. Leave a little space between each popper on the rack. If they’re touching, they’ll steam instead of crisp. You want that bacon crackling, not sweating.
Make extra. I’m not kidding. Double the batch. These disappear faster than you’d expect, and guests always want more. I’ve never once heard someone say “there are too many jalapeño poppers.”
Variations & Adaptations
One of the best things about this recipe is how easily it bends to your preferences. Here are some variations I’ve tried and loved:
Spicy Chorizo Version – Cook 1/2 pound of Mexican chorizo, drain the fat, and mix it into the cream cheese filling. The spicy, savory chorizo pairs beautifully with the jalapeño and bacon. This version is so good it might become your new default. If you love this, you’ll also enjoy my smoked queso dip with chorizo for another game day winner.
Smoked Instead of Baked – If you have a smoker, these poppers are incredible at 225°F (107°C) for about 1.5-2 hours. The low-and-slow method infuses them with a deep, woodsy smokiness that’s next-level. Use applewood or hickory for the best results.
Air Fryer Method – Short on time? Air fry at 375°F (190°C) for 10-12 minutes, flipping halfway through. The air fryer gets the bacon incredibly crispy in less time. Just don’t overcrowd the basket—work in batches if needed.
Dairy-Free Option – Use dairy-free cream cheese and shredded vegan cheddar. The texture will be slightly different, but the flavor is still fantastic. Just make sure your dairy-free cream cheese is softened before mixing.
Extra Spicy – Add 1/2 teaspoon of cayenne pepper to the cream cheese mixture, or sprinkle red pepper flakes over the filled poppers before wrapping. For true heat seekers, use habanero peppers instead of jalapeños—but proceed with caution.
Sweet Heat – Drizzle the finished poppers with a little honey or hot honey before serving. The sweetness cuts the heat and saltiness beautifully. This is my personal favorite variation for parties.
Serving & Storage Suggestions
These poppers are best served hot and fresh, but they’re still pretty fantastic at room temperature for a while. Here’s how to handle them:
Serving – Arrange the poppers on a large platter with the stems pointing outward for easy grabbing. Serve with ranch dressing, blue cheese dip, or sour cream on the side for dipping. A sprinkle of fresh chives or everything bagel seasoning adds a nice finishing touch. They pair perfectly with cold beer, margaritas, or even a crisp white wine like Sauvignon Blanc.
Make Ahead – Assemble the poppers completely (through step 5), but don’t bake them. Cover the tray tightly with plastic wrap and refrigerate for up to 24 hours. When you’re ready to serve, bake as directed, adding an extra 2-3 minutes since they’re starting from cold. This is my go-to game day strategy—everything’s done except the baking.
Storage – Leftover poppers (if you somehow have any) can be stored in an airtight container in the refrigerator for up to 3 days. The bacon will lose some crispness, but they’re still delicious.
Reheating – The best way to revive leftover poppers is in the oven or air fryer. Reheat at 350°F (175°C) for 5-7 minutes, or air fry at 375°F (190°C) for 3-4 minutes. The microwave will make the bacon sad and rubbery—avoid it if you can.
Freezing – You can freeze unbaked, assembled poppers on a baking sheet until solid, then transfer to a freezer bag. Bake from frozen at 400°F (200°C) for 25-30 minutes. They won’t be quite as crispy as fresh, but they’re still excellent in a pinch.
Nutritional Information & Benefits
Let’s be real—these are not health food. But they’re not as bad as you might think, and they do have some redeeming qualities:
Estimated per popper (based on 24 poppers):
Calories: 145 | Fat: 12g | Protein: 6g | Carbohydrates: 2g | Fiber: 0.5g | Sugar: 1g | Sodium: 280mg
What’s actually good about them:
- Jalapeños contain capsaicin, which has anti-inflammatory properties and can boost metabolism. They’re also a good source of vitamin C and vitamin A.
- Protein from the bacon and cheese helps keep you full and satisfied, which is useful when you’re grazing during a game.
- Calcium from the cheese supports bone health. Every little bit counts.
Dietary notes: This recipe is gluten-free, low-carb, and keto-friendly (about 2g net carbs per popper). It contains dairy and is not suitable for vegetarians or vegans.
My take? These are a treat, not a daily staple. But when you’re feeding a crowd on game day, they’re a far better choice than ultra-processed snacks. You know exactly what’s in them, and the ingredients are real food. That counts for something.
Conclusion
Look, I’m not going to tell you these crispy bacon-wrapped jalapeño poppers will change your life. But they will make your game day spread better. They’ll make your guests happy. And they’ll give you that quiet little moment of pride when someone takes a bite and says, “These are amazing—did you make these?”
The beauty of this recipe is how forgiving it is once you know the key tricks—par-cook that bacon, use a wire rack, don’t overstuff. After that, it’s just assembly and baking. You can customize the heat, play with the filling, make them ahead, or double the batch without breaking a sweat.
I’ve brought these to Super Bowl parties, backyard barbecues, and casual get-togethers. They’re always the first thing to disappear. And honestly? That never gets old.
So give them a try. Maybe start with a single batch. See how fast they go. And when you’re making them for the third time in a month (because you will be), remember—you heard it here first.
If you make these, I’d love to hear how they turned out. Drop a comment below, or tag me in your photos. Happy cooking, and enjoy the game!
Frequently Asked Questions
Can I use thick-cut bacon for jalapeño poppers?
I really don’t recommend it. Thick-cut bacon takes too long to cook through and will either stay chewy or overcook the jalapeño. Thin-cut bacon crisps up perfectly in the same time it takes the filling to heat through. Stick with thin-cut for the best results.
How do I make these less spicy?
The heat lives in the seeds and white membranes inside the jalapeño. Scrape them out thoroughly with a small spoon, and you’ll remove most of the spice. For even milder poppers, use mini sweet bell peppers instead of jalapeños—they have the same shape but zero heat.
Can I grill these instead of baking?
Absolutely. Grill over medium heat (about 350°F/175°C) with the lid closed for 15-20 minutes, turning occasionally, until the bacon is crispy and the peppers have nice grill marks. The smoky char adds another layer of flavor that’s fantastic.
How far ahead can I make these?
You can assemble the poppers up to 24 hours in advance and keep them covered in the refrigerator. When you’re ready to serve, just bake as directed, adding a few extra minutes since they’re starting cold. I don’t recommend baking them more than an hour before serving—they’re best fresh.
Why did my bacon come out soggy?
Two most common reasons: you didn’t use a wire rack, or you skipped the par-cooking step. The wire rack allows air to circulate underneath so the bacon crisps evenly. Par-cooking removes excess fat upfront so the bacon doesn’t steam in its own grease. Fix those two things, and you’ll get crispy bacon every time.
Pin This Recipe!
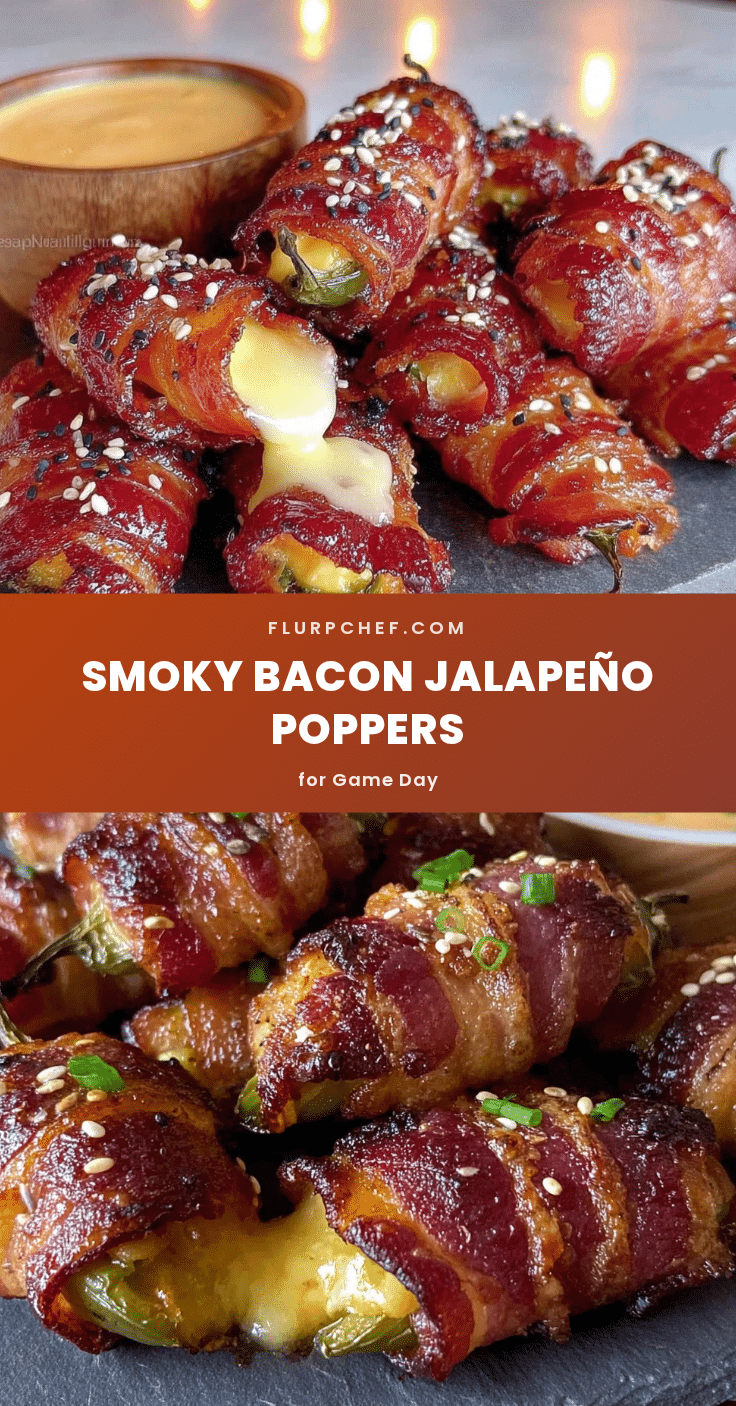
Crispy Bacon-Wrapped Jalapeño Poppers: Best Game Day Appetizer

These crispy bacon-wrapped jalapeño poppers deliver shatter-crisp bacon, a creamy tangy filling, and just the right amount of heat. Perfect for game day, they’re easy to make and always the first to disappear.
- Prep Time: 35 minutes
- Cook Time: 25 minutes
- Total Time: 1 hour
- Yield: 24 poppers 1x
- Category: Appetizer
- Cuisine: American
Ingredients
- 12 large fresh jalapeño peppers
- 8 ounces cream cheese, softened to room temperature
- 1 cup shredded sharp cheddar cheese
- 1/4 cup sour cream
- 1/2 teaspoon garlic powder
- 1/2 teaspoon onion powder
- 1/4 teaspoon smoked paprika
- 1/4 teaspoon salt
- 1/8 teaspoon black pepper
- 12 slices thin-cut bacon
- Fresh chives or green onions, chopped (optional)
- Ranch dressing or blue cheese dip (optional)
- Everything bagel seasoning (optional)
Instructions
- Put on gloves if using. Rinse jalapeños and pat dry. Cut each in half lengthwise through the stem. Use a small spoon or paring knife to scrape out seeds and white membranes. For milder poppers, remove all membrane; for spicier, leave some.
- Preheat oven to 400°F (200°C). Line a baking sheet with foil and lay bacon slices in a single layer. Bake for 6-8 minutes until bacon starts to render fat and is slightly translucent but still pliable. Remove and let cool on paper towels.
- In a mixing bowl, combine softened cream cheese, shredded cheddar, sour cream, garlic powder, onion powder, smoked paprika, salt, and pepper. Mix until smooth and well-combined. Taste and adjust seasoning if needed.
- Using a small spoon or piping bag, fill each jalapeño half with the cream cheese mixture. Fill level with the cut edge, not mounded. A heaping teaspoon per half is usually perfect.
- Cut par-cooked bacon slices in half crosswise. Wrap one half-slice around each stuffed jalapeño half, starting at one end and overlapping slightly. Tuck the end under to secure. Use a toothpick if needed.
- Place wrapped poppers seam-side down on a wire rack set over a baking sheet. Bake at 400°F (200°C) for 20-25 minutes until bacon is deep golden brown and crispy, and filling is hot and bubbly. For extra crispiness, broil for the last 1-2 minutes, watching closely.
- Let poppers rest on the rack for 5 minutes before serving. Transfer to a platter, sprinkle with chopped chives or everything bagel seasoning if desired, and serve.
Notes
Don’t skip the wire rack—it ensures crispy bacon all around. Use room temperature cream cheese for a smooth filling. Thin-cut bacon is essential; thick-cut will not crisp properly. For make-ahead, assemble poppers up to 24 hours in advance and refrigerate, then bake as directed adding 2-3 minutes. Leftovers can be reheated in the oven or air fryer for best texture.
Nutrition
- Serving Size: 1 popper
- Calories: 145
- Sugar: 1
- Sodium: 280
- Fat: 12
- Saturated Fat: 6
- Carbohydrates: 2
- Fiber: 0.5
- Protein: 6
Keywords: bacon-wrapped jalapeño poppers, game day appetizer, crispy bacon, jalapeño poppers, easy appetizer, keto appetizer, gluten-free appetizer


