My husband did not trust meal prep chicken. He said it was always dry, always disappointing, and honestly, I could not argue with him. For years, I tried every method—poaching, slow cooking, even those sad little steamer bags—and every single time, by day three, we were both reaching for takeout menus instead of the Tupperware in the fridge. So when I told him I was working on a crispy baked chicken thigh meal prep bowl recipe, he just raised an eyebrow. I did not blame him.
The problem with meal prep chicken is usually the skin. You work so hard to get it crispy right out of the oven, but then you seal it in a container and it turns into a sad, rubbery mess within hours. That was my breaking point, honestly. I spent a whole month testing different techniques—baking soda tricks, high-heat blasts, even trying to re-crisp the skin in a skillet each morning (which defeats the whole point of meal prep, right?).
Then I stumbled onto something that changed everything. It is not a fancy technique or some secret ingredient. It is just a smarter way to handle the chicken and the storage. The first time I cracked open a container on day three and heard that crunch, I actually laughed out loud. My husband took one bite and said, “Okay, I get it now.” That is the kind of win you hold onto. These crispy baked chicken thigh meal prep bowls are the result of all that trial and error, and they are the reason I actually look forward to Monday lunches now.
Why You’ll Love This Recipe
Let me tell you what makes these bowls different from every other meal prep recipe you have tried. It is not just about the chicken—it is about the whole experience of eating something that actually tastes good three days later.
- Crispy Skin That Stays Crispy: This is the whole point, right? I figured out a storage trick that keeps the skin shatteringly crisp even after refrigerating. No sad, soggy chicken here.
- Simple, Everyday Ingredients: You do not need any fancy spice blends or hard-to-find items. Everything is probably in your pantry right now.
- Perfect for Busy Weeks: Make these on Sunday, and you have lunches or dinners sorted for Monday through Wednesday. That is three days of not thinking about what to eat.
- Completely Customizable: The bowl base is totally flexible. Swap the grains, change the veggies, switch up the sauce—the chicken works with almost anything.
- High Protein, Satisfying: Chicken thighs are naturally juicier and more flavorful than breasts, plus they keep you full longer. No mid-afternoon snack cravings.
- Budget-Friendly: Chicken thighs are usually cheaper than breasts, and you are using affordable staples for the bowls. Meal prep does not have to be expensive.
What really sets this recipe apart is the technique. Most people bake chicken thighs at too low a temperature or crowd the pan, which steams the skin instead of crisping it. I use a specific method—high heat, proper spacing, and a little trick with the rack position—that gives you consistently perfect results every single time. This is not just another meal prep recipe; it is the one that finally works.
What Ingredients You Will Need
This recipe relies on simple, wholesome ingredients that work together to create big flavor without a lot of fuss. Most of these are pantry staples, which makes this an easy recipe to throw together even on a busy Sunday afternoon.
For the Crispy Baked Chicken Thighs
- Bone-in, skin-on chicken thighs (4-6 thighs, about 2 pounds) – This is non-negotiable for that crispy skin. The bone keeps the meat juicy while the skin gets golden and crackly. I prefer organic thighs when I can find them on sale.
- Olive oil (2 tablespoons) – Helps the seasoning stick and encourages browning. Avocado oil works too if that is what you have.
- Kosher salt (1½ teaspoons) – Do not skimp here. Salt is what draws out moisture from the skin, helping it crisp up. I use Diamond Crystal brand for its lighter texture.
- Garlic powder (1 teaspoon) – Adds savory depth without burning like fresh garlic would at high heat.
- Onion powder (1 teaspoon) – Complements the garlic and adds a subtle sweetness.
- Smoked paprika (1 teaspoon) – Gives the chicken a beautiful color and a hint of smoky flavor. Regular paprika works, but smoked is better.
- Black pepper (½ teaspoon) – Freshly ground is best.
- Optional: cayenne pepper (¼ teaspoon) – For a little heat. Leave it out if you prefer mild flavors.
For the Meal Prep Bowls
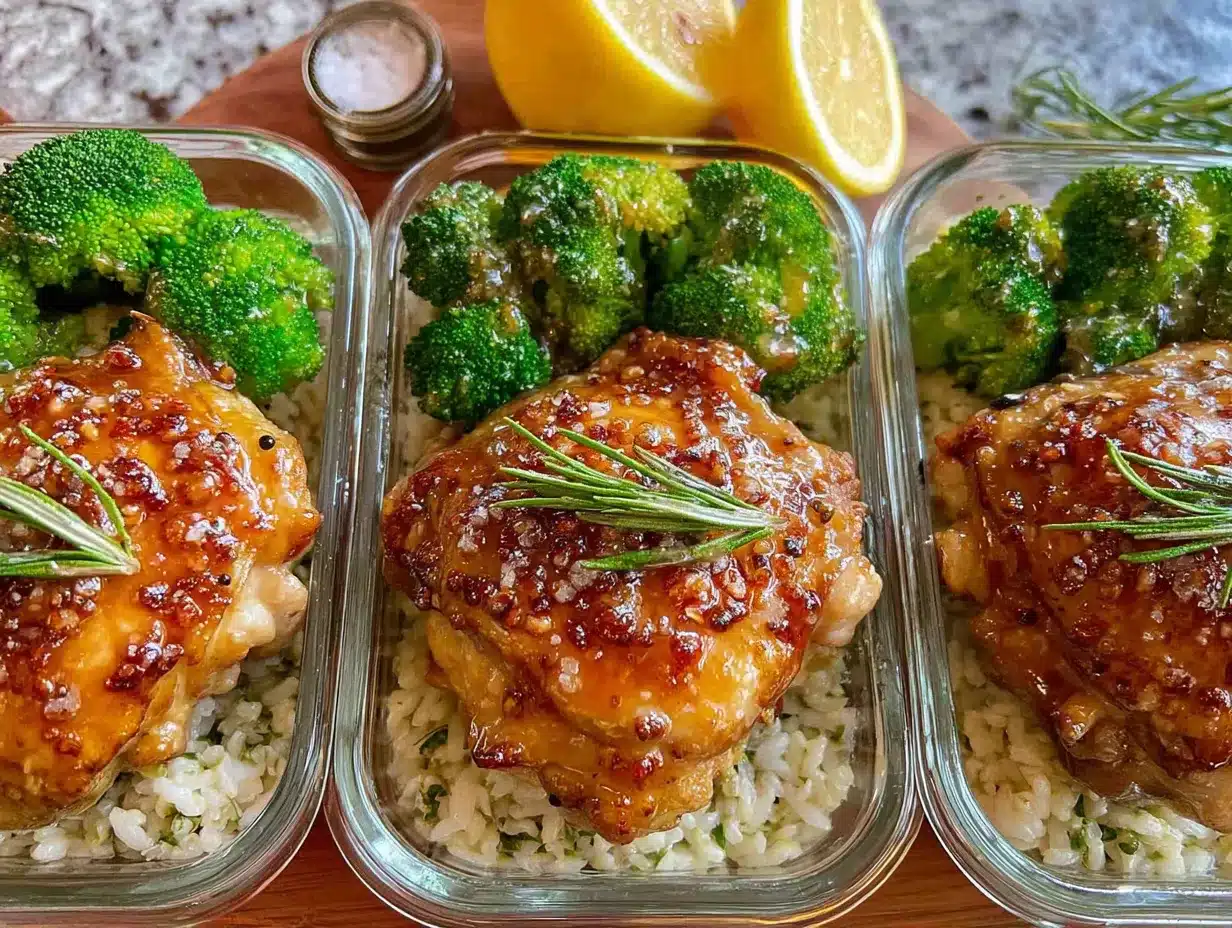
- Cooked rice or quinoa (3 cups) – I like jasmine rice for its fragrance, but brown rice or quinoa adds more fiber. Cook it ahead of time to save effort.
- Roasted vegetables (3 cups, mixed) – Broccoli, bell peppers, and sweet potatoes are my go-to. They all roast well and hold up for days in the fridge. Cut them into even pieces for consistent cooking.
- Fresh greens (2 cups, optional) – Spinach or arugula adds freshness. Add them right before eating so they do not get soggy.
- Your favorite sauce (½ cup) – A simple lemon vinaigrette, tahini dressing, or even a drizzle of sriracha mayo works beautifully. I sometimes use the same dressing from my Greek yogurt parfait recipe thinned with a little lemon juice for a tangy option.
Ingredient Selection Tips
When choosing chicken thighs, look for ones with the skin still attached and intact. The skin should look smooth and not torn. If the skin is already damaged, it will not crisp up as well. For the vegetables, pick ones that roast well and do not release too much water—broccoli, cauliflower, Brussels sprouts, and root vegetables are all excellent choices. Avoid watery veggies like zucchini or mushrooms unless you plan to eat them within a day.
Equipment Needed
You do not need a professional kitchen to make these bowls, but a few key tools make the process much smoother.
- Baking sheet (half-sheet pan, 18×13 inches) – A rimmed baking sheet is essential to catch any rendered fat. I use a heavy-duty aluminum one for even heat distribution.
- Wire rack (fits inside the baking sheet) – This is the secret to crispy skin. Lifting the chicken off the pan allows hot air to circulate underneath, preventing the skin from steaming. A cooling rack works perfectly.
- Instant-read thermometer – The only reliable way to know your chicken is done. Chicken thighs should reach 175-185°F for the best texture. I recommend the Thermapen brand for speed and accuracy.
- Sharp chef’s knife – For cutting vegetables and trimming any excess skin or fat from the chicken.
- Cutting board – Preferably two—one for raw chicken and one for vegetables.
- Mixing bowls – For tossing the chicken with seasonings and for assembling the bowls.
- Meal prep containers (4-6 containers, about 2-cup capacity) – Glass containers with tight-fitting lids are best. They do not absorb odors and they reheat well. I like the ones with separate compartments to keep the crispy chicken away from the grains and veggies.
- Optional: parchment paper or aluminum foil – For easier cleanup. Just line the baking sheet under the wire rack.
If you do not have a wire rack, you can try flipping the chicken halfway through cooking, but the skin will not get as consistently crispy. It is worth the small investment—I found mine for under $10 at a kitchen supply store.
Preparation Method
This method is designed to give you the crispiest skin possible while keeping the meat juicy. Follow these steps closely, and you will have perfect chicken every time.
- Preheat your oven to 425°F (220°C). Position the rack in the upper third of the oven, about 6-8 inches from the heating element. This high heat is crucial for rendering the fat and crisping the skin. While the oven heats, take the chicken out of the refrigerator and let it sit at room temperature for 15-20 minutes. Cold chicken will not cook evenly.
- Pat the chicken thighs completely dry with paper towels. This is the most important step. Any moisture on the skin will steam instead of crisp. Really take your time here—I use at least three or four paper towels per batch. Make sure you get the underside too, where the skin meets the bone.
- Season the chicken generously. In a small bowl, mix together the kosher salt, garlic powder, onion powder, smoked paprika, black pepper, and cayenne if using. Drizzle the olive oil over the chicken thighs and rub it in with your hands. Then sprinkle the seasoning mixture evenly over both sides of each thigh, making sure to get the seasoning under the skin where possible. This is where the flavor lives.
- Place a wire rack inside your baking sheet. Arrange the seasoned chicken thighs on the rack, skin side up, leaving at least 1 inch of space between each piece. Do not crowd them—crowding traps steam and prevents crisping. If your thighs are large, you might only fit 4 on a standard sheet pan. That is fine.
- Bake for 35-45 minutes, depending on the size of your thighs. Do not flip them. The skin should be deep golden brown and shatteringly crisp when you tap it with a fork. The internal temperature should read 175-185°F when inserted into the thickest part of the thigh without touching the bone. I usually start checking at the 30-minute mark.
- Let the chicken rest for 5-10 minutes on the rack after baking. This allows the juices to redistribute. Do not skip this step—cutting into hot chicken will release all those juices and leave you with dry meat.
- While the chicken bakes, prepare your vegetables. Toss your chopped veggies (broccoli florets, diced sweet potatoes, sliced bell peppers) with a little olive oil, salt, and pepper. Spread them on a separate baking sheet and roast at the same 425°F temperature for 20-25 minutes, stirring halfway through. They should be tender and lightly browned at the edges.
- Cook your grains according to package directions while the chicken and veggies are in the oven. I usually make a big batch of jasmine rice or quinoa. Fluff it with a fork and let it cool slightly before assembling the bowls.
- Assemble the meal prep bowls. Divide the grains evenly among your containers. Top with the roasted vegetables. For the chicken, here is the crucial storage trick: let the chicken cool completely on the wire rack before adding it to the containers. Once it is cool, place the chicken thighs skin side up in the containers, but do not seal the lids yet. Leave the containers open in the refrigerator for about 30 minutes to let any remaining steam escape. Then seal the lids. This prevents condensation from forming on the skin and ruining the crispiness.
- Store the sauce separately. Keep your dressing or sauce in a small container or a zip-top bag. Add it to the bowls just before reheating or eating. This keeps everything from getting soggy.
Cooking Tips & Techniques
I have made this recipe more times than I can count, and I have learned a few things the hard way. Here are my best tips for perfect results every time.
The drying trick—If you have time, leave the seasoned chicken thighs uncovered in the refrigerator for 1-2 hours before baking. This dries out the skin even further, leading to an even crispier result. I do this on Sunday mornings when I know I am prepping later in the day. It is not essential, but it makes a noticeable difference.
Do not flip the chicken. I see recipes all the time that tell you to flip chicken thighs halfway through. Do not do it. The skin needs to stay facing up the entire time to render properly. Flipping it will cause the skin to stick to the rack and tear, and you will lose all that beautiful crispiness.
The temperature matters more than you think. Chicken thighs are forgiving, but they are best at 175-185°F. Below that, the connective tissue has not fully broken down, and the meat can be tough. Above that, it starts to dry out. I always use my instant-read thermometer to be sure. It is a small investment that saves a lot of disappointment.
One mistake I made early on—I used to line the baking sheet with foil and then put the chicken directly on the foil. The skin would get sticky and pale instead of crispy. The wire rack is the game-changer. If you do not have one, you can try using a bed of thickly sliced onions or lemons to lift the chicken off the pan, but the rack works best.
Multitasking tip: While the chicken bakes, roast your vegetables on a separate pan. Everything finishes around the same time, so you can assemble the bowls while everything is still warm. This makes the whole process take about an hour from start to finish, with most of that being hands-off oven time.
Variations & Adaptations
One of the best things about these bowls is how easy they are to adapt. Here are some of my favorite variations.
Spicy Honey Glaze: During the last 5 minutes of baking, brush the chicken thighs with a mixture of 2 tablespoons honey and 1 teaspoon sriracha. The sugar caramelizes and gives you sticky, spicy-sweet skin that is absolutely addictive. Just be careful not to add it too early or the honey will burn.
Lemon Herb Version: Add the zest of one lemon and 2 tablespoons of fresh chopped thyme or rosemary to the seasoning mix. Squeeze a little lemon juice over the finished chicken before serving. This is bright and fresh, perfect for spring and summer meal prep.
BBQ Chicken Bowls: After baking, brush the chicken thighs with your favorite barbecue sauce and return to the oven for 3-4 minutes. Pair with corn, black beans, and a cilantro-lime rice for a Tex-Mex inspired bowl. This is a huge hit with kids.
Dietary Adaptations: For a gluten-free option, this recipe is naturally gluten-free as written. For dairy-free, it is already dairy-free too. If you need a lower-carb option, skip the grains and double up on the roasted vegetables or add a bed of sautéed spinach. You can also use cauliflower rice instead of regular rice.
Personal variation I love: I sometimes swap the smoked paprika for a tablespoon of harissa paste mixed with the olive oil. It gives the chicken a North African-inspired warmth that pairs beautifully with roasted sweet potatoes and a tahini dressing. My husband requests this version at least once a month now.
Serving & Storage Suggestions
These bowls are designed to be eaten throughout the week, but a few simple tricks will keep everything tasting fresh.
Serving temperature: I prefer these bowls reheated, but they are also delicious cold if you use a grain like quinoa or farro. To reheat, remove the chicken thigh from the container and reheat it separately. Place the chicken skin side up on a baking sheet in a 375°F oven for 8-10 minutes, or in an air fryer at 350°F for 5 minutes. Reheat the grains and vegetables in the microwave for 1-2 minutes, then add the chicken back on top. This keeps the skin crispy while everything else gets hot.
Storage instructions: Store the assembled bowls (without sauce) in airtight glass containers in the refrigerator for up to 4 days. The chicken will stay crispy for the first 3 days if you follow the cooling and storage tips above. By day 4, the skin will have softened slightly, but it is still much better than any other meal prep chicken I have tried.
Freezing: You can freeze the chicken thighs separately for up to 3 months. Wrap each cooled thigh tightly in plastic wrap and then in foil. To use, thaw overnight in the refrigerator and reheat in the oven or air fryer. The grains and vegetables do not freeze as well, so I recommend making those fresh when you are ready to eat.
Flavor development: Interestingly, the flavors in these bowls get better after a day or two. The seasoning on the chicken melds with the meat, and the roasted vegetables become even more tender. I actually prefer the bowls on day two or three. The only thing that suffers is the skin, which is why the separate reheating method is so important.
What to serve with it: A simple side salad with a lemon vinaigrette is perfect for adding freshness. If you want something heartier, try serving alongside a bowl of Tuscan white bean and kale soup for a cozy, complete meal. Or for a lighter option, add a handful of fresh arugula dressed with olive oil and lemon juice right before serving.
Nutritional Information & Benefits
Here is the approximate nutritional breakdown for one bowl (using jasmine rice, roasted broccoli and sweet potatoes, and one chicken thigh without sauce). Values are estimates and will vary based on specific ingredients and portion sizes.
| Nutrient | Amount Per Bowl |
|---|---|
| Calories | 520-580 |
| Protein | 35-40g |
| Carbohydrates | 45-50g |
| Fat | 22-26g |
| Saturated Fat | 6-8g |
| Fiber | 6-8g |
| Sugar | 8-10g (natural from vegetables) |
| Sodium | 600-700mg |
Health benefits: Chicken thighs are an excellent source of high-quality protein, which supports muscle repair and keeps you feeling full. They are also rich in B vitamins, particularly niacin and B6, which help convert food into energy. The bone-in cooking method also provides some collagen and gelatin, which is great for joint health and skin elasticity.
Dietary considerations: This recipe is naturally gluten-free, dairy-free, and nut-free. It is also suitable for low-carb and keto diets if you skip the grains. The main allergens to note are the chicken itself (obviously) and any sauces you choose to add. If you are watching your sodium, you can reduce the salt to 1 teaspoon, but the skin will not get quite as crispy.
Conclusion
These crispy baked chicken thigh meal prep bowls are the answer to every sad, dry meal prep lunch you have ever suffered through. The skin stays crispy, the meat stays juicy, and the whole thing comes together with minimal effort. Honestly, I make a batch almost every Sunday now, and I have not ordered takeout for lunch in months.
I love that this recipe is forgiving enough for beginners but impressive enough to serve to guests. It is the kind of meal that makes you feel like you have your life together, even if the rest of the week is chaos. The best part is watching someone take their first bite and seeing that surprised look—the one that says, “Wait, this is meal prep?”
Try this recipe and see for yourself. Swap in your favorite vegetables, play with the seasonings, and make it your own. I would love to hear how it turns out—leave a comment below and tell me what variations you tried. Did you go spicy? Did you add a sauce? Share your creation and tag me on social media. Happy cooking, and here is to never eating sad chicken again!
Frequently Asked Questions
Can I use boneless, skinless chicken thighs for this recipe?
You can, but you will not get the same crispy skin result since there is no skin. Boneless thighs cook faster (about 20-25 minutes at 425°F) and are still juicy, but they lack that shatteringly crisp texture. If you use boneless thighs, consider adding a breadcrumb or almond flour coating for crunch.
How do I keep the chicken skin crispy for more than 3 days?
The key is the cooling and storage method I described. Let the chicken cool completely on the wire rack before refrigerating. Leave the container lids slightly open for 30 minutes in the fridge to let steam escape. After day 3, the skin will start to soften, but you can re-crisp it in the oven or air fryer for a few minutes before eating.
Can I freeze the assembled meal prep bowls?
I do not recommend freezing the fully assembled bowls. The vegetables and grains become mushy when thawed. However, you can freeze the cooked chicken thighs separately for up to 3 months. Wrap each one tightly in plastic wrap and foil. Thaw overnight in the fridge and reheat in the oven to restore crispiness.
What are the best vegetables to use for meal prep bowls?
Sturdy vegetables that roast well and do not release too much water are best. Broccoli, cauliflower, sweet potatoes, Brussels sprouts, bell peppers, and red onions are my top picks. Avoid watery vegetables like zucchini, mushrooms, or eggplant unless you plan to eat them within a day. They release moisture and make everything soggy.
How do I reheat the chicken without losing the crispy skin?
Always remove the chicken from the container before reheating. Place it skin side up on a baking sheet in a 375°F oven for 8-10 minutes, or in an air fryer at 350°F for 5 minutes. Reheat the grains and vegetables separately in the microwave. Then assemble the bowl with the reheated chicken on top. This method keeps the skin crispy and everything else hot.
Pin This Recipe!

Crispy Baked Chicken Thigh Meal Prep Bowls: Easy & Healthy

These crispy baked chicken thigh meal prep bowls are the answer to every sad, dry meal prep lunch you have ever suffered through. The skin stays crispy, the meat stays juicy, and the whole thing comes together with minimal effort.
- Prep Time: 20 minutes
- Cook Time: 45 minutes
- Total Time: 1 hour 5 minutes
- Yield: 4-6 servings 1x
- Category: Main Course
- Cuisine: American
Ingredients
- 4–6 bone-in, skin-on chicken thighs (about 2 pounds)
- 2 tablespoons olive oil
- 1½ teaspoons kosher salt
- 1 teaspoon garlic powder
- 1 teaspoon onion powder
- 1 teaspoon smoked paprika
- ½ teaspoon black pepper
- ¼ teaspoon cayenne pepper (optional)
- 3 cups cooked rice or quinoa
- 3 cups mixed roasted vegetables (broccoli, bell peppers, sweet potatoes)
- 2 cups fresh greens (spinach or arugula, optional)
- ½ cup your favorite sauce (lemon vinaigrette, tahini dressing, or sriracha mayo)
Instructions
- Preheat your oven to 425°F (220°C). Position the rack in the upper third of the oven, about 6-8 inches from the heating element. Take the chicken out of the refrigerator and let it sit at room temperature for 15-20 minutes.
- Pat the chicken thighs completely dry with paper towels. This is the most important step.
- In a small bowl, mix together the kosher salt, garlic powder, onion powder, smoked paprika, black pepper, and cayenne if using. Drizzle the olive oil over the chicken thighs and rub it in with your hands. Then sprinkle the seasoning mixture evenly over both sides of each thigh, getting under the skin where possible.
- Place a wire rack inside your baking sheet. Arrange the seasoned chicken thighs on the rack, skin side up, leaving at least 1 inch of space between each piece.
- Bake for 35-45 minutes, depending on the size of your thighs. Do not flip them. The skin should be deep golden brown and shatteringly crisp. The internal temperature should read 175-185°F.
- Let the chicken rest for 5-10 minutes on the rack after baking.
- While the chicken bakes, prepare your vegetables. Toss your chopped veggies with a little olive oil, salt, and pepper. Spread them on a separate baking sheet and roast at 425°F for 20-25 minutes, stirring halfway through.
- Cook your grains according to package directions while the chicken and veggies are in the oven.
- Assemble the meal prep bowls: Divide the grains evenly among your containers. Top with the roasted vegetables. Let the chicken cool completely on the wire rack before adding it to the containers. Place the chicken thighs skin side up in the containers, but do not seal the lids yet. Leave the containers open in the refrigerator for about 30 minutes to let any remaining steam escape. Then seal the lids.
- Store the sauce separately. Add it to the bowls just before reheating or eating.
Notes
For extra crispy skin, leave the seasoned chicken thighs uncovered in the refrigerator for 1-2 hours before baking. Do not flip the chicken during baking. The wire rack is essential for crispy skin. For best results, reheat the chicken separately from the grains and vegetables.
Nutrition
- Serving Size: 1 bowl (1 chicken th
- Calories: 520580
- Sugar: 810
- Sodium: 600700
- Fat: 2226
- Saturated Fat: 68
- Carbohydrates: 4550
- Fiber: 68
- Protein: 3540
Keywords: crispy baked chicken thighs, meal prep bowls, healthy meal prep, chicken thigh recipe, easy dinner, high protein meal prep


