I used to be a little bit of a snob about Halloween candy. You know the type—the one who turns up their nose at the stuff that comes in the crinkly plastic wrappers, insisting that homemade is the only way to go. I spent one particularly ambitious October making caramel apples from scratch that looked beautiful for about ten minutes before they turned into a sticky, sliding mess. My kitchen looked like a crime scene, and I was covered in a film of sugar and regret. It was my neighbor, a woman named Carol who has lived on our street for forty years, who finally set me straight. She watched me scrubbing at a pot of hardened caramel and just shook her head with this knowing smile. “You’re working too hard,” she said. “Halloween is about the fun, not the fuss.” A few days later, she knocked on my door with a plate of this Easy 3-Ingredient Candy Corn Bark. It was beautiful—layered white chocolate, studded with bright orange and yellow candy corn, and it looked like it took hours. When I asked for the recipe, she just laughed. “It’s three things,” she said. “And it takes ten minutes.” Honestly, she was right. This candy corn bark is the perfect Halloween treat because it gives you that impressive, festive look without any of the stress. It’s the kind of recipe that makes you feel like a kitchen genius, even when you’re just melting chocolate and sprinkling candy. I mean, who doesn’t love a win like that? Maybe you’ve been there, staring at a Pinterest-perfect recipe that takes all afternoon. This isn’t that. This is the recipe you make while the kids are getting their costumes on, and it still makes you look like a hero.
Why You’ll Love This Recipe
Let’s be real for a second. We all want to make something special for Halloween, but we also want to keep our sanity. This Easy 3-Ingredient Candy Corn Bark is the answer to that prayer. I’ve tested this recipe more times than I care to admit (my family is now officially sick of candy corn), and I can tell you with absolute certainty that it works every single time. It’s the kind of recipe that builds your confidence in the kitchen because it’s nearly impossible to mess up.
- Quick & Easy: This comes together in about 10 minutes of active time. You just melt, spread, and sprinkle. Perfect for those last-minute Halloween parties or when you need a treat for the classroom.
- Simple Ingredients: You only need white chocolate chips, candy corn, and a little bit of coconut oil or shortening. No fancy grocery store trips required. You probably have the white chocolate in your pantry right now.
- Perfect for Halloween: This bark screams Halloween. The colors are perfect, and it’s great for parties, trick-or-treaters, or just a fun snack to have around the house.
- Crowd-Pleaser: I’ve brought this to two different Halloween gatherings, and it was the first thing to disappear every time. Kids love the sweet, crunchy texture, and adults appreciate that it’s not overly complicated.
- Unbelievably Delicious: The combination of creamy white chocolate and the chewy, slightly crunchy candy corn is a total winner. It’s a perfect balance of textures that makes you go back for just one more piece.
What makes this recipe different from all the other bark recipes out there? It’s the texture. Most recipes just melt the chocolate and dump the candy on top. But I’ve found that adding a tiny bit of coconut oil to the white chocolate makes it set up with a beautiful, snappy shine. It’s not greasy or soft—it breaks cleanly into perfect little shards. This isn’t just another version of candy bark; it’s the best version. It’s the kind of treat that makes you close your eyes after the first bite. It’s Halloween comfort food, made fast, but with the same soul-soothing satisfaction as something you slaved over all day.
What Ingredients You Will Need
This recipe uses just three simple ingredients to deliver a festive and delicious Halloween treat. The beauty of this bark is in its simplicity, so using good quality ingredients really makes a difference in the final flavor and texture. Here’s what you’ll need to grab from the store.
- 12 ounces (340g) White Chocolate Chips or Melting Wafers: This is the base of your bark. I personally prefer using high-quality white chocolate chips like Ghirardelli or Guittard because they melt more smoothly and have a creamier flavor. If you can find white melting wafers (like Candiquik), those are even easier to work with because they are designed to melt without seizing up. Avoid white chocolate that is labeled as “morsels” from generic brands, as they often contain stabilizers that prevent them from melting into a smooth, spreadable consistency.
- 1 ½ cups (about 200g) Candy Corn: This is the star of the show! You can use classic candy corn or the seasonal autumn mixes that have the little pumpkins and other shapes. For a more festive look, you can even use the “Harvest Corn” mix that has chocolate and caramel flavors. I like to separate the colors a little bit, but honestly, just dumping them in works perfectly. If you want a more intense candy corn flavor, you can chop them roughly, but I prefer leaving them whole for that satisfying crunch.
- 1 teaspoon (5ml) Coconut Oil or Vegetable Shortening: This is my secret ingredient. Adding a tiny amount of fat to the white chocolate helps it melt more smoothly and gives the finished bark a beautiful, glossy sheen. It also helps the chocolate set up with a cleaner snap, making it easier to break into pieces. You can skip this if you are using melting wafers, but for regular chocolate chips, it’s a game-changer. It doesn’t add any coconut flavor, I promise!
Optional Add-Ins for Fun:
- ¼ cup (30g) Mini Pretzel Twists: For a salty-sweet twist, crush a few pretzels and sprinkle them over the top with the candy corn. The salt really balances the sweetness.
- ¼ cup (30g) Roasted, Salted Peanuts: Adds a wonderful crunch and a savory element that pairs beautifully with the sweet chocolate.
- Halloween Sprinkles: For an extra pop of color and festivity, add some orange, black, and purple sprinkles before the chocolate sets.
Substitution Guidance: If you are dairy-free, you can easily swap the white chocolate chips for a dairy-free version. Just make sure to check the label. The coconut oil is already dairy-free, so that’s a win. If you don’t have candy corn, you can use any other Halloween candy, like chopped-up Reese’s Pieces or M&M’s. The possibilities are endless!
Equipment Needed
You don’t need a fancy kitchen to make this Easy 3-Ingredient Candy Corn Bark. In fact, you probably already have everything you need sitting in your drawers and cabinets. Here’s the short list of what you’ll need to pull together.
- Baking Sheet: A standard half-sheet pan (about 13×18 inches) is perfect. You’ll need one that fits in your fridge.
- Parchment Paper or Silicone Baking Mat: This is non-negotiable. The parchment paper prevents the chocolate from sticking to the pan and makes clean-up an absolute breeze. I’ve tried using wax paper before, and it’s a disaster—the chocolate sticks. Use parchment.
- Microwave-Safe Bowl or Double Boiler: I prefer the microwave for speed. A large glass measuring cup or a ceramic bowl works great. If you are nervous about burning chocolate, you can use a double boiler, but the microwave is faster and easier.
- Rubber Spatula: For stirring the chocolate and spreading it out on the baking sheet. A silicone spatula is best because it won’t scratch your bowls.
- Sharp Knife or Pizza Cutter: To break the bark into pieces after it sets. A pizza cutter actually works better than a knife because it creates clean lines without shattering the chocolate.
If you don’t have a microwave, a double boiler is a great alternative. Just be careful not to let any water get into the chocolate, or it will seize up and become grainy. I learned that the hard way! For a budget-friendly option, a cheap metal bowl set over a pot of simmering water works just as well as a fancy double boiler.
Preparation Method
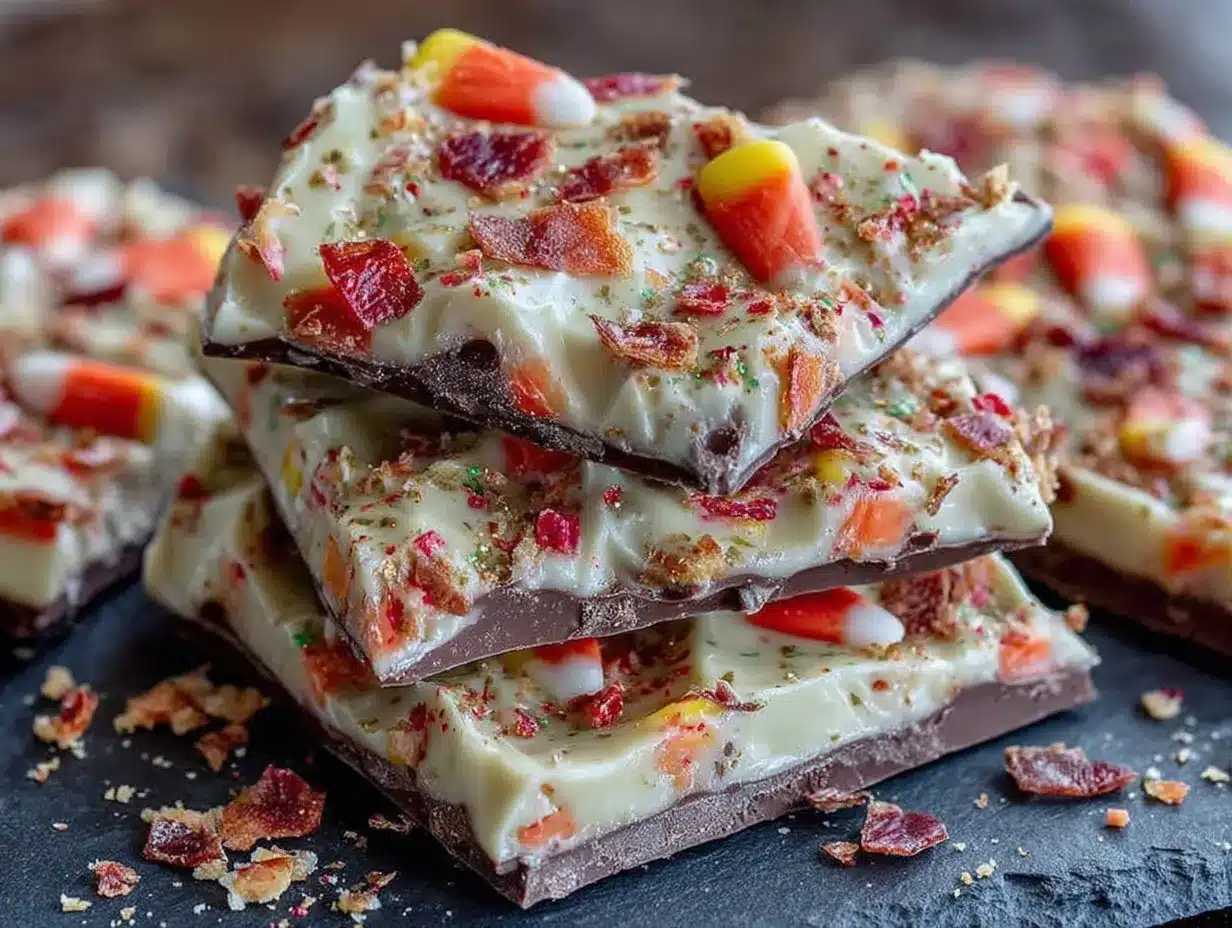
This is the fun part. The whole process takes about 10 minutes of hands-on time, plus about 30 minutes for the bark to set in the fridge. It’s so simple that you can even do it with your kids. Let’s get started.
- Prepare Your Pan (2 minutes): Line your baking sheet with a sheet of parchment paper. Make sure the paper is large enough to hang over the edges a little bit. This will help you lift the finished bark out of the pan later. Set the pan aside.
- Melt the White Chocolate (3 minutes): Place your 12 ounces of white chocolate chips and 1 teaspoon of coconut oil in a microwave-safe bowl. Heat it in the microwave at 50% power for 30-second intervals. After each interval, take it out and stir it with your rubber spatula. It will look like it’s not melting at first—that’s normal. Keep going. After about 2 to 3 minutes of this (total), the residual heat will melt the chips into a smooth, glossy liquid. Warning: Do not overheat white chocolate! It burns very easily and will turn into a thick, grainy mess. If you see any lumps that won’t stir out, just stop and let the residual heat do the work.
- Spread the Chocolate (2 minutes): Pour the melted white chocolate onto the center of your prepared baking sheet. Use your spatula to spread it out into a rough rectangle. You want it to be about ¼-inch thick. Don’t stress about making it perfect—the rough edges are part of the charm. The bark doesn’t have to be a perfect square; a rustic shape looks more homemade and inviting.
- Add the Candy Corn (1 minute): While the chocolate is still wet and melted, sprinkle your 1 ½ cups of candy corn evenly over the top. Press them down gently with your fingers or the back of the spatula so they stick into the chocolate a little bit. This is where you can get creative! I like to arrange a few pieces in a little pattern, but mostly I just scatter them. If you are adding any optional toppings like pretzels or sprinkles, now is the time to add them.
- Set the Bark (30 minutes): Carefully transfer the baking sheet to the refrigerator. Let it chill for at least 30 minutes, or until the chocolate is completely firm and set. It should feel hard to the touch and not bend when you try to lift a corner. If you are in a hurry, you can pop it in the freezer for about 15 minutes, but keep an eye on it so it doesn’t get too cold and brittle.
- Break into Pieces (2 minutes): Once the bark is fully set, remove the pan from the fridge. Lift the parchment paper to remove the entire sheet of bark. Place it on a cutting board. Use a sharp knife or a pizza cutter to break or cut it into irregular pieces. I prefer a pizza cutter because it gives you nice, clean edges without shattering the chocolate. You can make big shards or small bite-sized pieces—it’s totally up to you.
Sensory Cue: When you break the bark, you should hear a satisfying *snap*. That’s how you know it’s set perfectly. If it bends, it needs more time in the fridge.
Cooking Tips & Techniques
Over the years, I’ve made this bark more times than I can count. I’ve had my fair share of disasters, and I’ve learned a few tricks along the way that will help you get perfect results every single time. Let me share them with you so you don’t make the same mistakes I did.
- The Seized Chocolate Nightmare: The most common problem with melting white chocolate is that it seizes up and turns into a thick, crumbly paste. This happens when a tiny bit of water gets into the chocolate. How to avoid it: Make sure your bowl and spatula are completely dry. Even a drop of water from a washed spoon can ruin the whole batch. If your chocolate does seize, you can try to save it by adding a tablespoon of vegetable oil or shortening and stirring vigorously. It won’t be as smooth, but it might be salvageable.
- Don’t Overmix: Once the chocolate is melted, don’t stir it too much. Overmixing can cause the cocoa butter to separate, making the chocolate look greasy and streaky when it sets. Just stir it gently until it’s smooth, then stop.
- Room Temperature Candy Corn: If your candy corn is cold from being stored in the pantry, it can cause the chocolate to seize around it. Let your candy corn come to room temperature before you sprinkle it on the melted chocolate. This ensures a smooth, even coating.
- Timing is Everything: Work quickly once the chocolate is melted. It starts to set as soon as it cools down. Have your candy corn measured and ready to go before you melt the chocolate. This way, you can work fast and get the bark into the fridge before it starts to set on its own.
- Perfect Shards Every Time: For the prettiest pieces, let the bark set completely in the fridge. Then, instead of just hacking at it with a knife, use a sharp chef’s knife and score the top of the bark in a grid pattern before you break it. This gives you more control over the size of the pieces.
Variations & Adaptations
One of the best things about this Easy 3-Ingredient Candy Corn Bark is how easy it is to change up. You can make it your own with just a few simple swaps. Here are some of my favorite variations that I’ve tried over the years.
- Chocolate Lover’s Bark: Swap the white chocolate for semi-sweet or dark chocolate chips. The bitterness of the dark chocolate is a fantastic contrast to the super-sweet candy corn. It’s like a grown-up version of the treat. I made this for a Halloween party last year, and it was a huge hit with the adults.
- Salty-Sweet Pretzel Bark: This is my personal favorite. Before you add the candy corn, sprinkle a generous layer of crushed mini pretzels over the melted white chocolate. Then top with the candy corn. The salt from the pretzels cuts through the sweetness perfectly. It’s that whole salty-sweet thing that is just irresistible.
- Peanut Butter Swirl Bark: After you spread the white chocolate on the pan, drop small spoonfuls of creamy peanut butter over the top. Use a knife to swirl it into the chocolate. Then add the candy corn. The peanut butter adds a rich, savory note that takes this bark to a whole new level. Just make sure your peanut butter is runny, not the natural kind that separates.
- Halloween Sprinkle Explosion: For the most festive bark ever, skip the candy corn entirely and use a mix of Halloween-colored M&M’s and sprinkles. You can use orange, black, and green M&M’s, and top with orange and black jimmies. It’s a fun, colorful twist that kids absolutely love.
- Vegan & Dairy-Free Option: Use dairy-free white chocolate chips (like the ones from Enjoy Life brand) and a little coconut oil. Make sure your candy corn is also vegan (most are!). This version is just as creamy and delicious, and no one will know the difference.
Serving & Storage Suggestions
This bark is so versatile. You can serve it in so many different ways, and it stores beautifully, which makes it perfect for making ahead of time. Here’s how to get the most out of your batch.
Serving: This bark is best served chilled or at room temperature. I prefer it straight from the fridge because the chocolate has that satisfying snap. To serve, arrange the pieces on a festive platter or in a decorative jar. It looks beautiful on a Halloween-themed cake stand. You can also package it up in little cellophane bags tied with orange ribbon for a perfect party favor or a treat for your child’s classmates. It pairs wonderfully with a hot cup of apple cider or a glass of cold milk.
Storage: Store your candy corn bark in an airtight container in the refrigerator. It will stay fresh and crisp for up to 2 weeks. I like to layer the pieces between sheets of parchment paper to prevent them from sticking together. Do not store it at room temperature if your kitchen is warm, as the chocolate can get soft and sticky.
Freezing: This bark freezes beautifully! Place the pieces in a single layer on a baking sheet and freeze for about an hour. Then, transfer them to a freezer-safe bag or container. They will keep for up to 3 months. To thaw, just place them in the refrigerator for a few hours or let them sit at room temperature for about 15 minutes. The flavor and texture are just as good as the day you made them.
How Flavors Develop: Honestly, this bark is best eaten within the first week. The candy corn stays nice and chewy, and the chocolate is perfectly snappy. After that, the candy corn can start to get a little stale and hard. But let’s be real—it never lasts that long in my house!
Nutritional Information & Benefits
Let’s be honest—this is a treat, not a health food. But knowing what’s in it is still helpful. Here’s a rough estimate of the nutritional information for one serving (about 1/12th of the recipe).
- Calories: Approximately 250-300 calories per serving.
- Fat: 12-15g (mostly from the white chocolate and coconut oil).
- Carbohydrates: 35-40g (mostly sugar from the candy corn and chocolate).
- Protein: 2-3g.
Health Benefits (such as they are!): While this is a treat, there are a few small bright spots. The white chocolate does contain some calcium from the milk solids. The coconut oil provides a small amount of healthy fats, which can help with energy. Mostly, though, this recipe is about joy and celebration. It’s a treat to be enjoyed in moderation as part of a balanced diet. Life is all about balance, right?
Dietary Considerations: This recipe is naturally vegetarian. For a gluten-free option, just make sure your candy corn is certified gluten-free (most are, but always check the label). For a vegan option, use dairy-free white chocolate. The main allergen to be aware of is dairy from the white chocolate.
Conclusion
So there you have it. This Easy 3-Ingredient Candy Corn Bark is more than just a recipe—it’s a little slice of Halloween happiness that you can make in ten minutes flat. It’s proof that you don’t need a dozen ingredients or a culinary degree to make something that looks and tastes impressive. I love this recipe because it reminds me to stop overcomplicating things. Sometimes, the simplest treats are the ones that bring the most joy. Whether you’re making it for a party, a classroom, or just for a cozy night in with a scary movie, this bark is guaranteed to put a smile on your face. I’d love to see your creations! Leave a comment below and let me know how it turned out, or tag me in your photos on Pinterest. Do you have any fun variations? I’m always looking for new ideas. Now go on, get melting—Halloween is waiting!
Frequently Asked Questions
1. Can I use milk chocolate instead of white chocolate?
Absolutely! Milk chocolate works wonderfully. It will give the bark a richer, sweeter flavor that pairs beautifully with the candy corn. Just follow the same melting instructions.
2. My white chocolate seized up and turned grainy. Can I fix it?
Yes, you can try to save it! Add 1 tablespoon of vegetable oil or shortening to the seized chocolate and stir it vigorously over very low heat. It won’t be perfectly smooth, but it will be spreadable. Prevention is key—make sure no water gets into the bowl.
3. How do I make perfect, clean pieces of bark?
For clean shards, let the bark set completely in the fridge. Use a sharp, heavy chef’s knife and score the top in a grid pattern before you break it. You can also use a pizza cutter for straight lines.
4. Can I add other candies to this bark?
Of course! This recipe is super flexible. Try adding chopped Reese’s Peanut Butter Cups, chopped Snickers bars, or even crushed Oreos. Just make sure to add them while the chocolate is still wet.
5. How long does this bark last?
Stored in an airtight container in the refrigerator, this bark will stay fresh for up to 2 weeks. It also freezes beautifully for up to 3 months. Just be sure to separate the layers with parchment paper.
Pin This Recipe!
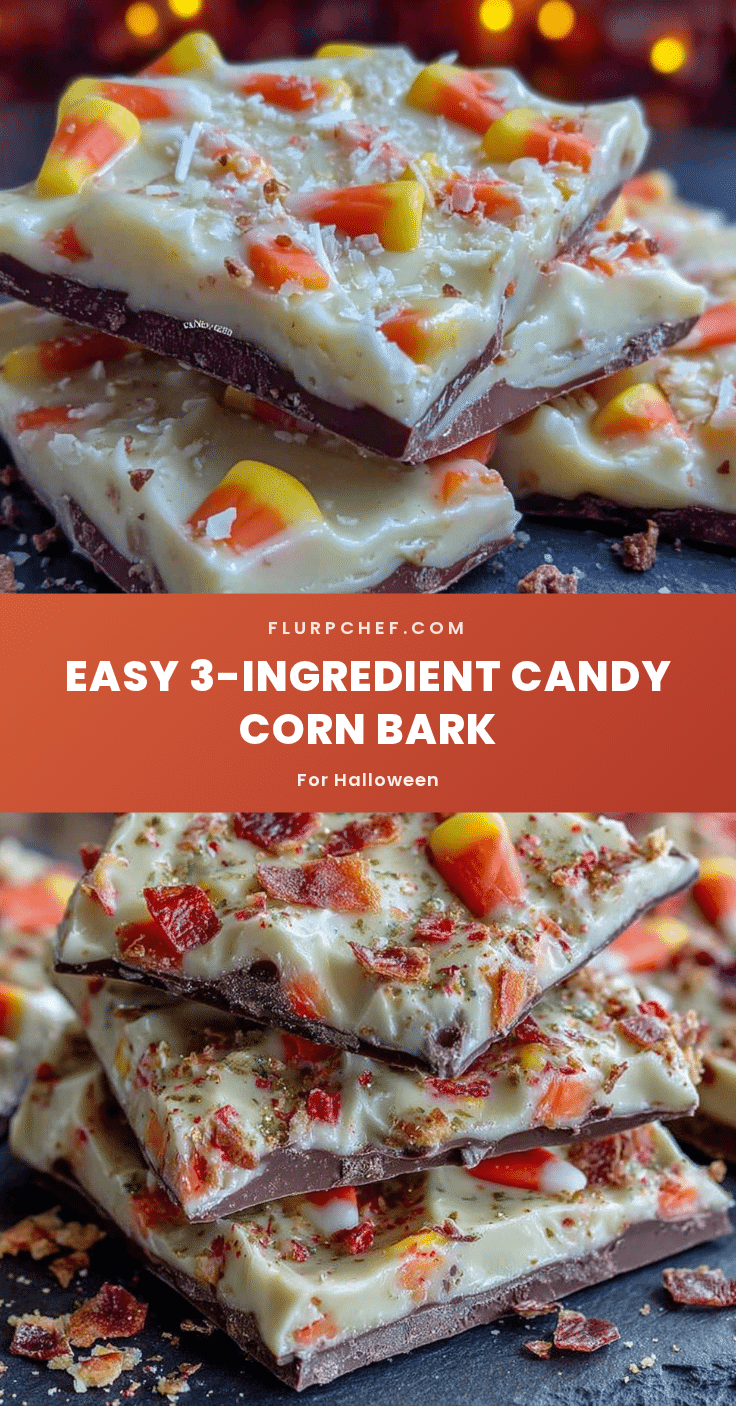
Easy 3-Ingredient Candy Corn Bark: Perfect Halloween Treat
This Easy 3-Ingredient Candy Corn Bark is a quick and festive Halloween treat made with white chocolate, candy corn, and a touch of coconut oil. It comes together in just 10 minutes and is perfect for parties, trick-or-treaters, or a fun snack.
- Prep Time: 10 minutes
- Cook Time: 0 minutes
- Total Time: 40 minutes
- Yield: 12 servings 1x
- Category: Dessert
- Cuisine: American
Ingredients
- 12 ounces (340g) White Chocolate Chips or Melting Wafers
- 1 ½ cups (about 200g) Candy Corn
- 1 teaspoon (5ml) Coconut Oil or Vegetable Shortening
- Optional: ¼ cup (30g) Mini Pretzel Twists
- Optional: ¼ cup (30g) Roasted, Salted Peanuts
- Optional: Halloween Sprinkles
Instructions
- Prepare Your Pan: Line a baking sheet with parchment paper, letting it hang over the edges slightly. Set aside.
- Melt the White Chocolate: Place 12 ounces of white chocolate chips and 1 teaspoon of coconut oil in a microwave-safe bowl. Heat at 50% power for 30-second intervals, stirring after each, until smooth and glossy (about 2-3 minutes total). Do not overheat.
- Spread the Chocolate: Pour the melted chocolate onto the center of the prepared baking sheet. Use a rubber spatula to spread it into a rough rectangle about ¼-inch thick.
- Add the Candy Corn: While the chocolate is still wet, sprinkle 1 ½ cups of candy corn evenly over the top. Gently press them into the chocolate. Add any optional toppings now.
- Set the Bark: Transfer the baking sheet to the refrigerator and chill for at least 30 minutes, or until the chocolate is completely firm and set.
- Break into Pieces: Lift the parchment paper to remove the bark from the pan. Place on a cutting board and use a sharp knife or pizza cutter to break or cut into irregular pieces.
Notes
For best results, ensure all equipment is completely dry to prevent the chocolate from seizing. Let candy corn come to room temperature before adding to avoid causing the chocolate to seize. Store in an airtight container in the refrigerator for up to 2 weeks, or freeze for up to 3 months.
Nutrition
- Serving Size: 1/12 of recipe
- Calories: 275
- Sugar: 35
- Sodium: 45
- Fat: 13
- Saturated Fat: 8
- Carbohydrates: 38
- Protein: 2
Keywords: candy corn bark, Halloween treat, easy dessert, white chocolate bark, 3-ingredient recipe


