It was 10:47 PM on a random Wednesday in October, and I had this ridiculous urge to make something spooky. Not like, full-on haunted house spooky, but the kind of cute-funny spooky you see on Pinterest and think, “I could totally do that.” The problem? I had zero Halloween baking supplies. No candy eyes, no black gel icing, no skeleton-shaped cookie cutters. Nothing. I did have a bag of pretzel rods that were about to expire, a block of almond bark I’d bought on a whim, and a half-empty bag of chocolate chips from a previous baking disaster. Honestly, I almost just went to bed. But something about that late-night quiet made me stubborn. I grabbed the pretzels, melted the chocolate, and started wrapping. The first one looked less like a mummy and more like a sad, chocolatey bandage situation. But by the third one, I found a rhythm. By the fifth, I was laughing at how genuinely cute they turned out. That’s the thing about late-night kitchen experiments—you’re not trying to impress anyone, so you just play. And that’s exactly how these Easy Chocolate Mummy Wrapped Pretzel Rods were born. Maybe you’ve been there, standing in your kitchen at a weird hour with a craving and a half-baked idea. Trust me, this one works.
Why You’ll Love This Recipe
Let me tell you, after making these for three different Halloween parties and two classroom celebrations, I’ve never had a recipe disappear faster. And the best part? They’re almost embarrassingly simple. Here’s why these little guys are about to become your go-to Halloween treat:
- Quick & Easy: From start to finish, you’re looking at about 15 minutes of active work. Seriously. Melt, dip, wrap, chill. That’s it.
- Simple Ingredients: Three main ingredients. Maybe four if you count the candy eyes. No weird specialty items, no trips to three different stores.
- Perfect for Halloween: Whether it’s a classroom party, a work potluck, or just a fun family activity on a rainy October afternoon, these fit the bill perfectly.
- Crowd-Pleaser: Kids go absolutely bonkers for them. Adults pretend to be sophisticated but I’ve watched grown men eat three in a row without blinking.
- Unbelievably Delicious: The salty crunch of the pretzel against the smooth, sweet chocolate is a combination that never gets old. It’s like the universe decided salt and chocolate should be best friends.
What makes these different from every other Halloween treat out there? It’s the texture. Most mummy treats use cookies or marshmallows, which can get soft or sticky. These pretzel rods stay perfectly crunchy, even after they’re coated. Plus, the wrapping technique gives them that authentic mummy look without needing any artistic talent. I promise you, if I can make these look good, anyone can.
This isn’t just a recipe—it’s the kind that makes you feel like a holiday hero with almost zero effort. You get all the credit for making something “from scratch,” and nobody has to know it took you less time than scrolling through Netflix.
What Ingredients You Will Need
This recipe uses just a handful of simple ingredients to create something that looks way more complicated than it actually is. Here’s what you need to gather:
- Pretzel rods – 1 standard bag (about 10-12 ounces). Look for thick, sturdy rods that won’t snap easily when you’re dipping them. I prefer the Snyder’s of Hanover brand because they’re consistently straight and sturdy, but any brand works fine.
- White almond bark or white chocolate melting wafers – 12 ounces. This is your mummy wrapping. Almond bark melts smoother and sets harder than regular white chocolate, which makes the wrapping process much easier. If you use white chocolate chips, add a teaspoon of coconut oil to help them melt smoothly.
- Semi-sweet or dark chocolate chips – 1 cup. You’ll use this for the mummy’s eyes and maybe a little drizzling action. I like Ghirardelli 60% cacao for that perfect balance of sweetness.
- Candy eyes – 1 small package (about 24-30 eyes). You can find these at any craft store or in the baking aisle during Halloween. If you can’t find them, you can pipe white chocolate dots and add a tiny dark chocolate dot in the center.
Optional add-ins:
- Orange or black sprinkles – for a little extra Halloween flair
- Crushed graham crackers or Oreo crumbs – roll the mummies in these before the chocolate sets for a “dusty mummy” effect
- Coconut oil – just a teaspoon, to thin out your chocolate if needed
One thing I learned the hard way: don’t buy the thin pretzel sticks thinking they’re the same thing. They’re not. They snap under the weight of the chocolate and you’ll end up with a bunch of mummy stumps. Trust me on this one. The rods need to be substantial enough to hold up to the coating.
For the white coating, I’ve tried a few different options over the years. The Wilton candy melts work great and come in white, but almond bark from the baking aisle is usually cheaper and works just as well. If you’re dairy-free, there are some great vegan white chocolate options out there—just make sure you melt them slowly and add a little coconut oil to keep the texture right.
Equipment Needed
You don’t need a fancy kitchen setup for these mummies. Here’s what you’ll actually use:
- Microwave-safe bowls – two medium bowls for melting your chocolates separately
- Parchment paper or silicone baking mat – for setting the finished mummies on. Wax paper works in a pinch but parchment is better.
- Baking sheet – to hold your parchment paper and give the mummies a flat surface to set on
- Small offset spatula or butter knife – for spreading the chocolate if needed
- Toothpicks – for placing the candy eyes with precision. Your fingers will thank you later.
- Piping bag or small zip-top bag – for drizzling the dark chocolate. A sandwich bag with the corner snipped off works perfectly.
If you don’t have a microwave, you can melt the chocolate using a double boiler on the stovetop. Just be patient and keep the heat low—chocolate burns fast and smells terrible when it does. I learned this the hard way during a failed batch of peppermint bark and my kitchen smelled like burnt regret for three days.
For the budget-conscious, don’t run out and buy a fancy piping set. That little sandwich bag trick has gotten me through dozens of recipes. Just make sure you snip a really tiny corner—you can always make the hole bigger if needed, but you can’t undo a giant gash.
Preparation Method
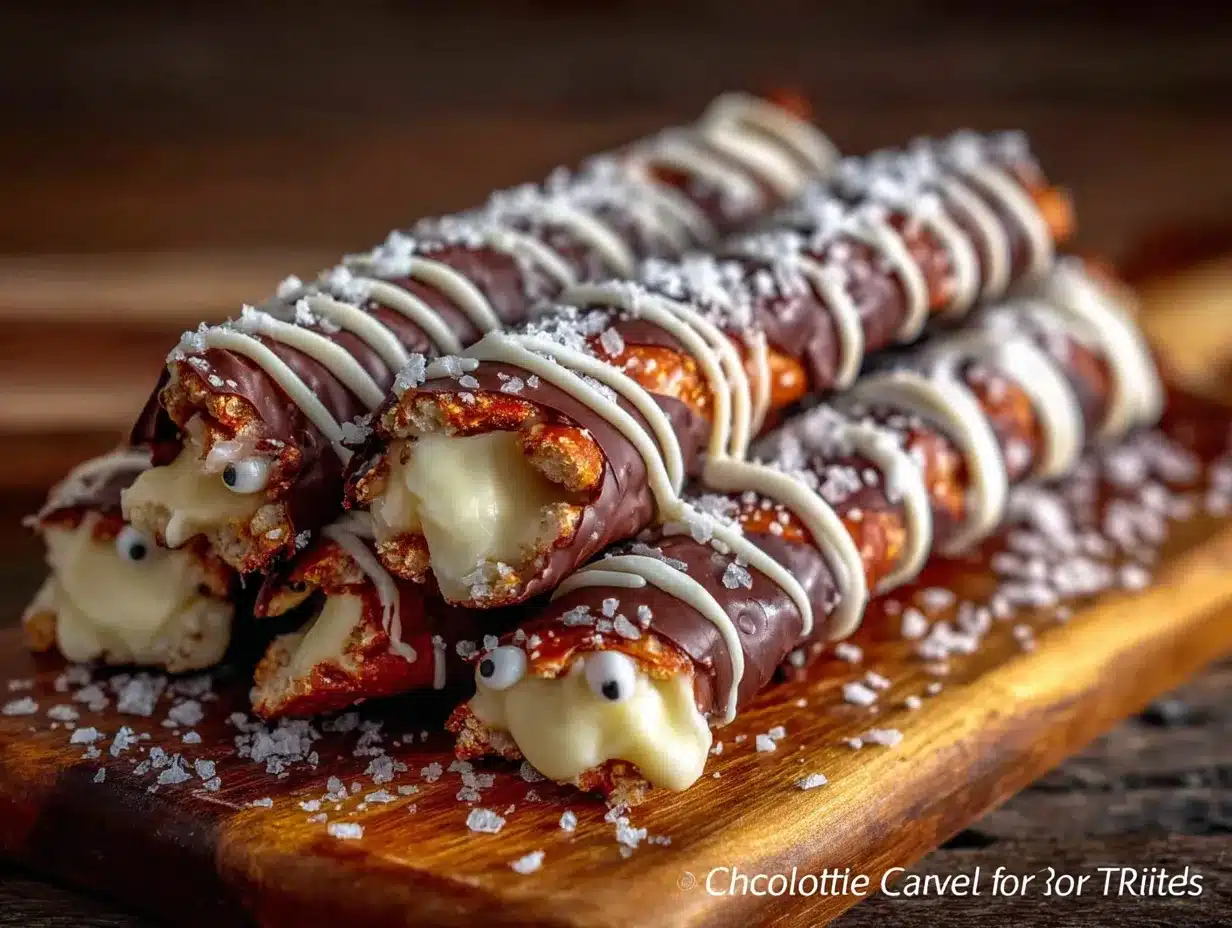
Alright, let’s make some mummies. This is where the magic happens. Take your time with the first one, and by the third, you’ll be in a rhythm.
- Prep your workspace. Line a baking sheet with parchment paper. Make sure you have enough room in your fridge or freezer to fit the sheet later. Clear your counters, wash your hands, and put on some spooky music if that’s your vibe. I’m partial to the “Monster Mash” on repeat, but you do you.
- Melt the white almond bark or white chocolate. Break the almond bark into pieces and place them in a microwave-safe bowl. Microwave in 30-second intervals, stirring well after each interval. It usually takes about 1.5 to 2 minutes total. Don’t rush this. Overheated chocolate gets thick and clumpy, and nobody wants a lumpy mummy. When it’s smooth and fully melted, set it aside. If it seems too thick, stir in half a teaspoon of coconut oil.
- Melt the dark chocolate. In a separate bowl, melt the semi-sweet or dark chocolate chips using the same 30-second interval method. Stir until smooth. This will be for the eyes and any decorative drizzling. Set it aside but keep it warm—if it starts to set, give it another 10 seconds in the microwave.
- Start dipping. Hold a pretzel rod by one end and dip it into the melted white chocolate, leaving about an inch uncovered at the top (that’s where you’ll hold it). Let any excess drip back into the bowl. Don’t worry about perfection here—the mummy look is supposed to be a little messy.
- Wrap like a mummy. Here’s the technique: instead of just dipping, use a spoon to drizzle more white chocolate over the pretzel in a back-and-forth, crisscross pattern. This creates those bandage-like stripes that make it look like a real mummy. Rotate the pretzel as you go so all sides get covered. Leave small gaps of pretzel showing through—that’s the “mummy” effect. A solid white pretzel is just a white pretzel, not a mummy.
- Add the eyes. While the white chocolate is still wet, place two candy eyes near the top of the pretzel (the end without the chocolate). Press them gently so they stick. Use a toothpick for precision if your fingers are getting chocolatey. If you’re using piped eyes instead, let the white chocolate set for 2 minutes first, then pipe two small dots and add a tiny dark chocolate dot in the center.
- Set the mummies. Carefully place each finished mummy on the parchment-lined baking sheet. Leave a little space between them so they don’t stick together. Repeat with the remaining pretzels.
- Chill to set. Place the baking sheet in the refrigerator for about 15-20 minutes, or until the chocolate is completely firm. If you’re in a hurry, 10 minutes in the freezer works too—just don’t forget about them or they’ll get too cold and the chocolate might crack.
- Final drizzle (optional but fun). Once the white chocolate is set, transfer the remaining melted dark chocolate to a small piping bag or zip-top bag with a tiny corner snipped off. Drizzle a little extra dark chocolate over the mummies for a “mummy bandage” effect. Let that set for another 5 minutes.
- Serve or store. Once fully set, your mummies are ready to eat. Arrange them on a platter with the wrapped ends pointing up like a little mummy army.
One thing I want you to know: your first mummy is probably going to look a little rough. That’s normal. By the third one, you’ll find your groove. And honestly, the imperfect ones have more character. Mummies aren’t supposed to look perfect—they’ve been wrapped for centuries.
Cooking Tips & Techniques
After making about a hundred of these little guys over the years, I’ve collected some hard-won wisdom. Let me save you some trouble.
The biggest mistake I made: The first time I tried these, I dipped the entire pretzel in white chocolate like I was making a chocolate-covered strawberry. They looked like white pretzels, not mummies. The key is leaving gaps. You want the pretzel to peek through in places. That’s what makes them look wrapped, not just coated. Less is actually more here.
Temperature matters. If your kitchen is warm or humid, the chocolate might take longer to set, or it might get streaky. Work in a cool room if possible. If you’re sweating, your chocolate is sweating too. I made a batch during a heatwave once and they never fully set—they just stayed tacky and picked up every piece of lint in the kitchen.
Multitasking strategy: Melt your white chocolate first, then your dark chocolate while you’re dipping the first few mummies. That way the dark chocolate is still warm and fluid when you need it for the eyes. If you melt both at the same time, the dark chocolate might start setting before you get to it.
For consistent results: Work in small batches. Don’t try to dip all 12 pretzels at once. Dip 3-4, add their eyes, set them on the tray, then move to the next batch. The white chocolate will stay warmer and more workable this way, and you won’t feel rushed.
The toothpick trick: Keep a bowl of toothpicks nearby. When you place a candy eye and it slides down the chocolate, a toothpick is your best friend for nudging it back into place. Also great for popping any air bubbles that form in the chocolate coating.
If your chocolate gets too thick: Don’t add water. Water is chocolate’s worst enemy—it’ll seize up into a grainy mess. Add a tiny bit of coconut oil or vegetable shortening instead. Stir it in gently and the chocolate will loosen right up.
Variations & Adaptations
One of my favorite things about this recipe is how easy it is to mix up. Here are some ways I’ve adapted it over the years:
Dark Chocolate Mummies: Swap the white chocolate for dark or milk chocolate, and use white candy eyes instead. It gives them a spookier, more dramatic look. My husband actually prefers these because he says white chocolate is “too sweet.” I disagree, but I still make him his dark chocolate mummies.
Gluten-Free Version: Most pretzel rods contain wheat, but there are some great gluten-free pretzel rods on the market now. Snyder’s makes a gluten-free version that works perfectly. The rest of the ingredients are naturally gluten-free, so this is an easy swap.
Spider Mummies: Instead of just eyes, add eight small pretzel sticks (broken in half) sticking out of the sides before the chocolate sets. Now you’ve got mummy-spiders. My nephew requested these for his Halloween party and they were a huge hit.
Colorful Mummies: Add a drop of orange or green food coloring to the white chocolate for a fun twist. Just make sure you use gel food coloring, not liquid, or the chocolate might seize. I made a batch of neon green mummies one year and they looked radioactive in the best way.
Crunchy Mummies: Before the chocolate sets, roll the mummies in crushed graham crackers, Oreo crumbs, or even crushed pretzel pieces. It adds texture and makes them look like they’ve been crawling through a graveyard. Perfect for a more rustic, “undead” look.
Peanut Butter Mummies: Mix a tablespoon of peanut butter into the melted dark chocolate before drizzling. The salty-sweet combination is absolutely killer. Just make sure the peanut butter is smooth and well-stirred.
Serving & Storage Suggestions
These mummies are best served at room temperature, straight from the fridge. The chocolate should be firm but not cold—about 5 minutes after you take them out of the fridge is the sweet spot.
Presentation ideas: Stand them up in a tall glass jar or a coffee mug for a dramatic display. I like to use a black or orange mug and arrange them with the wrapped ends pointing up like a bouquet of mummies. For a party platter, lay them flat on a tray with some Halloween sprinkles scattered around. Mini pumpkin candies or candy corn make great decorations too.
What to serve with them: These are great on their own, but they pair wonderfully with a warm mug of apple cider, hot chocolate, or even a pumpkin spice latte. If you’re serving them at a party, set out a bowl of popcorn or pretzel bites alongside for a salty contrast.
Storage instructions: Store your mummies in an airtight container at room temperature for up to a week. If your kitchen is warm, keep them in the refrigerator—they’ll last up to two weeks there. Layer them between sheets of parchment paper so they don’t stick together.
Freezer tips: You can freeze these for up to three months. Place them in a single layer on a baking sheet and freeze until solid, then transfer to a freezer-safe bag or container. To thaw, let them sit at room temperature for about 15 minutes. Don’t microwave them—the chocolate will get weird.
Flavor development: Honestly, these taste best within the first few days. The pretzel stays crunchiest then. After about a week, the pretzel might start absorbing a little moisture from the chocolate and get slightly softer. Still delicious, but not as snappy. That’s never stopped me from eating them, though.
Nutritional Information & Benefits
Let’s be real—these are a treat, not a health food. But here’s the breakdown if you’re curious:
Per mummy (approximate, based on 12 servings):
- Calories: 180-220
- Fat: 10-12g
- Carbohydrates: 22-26g
- Sugar: 16-20g
- Protein: 2-3g
- Sodium: 200-300mg
Health highlights: Dark chocolate contains antioxidants called flavonoids, which can support heart health when consumed in moderation. Pretzels provide a quick source of carbohydrates for energy. And honestly, the portion control is built in—one mummy is satisfying enough that you probably won’t eat a dozen. Probably.
Dietary considerations: This recipe can be made gluten-free with gluten-free pretzel rods. It’s naturally nut-free (unless you add peanut butter), and you can use dairy-free white chocolate and dark chocolate for a vegan version. Always check your ingredient labels if you’re cooking for someone with allergies—some white chocolate brands contain milk solids.
My personal wellness perspective: I’m a big believer in balance. These are a fun, seasonal treat that brings joy to Halloween celebrations. I don’t stress about the sugar content for a party or a holiday. Life’s too short to skip the mummy pretzels. Just maybe don’t eat five in one sitting. Or do. I’m not the boss of you.
Frequently Asked Questions
Can I use white chocolate chips instead of almond bark?
Yes, but add a teaspoon of coconut oil to help them melt smoothly. White chocolate chips have less cocoa butter and can get thick or seize more easily. Almond bark is more forgiving for beginners.
My candy eyes keep sliding off. What am I doing wrong?
You’re probably waiting too long to add them. Place the eyes immediately after wrapping, while the white chocolate is still wet. If the chocolate has already started to set, dip the back of the candy eye in a tiny bit of melted chocolate first to help it stick.
Can I make these ahead of time for a party?
Absolutely. They can be made up to a week in advance and stored in an airtight container in the refrigerator. I usually make mine 2-3 days before and they’re perfect. Just let them sit at room temperature for 10 minutes before serving.
How do I keep the chocolate from getting streaky or blotchy?
Streaky chocolate usually means it was overheated or cooled too quickly. Melt your chocolate slowly at 50% power in the microwave, stirring frequently. If it’s already streaky, a quick re-melt and stir can sometimes fix it. Also, make sure your pretzels are at room temperature—cold pretzels can cause the chocolate to seize.
My pretzel rods keep snapping when I dip them. Any tips?
This happens when the chocolate is too thick or too hot. Thin your chocolate with a tiny bit of coconut oil, and make sure it’s not scorching hot. Also, dip gently—don’t jam the pretzel into the chocolate like you’re mad at it. A gentle twist-and-dip motion works best.
Conclusion
These Easy Chocolate Mummy Wrapped Pretzel Rods have become a non-negotiable part of my Halloween season. They’re the recipe I bring to every party, the one I make with my niece when she comes over to carve pumpkins, and the one I keep stashed in the fridge for those late-night October cravings. They’re proof that you don’t need fancy supplies or hours of time to make something that feels special.
I hope you give these a try, and I hope you make them your own. Add sprinkles, change up the chocolate, get weird with it. That’s the whole point of holiday baking—having fun and sharing something tasty with the people you love.
If you make these mummies, I’d love to hear about it. Drop a comment below and tell me how they turned out, or tag me in your photos on social media. Did you try a fun variation? Did your kids get completely covered in chocolate? I want to know. Happy Halloween, and happy snacking!
Pin This Recipe!
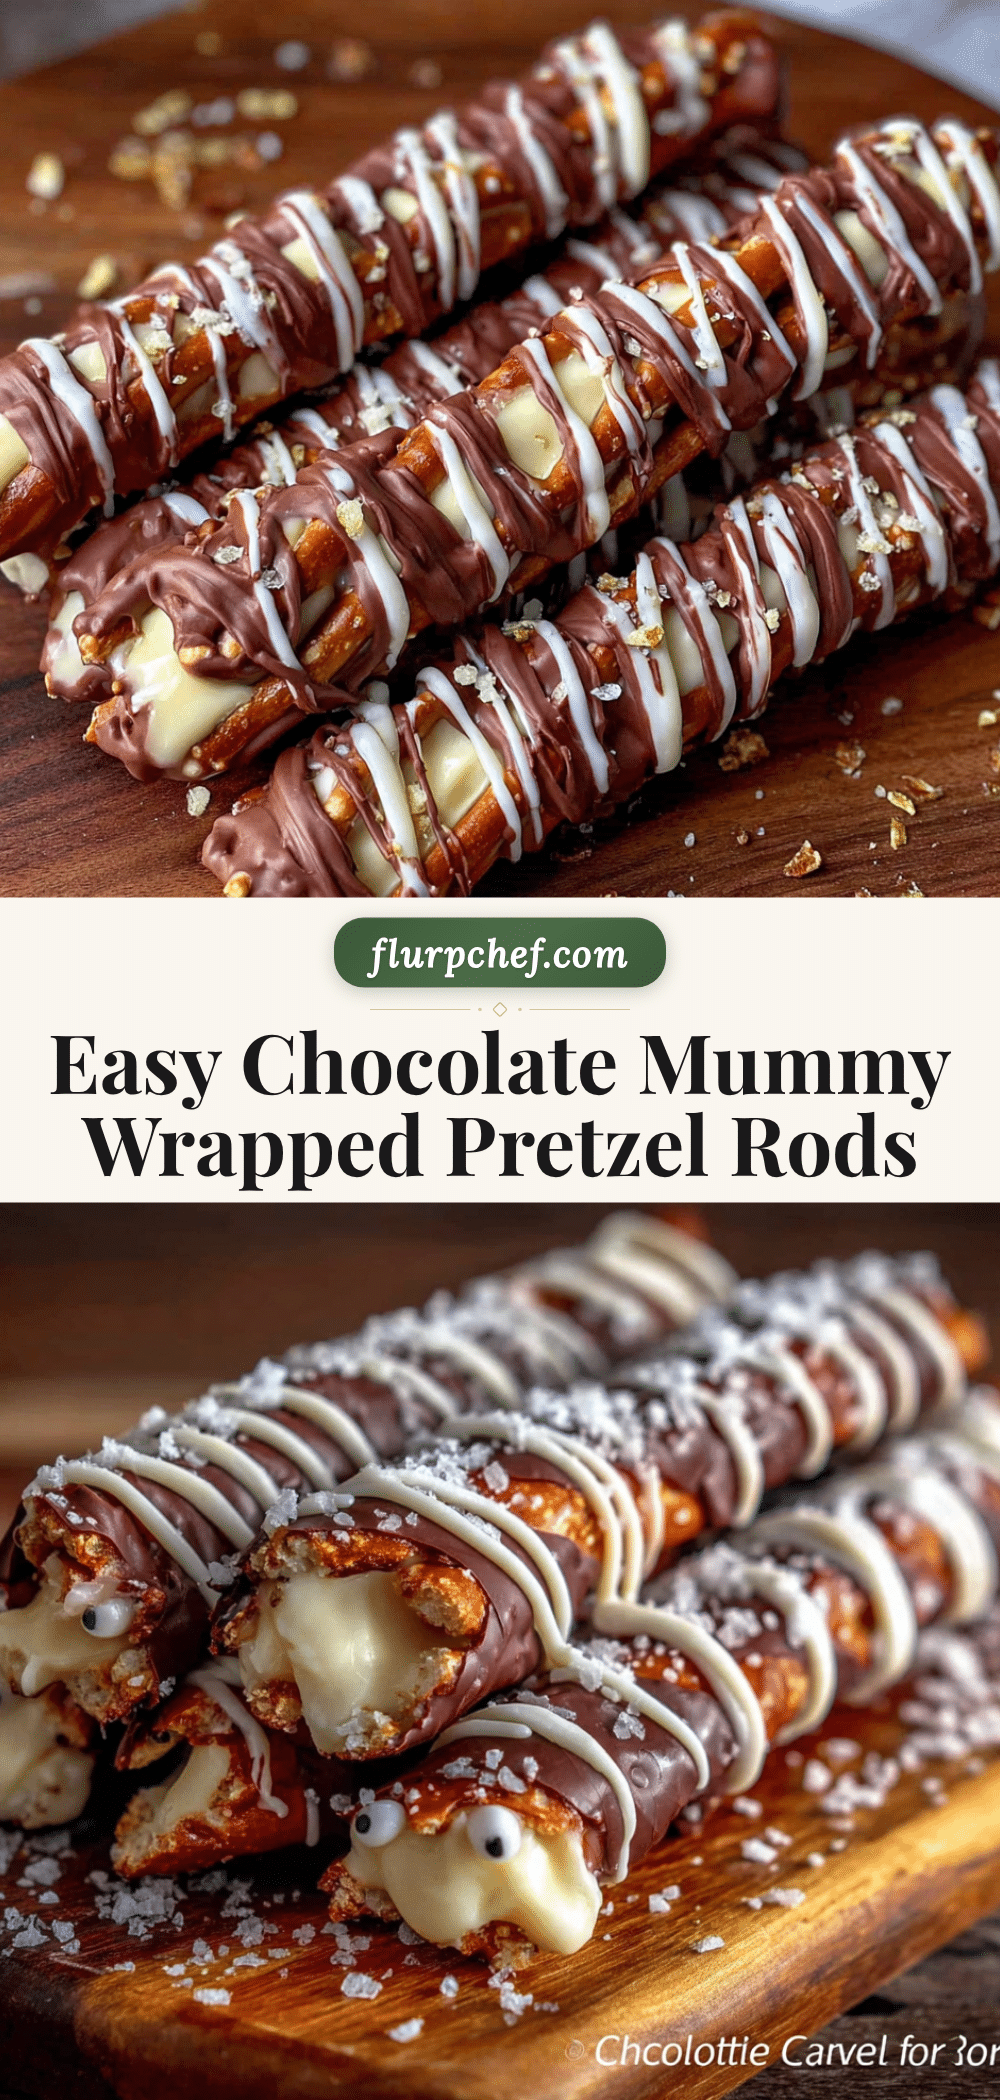
Easy Chocolate Mummy Wrapped Pretzel Rods
These Easy Chocolate Mummy Wrapped Pretzel Rods are a quick, fun, and delicious Halloween treat made with just a few simple ingredients. Salty pretzel rods are wrapped in white chocolate and decorated with candy eyes for a spooky snack that’s perfect for parties and classroom celebrations.
- Prep Time: 15 minutes
- Cook Time: 0 minutes
- Total Time: 35 minutes (including chilling time)
- Yield: 12 servings 1x
- Category: Dessert
- Cuisine: American
Ingredients
- 1 standard bag (10–12 ounces) pretzel rods
- 12 ounces white almond bark or white chocolate melting wafers
- 1 cup semi-sweet or dark chocolate chips
- 1 small package (24-30) candy eyes
- Orange or black sprinkles (optional)
- Crushed graham crackers or Oreo crumbs (optional)
- 1 teaspoon coconut oil (optional, for thinning chocolate)
Instructions
- Prep your workspace. Line a baking sheet with parchment paper. Make sure you have enough room in your fridge or freezer to fit the sheet later.
- Melt the white almond bark or white chocolate. Break the almond bark into pieces and place them in a microwave-safe bowl. Microwave in 30-second intervals, stirring well after each interval, until smooth (about 1.5 to 2 minutes total). If too thick, stir in half a teaspoon of coconut oil.
- Melt the dark chocolate. In a separate bowl, melt the semi-sweet or dark chocolate chips using the same 30-second interval method. Stir until smooth. Set aside but keep warm.
- Start dipping. Hold a pretzel rod by one end and dip it into the melted white chocolate, leaving about an inch uncovered at the top. Let any excess drip back into the bowl.
- Wrap like a mummy. Use a spoon to drizzle more white chocolate over the pretzel in a back-and-forth, crisscross pattern to create bandage-like stripes. Rotate the pretzel as you go so all sides get covered. Leave small gaps of pretzel showing through.
- Add the eyes. While the white chocolate is still wet, place two candy eyes near the top of the pretzel (the end without the chocolate). Press them gently so they stick. Use a toothpick for precision if needed.
- Set the mummies. Carefully place each finished mummy on the parchment-lined baking sheet. Leave a little space between them so they don’t stick together. Repeat with the remaining pretzels.
- Chill to set. Place the baking sheet in the refrigerator for about 15-20 minutes, or until the chocolate is completely firm. For a quicker set, use the freezer for 10 minutes.
- Final drizzle (optional but fun). Once the white chocolate is set, transfer the remaining melted dark chocolate to a small piping bag or zip-top bag with a tiny corner snipped off. Drizzle a little extra dark chocolate over the mummies for a ‘mummy bandage’ effect. Let that set for another 5 minutes.
- Serve or store. Once fully set, your mummies are ready to eat. Arrange them on a platter with the wrapped ends pointing up.
Notes
Your first mummy might look rough, but that’s normal. The imperfect ones have more character. For best results, work in a cool room and melt chocolate slowly to avoid seizing. If using white chocolate chips instead of almond bark, add a teaspoon of coconut oil to help them melt smoothly. Store in an airtight container at room temperature for up to a week, or in the refrigerator for up to two weeks.
Nutrition
- Serving Size: 1 mummy
- Calories: 200
- Sugar: 18
- Sodium: 250
- Fat: 11
- Saturated Fat: 6
- Carbohydrates: 24
- Fiber: 1
- Protein: 2.5
Keywords: Halloween treats, mummy pretzels, chocolate pretzel rods, easy Halloween recipe, spooky snacks, no-bake dessert


