Late October, the kitchen lit only by the stove hood and the streetlamp outside the window, and all I wanted was something small and sweet that felt like a secret. Not a cake that would sit on the counter for days, not a batch of cookies begging to be eaten before they went stale. Just a little ghost. A tiny, crisp, airy thing that could float on a baking sheet and disappear in two bites. That is how these Easy Ghost Meringue Cookies with Chocolate Chip Eyes came to be—not out of a need to impress anyone at a party, but out of a quiet Tuesday night and a craving for something delicate.
I had egg whites left over from making a batch of creamy butternut squash apple bisque (a story for another day) and honestly, I could not bring myself to toss them. So I stood there, whisk in hand, watching the whites turn into clouds. The sugar went in slowly, the mixer humming that familiar hum, and I thought—these could be ghosts. Just a little piping, two chocolate chips for eyes, and suddenly the bowl was full of tiny spirits waiting to be baked.
There is something about meringue that demands patience. You cannot rush it. You have to let the sugar dissolve completely, let the peaks form slowly, let the oven do its long, low work. And that is exactly what I needed that night—something that would not let me hurry. These ghost cookies are not flashy. They are not covered in sprinkles or dripping with glaze. They are quiet and crisp and just a little bit spooky. And that is why they stuck with me.
Why You’ll Love This Recipe
I have tested this recipe more times than I care to admit. The first batch came out flat and sad. The second batch had chocolate chip eyes that sank right through the meringue. By the third try, I had figured out the timing, the piping technique, and the exact way to press in those tiny eyes without ruining the shape. So trust me when I say—this version works.
- Quick & Easy : Comes together in about 20 minutes of active time, then the oven does the rest. Perfect for last-minute Halloween treats or a weekend baking project with kids.
- Simple Ingredients : You only need egg whites, sugar, cream of tartar, vanilla, and mini chocolate chips. No fancy grocery trips required.
- Perfect for Halloween : These little ghosts are adorable on a dessert table, tucked into lunchboxes, or served alongside a graveyard brownie trifle for a spooky spread.
- Crowd-Pleaser : Kids love the cute faces, and adults appreciate that they are light and not overly sweet.
- Unbelievably Delicious : The outside is crisp and shatteringly light, while the inside stays just slightly chewy. The chocolate chips add little pockets of richness that balance the sweetness perfectly.
What makes this recipe different from all the other ghost meringue recipes out there? It is the technique. I pipe the ghosts tall and round, then gently press the chocolate chips in at just the right angle so they look like real eyes staring back at you. No sinking, no melting, no flat ghosts. Just perfect little spirits every time.
This is the kind of recipe that makes you smile when you open the container. It is not trying to be fancy. It is just trying to be fun. And honestly, that is exactly what Halloween baking should be.
What Ingredients You Will Need
This recipe uses simple, pantry-friendly ingredients to create something that looks like it took way more effort than it actually did. The magic is all in the technique, not the grocery list.
- Egg whites : 3 large egg whites, at room temperature. Room temperature whites whip up higher and hold more air. Separate your eggs when they are cold, then let the whites sit on the counter for about 30 minutes before starting.
- Granulated sugar : ¾ cup (150 grams). Use fine granulated sugar, not superfine or powdered. The sugar needs to dissolve completely into the egg whites, and regular granulated does this best.
- Cream of tartar : ¼ teaspoon. This stabilizes the meringue and helps it hold its shape. If you do not have cream of tartar, you can substitute ½ teaspoon of lemon juice or white vinegar.
- Vanilla extract : ½ teaspoon. Pure vanilla adds warmth and depth. I prefer Nielsen-Massey for its clean flavor, but any pure vanilla works. Avoid imitation vanilla here—it can leave a weird aftertaste in meringue.
- Mini chocolate chips : ¼ cup (about 45 grams). Use mini chips, not regular-sized. Regular chips are too heavy and will sink right through the meringue. I like Ghirardelli mini chips for their consistent size and rich taste.
- Salt : A tiny pinch. Just enough to balance the sweetness. Do not skip it.
That is it. Six ingredients. No food coloring, no specialty flours, no complicated extracts. The simplicity is part of the charm.
One note on egg whites: if you are worried about wasting yolks, save them for a batch of brown butter banana bread or add them to your morning scrambled eggs. Nothing goes to waste here.
Equipment Needed
- Stand mixer or electric hand mixer : A stand mixer makes this easier, but a hand mixer works just fine. You will be beating the egg whites for about 8–10 minutes total, so whatever you use needs to be reliable.
- Large mixing bowl : Make sure it is completely clean and dry. Any grease or residue will prevent the egg whites from whipping up properly. Glass or metal bowls work best—plastic can hold onto oils.
- Piping bag and round tip : A large piping bag fitted with a round tip (about ½-inch opening) gives you control over the ghost shapes. If you do not have a piping bag, a sturdy zip-top bag with the corner snipped off works perfectly.
- Baking sheets : Two large baking sheets lined with parchment paper. Do not use wax paper or foil—the meringues will stick.
- Kitchen scale : Optional but helpful for measuring sugar and chocolate chips accurately. Meringue is finicky, and precise measurements matter.
- Cooling rack : Meringues need to cool completely on the baking sheet before moving, but a cooling rack is useful for the final storage step.
I have made these with both a fancy stand mixer and a $15 hand mixer from the grocery store. Both worked. The key is patience, not equipment.
Preparation Method
Step 1: Preheat and prepare
Preheat your oven to 200°F (93°C). Line two large baking sheets with parchment paper. Set aside.
Step 2: Whip the egg whites
Place the 3 room-temperature egg whites and ¼ teaspoon cream of tartar in the bowl of your stand mixer (or a large mixing bowl if using a hand mixer). Beat on medium speed until frothy and opaque, about 2 minutes. The bubbles should be small and uniform, not large and soapy.
Step 3: Add the sugar slowly
With the mixer running on medium speed, add the ¾ cup granulated sugar one tablespoon at a time. I know it is tempting to dump it all in at once—do not do it. Adding the sugar slowly gives it time to dissolve. This takes about 3–4 minutes. Once all the sugar is added, increase the speed to high and beat until stiff, glossy peaks form. The meringue should look like marshmallow fluff and hold its shape when you lift the whisk. This usually takes another 4–5 minutes. You should not feel any graininess when you rub a tiny bit between your fingers. If it feels gritty, keep beating.
Step 4: Add vanilla and salt
Add ½ teaspoon vanilla extract and a tiny pinch of salt. Beat on high for another 30 seconds until combined. Do not overmix at this stage—you want to keep all that air you just whipped in.
Step 5: Pipe the ghosts
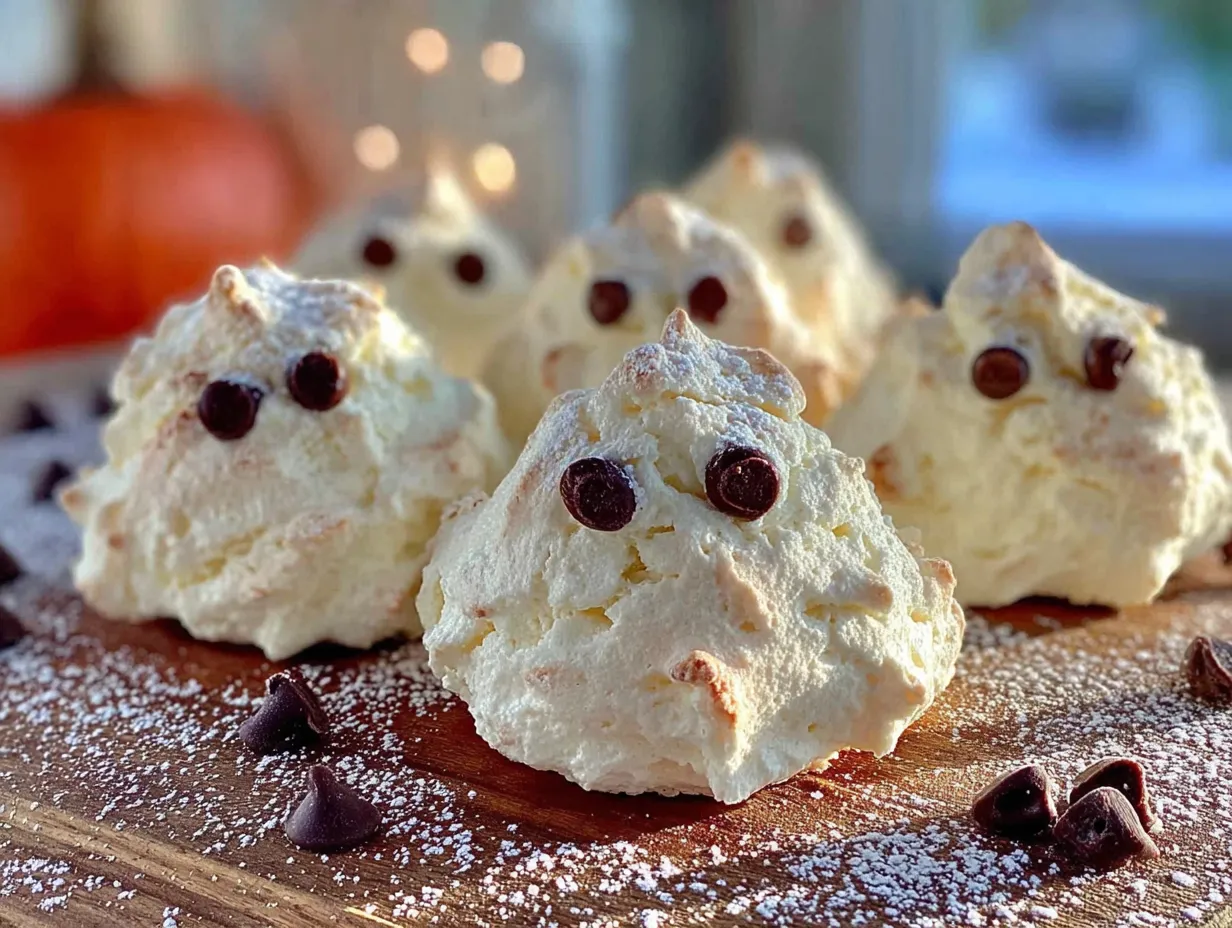
Transfer the meringue to your piping bag fitted with a round tip. Hold the bag straight up and down, about ½ inch above the parchment paper. Pipe a tall, round blob about 2 inches wide at the base, pulling straight up to create a peak at the top. This is your ghost body. Leave about 2 inches between each ghost—they do not spread much, but you want air to circulate. You should get about 20–24 ghosts from this batch.
Step 6: Add the eyes
This is the fun part. Gently press two mini chocolate chips into each ghost to create eyes. Press them in at a slight angle so they look like they are looking around—it gives them personality. Do not press too deep or the chocolate chips will sink as the meringue bakes. Just enough so they stay put. If a chocolate chip falls off, just press it back in gently.
Step 7: Bake low and slow
Place the baking sheets in the preheated oven and bake for 1 hour and 15 minutes. Do not open the oven door during baking. After 1 hour and 15 minutes, turn the oven off but leave the meringues inside for another 30 minutes. This gradual cooling prevents cracking.
Step 8: Cool completely
Remove the baking sheets from the oven and let the meringues cool completely on the sheets. Do not try to move them while they are warm—they are fragile and will break. Once fully cool, they should lift easily off the parchment paper.
Step 9: Store or serve
Serve immediately or store in an airtight container at room temperature. Do not refrigerate—humidity will ruin the texture.
Cooking Tips & Techniques
The first time I made these, I was so excited to see the ghosts that I opened the oven door after 45 minutes to check on them. Bad idea. The cold air hit the meringue, and half of them cracked right down the middle. They still tasted fine, but they looked like ghosts that had been through something traumatic. So learn from my mistake—resist the urge to peek.
Humidity is the enemy of meringue. Do not make these on a rainy day. The sugar in the meringue absorbs moisture from the air, and they will end up sticky and soft instead of crisp and light. Pick a dry day and your ghosts will thank you.
If your chocolate chips keep sinking, try chilling them in the freezer for 10 minutes before pressing them into the meringue. Cold chips hold their shape better and are less likely to sink during baking.
For perfectly shaped ghosts, hold the piping bag completely vertical. If you angle it, the ghosts will lean to one side. I have a whole batch of leaning ghosts that look like they are about to fall over—they were cute in a derpy way, but not exactly what I was going for.
Multitasking tip: while the meringues are baking, you can prep other Halloween treats like crispy mummy crescent roll hotdogs for a full spooky spread. The oven is busy with the meringues for over an hour, so plan your timing accordingly.
Variations & Adaptations
Spooky color twist : Add a tiny drop of black or purple gel food coloring to the meringue just before piping. Swirl it in gently—do not mix completely. You will get ghostly marbled effects that look amazing.
Flavor variations : Replace the vanilla extract with peppermint extract for a cool, minty ghost. Or use almond extract for a subtle nutty flavor. Just be careful—extracts are potent, so start with ¼ teaspoon and taste the meringue before adding more.
Gluten-free and dairy-free : These are naturally gluten-free and dairy-free as written. Just double-check your chocolate chips for any dairy additives. Most mini chips are dairy-free, but some brands add milk solids.
Different eye options : If you do not have mini chocolate chips, use black sprinkles, tiny candy pearls, or even a dot of black gel icing. I have used black sesame seeds in a pinch—they look like tiny, creepy eyes and taste surprisingly good.
Big ghost version : Pipe larger ghosts (about 4 inches tall) and bake for an additional 15–20 minutes. These make great centerpieces for a Halloween dessert table. Just be careful moving them—big meringues are more fragile.
I once tried making these with a swirl of cocoa powder mixed into half the meringue for a ghostly gray effect. It looked like little storm clouds. Not exactly what I wanted, but they tasted great. Sometimes experiments go sideways, and that is okay.
Serving & Storage Suggestions
Serve these ghost cookies at room temperature. They are best within 24 hours of baking when the outside is still perfectly crisp and the inside has that slight chewiness. Arrange them on a platter with a few fake spiderwebs or around a bowl of graveyard brownie trifle for a full Halloween dessert spread.
They pair beautifully with a hot cup of coffee or a glass of cold milk. For a grown-up treat, serve them alongside a spiced pumpkin apple cider mocktail—the sweetness of the meringue balances the tart cider perfectly.
Storage is simple: place the cooled meringues in an airtight container at room temperature. Layer them between sheets of parchment paper so they do not bump into each other and break. They will stay crisp for up to 5 days, though honestly, they rarely last that long in my house.
Do not store them in the refrigerator. The humidity will turn them sticky and soft. If you live in a humid climate, add a silica gel packet (the kind that comes in shoe boxes) to the container to absorb excess moisture.
These meringues do not freeze well—the thawing process introduces moisture and ruins the texture. Make them fresh when you need them.
One thing I love about these cookies is that the flavor actually improves slightly after a day. The vanilla mellows out, and the chocolate chips set firmly. They are good immediately, but they are even better the next morning with your coffee.
Nutritional Information & Benefits
Per serving (1 ghost cookie): approximately 35 calories, 0g fat, 8g carbohydrates, 8g sugar, 0g fiber, 1g protein. These numbers are estimates and will vary based on exact ingredients and portion sizes.
The main ingredient here is egg whites, which are pure protein and contain no fat or cholesterol. Egg whites are also a good source of selenium and riboflavin. So while these are definitely a treat, they are a lighter option compared to butter-heavy cookies or frosted cupcakes.
These ghost cookies are naturally gluten-free, dairy-free (check your chocolate chips), and nut-free. They are also low in fat and contain no artificial colors or preservatives if you stick with pure vanilla and simple chocolate chips.
Potential allergens: eggs and (depending on your chocolate chips) soy or dairy. Always check labels if serving to someone with allergies.
From a wellness perspective, I love that these cookies let you enjoy something sweet and festive without the heaviness of traditional baked goods. They satisfy the craving for something special without leaving you feeling sluggish. Perfect for when you want a little treat but not a whole slice of cake.
Conclusion
These Easy Ghost Meringue Cookies with Chocolate Chip Eyes are proof that the simplest recipes often bring the most joy. Six ingredients, a little patience, and suddenly you have a whole flock of tiny ghosts staring back at you from the baking sheet. They are fun to make, adorable to look at, and genuinely delicious to eat.
I hope you make these your own. Add a drop of food coloring if you want. Pipe them tall or short. Give them two eyes or three. There is no wrong way to make a ghost. That is the beauty of a simple recipe—it leaves room for your personality to shine through.
If you try these, I would love to hear how they turned out. Drop a comment below or tag me in your photos. Did your ghosts come out looking friendly or slightly terrifying? Both are acceptable. And if you have a favorite Halloween baking memory, share that too. This is the season for spooky stories and sweet treats, and I want to hear yours.
Happy baking, and may your ghosts be crisp, your chocolate chips stay put, and your kitchen smell like vanilla and sugar.
Frequently Asked Questions
Can I make these ghost meringues ahead of time?
Yes! You can bake them up to 5 days in advance. Store them in an airtight container at room temperature. Just keep them away from humidity.
Why did my meringue turn out sticky?
Sticky meringue usually means humidity got to them. Either the weather was too humid when you baked them, or they were stored in a moist environment. Next time, pick a dry day and make sure your container is completely sealed.
Can I use liquid egg whites from a carton?
I do not recommend it. Carton egg whites are pasteurized differently and often contain stabilizers that prevent them from whipping up properly. Fresh egg whites give you the best volume and texture.
My chocolate chips keep sinking to the bottom. What am I doing wrong?
Two things to check: first, make sure you are using mini chocolate chips, not regular-sized. Regular chips are too heavy. Second, try freezing the chips for 10 minutes before pressing them into the meringue. Cold chips hold their position better.
Can I double this recipe?
Absolutely. Just make sure your mixer bowl is large enough to handle 6 egg whites. You may need to bake in batches or use multiple oven racks. Rotate the baking sheets halfway through if using multiple racks to ensure even baking.
Pin This Recipe!
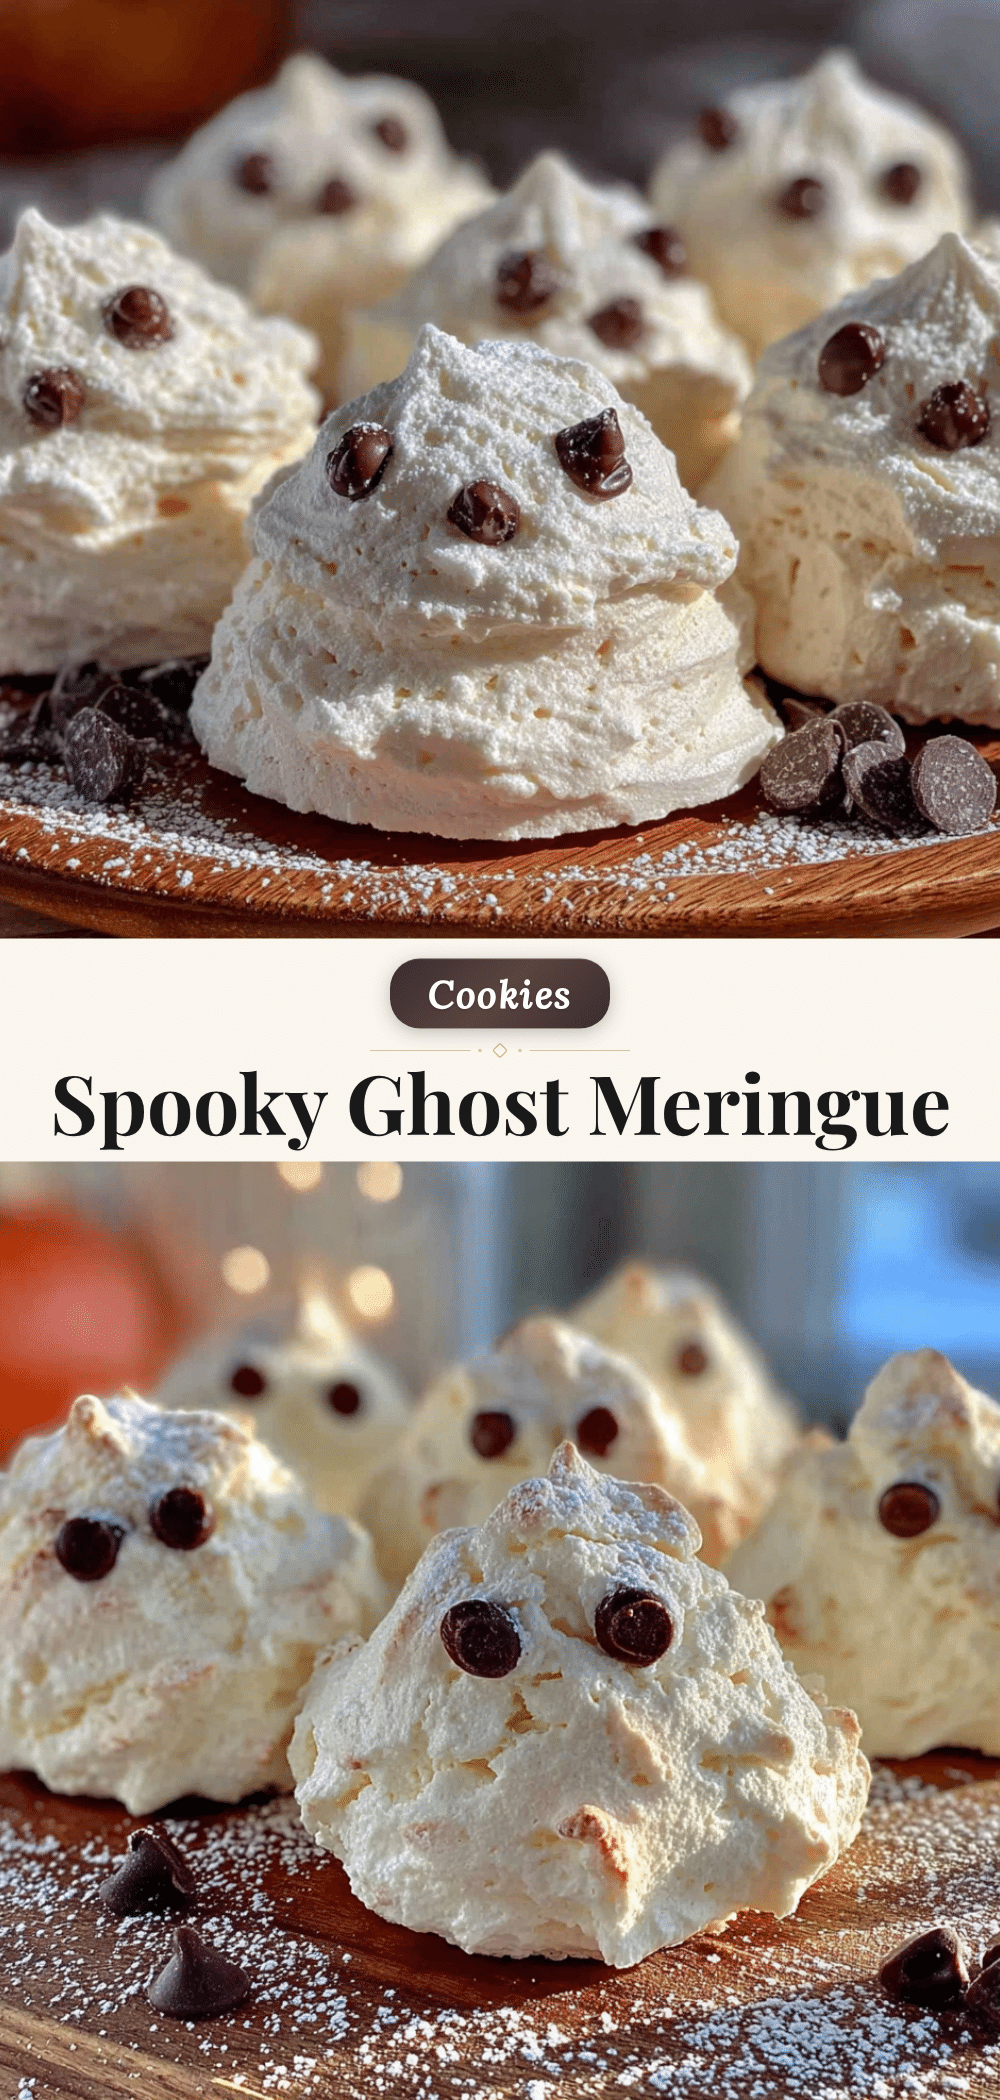
Easy Ghost Meringue Cookies with Chocolate Chip Eyes
These Easy Ghost Meringue Cookies with Chocolate Chip Eyes are light, crisp, and adorable—perfect for Halloween. Made with just six simple ingredients, they come together quickly and are a fun, spooky treat for kids and adults alike.
- Prep Time: 20 minutes
- Cook Time: 1 hour 15 minutes
- Total Time: 2 hours 5 minutes
- Yield: 20-24 cookies 1x
- Category: Dessert
- Cuisine: American
Ingredients
- 3 large egg whites, at room temperature
- ¾ cup (150 grams) granulated sugar
- ¼ teaspoon cream of tartar
- ½ teaspoon vanilla extract
- ¼ cup (45 grams) mini chocolate chips
- A tiny pinch of salt
Instructions
- Preheat your oven to 200°F (93°C). Line two large baking sheets with parchment paper.
- Place the room-temperature egg whites and cream of tartar in the bowl of a stand mixer (or a large mixing bowl if using a hand mixer). Beat on medium speed until frothy and opaque, about 2 minutes.
- With the mixer running on medium speed, add the granulated sugar one tablespoon at a time, taking about 3–4 minutes. Once all sugar is added, increase speed to high and beat until stiff, glossy peaks form, about 4–5 minutes. The meringue should feel smooth when rubbed between your fingers.
- Add the vanilla extract and a tiny pinch of salt. Beat on high for another 30 seconds until combined.
- Transfer the meringue to a piping bag fitted with a round tip (about ½-inch opening). Pipe tall, round blobs about 2 inches wide at the base, pulling straight up to create a peak. Leave about 2 inches between each ghost. You should get about 20–24 ghosts.
- Gently press two mini chocolate chips into each ghost to create eyes, pressing at a slight angle. Do not press too deep.
- Bake for 1 hour and 15 minutes. Do not open the oven door during baking. After 1 hour and 15 minutes, turn the oven off and leave the meringues inside for another 30 minutes.
- Remove the baking sheets from the oven and let the meringues cool completely on the sheets. Once fully cool, they should lift easily off the parchment paper.
- Serve immediately or store in an airtight container at room temperature. Do not refrigerate.
Notes
Do not open the oven door during baking to prevent cracking. Avoid making these on a humid day. For perfectly shaped ghosts, hold the piping bag completely vertical. If chocolate chips sink, chill them in the freezer for 10 minutes before pressing into the meringue. Store in an airtight container at room temperature for up to 5 days. Do not refrigerate or freeze.
Nutrition
- Serving Size: 1 ghost cookie
- Calories: 35
- Sugar: 8
- Sodium: 10
- Carbohydrates: 8
- Protein: 1
Keywords: ghost meringue cookies, Halloween cookies, meringue cookies, chocolate chip eyes, easy Halloween dessert, gluten-free cookies, dairy-free cookies


