There used to be a tiny taqueria on the corner of 7th and Elm that made a taco skillet that defied logic. I mean, it was just ground meat, peppers, and rice in a cast iron pan, but somehow it tasted like a warm hug after a terrible day. When they closed two summers ago—turned into a vape shop, of all things—I actually mourned for a week. Honestly, I may have driven by twice hoping it was a bad dream.
After twelve tries—twelve, let me tell you, including one disastrous batch with way too much cumin that made my kitchen smell like a sweaty gym bag—I finally got it. This ground turkey taco skillet meal prep is the exact replica of that magic, and I’m not being dramatic when I say I almost cried eating it the first time it worked. The key was browning the turkey until it got those crispy little edges, something I overlooked in my first few attempts because I was rushing.
Maybe you’ve been there, chasing a flavor from a place that no longer exists. It’s a weird kind of grief, isn’t it? But here’s the thing—this recipe isn’t just a copy. It’s better, because you can make it in twenty minutes on a Tuesday when you’re exhausted and the last thing you want to do is think about dinner. The best part? The flavors actually get better overnight, which makes it the perfect meal prep hero. I keep making it because it reminds me that some good things don’t have to disappear forever.
Why You’ll Love This Recipe
Let me be straight with you—I’ve tested this ground turkey taco skillet meal prep at least eight times over the past year, and it’s the only meal prep recipe I haven’t gotten bored of. That’s saying something, because I get bored of leftovers after day two usually. Here’s why this one sticks:
- Quick & Easy: From fridge to table in 20 minutes flat. No marinating, no complicated techniques, no crying over a hot stove after a long day.
- Simple Ingredients: Ground turkey, canned tomatoes, beans, spices, and rice. You probably have most of this in your pantry right now, and if not, it’s a one-aisle trip at the store.
- Perfect for Meal Prep: This recipe was born for Sunday afternoon prep sessions. Make a big batch, portion it out, and you’ve got lunch or dinner sorted for four days. It reheats like a dream—no sad, soggy microwave meals here.
- Crowd-Pleaser: My picky-eating nephew asked for seconds, and my health-conscious sister asked for the recipe. It’s that rare dish that pleases everyone at the table, from kids to keto-obsessed cousins.
- Unbelievably Delicious: The texture is what gets me—crispy-edged turkey, tender rice, and beans that soak up all the seasoned tomato goodness. It’s comfort food that doesn’t weigh you down.
What makes this different from every other taco skillet recipe out there? It’s the technique, honestly. Most recipes tell you to just dump everything in and stir, but that gives you sad, gray meat. I take an extra two minutes to really brown the turkey in batches, which creates those deep, caramelized bits that make the whole dish sing. Plus, I add the spices at the right moment—after the meat browns, before the liquids go in—which toasts them and wakes up their flavor in a way that dumping them in with the tomatoes just can’t match.
This isn’t just another weeknight dinner. It’s the kind of meal that makes you close your eyes after the first bite, even if you’re eating it standing over the kitchen counter because you’re too tired to sit down. It’s comfort food reimagined—healthier with the turkey, faster with the one-pan method, but with the same soul-soothing satisfaction as that long-gone taqueria version. Perfect for impressing your future self on a busy Wednesday, or turning a simple Tuesday into something worth looking forward to.
What Ingredients You Will Need
This ground turkey taco skillet meal prep uses simple, wholesome ingredients to deliver big flavor without the fuss. Most of these are pantry staples, and I’ve included notes on substitutions so you can work with what you have.
For the Skillet Base
- 1 tablespoon olive oil (avocado oil works great too—use what you’ve got)
- 1 pound ground turkey (93% lean is my sweet spot—not too dry, not too greasy. I prefer Jennie-O or Butterball for consistent texture)
- 1 medium yellow onion, diced (about 1 cup—white onion works too, but yellow gives a sweeter base)
- 3 cloves garlic, minced (jarred minced garlic works in a pinch, but fresh is better for that punchy flavor)
- 1 medium bell pepper, diced (any color works—red adds sweetness, green adds a sharper bite)
For the Seasoning
- 1 tablespoon chili powder (I use McCormick, but any brand works—just make sure it’s not expired, because old chili powder is sad chili powder)
- 1 teaspoon ground cumin (this is non-negotiable for that authentic taco flavor)
- 1 teaspoon smoked paprika (regular paprika works, but smoked adds that subtle campfire depth)
- ½ teaspoon garlic powder (not the same as fresh garlic—trust me on this one)
- ½ teaspoon onion powder (adds a background sweetness that rounds everything out)
- ½ teaspoon dried oregano (Mexican oregano if you have it, but regular works fine)
- ½ teaspoon salt (plus more to taste—I start here and adjust at the end)
- ¼ teaspoon black pepper (freshly ground if you can, but pre-ground is fine)
- Pinch of cayenne pepper (optional—for heat lovers. I skip it when meal prepping for the week because tastes vary)
For the Skillet Assembly
- 1 can (14.5 ounces) diced tomatoes with green chiles (Rotel is my go-to—the fire-roasted version adds extra depth. If you can’t find it, use regular diced tomatoes plus a small can of green chiles)
- 1 can (15 ounces) black beans, drained and rinsed (pinto beans or kidney beans work too—just drain and rinse well to reduce sodium)
- 1 cup cooked white or brown rice (leftover rice from yesterday’s takeout is perfect. Cauliflower rice works great for low-carb folks)
- ½ cup chicken or vegetable broth (low-sodium preferred—you can control the salt better. Water works in a pinch, but broth adds more flavor)
For Serving (Optional but Recommended)
- Fresh cilantro, chopped (I’m a cilantro lover, but if you’re in the “soap gene” camp, skip it or use fresh parsley)
- Lime wedges (a squeeze of lime right before eating brightens everything up)
- Shredded cheese (cheddar, Monterey Jack, or a Mexican blend—I use about ¼ cup per serving)
- Sour cream or Greek yogurt (Greek yogurt is my go-to for extra protein and less fat)
- Avocado, diced (adds creaminess and healthy fats—I add this fresh, not during meal prep)
Ingredient Selection Tips: Look for ground turkey that’s not too lean—93% is ideal because it has enough fat to stay moist during browning. If you buy 99% lean, you’ll need to add a splash more oil to prevent sticking. For the beans, I prefer canned for convenience, but if you’re cooking dried beans, use about 1½ cups cooked. And here’s a pro tip: if you’re using leftover rice, make sure it’s cold from the fridge—it holds its shape better and doesn’t turn mushy in the skillet.
Equipment Needed
You don’t need a fancy kitchen for this ground turkey taco skillet meal prep. Here’s what you’ll need:
- Large skillet or cast iron pan (12-inch is ideal—you need room to spread the turkey for proper browning. Non-stick works, but cast iron gives you those glorious crispy bits. I use my Lodge 12-inch and it’s perfect)
- Wooden spoon or spatula (for breaking up the turkey. A metal spatula works better for scraping up browned bits, but wood is gentler on non-stick pans)
- Cutting board and chef’s knife (for dicing the onion and bell pepper. A sharp knife makes this step take two minutes instead of ten)
- Measuring spoons (for the spices—eyeballing works if you’re experienced, but measure the first few times to get the balance right)
- Can opener (obvious, but you’d be surprised how many times I’ve forgotten to check if mine works)
- Colander (for draining and rinsing the black beans)
- Meal prep containers (4 airtight containers, about 2-cup capacity each. Glass containers are best for reheating, but BPA-free plastic works too)
Budget-Friendly Options: Don’t have a cast iron pan? A non-stick skillet works just fine—just be gentle when scraping up the browned bits. No chef’s knife? A sharp paring knife will do the job, it’ll just take a little longer. And if you don’t have meal prep containers, use mason jars or any leftover takeout containers you’ve washed and saved. I’ve been using the same set of Pyrex containers for three years now, and they’re still going strong.
Maintenance Tip: If you’re using cast iron, don’t soak it after cooking—just wipe it clean with a paper towel, rinse with hot water, and dry immediately. A quick rub with a thin layer of oil keeps it seasoned and ready for next time.
Preparation Method
Let’s get cooking. This ground turkey taco skillet meal prep comes together in about 20 minutes, and I’ve broken it down so you can follow along without stress. Set a timer if you need to—I do, because I always get distracted by my phone.
- Prep your ingredients first (5 minutes): Dice the onion and bell pepper, mince the garlic, drain and rinse the black beans, and measure out your spices into a small bowl. Having everything ready before you start cooking makes the process smooth and prevents that panicked scramble when something starts burning. Trust me, I learned this the hard way after burning garlic three times in one week.
- Heat the oil and start the turkey (2 minutes): Place your large skillet over medium-high heat and add the olive oil. Let it heat for about 30 seconds until it shimmers—you want it hot but not smoking. Add the ground turkey in an even layer. Here’s the crucial part: don’t touch it for 3-4 minutes. Let it sit and develop a deep brown crust. I know it’s tempting to stir, but resist. That browning is where all the flavor lives.
- Break up and brown the turkey (4 minutes): After 3-4 minutes, use your wooden spoon or spatula to break the turkey into crumbles. You should see deep brown patches on the bottom. Continue cooking, stirring occasionally, until the turkey is cooked through and has crispy edges—about 3 more minutes. If you’re using 93% lean turkey, there shouldn’t be much fat to drain. If there’s excess, carefully spoon it out, leaving about a tablespoon in the pan.
- Sauté the aromatics (3 minutes): Reduce the heat to medium. Add the diced onion and bell pepper to the skillet with the turkey. Cook, stirring frequently, for about 2 minutes until the onion turns translucent and the pepper softens. Add the minced garlic and cook for another 30-45 seconds until fragrant—you’ll smell it when it’s ready. Don’t let the garlic burn, or it’ll turn bitter and ruin the whole dish. I’ve done this, and it’s not pretty.
- Toast the spices (1 minute): Push the meat and vegetables to one side of the pan. Add your pre-measured spice blend (chili powder, cumin, smoked paprika, garlic powder, onion powder, oregano, salt, pepper, and cayenne if using) directly to the empty space. Let them toast for about 30 seconds, stirring constantly, until they smell fragrant and slightly darker. Then stir everything together so the spices coat the meat and vegetables evenly. This toasting step wakes up the spices and makes them taste ten times more vibrant—it’s a game-changer.
- Add the liquids and beans (5 minutes): Pour in the can of diced tomatoes with green chiles (including the liquid), the drained black beans, and the chicken broth. Stir everything together, scraping up any browned bits from the bottom of the pan—those bits are pure flavor. Bring the mixture to a simmer, then reduce the heat to medium-low. Let it bubble gently for about 5 minutes, stirring occasionally, until the liquid reduces slightly and the flavors meld together. The sauce should thicken just a bit—not soupy, not dry.
- Fold in the rice (2 minutes): Add the cooked rice to the skillet and gently fold it into the mixture. Cook for 1-2 minutes until the rice is heated through. If the mixture looks too dry, add a splash more broth or water. If it looks too wet, let it simmer an extra minute or two. The texture should be hearty and slightly saucy—not a soup, but not dry either. Taste and adjust salt and pepper if needed.
- Cool and portion for meal prep (5 minutes): Remove the skillet from heat and let it cool for about 5 minutes. Divide the mixture evenly among your four meal prep containers. If you’re adding toppings like cheese or avocado, pack them separately to keep everything fresh. Let the containers cool completely (about 20 minutes) before sealing and refrigerating. I know it’s tempting to throw them in the fridge hot, but that creates condensation and makes everything soggy.
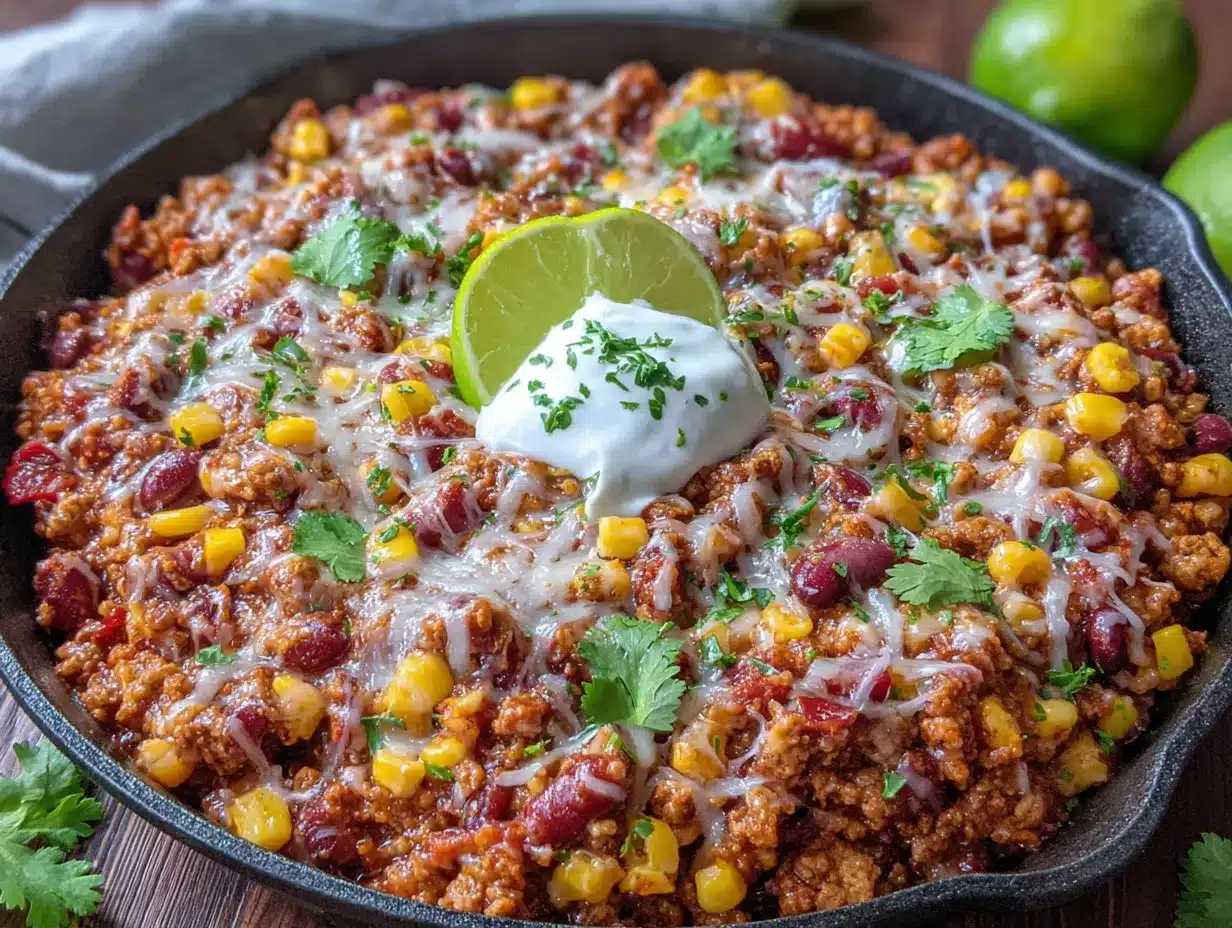
Sensory Cues Throughout: When the turkey is properly browned, you’ll hear a satisfying sizzle and see deep amber patches. When the garlic is ready, your kitchen will smell like heaven. When the spices toast, the aroma will intensify and become almost nutty. When the dish is done, the colors will be vibrant—deep red from the tomatoes, black from the beans, and flecks of green from the peppers and cilantro.
Troubleshooting: If your skillet looks dry at any point, add a splash of broth. If it’s too wet, let it simmer uncovered for a few extra minutes. If the flavors taste flat, add a squeeze of lime juice or a pinch more salt—sometimes that’s all it needs.
Cooking Tips & Techniques
After making this ground turkey taco skillet meal prep at least a dozen times, I’ve collected some hard-earned wisdom. Let me save you from my mistakes.
Don’t overcrowd the pan: This is the number one mistake I made early on. If you’re doubling the recipe, cook the turkey in two batches. When the pan is too crowded, the meat steams instead of browning, and you end up with gray, sad turkey. Trust me, I’ve been there, and it’s not worth the saved time. Brown in batches, combine at the end.
Toast your spices: I mentioned this in the method, but it deserves repeating. Toasting the spices in the hot pan for 30 seconds before adding liquid transforms them from flat to vibrant. It’s a 30-second step that makes a world of difference. I learned this from a chef friend who said, “Spices are like flowers—they need a little heat to bloom.” She was right.
Use cold rice: If you’re using leftover rice, make sure it’s cold from the fridge. Warm rice tends to break apart and turn mushy when stirred into the skillet. Cold rice holds its shape better and absorbs the sauce without disintegrating. I learned this after a particularly sad batch that looked like risotto gone wrong.
Season in layers: Don’t dump all the salt in at once. Season the turkey lightly as it browns, then add the spice blend (which has salt), and taste at the end before adjusting. This layering creates depth—each component gets seasoned properly without becoming salty. It’s a technique that professional chefs use, and it’s easy to do at home.
Multitasking strategy: While the turkey is browning in step 2, use those 3-4 minutes to dice your vegetables or measure your spices. When the skillet is simmering in step 6, wash your cutting board and knife. This keeps you efficient and makes cleanup easier. I set a timer for each step so I don’t get distracted—my phone’s timer is my best friend in the kitchen.
My biggest failure: The time I forgot to drain the black beans. The skillet turned into a soupy, gray mess, and the extra liquid washed away all the seasoning. I salvaged it by simmering for an extra 10 minutes and adding more spices, but it was never quite right. Now I always drain and rinse my beans, even if I’m in a hurry. Learn from my mistake—it’s a small step that makes a big difference.
Variations & Adaptations
One of the best things about this ground turkey taco skillet meal prep is how adaptable it is. I’ve tried several variations, and here are my favorites:
Low-Carb / Keto Version: Skip the rice entirely and use cauliflower rice instead. Cook the cauliflower rice separately (sauté it in a dry pan for 5-7 minutes to remove excess moisture), then fold it in at the end. You can also add extra vegetables like zucchini or spinach to bulk it up. My keto friend swears by this version and says it’s the only taco skillet she eats.
Vegetarian Version: Replace the ground turkey with two cans of black beans or lentils (use about 2 cups cooked lentils). Use vegetable broth instead of chicken broth, and add an extra tablespoon of olive oil for richness. The texture is different—heartier and earthier—but it’s just as satisfying. I made this for my vegetarian sister, and she asked for the recipe within minutes.
Spicy Version: If you like heat, add a diced jalapeño along with the onion and bell pepper (seeds removed for milder heat, seeds in for fiery). Use fire-roasted diced tomatoes with habanero if you can find them, and add an extra pinch of cayenne. Top with sliced fresh jalapeños before serving. My spice-loving husband adds hot sauce to his portion every single time.
Cheesy Version: After folding in the rice, sprinkle ½ cup of shredded cheddar or Monterey Jack cheese over the top. Cover the skillet with a lid for 2 minutes until the cheese melts. Stir it in for a creamy, indulgent texture. This is my guilty pleasure version, and I only make it when I’ve had a particularly rough week.
Slow Cooker Adaptation: Brown the turkey and sauté the vegetables in a skillet first (steps 1-5), then transfer everything to a slow cooker. Add the tomatoes, beans, broth, and rice. Cook on low for 4-6 hours or high for 2-3 hours. The texture will be softer and more stew-like, but it’s perfect for busy days when you want dinner waiting for you.
Allergen Substitutions: For gluten-free, this recipe is naturally gluten-free as written—just double-check your spice blends, as some contain wheat flour. For dairy-free, skip the cheese and use dairy-free sour cream or Greek yogurt alternatives. For soy-free, use coconut aminos instead of any soy-based sauces (though this recipe doesn’t call for any).
Serving & Storage Suggestions
This ground turkey taco skillet meal prep is versatile when it comes to serving, and it stores beautifully. Here’s everything you need to know.
Serving Temperature: Serve hot, straight from the skillet or reheated. The ideal serving temperature is around 165°F, which is when the flavors are most vibrant. If you’re eating it cold (some people like it that way), let it sit at room temperature for 10 minutes first to take the chill off.
How to Serve: Spoon the skillet mixture into bowls and top with your favorite fixings. I like a dollop of Greek yogurt, a sprinkle of shredded cheese, a few avocado slices, and a generous squeeze of lime. Fresh cilantro on top adds a pop of color and freshness. You can also serve it in warm tortillas for taco night, over a bed of lettuce for a taco salad, or with tortilla chips for scooping.
Complementary Dishes: This skillet pairs beautifully with a simple side salad (romaine, cherry tomatoes, and a lime vinaigrette), Mexican street corn (esquites), or a bowl of black bean soup. For drinks, a cold Mexican beer, a margarita, or even just sparkling water with lime works perfectly.
Storage Instructions: Store in airtight containers in the refrigerator for up to 4 days. The flavors actually deepen and meld overnight, so day two and three are often the best. For longer storage, freeze individual portions in freezer-safe containers for up to 3 months. Thaw overnight in the refrigerator before reheating.
Reheating Methods: The best way to reheat is in a skillet over medium heat with a splash of water or broth. Stir occasionally for about 5 minutes until heated through. The microwave works too—heat on high for 2-3 minutes, stirring halfway through. Add a damp paper towel over the container to prevent drying out. If reheating from frozen, microwave for 4-5 minutes, stirring halfway. I prefer the skillet method because it revives the crispy edges on the turkey, but the microwave is fine when you’re in a hurry.
Flavor Development: One thing I love about this recipe is that the flavors get better over the first 24-48 hours. The spices meld, the rice absorbs the sauce, and everything becomes more cohesive. That said, by day four, the texture starts to soften, so I recommend eating it within three days for the best experience. I always make a batch on Sunday and enjoy it for lunch Monday through Wednesday.
Nutritional Information & Benefits
This ground turkey taco skillet meal prep is not just delicious—it’s also pretty darn good for you. Here’s the breakdown for one serving (about 1½ cups, without toppings):
| Nutrient | Amount Per Serving |
|---|---|
| Calories | 385 |
| Protein | 32g |
| Carbohydrates | 38g |
| Fiber | 10g |
| Fat | 12g |
| Saturated Fat | 3g |
| Sodium | 680mg |
| Iron | 4mg (22% DV) |
| Vitamin C | 35mg (39% DV) |
Health Benefits: Ground turkey is a lean protein source that’s lower in saturated fat than beef, making it heart-friendly. Black beans are packed with fiber and plant-based protein, which help keep you full and support digestive health. Bell peppers are loaded with vitamin C—actually, one serving provides nearly 40% of your daily needs. The spices (cumin, chili powder, paprika) contain antioxidants and anti-inflammatory compounds. And the tomatoes provide lycopene, a powerful antioxidant linked to heart health.
Dietary Considerations: This recipe is naturally gluten-free (just check your spice blends), dairy-free (if you skip the cheese), and nut-free. It’s also relatively low in saturated fat and high in fiber, making it a great option for heart-healthy diets. If you’re watching your sodium, use low-sodium broth and no-salt-added canned tomatoes, and rinse your beans thoroughly.
Personal Perspective: I love that this meal feels indulgent but is actually nourishing. It’s the kind of food that makes you feel good after eating it—not heavy or sluggish, but satisfied and energized. For me, that’s the sweet spot in cooking: food that tastes like comfort but fuels your body like health food.
Conclusion
This ground turkey taco skillet meal prep is more than just a recipe—it’s a solution for those nights when you’re tired, hungry, and tempted to order takeout. It’s quick, it’s forgiving, and it tastes like something you’d actually look forward to eating. Plus, it brings back a little piece of that taqueria that I still miss, and that makes me happy every time I make it.
I encourage you to make this your own. Add more spice, swap in different beans, or load it up with your favorite toppings. The beauty of a skillet meal is that it adapts to whatever you have on hand and whatever you’re craving. Don’t be afraid to experiment—some of my best versions came from mistakes and substitutions.
Honestly, I love this recipe because it proves that you don’t need fancy ingredients or hours in the kitchen to eat well. You just need a little know-how, a good skillet, and the willingness to try. And now you have all three.
I’d love to hear how yours turns out! Drop a comment below and let me know what variations you tried, or tag me in your photos if you share them online. Happy cooking, and here’s to making weeknight dinners something to look forward to.
Frequently Asked Questions
Can I use ground beef instead of ground turkey?
Absolutely! Ground beef works perfectly in this recipe. Use 85% lean for the best flavor and texture. You may need to drain a bit more fat after browning, but otherwise, follow the same method. Ground chicken or pork also work great.
How do I prevent the rice from getting mushy during meal prep?
The key is using cold, leftover rice that’s been refrigerated for at least a few hours. Freshly cooked warm rice is too soft and will break down when stirred into the skillet. Also, don’t overcook the rice in the skillet—just fold it in and heat through for 1-2 minutes.
Can I freeze this ground turkey taco skillet meal prep?
Yes! Portion the cooled mixture into freezer-safe containers and freeze for up to 3 months. Thaw overnight in the refrigerator before reheating. The texture of the rice will soften slightly after freezing, so if that bothers you, consider making the skillet without rice and adding fresh rice after thawing.
What are the best toppings for this taco skillet?
My favorites are Greek yogurt (or sour cream), shredded cheddar or Monterey Jack cheese, diced avocado, fresh cilantro, and a squeeze of lime. For crunch, add crushed tortilla chips or toasted pumpkin seeds. For heat, add sliced jalapeños or a drizzle of hot sauce.
How long does this recipe last in the fridge?
Stored in airtight containers, this ground turkey taco skillet meal prep stays fresh for up to 4 days. The flavors actually improve over the first 24-48 hours. By day 4, the texture starts to soften, so I recommend eating it within 3 days for the best experience.
Pin This Recipe!
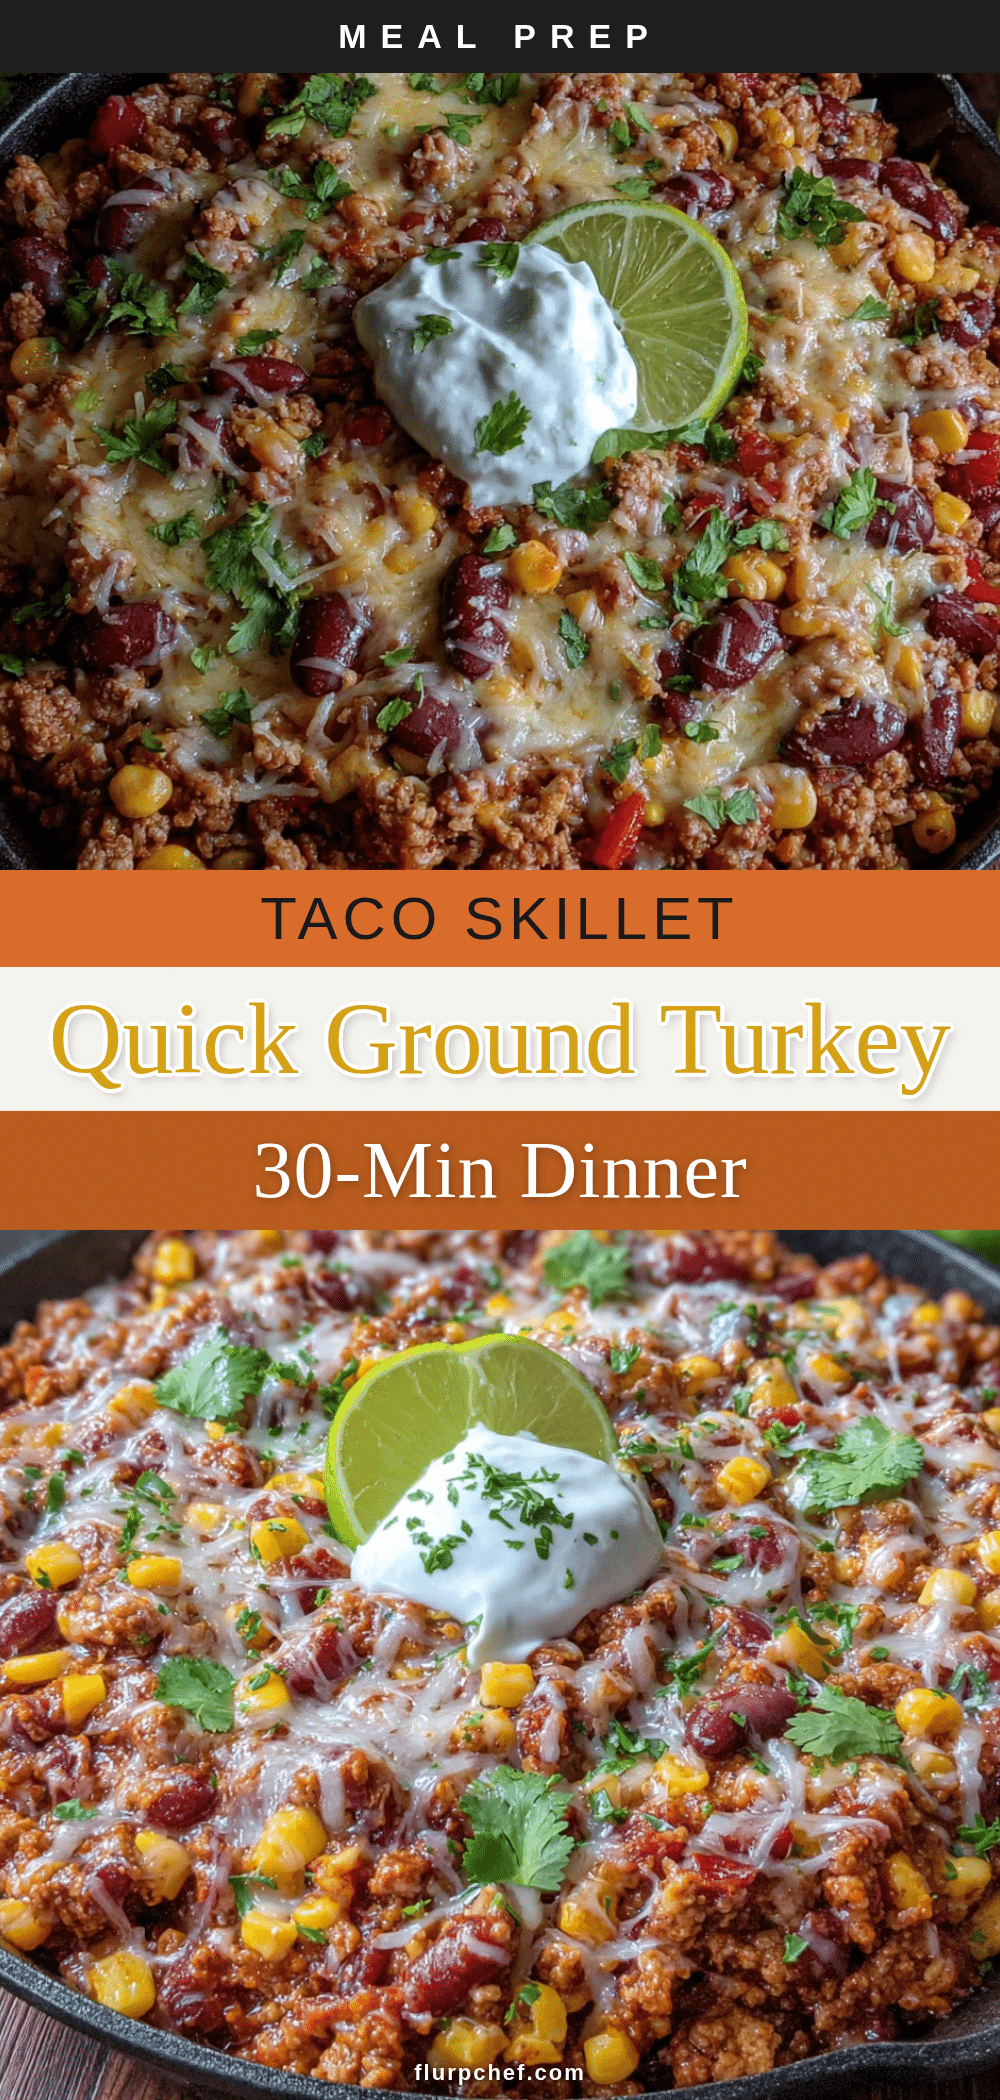
Easy Ground Turkey Taco Skillet Meal Prep in 20 Minutes

A quick and delicious ground turkey taco skillet perfect for meal prep, ready in just 20 minutes. This one-pan meal features crispy-edged turkey, tender rice, and beans in a seasoned tomato sauce, with flavors that get even better overnight.
- Prep Time: 5 minutes
- Cook Time: 15 minutes
- Total Time: 20 minutes
- Yield: 4 servings 1x
- Category: Main Course
- Cuisine: Mexican
Ingredients
- 1 tablespoon olive oil
- 1 pound ground turkey (93% lean)
- 1 medium yellow onion, diced
- 3 cloves garlic, minced
- 1 medium bell pepper, diced
- 1 tablespoon chili powder
- 1 teaspoon ground cumin
- 1 teaspoon smoked paprika
- ½ teaspoon garlic powder
- ½ teaspoon onion powder
- ½ teaspoon dried oregano
- ½ teaspoon salt
- ¼ teaspoon black pepper
- Pinch of cayenne pepper (optional)
- 1 can (14.5 ounces) diced tomatoes with green chiles
- 1 can (15 ounces) black beans, drained and rinsed
- 1 cup cooked white or brown rice
- ½ cup chicken or vegetable broth
- Fresh cilantro, chopped (for serving)
- Lime wedges (for serving)
- Shredded cheese (for serving)
- Sour cream or Greek yogurt (for serving)
- Avocado, diced (for serving)
Instructions
- Prep your ingredients first: Dice the onion and bell pepper, mince the garlic, drain and rinse the black beans, and measure out your spices into a small bowl.
- Heat the oil and start the turkey: Place your large skillet over medium-high heat and add the olive oil. Let it heat for about 30 seconds until it shimmers. Add the ground turkey in an even layer. Don’t touch it for 3-4 minutes to develop a deep brown crust.
- Break up and brown the turkey: After 3-4 minutes, use a wooden spoon or spatula to break the turkey into crumbles. Continue cooking, stirring occasionally, until the turkey is cooked through and has crispy edges—about 3 more minutes. If there’s excess fat, carefully spoon it out, leaving about a tablespoon in the pan.
- Sauté the aromatics: Reduce the heat to medium. Add the diced onion and bell pepper to the skillet with the turkey. Cook, stirring frequently, for about 2 minutes until the onion turns translucent and the pepper softens. Add the minced garlic and cook for another 30-45 seconds until fragrant.
- Toast the spices: Push the meat and vegetables to one side of the pan. Add your pre-measured spice blend directly to the empty space. Let them toast for about 30 seconds, stirring constantly, until they smell fragrant. Then stir everything together so the spices coat the meat and vegetables evenly.
- Add the liquids and beans: Pour in the can of diced tomatoes with green chiles (including the liquid), the drained black beans, and the chicken broth. Stir everything together, scraping up any browned bits from the bottom of the pan. Bring the mixture to a simmer, then reduce the heat to medium-low. Let it bubble gently for about 5 minutes, stirring occasionally, until the liquid reduces slightly and the flavors meld together.
- Fold in the rice: Add the cooked rice to the skillet and gently fold it into the mixture. Cook for 1-2 minutes until the rice is heated through. If the mixture looks too dry, add a splash more broth or water. Taste and adjust salt and pepper if needed.
- Cool and portion for meal prep: Remove the skillet from heat and let it cool for about 5 minutes. Divide the mixture evenly among four meal prep containers. If adding toppings like cheese or avocado, pack them separately. Let the containers cool completely (about 20 minutes) before sealing and refrigerating.
Notes
For best results, use cold leftover rice to prevent mushiness. The flavors improve over 24-48 hours, making this ideal for meal prep. Store in airtight containers in the refrigerator for up to 4 days, or freeze for up to 3 months. Reheat in a skillet with a splash of broth for best texture.
Nutrition
- Serving Size: 1½ cups (without top
- Calories: 385
- Sodium: 680
- Fat: 12
- Saturated Fat: 3
- Carbohydrates: 38
- Fiber: 10
- Protein: 32
Keywords: ground turkey taco skillet, meal prep, easy dinner, one-pan meal, healthy taco skillet, 20 minute meal


