The pudding cups sat on the counter for exactly four minutes before my nephew whispered, “Can I eat the dirt?” That’s when I knew I’d accidentally created something magical. I wasn’t trying to be the cool aunt that day — I was just trying to use up a box of chocolate pudding mix before it expired. But those little cups of crushed cookies, creamy pudding, and gummy worms became the most requested thing I bring to every family gathering.
Honestly, I didn’t think much of it at first. I mean, it’s pudding and crushed cookies. But there’s something about the way the layers come together — the dark, rich chocolate against the bright, chewy worms — that makes people of all ages light up. I’ve brought these Easy Halloween Dirt Cups with Gummy Worms to potlucks, classroom parties, and even a backyard barbecue in July (don’t judge, they’re that good). And every single time, someone asks for the recipe.
So here’s the thing — this isn’t complicated cooking. It’s barely cooking at all. But it’s the kind of recipe that makes you look like you put in way more effort than you actually did. And honestly? That’s my favorite kind of recipe to share.
Why You’ll Love This Recipe
Let me tell you why these Easy Halloween Dirt Cups with Gummy Worms have become my go-to dessert for pretty much any occasion that calls for a little fun.
- Quick & Easy : You can have these assembled in under 15 minutes. No oven, no stovetop, no complicated techniques. Just mix, layer, and chill. Perfect for those last-minute Halloween party invites or when the kids suddenly announce they need treats for school tomorrow.
- Simple Ingredients : You probably already have most of what you need in your pantry right now. Chocolate pudding mix, milk, Oreo cookies, and gummy worms. That’s it. No fancy baking supplies or trips to specialty stores.
- Perfect for Halloween : These are basically the unofficial dessert of spooky season. They look creepy, they taste amazing, and kids absolutely lose their minds over them. I’ve brought them to classroom parties, trunk-or-treat events, and Halloween potlucks — they always disappear first.
- Crowd-Pleaser : I’ve watched grown adults giggle while eating these. There’s something about digging into a cup of “dirt” and finding gummy worms that brings out the kid in everyone. They’re perfect for mixed-age gatherings where you need something that appeals to both toddlers and grandparents.
- Unbelievably Delicious : This isn’t just a gimmick — the combination of creamy chocolate pudding and crunchy cookie crumbs is genuinely delicious. The gummy worms add a chewy, fruity contrast that makes every bite interesting.
What makes these different from every other dirt cup recipe out there? It’s the texture. I’ve tested this dozens of times to get the perfect ratio of creamy to crunchy. The pudding needs to be silky smooth, the cookie crumbs need to be fine but not powdery, and the worms need to peek out just enough to look creepy without falling out. After countless trials (and plenty of taste-testing), this version hits every note perfectly.
This is the kind of dessert that makes you feel like a kid again. One bite and you’ll remember why Halloween was always your favorite holiday. It’s comfort food at its most playful — simple, satisfying, and just a little bit silly.
What Ingredients You Will Need
This recipe uses simple, everyday ingredients that come together to create something truly special. Here’s everything you’ll need to make the best Easy Halloween Dirt Cups with Gummy Worms:
For the Chocolate Pudding Layer
- 1 package (3.9 oz) instant chocolate pudding mix — I prefer Jell-O brand for its smooth texture and consistent results. Make sure you get the instant kind, not cook-and-serve, or the texture won’t be right.
- 2 cups cold milk — Whole milk gives the richest, creamiest pudding, but 2% works fine too. For a dairy-free version, use oat milk or almond milk (just know the pudding might be slightly thinner).
For the Dirt Crust and Topping
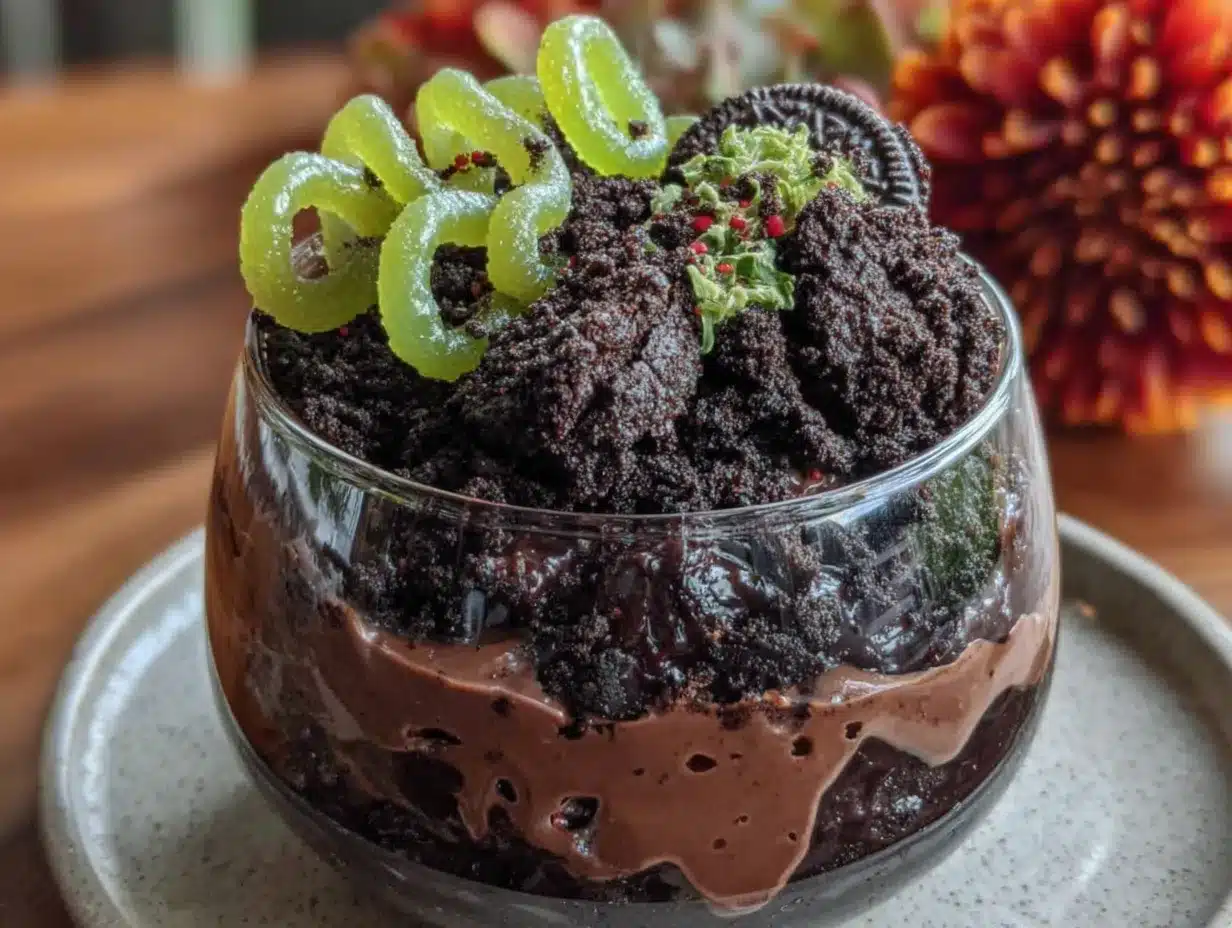
- 20-24 Oreo cookies — Regular Oreos work best. The chocolate wafers crush into that perfect dark “soil” texture. Double Stuf works too, but you’ll get a slightly lighter crumb. Avoid the golden ones — they don’t look like dirt at all.
- 2 tablespoons melted butter (optional) — This helps the cookie crumbs stick together a bit and adds richness. You can skip it if you want a lighter texture, but I find it makes the “dirt” taste more like a real crust.
For the Creepy Crawly Decorations
- 1 bag (4 oz) gummy worms — Get the sour kind for an extra flavor pop! I like the classic bright-colored worms for contrast against the dark pudding. Trolli and Black Forest both work great.
- Optional decorations : Halloween sprinkles, candy eyeballs, crushed graham crackers for a “sandy” look, or even a few candy pumpkins for a harvest-themed variation.
One thing I’ve learned through trial and error — don’t skimp on the gummy worms. You want enough that every cup has at least one worm peeking out and another hidden inside. I usually buy two bags because I always end up snacking on them while I’m assembling.
If you’re making these for a classroom or party where nut allergies might be a concern, check your pudding mix and cookie labels carefully. Most standard brands are nut-free, but it’s always worth double-checking.
Equipment Needed
You don’t need any fancy equipment for these Easy Halloween Dirt Cups with Gummy Worms — and that’s part of the beauty. Here’s what you’ll need:
- 6-8 small clear cups or glasses — I love using 8-ounce plastic cups for parties (they’re disposable and easy to transport). For a fancier look, use small mason jars or stemless wine glasses. The key is that they’re clear so you can see the layers.
- A medium mixing bowl — For whisking the pudding. Any bowl works, but I prefer a glass one because it’s easier to see if the pudding is fully dissolved.
- A whisk or electric mixer — A whisk works fine and gives you a little arm workout. An electric mixer makes it even faster and ensures a super smooth pudding with no lumps.
- A food processor or zip-top bag and rolling pin — For crushing the Oreos. I’ve used both methods countless times. The food processor gives you perfectly uniform crumbs in seconds. The bag-and-rolling-pin method is more satisfying and great for getting kids involved (just make sure the bag is well-sealed!).
- A small bowl — For mixing the crushed cookies with melted butter if you’re using it.
- A spoon or small spatula — For layering the pudding and crumbs.
- Measuring cups and spoons — For accurate pudding and milk measurements.
I’ve made these in everything from fancy glassware to solo cups, and honestly? They taste the same no matter what you serve them in. For Halloween parties, I love using those little plastic cups with lids — they’re easy to stack and transport, plus the lids keep everything fresh if you’re making them ahead of time.
Preparation Method
Making these Easy Halloween Dirt Cups with Gummy Worms is almost too simple. But I’ll walk you through every step because the details matter — especially if you want that perfect layered look.
- Crush the Oreos. Place 20-24 Oreo cookies in a food processor and pulse until you get fine crumbs that look like potting soil. If you don’t have a food processor, put the cookies in a large zip-top bag and crush them with a rolling pin. You want a mix of fine crumbs and tiny chunks — not completely powdered. If using melted butter, stir it into the crumbs until evenly moistened. Set aside.
- Make the pudding. In a medium mixing bowl, whisk together the instant chocolate pudding mix and 2 cups cold milk. Whisk vigorously for about 2 minutes until the mixture thickens. It should be smooth with no lumps. If you’re using an electric mixer, beat on low speed for about 1 minute. The pudding will be quite thin at first — don’t worry, it thickens as it sets.
- Let the pudding set. This is the step most people skip, and it makes a huge difference. Let the pudding sit for 5 minutes at room temperature. It should be thick enough that it holds its shape when you lift the whisk. If it’s still runny, give it another minute or two. You want it thick enough that it won’t immediately soak into the cookie crumbs.
- Layer the cups. Start with a spoonful of crushed Oreos in the bottom of each cup — about 1-2 tablespoons depending on your cup size. Press it down gently with the back of a spoon to create a firm base.
- Add the pudding. Spoon or pour the chocolate pudding over the cookie layer, filling each cup about halfway. Leave room for another layer of crumbs and the gummy worms.
- Insert the worms. Take a few gummy worms and push them into the pudding so they’re partially buried. Some should be peeking out, some should be completely hidden. This is where you can get creative — make it look like they’re crawling out of the dirt!
- Top with more “dirt.” Sprinkle another layer of crushed Oreos over the pudding, covering the worms completely. You want a thick enough layer that it actually looks like dirt — about 2-3 tablespoons per cup.
- Add final decorations. Place one or two more gummy worms on top, arranging them so they look like they’re crawling out of the dirt. You can also add candy eyeballs, Halloween sprinkles, or a small pumpkin candy for extra flair.
- Chill before serving. This is the hardest part — waiting. Refrigerate the cups for at least 1 hour before serving. This allows the pudding to fully set and the flavors to meld together. The texture is so much better after it’s been chilled. I’ve tried rushing this step, and the pudding is just too soft — it doesn’t hold its shape when you dig in.
- Serve cold. These are best enjoyed straight from the fridge. The cold pudding against the crunchy cookie crumbs is the perfect texture combination. Don’t let them sit out too long, or the crumbs will get soggy.
A few things I’ve learned the hard way: Don’t over-mix the pudding. Over-whisking can make it grainy. And whatever you do, don’t assemble these too far in advance — the cookie crumbs will absorb moisture from the pudding and lose their crunch. I usually make the pudding and crush the cookies the day before, then assemble them a few hours before serving.
Cooking Tips & Techniques
After making these Easy Halloween Dirt Cups with Gummy Worms at least thirty times (I’m not exaggerating), I’ve picked up a few tricks that make a real difference:
The perfect cookie crumb texture. You don’t want powder, and you don’t want chunks. The ideal crumb is somewhere between — fine enough to look like real soil, but with a few slightly larger pieces for texture. If you’re using a food processor, pulse in short bursts rather than running it continuously. For the bag method, let the kids go wild with the rolling pin for a few minutes, then check the texture.
Prevent soggy crumbs. The biggest mistake I’ve made (more than once) is adding the cookie crumbs too early. If you let the assembled cups sit overnight, the crumbs will turn into a mushy paste. They’ll still taste good, but you’ll lose that satisfying crunch. Assemble these no more than 4-6 hours before serving for the best texture. If you need to prep ahead, keep the crushed cookies and pudding separate in the fridge, then layer them right before your party.
Make it look professional. For a cleaner layered look, use a piping bag or a zip-top bag with the corner snipped off to pipe the pudding. This keeps the pudding from smearing against the sides of the cup and gives you those beautiful, Instagram-worthy layers. I learned this trick from a friend who’s a pastry chef, and it makes a huge difference.
Temperature matters. Cold pudding is key. If your pudding is room temperature when you layer it, it will be too thin and will sink into the cookie crumbs. Always chill the pudding first, or use cold milk straight from the fridge.
Don’t forget the worms. I once made an entire batch and forgot to add the gummy worms until after I’d finished layering. They were still good, but they were just chocolate pudding cups — not nearly as fun. Make sure you add the worms as you go, not just on top.
Variations & Adaptations
One of the best things about this recipe is how endlessly customizable it is. Here are some of my favorite variations:
Dairy-Free Version: Use your favorite plant-based milk (oat milk gives the creamiest texture) and vegan chocolate pudding mix. Most Oreos are actually vegan, so you’re good there. I’ve tested this with oat milk and it works beautifully — the pudding is slightly less thick but still delicious.
Peanut Butter Dirt Cups: Add a layer of peanut butter between the pudding and the cookie crumbs. Just warm up a few tablespoons of peanut butter in the microwave for 15 seconds and drizzle it over the pudding before adding the top layer of Oreos. The combination of chocolate and peanut butter is absolutely irresistible.
Spooky Spider Web Design: Before adding the top layer of cookie crumbs, pipe a spider web pattern on top of the pudding using melted white chocolate or white icing. Then add the crumbs around the edges so the web is visible in the center. It looks incredibly impressive but takes almost no extra effort.
Mummy Cups: Instead of worms, use candy eyeballs and wrap strips of fruit leather around the cup to look like mummy bandages. These are perfect for a non-creepy Halloween party or for younger kids who might find worms a little too realistic.
Pumpkin Patch Cups: For a fall-themed variation, swap the gummy worms for candy pumpkins and use crushed graham crackers mixed with a little orange food coloring for the “dirt.” The flavor combination of chocolate and pumpkin is surprisingly good.
Individual Trifles: Layer the pudding and cookies in larger glasses and add whipped cream, caramel sauce, and extra cookie crumbs for a decadent dessert that’s perfect for adult parties. I’ve served these at Thanksgiving and they were a huge hit.
If you love no-bake desserts as much as I do, you should definitely check out these creamy no-bake pumpkin pie cheesecake bars — they’re another fall favorite that comes together in minutes.
Serving & Storage Suggestions
These Easy Halloween Dirt Cups with Gummy Worms are best served cold, straight from the fridge. The contrast between the chilled, creamy pudding and the crunchy cookie crumbs is what makes them so addictive.
Serving Temperature: Serve these at refrigerator temperature, not room temperature. If they’ve been sitting out for more than 30 minutes, the pudding will start to soften and the crumbs will lose their crunch. For outdoor parties, keep them in a cooler or serve them in small batches.
Presentation Ideas: For a truly spooky presentation, serve these on a tray covered with black or orange tissue paper. Add a few plastic spiders, some fake cobwebs, and maybe a few more gummy worms scattered around the tray. The visual effect is amazing and makes the dessert feel like part of the Halloween decor.
Complementary Dishes: These dirt cups pair perfectly with other Halloween treats. I love serving them alongside this perfect graveyard brownie trifle for a full Halloween dessert spread. For a savory balance, try easy crispy mummy crescent roll hotdogs — they’re fun, kid-friendly, and complement the sweet dirt cups perfectly.
Storage Instructions: Leftover dirt cups can be stored in the refrigerator for up to 2 days. However, the cookie crumbs will gradually soften over time. If you’re making these ahead of time, I recommend keeping the crushed cookies and pudding separate and assembling them just before serving. If you have assembled cups that need to be stored, cover them tightly with plastic wrap or lids to prevent the pudding from absorbing fridge odors.
Freezing: I don’t recommend freezing these. The pudding will become watery when thawed, and the cookie crumbs will turn into a soggy mess. These are strictly a refrigerator dessert.
How Flavors Develop: The good news is that the flavor actually improves after a few hours in the fridge. The chocolate pudding becomes richer and more intense, and the gummy worms soften slightly, making them chewier and more flavorful. If you can resist eating them right away, they’re even better after a few hours.
Nutritional Information & Benefits
Let’s be real — these Easy Halloween Dirt Cups with Gummy Worms are a treat, not a health food. But here’s a rough estimate of what you’re looking at per serving (based on 6 servings):
- Calories: Approximately 350-400 per cup
- Fat: 14-16g
- Carbohydrates: 55-60g
- Protein: 6-8g
- Sugar: 38-42g
- Fiber: 2-3g
These numbers will vary based on the type of milk and specific brands you use. Using low-fat milk and reduced-fat Oreos can cut the calories and fat by about 20%.
Health Benefits (such as they are): The milk provides calcium and vitamin D. The cocoa in the pudding contains antioxidants called flavonoids, which have been linked to heart health. And the gummy worms… well, they’re mostly sugar and gelatin. But they’re fun!
Dietary Considerations: These are not gluten-free (Oreos contain wheat flour). For a gluten-free version, use gluten-free chocolate sandwich cookies and gluten-free instant pudding mix. They’re also not suitable for vegans unless you use plant-based milk and vegan pudding mix (most Oreos are actually vegan).
Allergen Warning: This recipe contains milk and wheat. Depending on your specific ingredients, it may also contain soy (in the Oreos) and corn (in some pudding mixes). Always check labels if you’re serving someone with allergies.
Look, I’m not going to pretend these are healthy. They’re a fun, indulgent treat for special occasions. But if you’re looking for something that’s both festive and better for you, try these healthy chocolate chip pumpkin protein muffins — they’re perfect for meal prep and actually have some nutritional value!
Conclusion
These Easy Halloween Dirt Cups with Gummy Worms are the kind of recipe that makes you feel like a kitchen genius without actually having to do much work. They’re fun, they’re delicious, and they bring out the kid in everyone who eats them.
I love that this recipe is so forgiving — you can use whatever cups you have, swap in different candies, or let the kids go wild with the decorations. Every batch turns out a little different, and that’s part of the charm. The first time I made these, my niece asked if we could have “dirt and worms” for every holiday. I told her we’d see.
Whether you’re making these for a Halloween party, a classroom celebration, or just because you want a fun dessert that doesn’t require turning on the oven, I promise they’ll be a hit. The combination of creamy chocolate pudding, crunchy cookie “dirt,” and chewy gummy worms is simply irresistible.
I’d love to hear how yours turn out! Drop a comment below and let me know what variations you tried, how the kids reacted, or if you came up with a fun new decoration idea. And if you’re looking for more Halloween inspiration, don’t miss these perfect witch hat chocolate sugar cookies — they’re almost as fun to make as they are to eat.
Happy Halloween, and happy eating!
Frequently Asked Questions
Can I make these dirt cups ahead of time?
You can, but I recommend assembling them no more than 4-6 hours before serving. The cookie crumbs will gradually soften as they absorb moisture from the pudding. If you need to prep further ahead, keep the crushed cookies and pudding separate in the fridge, then layer them right before your party. The pudding can be made up to 2 days in advance.
Can I use homemade chocolate pudding instead of instant?
Absolutely! Homemade pudding will give you a richer, creamier texture. Just make sure it’s completely cooled and thickened before layering. You may need to chill it for an extra 30 minutes to get the right consistency. Keep in mind that homemade pudding tends to be slightly thinner than instant, so your layers might not be as distinct.
How many servings does this recipe make?
This recipe makes 6-8 servings, depending on the size of your cups. I usually get 6 generous servings when using 8-ounce cups, or 8 smaller servings with 6-ounce cups. If you’re serving these at a party where there are other desserts, you can easily stretch it to 10-12 servings by using smaller cups.
Can I use other cookies besides Oreos?
Yes! Chocolate wafer cookies, chocolate graham crackers, or even chocolate sandwich cookies from store brands all work well. Just avoid cookies with cream fillings that are too soft — they won’t crush into the right texture. If you want a different flavor, try using vanilla wafers for a “sand” look or chocolate graham crackers for a slightly different taste.
How do I transport these to a party?
Transporting these is easy if you use cups with lids. If your cups don’t have lids, cover each one tightly with plastic wrap. Place them in a shallow box or on a tray with a rim to prevent sliding. Keep them level and cold — a cooler works great for longer trips. I once transported 24 of these in a cardboard box lined with a towel, and they all arrived perfectly intact.
Pin This Recipe!
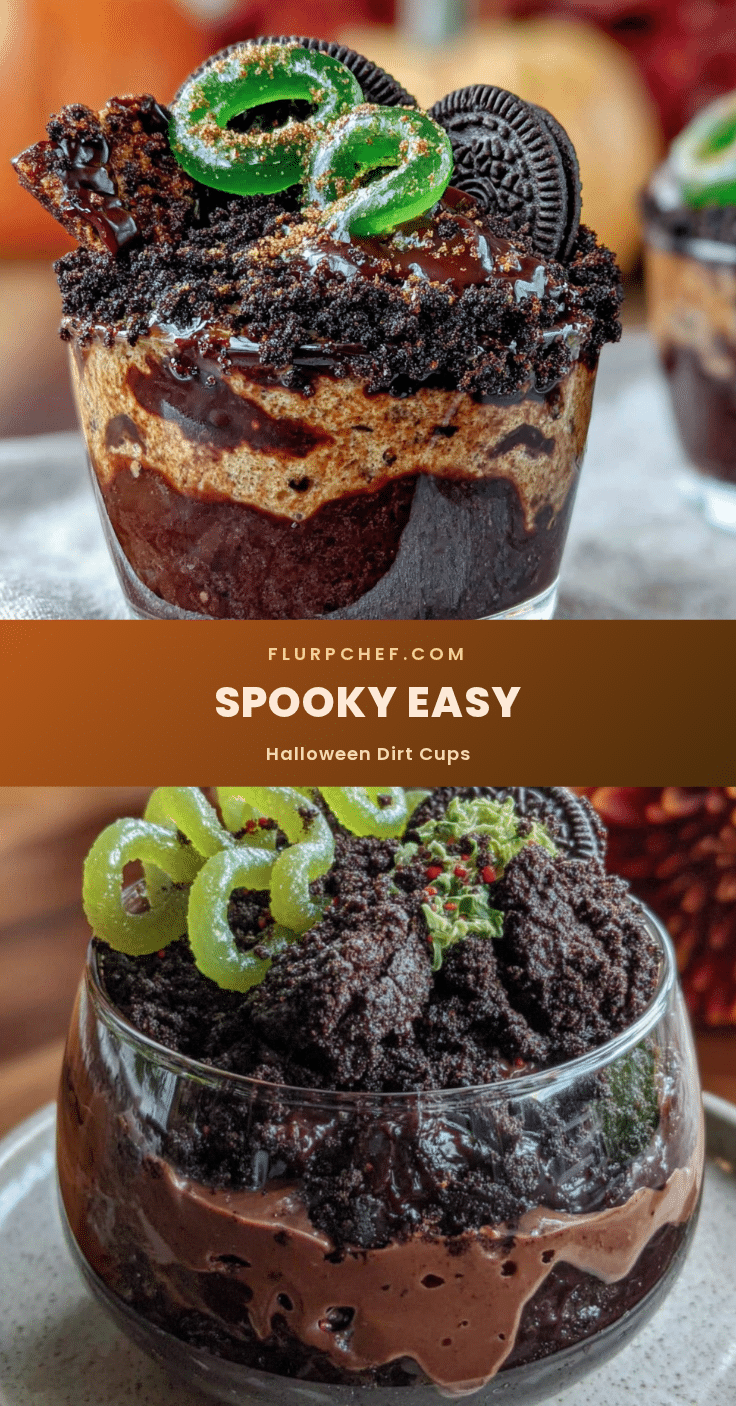
Easy Halloween Dirt Cups with Gummy Worms Best Dessert
These Easy Halloween Dirt Cups with Gummy Worms are a fun, no-bake dessert featuring creamy chocolate pudding, crunchy Oreo cookie ‘dirt,’ and chewy gummy worms. Perfect for Halloween parties, classroom celebrations, or any occasion that calls for a playful treat.
- Prep Time: 15 minutes
- Cook Time: 0 minutes
- Total Time: 1 hour 15 minutes
- Yield: 6-8 servings 1x
- Category: Dessert
- Cuisine: American
Ingredients
- 1 package (3.9 oz) instant chocolate pudding mix
- 2 cups cold milk
- 20–24 Oreo cookies
- 2 tablespoons melted butter (optional)
- 1 bag (4 oz) gummy worms
- Optional: Halloween sprinkles, candy eyeballs, crushed graham crackers, candy pumpkins
Instructions
- Crush the Oreos: Place 20-24 Oreo cookies in a food processor and pulse until you get fine crumbs that look like potting soil. If using melted butter, stir it into the crumbs until evenly moistened. Set aside.
- Make the pudding: In a medium mixing bowl, whisk together the instant chocolate pudding mix and 2 cups cold milk. Whisk vigorously for about 2 minutes until the mixture thickens and is smooth with no lumps.
- Let the pudding set: Let the pudding sit for 5 minutes at room temperature until it is thick enough to hold its shape when you lift the whisk.
- Layer the cups: Start with a spoonful of crushed Oreos in the bottom of each cup (about 1-2 tablespoons). Press it down gently with the back of a spoon to create a firm base.
- Add the pudding: Spoon or pour the chocolate pudding over the cookie layer, filling each cup about halfway.
- Insert the worms: Take a few gummy worms and push them into the pudding so they are partially buried. Some should be peeking out, some completely hidden.
- Top with more ‘dirt’: Sprinkle another layer of crushed Oreos over the pudding, covering the worms completely (about 2-3 tablespoons per cup).
- Add final decorations: Place one or two more gummy worms on top, arranging them so they look like they are crawling out of the dirt. Add optional decorations like candy eyeballs or Halloween sprinkles.
- Chill before serving: Refrigerate the cups for at least 1 hour before serving to allow the pudding to fully set and the flavors to meld.
- Serve cold: Enjoy straight from the fridge for the best texture contrast between cold pudding and crunchy cookie crumbs.
Notes
Assemble no more than 4-6 hours before serving for best texture. Keep crushed cookies and pudding separate if prepping ahead. Use cold milk for best pudding consistency. For a dairy-free version, use plant-based milk and vegan pudding mix. Most Oreos are vegan.
Nutrition
- Serving Size: 1 cup (8 oz)
- Calories: 375
- Sugar: 40
- Sodium: 480
- Fat: 15
- Saturated Fat: 6
- Carbohydrates: 58
- Fiber: 2
- Protein: 7
Keywords: Halloween dirt cups, gummy worms, no-bake dessert, chocolate pudding, Oreo cookies, easy Halloween dessert, kid-friendly dessert


