I figured packing a lunch that my kid would actually eat and that wouldn’t come back home in a sad, squished bag was basically a pipe dream. It took about three weeks of opening lunchboxes full of half-eaten sandwiches and untouched veggie sticks for that fantasy to fall apart completely.
So I started thinking about what actually works. Bite-sized things. Things that look fun. Things that don’t get soggy by 11 AM. And honestly, things that I can throw together when I’m already scrambling to find matching socks at 7:45 in the morning. That’s when these ham and cheese pinwheels entered the chat—and they haven’t left since.
The first time I made them, I wasn’t trying to be clever. I just had leftover tortillas, some deli ham that was about to turn, and a block of cream cheese that needed using. I rolled them up, sliced them into little spirals, and tossed them into a bento box with some grapes and a handful of goldfish crackers. My kid ate every single one. Then asked for more. I actually checked the lunchbox twice because I thought maybe they fell out on the car floor. Nope. Just gone.
That’s the thing about this easy ham and cheese pinwheel bento lunch. It doesn’t try hard. It just works. The cream cheese keeps everything together, the ham adds that salty punch, and the tortilla stays soft without getting mushy. It’s the kind of lunch that makes you feel like you’ve got your life together—even if the rest of the morning was a disaster.
These little spirals have become my secret weapon for school lunches, work lunches, and even lazy weekend snacks. And once you see how simple they are, you’ll probably feel the same way.
Why You’ll Love This Recipe
Let me tell you why this one sticks. I’ve tested a lot of lunch ideas over the years, and most of them fall into two categories: too complicated to make on a Tuesday, or too boring to actually get eaten. These pinwheels hit a sweet spot that I honestly didn’t think existed.
- Quick & Easy: You can put these together in about 10 minutes flat. No cooking, no waiting, no fancy techniques. Just spread, roll, slice, and pack.
- Simple Ingredients: Tortillas, cream cheese, ham, and whatever veggies or extras you have hanging around. No special grocery trips required.
- Perfect for Lunchboxes: They hold up beautifully in a bento box or any container. No sogginess, no falling apart, no sad lunchbox surprises at noon.
- Crowd-Pleaser: I’ve packed these for picky kids, hungry adults, and everyone in between. They disappear every single time.
- Endlessly Customizable: Swap the ham for turkey, add some shredded cheddar, throw in spinach or bell peppers—you really can’t mess this up.
What makes this version different from the other pinwheel recipes out there? It’s the cream cheese base. I’ve tried using mayo, mustard, and even hummus as the spread, and nothing holds the roll together quite like cream cheese. It acts like edible glue, keeping everything in place while adding a subtle tang that complements the ham perfectly. Plus, it doesn’t weep or make the tortilla soggy, even after sitting in the fridge overnight.
This isn’t just another lunch idea. It’s the kind of recipe that makes you close the lunchbox with actual confidence. No crossing your fingers. No hoping for the best. Just a solid, reliable lunch that works.
What Ingredients You Will Need
This recipe uses simple, everyday ingredients that you probably already have in your kitchen. The beauty of these pinwheels is that they don’t require anything fancy—just a few staples that come together beautifully.
- Large flour tortillas (10-inch): You want the burrito-sized ones, not the small taco ones. They roll up easier and give you more pinwheels per wrap. I personally prefer Mission or Guerrero brand for their flexibility.
- 8 ounces cream cheese, softened: Full-fat works best for texture and flavor, but reduced-fat will do in a pinch. Let it sit on the counter for 20 minutes before using so it spreads smoothly. (Philadelphia is my go-to.)
- 8-10 slices deli ham: Thinly sliced honey ham or black forest ham both work great. You want them thin enough to roll without cracking but thick enough to taste. I usually grab the Boar’s Head or Hillshire Farm from the deli counter.
- 1/2 cup shredded cheddar cheese (optional): Adds extra cheesiness and helps the pinwheels hold their shape. Sharp cheddar gives more flavor, but mild works fine for kids.
- 1/4 cup finely chopped bell peppers (optional): Red or orange adds color and a little crunch. Make sure they’re chopped really small so they don’t interfere with the roll.
- 1/4 cup fresh spinach leaves (optional): Adds a pop of green and some extra nutrition. Pat them dry before layering so they don’t make the tortilla soggy.
- Salt and pepper to taste: Honestly, the ham is usually salty enough, so go easy. A tiny pinch of black pepper adds a nice little kick.
For the cream cheese mixture, I sometimes add a teaspoon of dried dill or a squeeze of lemon juice to brighten things up. It’s not necessary, but it gives the pinwheels a little more personality. If you’re packing these for adults, a sprinkle of everything bagel seasoning on top before rolling is absolutely fantastic—kind of like what I did with these creamy turkey pinwheel roll-ups.
Equipment Needed
The equipment list for this recipe is refreshingly short. You probably already own everything you need.
- Cutting board: A large, flat surface for assembling and slicing. Wood or plastic both work fine.
- Butter knife or offset spatula: For spreading the cream cheese evenly across the tortilla. An offset spatula gives you better control, but a regular butter knife works just as well.
- Sharp chef’s knife: A good, sharp knife makes all the difference when slicing the pinwheels. Dull knives will squish the roll and make messy cuts. I use my Wusthof 8-inch chef’s knife for this.
- Plastic wrap: For wrapping the rolled tortillas tightly before chilling. This helps them hold their shape and makes slicing much cleaner.
- Bento box or container: Any airtight container works. I love my Yumbox or Bentgo boxes because they keep everything separated and organized.
- Small mixing bowl: For mixing any add-ins into the cream cheese if you’re customizing the spread.
If you don’t have plastic wrap, you can use parchment paper or wax paper instead. Just make sure whatever you use is tight enough to hold the roll together while it chills. I’ve also used reusable beeswax wraps in a pinch, and they work surprisingly well.
Preparation Method
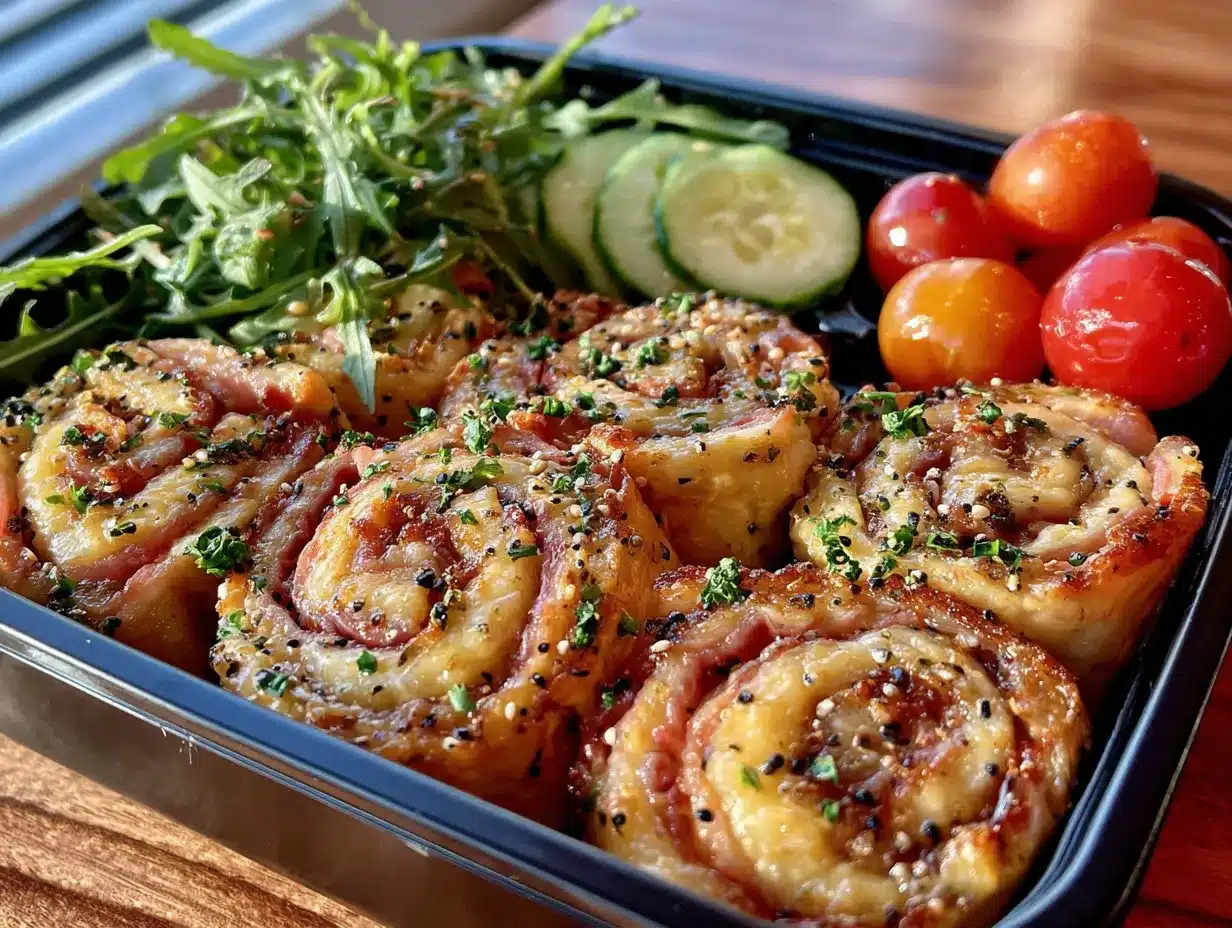
Making these pinwheels is almost embarrassingly easy. Here’s how to do it step by step.
- Soften the cream cheese: Take your cream cheese out of the fridge about 20 minutes before you start. You want it soft enough to spread like butter. If you’re in a hurry, microwave it for 10-15 seconds—just don’t overdo it or you’ll end up with melted cream cheese soup.
- Mix the cream cheese (optional): If you’re adding any seasonings or finely chopped veggies, mix them into the softened cream cheese now. A little dried dill, garlic powder, or everything bagel seasoning works beautifully. Stir until everything is evenly distributed.
- Spread the cream cheese: Lay one tortilla flat on your cutting board. Using your butter knife or offset spatula, spread a thin, even layer of cream cheese across the entire surface. Go all the way to the edges—this is what seals the roll and prevents gaps. Don’t go too thick or the pinwheels will be gummy.
- Layer the ham: Place 4-5 slices of deli ham across the cream cheese, overlapping them slightly. You want even coverage without huge gaps. If the ham slices are large, you might only need 3-4. If they’re small, use more. Trust your eyes here.
- Add extras (optional): Sprinkle shredded cheddar, chopped bell peppers, or fresh spinach leaves over the ham. Don’t go overboard—you still need to be able to roll it up. A thin, even layer is plenty.
- Roll it up tight: Starting from one edge, roll the tortilla as tightly as you can without tearing it. Use your fingers to keep the filling tucked in as you go. Think of it like rolling a sleeping bag—firm and even pressure all the way across.
- Wrap and chill: Tightly wrap the rolled tortilla in plastic wrap. Twist the ends like a candy wrapper to keep it snug. Pop it in the fridge for at least 30 minutes—longer is better. This step is non-negotiable if you want clean slices. The chilling firms up the cream cheese and sets the shape.
- Slice into pinwheels: Unwrap the chilled roll and place it on your cutting board. Using a sharp chef’s knife, slice the roll into 1-inch thick rounds. Use a gentle sawing motion rather than pressing straight down—this prevents squishing. You should get about 8-10 pinwheels per tortilla.
- Pack and serve: Arrange the pinwheels in your bento box or container. They can sit at room temperature for a few hours, so they’re perfect for packed lunches. Add some fruit, veggie sticks, or crackers on the side for a complete meal.
One thing I learned the hard way—don’t skip the chilling step. The first time I made these, I was in a rush and sliced them right after rolling. They came out looking like sad, squished blobs instead of neat little spirals. The cream cheese needs that time in the fridge to firm up and hold everything together. Thirty minutes makes all the difference.
Cooking Tips & Techniques
After making these pinwheels more times than I can count, I’ve picked up a few tricks that make the process even smoother.
Use room temperature cream cheese. This is the number one tip I can give you. Cold cream cheese tears the tortilla when you try to spread it, and nobody wants a ripped tortilla. Let it sit out for 20 minutes, or give it a quick 10-second zap in the microwave. It should spread like soft butter—smooth and easy, no resistance.
Don’t overfill. I know it’s tempting to pile on the ham and cheese, but trust me on this one. Too much filling makes the roll bulge and split, and you’ll end up with a messy explosion instead of neat pinwheels. A thin, even layer of everything is the way to go. You can always make more rolls if you need extra.
Slice with a serrated knife. If you have one, a serrated knife actually gives you cleaner cuts than a straight blade. The sawing motion cuts through the tortilla without squishing the roll. If you only have a chef’s knife, make sure it’s razor sharp and use that gentle sawing motion I mentioned earlier.
Chill longer for cleaner slices. Thirty minutes is the minimum, but an hour or even overnight is better. The longer the roll sits, the firmer it gets, and the cleaner your slices will be. I often make these the night before and slice them in the morning—perfect every time.
Keep the ends for snacking. The very ends of the roll (the first and last slice) usually have more tortilla than filling and look a little wonky. I eat those myself while packing the lunchbox. It’s the cook’s tax, and honestly, it’s one of the best parts of making these.
I once forgot to wrap the roll tightly before chilling, and the cream cheese dried out on the edges. The pinwheels still tasted fine, but they looked a little sad. Now I always double-check that the plastic wrap is snug—no air gaps, no loose spots. It makes a real difference in the final appearance.
Variations & Adaptations
This recipe is incredibly flexible. Here are some variations I’ve tried and loved.
- Turkey and Swiss: Swap the ham for thinly sliced turkey breast and use Swiss cheese instead of cheddar. Add a smear of Dijon mustard to the cream cheese for a grown-up twist. This version is great for adult lunchboxes or picnic platters.
- Veggie Cream Cheese: Skip the ham entirely and mix finely chopped cucumber, shredded carrot, and fresh dill into the cream cheese. It’s a fresh, crunchy option that even non-vegetarians will enjoy. My friend makes these for her kids and calls them “garden spirals.”
- Spicy Southwest: Add a tablespoon of chopped pickled jalapeños and a sprinkle of cumin to the cream cheese. Use pepper jack cheese and replace the ham with shredded chicken or black beans. These have a nice little kick without being overwhelming.
- Everything Bagel Style: Mix everything bagel seasoning into the cream cheese before spreading. Use turkey or ham, and add a layer of thinly sliced cucumber for crunch. It tastes just like an everything bagel sandwich, minus the bagel. I did a version of this with my creamy turkey pinwheel roll-ups and it was a hit.
- Gluten-Free Option: Use gluten-free tortillas or large lettuce leaves instead of flour tortillas. Lettuce wraps don’t hold up as well in a lunchbox, so I’d recommend eating those right away. But gluten-free tortillas work beautifully—just handle them gently as they can be a bit more delicate.
- Low-Carb Version: Swap the flour tortillas for low-carb or keto-friendly tortillas. The rest of the recipe stays exactly the same. These are great for anyone watching their carb intake but still wanting a satisfying lunch.
My personal favorite variation combines everything bagel seasoning with turkey and a thin slice of provolone. It’s what I pack for my own lunches when I want something that feels a little special without any extra effort. The seasoning adds that salty, savory punch that makes every bite interesting.
Serving & Storage Suggestions
These pinwheels are best served cold or at room temperature, which makes them perfect for packed lunches. I usually pack them straight from the fridge in the morning, and by lunchtime they’ve warmed up slightly but are still firm and delicious.
For a complete bento lunch, I pair these pinwheels with a mix of fresh fruit (grapes, apple slices, or berries), crunchy veggie sticks (carrot, cucumber, or bell pepper), and a small treat like a few chocolate chips or a mini cookie. The variety keeps things interesting and ensures a balanced meal. If you’re looking for more lunchbox inspiration, this easy sheet pan teriyaki chicken bento box recipe is another great option for meal prep.
Storage: Keep the pinwheels in an airtight container in the refrigerator for up to 3 days. They actually taste great on day two because the flavors have had time to meld together. Just make sure they’re sealed tightly so they don’t dry out.
Freezing: You can freeze the rolled tortillas (before slicing) for up to 1 month. Wrap them tightly in plastic wrap and then foil, or place them in a freezer bag. When you’re ready to use them, thaw in the refrigerator overnight, then slice and pack as usual. The texture stays surprisingly good.
Reheating: These are meant to be eaten cold, so no reheating needed. If you prefer them warm (which I sometimes do for a quick snack), you can microwave a few pinwheels for about 10-15 seconds. Just be careful—the cream cheese gets hot fast.
One thing I’ve noticed is that the flavors actually get better after a few hours in the fridge. The cream cheese absorbs some of the ham’s saltiness, and everything melds together into this cohesive, delicious bite. So don’t hesitate to make these a day ahead—they’ll be even better.
Nutritional Information & Benefits
Here’s an approximate nutritional breakdown for one serving (about 4 pinwheels, based on using 8-inch tortillas, full-fat cream cheese, and deli ham):
- Calories: 280-320
- Protein: 15-18g
- Fat: 16-20g
- Carbohydrates: 18-22g
- Fiber: 1-2g
- Sodium: 700-900mg (varies based on ham)
The numbers will shift depending on your specific ingredients and portion sizes. Using reduced-fat cream cheese and low-sodium ham can bring those numbers down significantly.
These pinwheels offer a decent balance of protein and carbs, making them a satisfying lunch option that won’t leave you crashing an hour later. The protein from the ham and cream cheese helps keep you full, while the tortilla provides quick energy. If you add veggies like spinach or bell peppers, you’ll also get a boost of vitamins A and C.
For anyone watching their sodium intake, look for low-sodium deli ham or rinse the ham slices before using them. You can also use turkey breast, which tends to be lower in sodium than ham. And if you’re dairy-sensitive, dairy-free cream cheese works perfectly here—just make sure it’s the spreadable kind, not the block.
I personally love that these pinwheels feel indulgent without being heavy. They’re satisfying in a way that makes you forget you’re eating something that’s actually pretty balanced. It’s comfort food that happens to be practical.
Conclusion
These easy ham and cheese pinwheel bento lunches have honestly changed the way I think about packed lunches. They’re simple enough for a chaotic weekday morning, but they look and taste like you actually put effort into them. That’s a rare combination in the lunchbox world.
What I love most about this recipe is how forgiving it is. You can use whatever you have on hand, customize it to your family’s preferences, and it still turns out great. There’s no pressure to get it perfect—just spread, roll, slice, and pack. The pinwheels do the rest of the work.
I’d love to hear how these turn out for you. Did you add any fun variations? Did your kids actually eat them? (Mine did, and that felt like a major parenting win.) Drop a comment below and let me know—I read every single one and I love seeing what you come up with. And if you found a new favorite lunch idea, share it with a friend who could use a little lunchbox relief.
Here’s to lunches that actually get eaten, mornings that feel a little less stressful, and the simple joy of a perfectly rolled pinwheel. Happy packing!
Frequently Asked Questions
Can I make these ham and cheese pinwheels the night before?
Absolutely. In fact, I recommend it. Assemble and roll the tortillas, wrap them tightly in plastic wrap, and refrigerate overnight. Slice them in the morning before packing. The overnight chill makes the slices even cleaner and the flavors even better.
How do I keep the pinwheels from getting soggy in the lunchbox?
Make sure your cream cheese is spread evenly to the edges of the tortilla—this creates a seal that prevents moisture from the ham from seeping into the tortilla. Also, pat any veggies like spinach or bell peppers dry before adding them. The chilling step also helps firm everything up and reduces sogginess.
Can I use flavored cream cheese?
Yes! Chive and onion cream cheese is fantastic with ham. Garden vegetable cream cheese also works well. Just be aware that flavored cream cheeses can be a little softer than plain, so you might need to chill the rolls a bit longer before slicing.
How many pinwheels does one tortilla make?
One large 10-inch flour tortilla typically yields 8-10 pinwheels, depending on how thick you slice them. For a kid’s lunchbox, 4-5 pinwheels is usually plenty. For an adult lunch, 6-8 makes a satisfying meal, especially with sides.
Can I use a different type of cheese instead of cream cheese?
You can, but the texture will be different. Cream cheese works best because it’s spreadable and acts as a binder. If you want to try something else, whipped butter or a thick hummus can work in a pinch. Just note that they won’t hold the roll together quite as well, so handle the pinwheels gently.
Pin This Recipe!

Easy Ham and Cheese Pinwheel Bento Lunch: Best Make-Ahead Idea

These easy ham and cheese pinwheel bento lunches are simple enough for a chaotic weekday morning, but they look and taste like you actually put effort into them. They’re perfect for school lunches, work lunches, and even lazy weekend snacks.
- Prep Time: 10 minutes
- Cook Time: 0 minutes
- Total Time: 40 minutes (includes 30 minutes chilling)
- Yield: 4 servings 1x
- Category: Lunch
- Cuisine: American
Ingredients
- 4 large flour tortillas (10-inch)
- 8 ounces cream cheese, softened
- 8–10 slices deli ham
- 1/2 cup shredded cheddar cheese (optional)
- 1/4 cup finely chopped bell peppers (optional)
- 1/4 cup fresh spinach leaves (optional)
- Salt and pepper to taste
Instructions
- Soften the cream cheese: Take your cream cheese out of the fridge about 20 minutes before you start. You want it soft enough to spread like butter. If you’re in a hurry, microwave it for 10-15 seconds—just don’t overdo it or you’ll end up with melted cream cheese soup.
- Mix the cream cheese (optional): If you’re adding any seasonings or finely chopped veggies, mix them into the softened cream cheese now. A little dried dill, garlic powder, or everything bagel seasoning works beautifully. Stir until everything is evenly distributed.
- Spread the cream cheese: Lay one tortilla flat on your cutting board. Using your butter knife or offset spatula, spread a thin, even layer of cream cheese across the entire surface. Go all the way to the edges—this is what seals the roll and prevents gaps. Don’t go too thick or the pinwheels will be gummy.
- Layer the ham: Place 4-5 slices of deli ham across the cream cheese, overlapping them slightly. You want even coverage without huge gaps. If the ham slices are large, you might only need 3-4. If they’re small, use more. Trust your eyes here.
- Add extras (optional): Sprinkle shredded cheddar, chopped bell peppers, or fresh spinach leaves over the ham. Don’t go overboard—you still need to be able to roll it up. A thin, even layer is plenty.
- Roll it up tight: Starting from one edge, roll the tortilla as tightly as you can without tearing it. Use your fingers to keep the filling tucked in as you go. Think of it like rolling a sleeping bag—firm and even pressure all the way across.
- Wrap and chill: Tightly wrap the rolled tortilla in plastic wrap. Twist the ends like a candy wrapper to keep it snug. Pop it in the fridge for at least 30 minutes—longer is better. This step is non-negotiable if you want clean slices. The chilling firms up the cream cheese and sets the shape.
- Slice into pinwheels: Unwrap the chilled roll and place it on your cutting board. Using a sharp chef’s knife, slice the roll into 1-inch thick rounds. Use a gentle sawing motion rather than pressing straight down—this prevents squishing. You should get about 8-10 pinwheels per tortilla.
- Pack and serve: Arrange the pinwheels in your bento box or container. They can sit at room temperature for a few hours, so they’re perfect for packed lunches. Add some fruit, veggie sticks, or crackers on the side for a complete meal.
Notes
Don’t skip the chilling step—it’s essential for clean slices. Use room temperature cream cheese to avoid tearing the tortilla. The ends of the roll make great cook’s snacks. For best results, make these the night before and slice in the morning.
Nutrition
- Serving Size: 4 pinwheels
- Calories: 300
- Sugar: 2
- Sodium: 800
- Fat: 18
- Saturated Fat: 10
- Carbohydrates: 20
- Fiber: 1.5
- Protein: 16
Keywords: ham and cheese pinwheels, bento lunch, make-ahead lunch, easy lunch ideas, kid-friendly lunch, school lunch, pinwheel sandwiches


