I showed up to the parking lot with a cardboard box full of these little cups, and by the time I’d set down the cooler, three people had already asked where I got them. One guy actually tried to hand me a five-dollar bill. I laughed and told him they were just snacks I threw together that morning. He didn’t believe me. Honestly, I wouldn’t have either if I’d been on the other side of that exchange. There’s something about individual portions that makes people feel like you’ve gone to some serious effort—even when you haven’t.
The thing is, I wasn’t even planning to make these easy mini charcuterie cups for tailgate parties that day. I’d grabbed a pack of salami and some cheese cubes on a whim, thinking I’d just toss them on a platter like everyone else. But then I remembered the last time I brought a board to a game. It was a mess within ten minutes—crackers shattered, olives rolling into someone’s dip, and that one guy using his bare hands to grab everything at once. I wanted something cleaner. Something people could hold in one hand while clutching a drink in the other. So I grabbed some small cups from the pantry and started layering. It was pure practicality at first. But the second I saw how good they looked—like little edible presents—I knew I’d accidentally stumbled onto something.
These mini charcuterie cups have become my go-to for every gathering since. They travel well, they’re endlessly customizable, and they make you look like you planned way more than you actually did. I’ve brought them to barbecues, birthday parties, and even a work potluck where someone asked if I’d catered them. I hadn’t. I just really like cheese and meat, and I figured out a smarter way to serve them. That’s the whole secret, honestly. You don’t need a fancy board or a culinary degree. You just need a few good ingredients, some cups, and the willingness to stack things in a way that looks intentional. Trust me on this one.
Why You’ll Love This Recipe
Let me tell you why these little cups have basically replaced every other appetizer I used to make. I’ve tested them at tailgates, backyard hangs, and even a quiet night in where I ate three of them for dinner and felt zero shame.
- Quick & Easy : You can assemble a dozen cups in under ten minutes. No cooking, no heating, no complicated steps. Just grab, layer, and go.
- Simple Ingredients : Everything comes from the regular grocery store. You don’t need specialty items or a trip to a fancy deli counter. I’ve made these with whatever cheese and meat were on sale and they still turned out great.
- Perfect for Tailgates : They’re portable, mess-free, and easy to eat standing up. No plates or utensils required. Just grab a cup and get back to the game.
- Crowd-Pleaser : I’ve watched picky eaters, kids, and adults all go back for seconds. There’s something about the individual portion that makes everyone feel special.
- Unbelievably Delicious : The combination of salty meat, creamy cheese, crunchy crackers, and a little pop from olives or pickles is just perfect. It hits every texture and flavor you want in one bite.
What makes these different from a regular charcuterie board is the convenience. You don’t have to worry about people double-dipping or fighting over the last piece of prosciutto. Everyone gets their own perfectly balanced cup. And honestly, they just look so cute sitting there in a row. It’s the kind of snack that makes people smile before they even take a bite.
This isn’t just another appetizer. It’s the one that disappears first at every party. The one people text you about afterward asking for the recipe. And the one you’ll start making on autopilot because it’s just that easy and that good.
What Ingredients You Will Need
This recipe uses simple, store-bought ingredients to deliver big flavor and satisfying texture without any fuss. You can mix and match based on what you like or what’s on sale. Here’s what I typically use for my easy mini charcuterie cups for tailgate parties:
For the Meat
- Salami – I prefer Genoa salami for its rich, slightly spicy flavor. Look for presliced rounds to save time.
- Prosciutto – Adds a delicate, salty note. Tear it into ribbons for a more rustic look.
- Pepperoni – A crowd favorite, especially for game day. The slight heat pairs beautifully with cheese.
For the Cheese
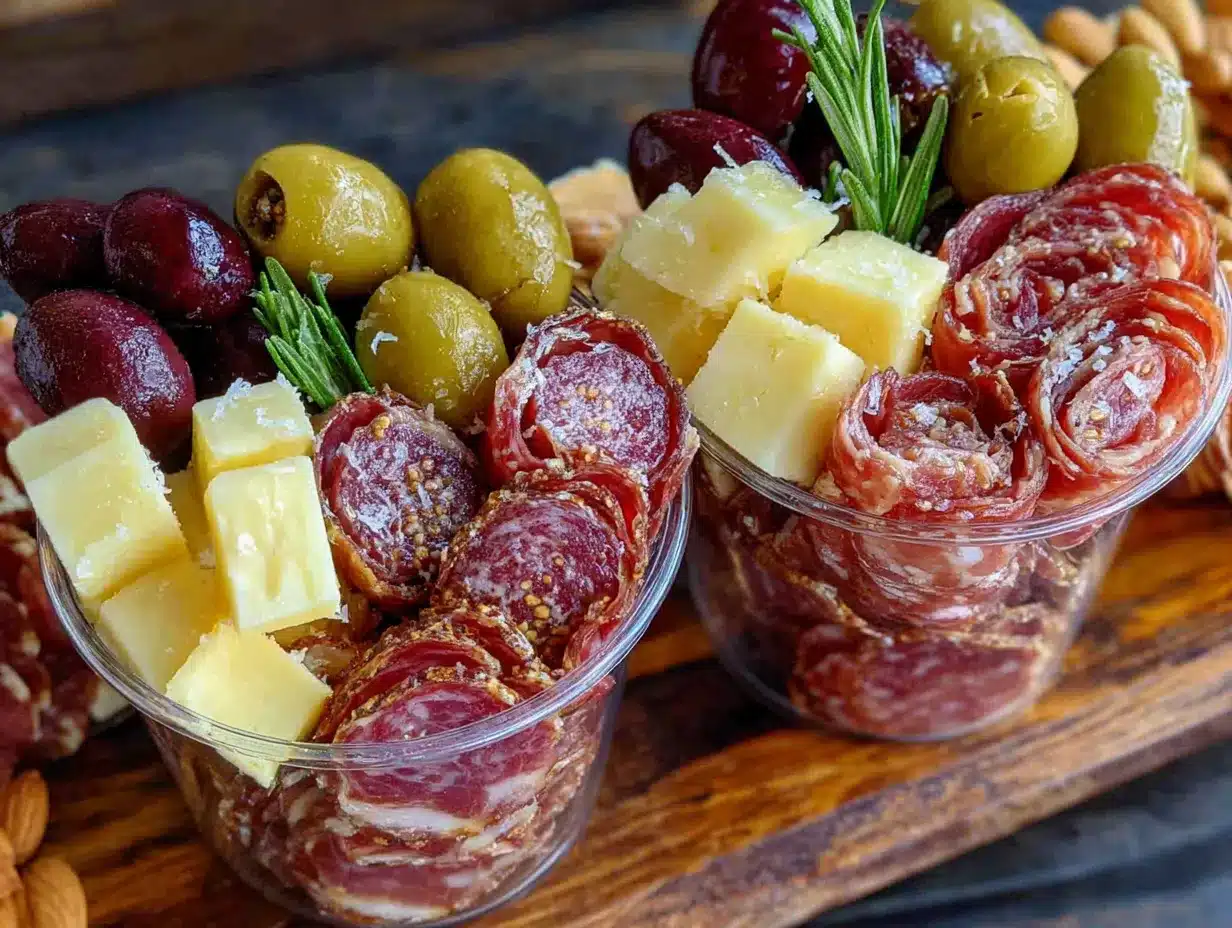
- Cheddar cubes – Sharp or mild, both work. I like to cut them into small squares so they fit neatly in the cup.
- Pepper Jack cheese – Adds a little kick that’s perfect for tailgating. I recommend [Tillamook] for consistent quality.
- Fresh mozzarella pearls – Soft, creamy, and a nice contrast to the hard cheeses. Pat them dry if they seem wet.
For the Crackers and Crunch
- Mini crackers – I love using buttery Ritz-style crackers or tiny cheese crisps. They fit perfectly in the cup without breaking.
- Pretzel sticks – Adds crunch and a nice salty bite. They also double as a dipper for any spreads.
- Breadsticks – Thin, crunchy breadsticks add height and visual appeal. Snap them in half if they’re too long.
For the Fruits and Pickles
- Red grapes – Sweet and juicy, they cut through the saltiness of the meat and cheese. Seedless is a must.
- Dried apricots – Chewy and tangy, they add a little sweetness and a pop of color.
- Cornichons or mini pickles – The briny crunch is essential. I like the little gherkins you find near the olives.
- Kalamata olives – Rich and briny, they add a Mediterranean touch. Pitted ones are easier to eat.
For the Spreads and Extras
- Honey – A drizzle over the cheese or prosciutto is a game changer. Use a good-quality local honey if you can.
- Whole-grain mustard – Adds a tangy pop that pairs well with salami and cheddar.
- Fresh rosemary or thyme – A small sprig tucked into each cup makes them look fancy. Totally optional but worth it.
Substitution Guidance: If you’re feeding a crowd with dietary restrictions, swap the cheese with dairy-free alternatives or use turkey pepperoni for a lighter option. For a gluten-free version, skip the crackers and use gluten-free pretzel sticks or veggie chips instead.
Equipment Needed
You don’t need much to make these cups. That’s part of the beauty. Here’s what I use:
- Small clear plastic cups – I like the 5-ounce size. They’re sturdy, see-through, and easy to find at any party supply store. You can also use small mason jars or even paper cups if that’s what you have.
- Cutting board and knife – For cubing cheese and slicing fruit. A sharp knife makes the job quicker and cleaner.
- Small bowls – To hold your ingredients while you assemble. It keeps things organized and prevents cross-contamination.
- Toothpicks or mini skewers – Optional, but useful if you want to layer items that are easier to pick up. I sometimes use them for the olives and cheese cubes.
- Tray or platter – To carry the cups to the tailgate. A baking sheet works perfectly in a pinch.
I’ve made these with just a butter knife and a set of plastic cups before. It’s not fancy, but it works. If you’re using mason jars, make sure they’re wide-mouthed so you can easily reach the bottom.
Preparation Method
Here’s how I put these together. It’s more about layering than actual cooking, but there are a few tricks I’ve learned that make a big difference.
- Prep your ingredients (5 minutes). Cube your cheddar and pepper jack into ½-inch squares. Halve or quarter the grapes if they’re large. Drain the olives and cornichons. Tear the prosciutto into strips about 2 inches wide. If you’re using salami, you can leave the slices whole or fold them into little quarters.
- Choose your cup order. I always start with the heaviest items at the bottom. That means cheese cubes and olives go in first. This keeps the cup stable and prevents the lighter crackers from getting crushed. Drop in about 3-4 cheese cubes and 2-3 olives per cup.
- Add the meat layer (2 minutes). Fold your salami slices into little triangles or roll them into small cylinders. Tuck them in around the cheese. For the prosciutto, I like to create little nests—just scrunch the strips and place them on top of the cheese. The meat should peek out a bit so people can see what’s inside.
- Insert the crackers and pretzels (2 minutes). Gently slide 2-3 mini crackers into the sides of the cup, standing them up vertically. Add 2-3 pretzel sticks next to them. This creates a nice visual contrast and gives people something to grab first.
- Top with fruit and pickles (2 minutes). Place 2-3 grapes on top of the meat layer. Tuck in a cornichon or two. If you’re using dried apricots, fold them in half and nestle them between the crackers. The goal is to create a little landscape of colors and textures.
- Add the finishing touches (1 minute per cup). Drizzle a tiny bit of honey over the cheese or prosciutto. Add a small dollop of whole-grain mustard if you’re using it. Tuck a sprig of fresh rosemary or thyme into the side for that chef-y touch. It looks incredible and smells amazing.
- Chill until ready to serve (optional). If you’re making these ahead of time, cover the tray with plastic wrap and refrigerate for up to 4 hours. Take them out about 15 minutes before serving to let the cheese come to room temperature. The flavors really open up.
Pro tip: If you’re transporting these to a tailgate, place the cups in a shallow cardboard box or on a rimmed baking sheet. They’ll stay upright and won’t tip over in the car. I learned this the hard way after a sharp turn sent a dozen cups flying in my backseat.
Cooking Tips & Techniques
I’ve made these cups probably fifty times by now, and I’ve definitely had my share of flops. Here are the lessons I’ve learned so you don’t have to repeat my mistakes.
Don’t overfill the cups. I know it’s tempting to cram as much as possible in there, but people need to be able to grab items without everything spilling out. Leave about a half-inch of space at the top. It looks cleaner and is easier to eat from.
Balance your textures. The best cups have a mix of soft, crunchy, chewy, and briny. If you go too heavy on the crackers, it’s dry. Too much cheese, and it’s one-note. I aim for about 40% meat and cheese, 30% crunch, and 30% fruit and pickles. That ratio has never let me down.
Think about color. These cups are as much about presentation as they are about taste. I try to include at least three different colors in each cup. Red grapes, green olives, yellow cheese, brown crackers—it makes a visual impact that people notice before they even taste anything.
Use the same folding technique for salami. If you fold each slice the same way (I do a simple triangle fold), the cups look uniform and professional. It takes an extra second but makes a huge difference in the final look.
Don’t skip the honey. I know it sounds weird with salty meat and cheese, but a tiny drizzle of honey on the prosciutto or cheddar is honestly magical. It brings out the richness of the cheese and balances the salt. Just don’t go overboard—a little goes a long way.
Prep in an assembly line. When I’m making a big batch, I set up all my ingredients in bowls and line up the cups. I do all the cheese first, then all the meat, then the crackers, and so on. It’s way faster than doing one cup at a time. I can crank out 24 cups in about 15 minutes this way.
One time I forgot the crackers entirely and just had cups of meat, cheese, and grapes. They were still good, but people kept asking where the crunch was. Don’t skip the crackers—they’re the unsung hero of the whole thing.
Variations & Adaptations
The beauty of these cups is how flexible they are. Here are some variations I’ve tried and loved.
Low-Carb / Keto Version
Skip the crackers and pretzels entirely. Replace them with cucumber slices, bell pepper strips, or pork rinds. The crunch is still there, but the carbs are gone. I’ve made these for a keto friend’s birthday party and they were a hit.
Mediterranean Twist
Swap the cheddar for feta cheese cubes and the salami for grilled halloumi if you can find it. Add cherry tomatoes, cucumber chunks, and a little tzatziki sauce in a small cup on the side. It’s a completely different flavor profile but just as good.
Sweet and Spicy
Use pepperoni and pepper jack cheese, then add a few pickled jalapeño slices and a drizzle of hot honey. The combination of heat and sweetness is addictive. I’ve brought these to a few tailgates and they’re always the first to go.
Breakfast Charcuterie Cups
Okay, this one’s a little unconventional, but hear me out. Use mini pancakes or waffle pieces instead of crackers, add breakfast sausage links or bacon bits, cheddar cubes, and a few apple slices. Drizzle with maple syrup instead of honey. It’s a fun brunch twist that works surprisingly well.
Vegetarian Version
Skip the meat entirely and double up on the cheese. Add roasted red peppers, artichoke hearts, marinated mushrooms, and extra fruit. The savory elements from the roasted veggies will make up for the missing meat.
My personal favorite variation is the sweet and spicy one. I made it on a whim during a playoff game and now I can’t go back. The hot honey with the pepper jack is just perfect.
Serving & Storage Suggestions
These cups are best served at room temperature, so if you’ve refrigerated them, take them out about 15-20 minutes before you plan to eat. The cheese softens slightly and the flavors become more pronounced. Cold cheese is fine, but room-temperature cheese is better.
For presentation, I like to arrange the cups on a large wooden board or a simple white platter. Sprinkle a few extra grapes or olives around the base for a more abundant look. If you’re at a tailgate, just set the tray on the tailgate itself—it’s casual and fits the vibe.
These pair beautifully with a cold beer, a crisp white wine like Sauvignon Blanc, or even a bubbly sparkling water with lemon. If you’re looking for a drink to match, try my cozy spiced pumpkin apple cider mocktail for a fall tailgate. For something more savory, these cups are also great alongside flavorful smoked queso dip with chorizo.
Storage: If you have leftovers (which honestly rarely happens), you can store the cups in the refrigerator for up to 24 hours. The crackers might get a little soft, but the flavors will still be good. To re-crisp the crackers, you can pop the cups in a 350°F oven for about 3 minutes—just remove any fresh herbs first. I don’t recommend freezing these. The texture of the cheese and fruit won’t hold up well.
The flavors actually meld together a bit after a few hours in the fridge. The honey soaks into the cheese slightly, and the prosciutto gets a little more tender. It’s a different experience, but still enjoyable.
Nutritional Information & Benefits
This recipe is naturally high in protein and healthy fats, making it a satisfying snack that keeps you full during a long game. Here are the estimated values for one cup (using the standard ingredients listed above):
| Nutrient | Amount per Cup |
|---|---|
| Calories | 220-280 kcal |
| Protein | 12-15g |
| Fat | 16-20g |
| Carbohydrates | 10-14g |
| Fiber | 1-2g |
| Sugar | 6-8g |
| Sodium | 600-800mg |
The cheese provides calcium and protein, while the grapes and dried fruit offer natural sugars and antioxidants. The olives and pickles add beneficial probiotics and healthy monounsaturated fats. If you’re watching your sodium, you can use low-sodium meats and unsalted crackers.
This recipe is gluten-free if you use gluten-free crackers and skip the pretzels. It’s also naturally low-carb if you omit the crackers and fruit. For a dairy-free version, use vegan cheese alternatives or skip the cheese entirely and double up on the meat and olives.
I personally love that these cups feel indulgent without being over-the-top. You get the satisfaction of a full charcuterie experience in a portion-controlled size. It’s the kind of snack that feels like a treat but doesn’t leave you feeling heavy.
Conclusion
These easy mini charcuterie cups for tailgate parties have become my secret weapon for every gathering. They’re simple enough to throw together in minutes but impressive enough to make people think you spent hours. The best part? You can customize them endlessly based on what you love or what’s in your fridge.
I’ve made these for Super Bowl parties, birthday cookouts, and even a quiet night in where I needed a snack that felt special. They never disappoint. The combination of salty, sweet, crunchy, and creamy is just so satisfying. And the individual cups mean no fighting over the last piece of anything.
I’d love to hear how you make these your own. Do you have a favorite meat and cheese combo? A secret ingredient you always add? Drop a comment below and let me know. And if you try these for your next tailgate, tag me in your photos—I love seeing them in action. Until next time, happy snacking!
Frequently Asked Questions
Can I make these cups ahead of time?
Yes, you can assemble them up to 4 hours in advance. Just cover the tray with plastic wrap and refrigerate. Take them out 15 minutes before serving to let the cheese come to room temperature.
What if I don’t have small cups?
No problem! You can use small mason jars, paper cups, or even shot glasses for a mini version. Just adjust the portion sizes accordingly. I’ve also used silicone muffin cups in a pinch.
Can I use different types of meat?
Absolutely. Prosciutto, salami, pepperoni, ham, and even sliced roast beef all work great. Just make sure the meat is thinly sliced so it’s easy to fold or roll.
How do I keep the crackers from getting soggy?
Layer the crackers on top of the meat and cheese, not at the bottom of the cup. The meat and cheese act as a barrier against any moisture from the fruit or pickles. If you’re making them far in advance, consider adding the crackers right before serving.
Are these cups kid-friendly?
Yes, they’re a huge hit with kids! Just skip any spicy ingredients like pepper jack or jalapeños, and use kid-friendly options like cheddar cubes, turkey slices, and grapes. The individual cups make them feel like a fun snack pack.
Pin This Recipe!
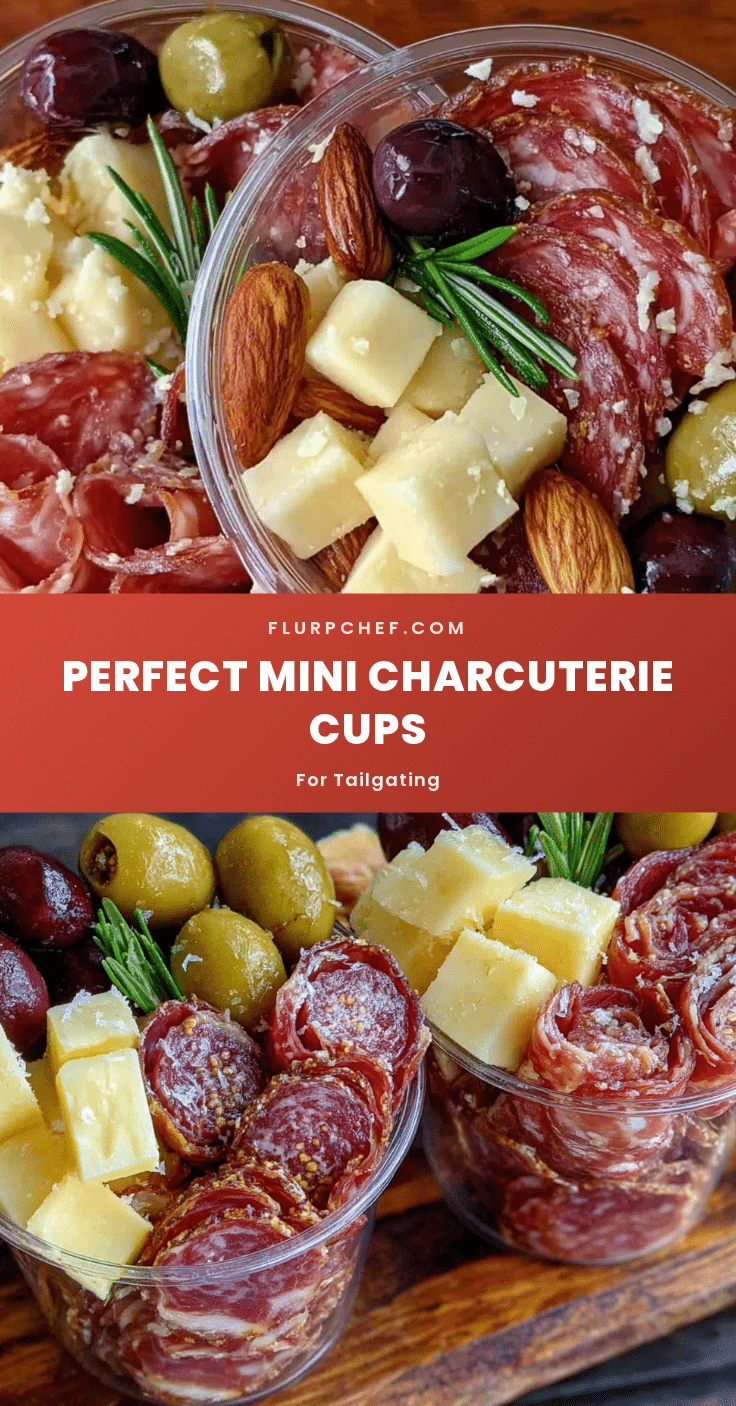
Easy Mini Charcuterie Cups Best Tailgate Snack
These easy mini charcuterie cups are the perfect tailgate snack—portable, mess-free, and endlessly customizable. Layer your favorite meats, cheeses, crackers, and fruits in individual cups for a crowd-pleasing appetizer that looks impressive but comes together in minutes.
- Prep Time: 10 minutes
- Cook Time: 0 minutes
- Total Time: 10 minutes
- Yield: 12 servings
- Category: Appetizer
- Cuisine: American
Ingredients
- Salami (Genoa, presliced rounds)
- Prosciutto (thinly sliced, torn into ribbons)
- Pepperoni
- Cheddar cubes (sharp or mild, cut into ½-inch squares)
- Pepper Jack cheese (cubed)
- Fresh mozzarella pearls
- Mini crackers (Ritz-style or cheese crisps)
- Pretzel sticks
- Thin breadsticks
- Red grapes (seedless, halved or quartered if large)
- Dried apricots
- Cornichons or mini pickles
- Kalamata olives (pitted)
- Honey
- Whole-grain mustard
- Fresh rosemary or thyme sprigs (optional)
Instructions
- Prep your ingredients: Cube cheddar and pepper jack into ½-inch squares. Halve or quarter grapes if large. Drain olives and cornichons. Tear prosciutto into 2-inch wide strips. Leave salami slices whole or fold into quarters.
- Choose your cup order: Start with the heaviest items at the bottom—cheese cubes and olives. Add about 3-4 cheese cubes and 2-3 olives per cup.
- Add the meat layer: Fold salami slices into triangles or roll into small cylinders and tuck around the cheese. For prosciutto, create little nests by scrunching strips and placing on top of cheese.
- Insert crackers and pretzels: Gently slide 2-3 mini crackers into the sides of the cup, standing them up vertically. Add 2-3 pretzel sticks next to them.
- Top with fruit and pickles: Place 2-3 grapes on top of the meat layer. Tuck in a cornichon or two. Fold dried apricots in half and nestle between crackers.
- Add finishing touches: Drizzle a tiny bit of honey over cheese or prosciutto. Add a small dollop of whole-grain mustard if using. Tuck a sprig of fresh rosemary or thyme into the side.
- Chill until ready to serve (optional): Cover tray with plastic wrap and refrigerate for up to 4 hours. Take out 15 minutes before serving to let cheese come to room temperature.
Notes
Don’t overfill cups—leave about half an inch of space at the top. Balance textures: aim for 40% meat and cheese, 30% crunch, 30% fruit and pickles. Use the same folding technique for salami for a uniform look. A tiny drizzle of honey on prosciutto or cheddar is magical. Prep in an assembly line for efficiency. For transport, place cups in a shallow cardboard box or rimmed baking sheet to prevent tipping.
Nutrition
- Serving Size: 1 cup
- Calories: 250
- Sugar: 7
- Sodium: 700
- Fat: 18
- Saturated Fat: 8
- Carbohydrates: 12
- Fiber: 1.5
- Protein: 13.5
Keywords: mini charcuterie cups, tailgate snacks, easy appetizers, individual charcuterie, party snacks, game day food


