My neighbor, Mrs. Kowalski, watched me struggling to peel a batch of hard-boiled eggs one Tuesday afternoon. I was standing at my kitchen counter, the screen door open, letting in that crisp October air. She didn’t say anything at first. Then she walked over, picked up an egg, and showed me how to crack it gently all over before rolling it between her palms. “The shell tells you when it’s ready to let go,” she said with a little shrug. That day, we ended up talking for an hour about her childhood in Poland and how her mother would turn simple boiled eggs into little works of art for holidays. She mentioned something about carving them into tiny pumpkins once, just for fun. Honestly, I filed that idea away and forgot about it for almost a year.
Then last fall, I was staring at a carton of eggs in my fridge, trying to figure out what to bring to my daughter’s preschool Halloween party. Everything store-bought felt too expensive, and I didn’t want to show up with another bag of chips. That memory of Mrs. Kowalski’s egg trick came rushing back. I grabbed the eggs, some paprika, and a few pantry staples, and started experimenting. Let me tell you, the first batch looked more like lumpy orange blobs than pumpkins. My three-year-old laughed at them, which honestly made it better. I mean, maybe you’ve been there—trying to make something cute on a budget and ending up with a kitchen disaster that somehow still tastes good.
But I kept tweaking. By the third try, I had it. Little deviled eggs that actually looked like tiny pumpkins, with a creamy filling that even picky eaters couldn’t resist. The best part? They cost me less than five dollars to make. That preschool party turned into a whole thing—parents asking for the recipe, kids grabbing seconds, my daughter proudly telling everyone her mom made the pumpkin eggs. That’s the thing about this recipe. It’s not fancy or complicated. It’s just smart. It uses what you already have, it makes everyone smile, and it proves that you don’t need to spend a lot to make something special. This recipe stayed with me because it showed me that the best ideas often come from a simple conversation and a willingness to mess up a few times before getting it right.
Why You’ll Love This Recipe
This isn’t just another deviled egg recipe. It’s a budget-friendly appetizer that looks like you spent way more time and money than you actually did. I’ve tested this with my own kids, with neighbor kids, and even with a group of skeptical adults at a potluck. Every single time, people light up when they see those little orange pumpkins. Here is why this recipe works so well for families like yours.
- Budget-Friendly: You only need a dozen eggs, a little paprika, and some basic pantry staples. No fancy ingredients, no specialty stores. This whole recipe costs around four to five dollars, depending on where you shop.
- Kid-Approved: My own children used to turn their noses up at deviled eggs. But when I turned them into mini pumpkins? They couldn’t grab them fast enough. Something about the shape makes them fun, not weird.
- Perfect for Halloween or Fall Gatherings: Whether it’s a preschool party, a family get-together, or just a fun weekend snack, these eggs fit right in. They’re festive without being over the top.
- Quick and Easy: From start to finish, you’re looking at about 30 minutes of active time. Most of that is waiting for the eggs to boil and cool.
- Naturally Gluten-Free and Low-Carb: If you’re watching carbs or cooking for someone with dietary restrictions, these eggs are a safe bet. No flour, no grains, just protein-packed goodness.
- Leftovers Reheat Well: Okay, not the deviled eggs themselves—those are best fresh. But hard-boiled eggs? You can make extra and use them for breakfast or lunch the next day.
This recipe is different from the rest because of the technique. I’m not just talking about adding paprika on top. I’m showing you how to shape the filling so it actually looks like a pumpkin stem and all. It’s a small detail, but it makes a huge difference. Plus, the filling has a secret ingredient that makes it extra creamy without costing more. Honestly, once you try this version, you won’t go back to plain deviled eggs.
What Ingredients You Will Need
This recipe uses simple, everyday ingredients to create something that looks and tastes special. You probably already have most of these in your kitchen right now. If not, they’re all easy to find and won’t break the bank.
- 12 large eggs (room temperature works best for even cooking, but cold is okay in a pinch)
- 1/4 cup mayonnaise (I prefer Hellmann’s or Duke’s for the creamiest texture, but any brand works)
- 1 teaspoon yellow mustard (adds that classic tangy flavor)
- 1/2 teaspoon white vinegar (helps balance the richness)
- 1/4 teaspoon salt (fine sea salt dissolves better than coarse)
- 1/8 teaspoon black pepper (freshly ground if you have it)
- 1 to 2 tablespoons paprika (smoked or sweet both work; smoked adds a deeper flavor)
- Small fresh parsley or chives (for the pumpkin stems, optional but highly recommended)
That’s it. No cream cheese, no sour cream, no hidden expensive ingredients. The magic happens with how you prepare and assemble them. Let me walk you through a few specifics so you get the best results.
Eggs: Fresh eggs are great for eating, but slightly older eggs (about a week old) are actually easier to peel after boiling. If your eggs are super fresh, you might have a tougher time getting the shells off cleanly. Not a dealbreaker, just something to keep in mind. I usually buy my eggs a few days before I plan to make these.
Mayonnaise: Full-fat mayo gives the creamiest filling. If you’re watching calories, you can use a light version, but the texture won’t be quite as rich. I’ve tried it with both, and honestly, the full-fat version is worth the splurge for a party dish.
Paprika: This is what gives the eggs their pumpkin color. Sweet paprika is milder and more common, while smoked paprika adds a subtle earthy flavor that pairs beautifully with the eggs. I often use a mix of both—half sweet, half smoked. If you only have one, don’t stress. It’ll still look and taste great.
Parsley or Chives: These are for the little green stems on top. You can skip them if you don’t have any, but they really sell the pumpkin look. A tiny piece of cilantro or even a small sliver of green bell pepper works too.
Equipment Needed
You don’t need any fancy gadgets for this recipe. Here is what you’ll want to have on hand.
- Medium saucepan: For boiling the eggs. Make sure it’s big enough to hold all 12 eggs in a single layer.
- Large bowl: Filled with ice water for shocking the eggs after boiling.
- Sharp knife: For cutting the eggs cleanly. A dull knife will tear the whites.
- Small mixing bowl: For combining the filling ingredients.
- Fork or potato masher: For mashing the egg yolks. A fork works fine, but a masher makes it quicker.
- Piping bag or zip-top bag: For piping the filling into the egg whites. A zip-top bag with the corner snipped off works perfectly and costs nothing.
- Small spoon or offset spatula: For filling the eggs if you don’t want to pipe them.
- Cutting board: For chopping parsley or chives.
If you don’t have a piping bag, don’t worry. I’ve made these plenty of times using just a zip-top bag. It’s less messy and easier to control. Also, if you don’t have a potato masher, you can press the yolks through a fine-mesh sieve for an extra smooth texture. That’s an old trick my grandmother used.
Preparation Method
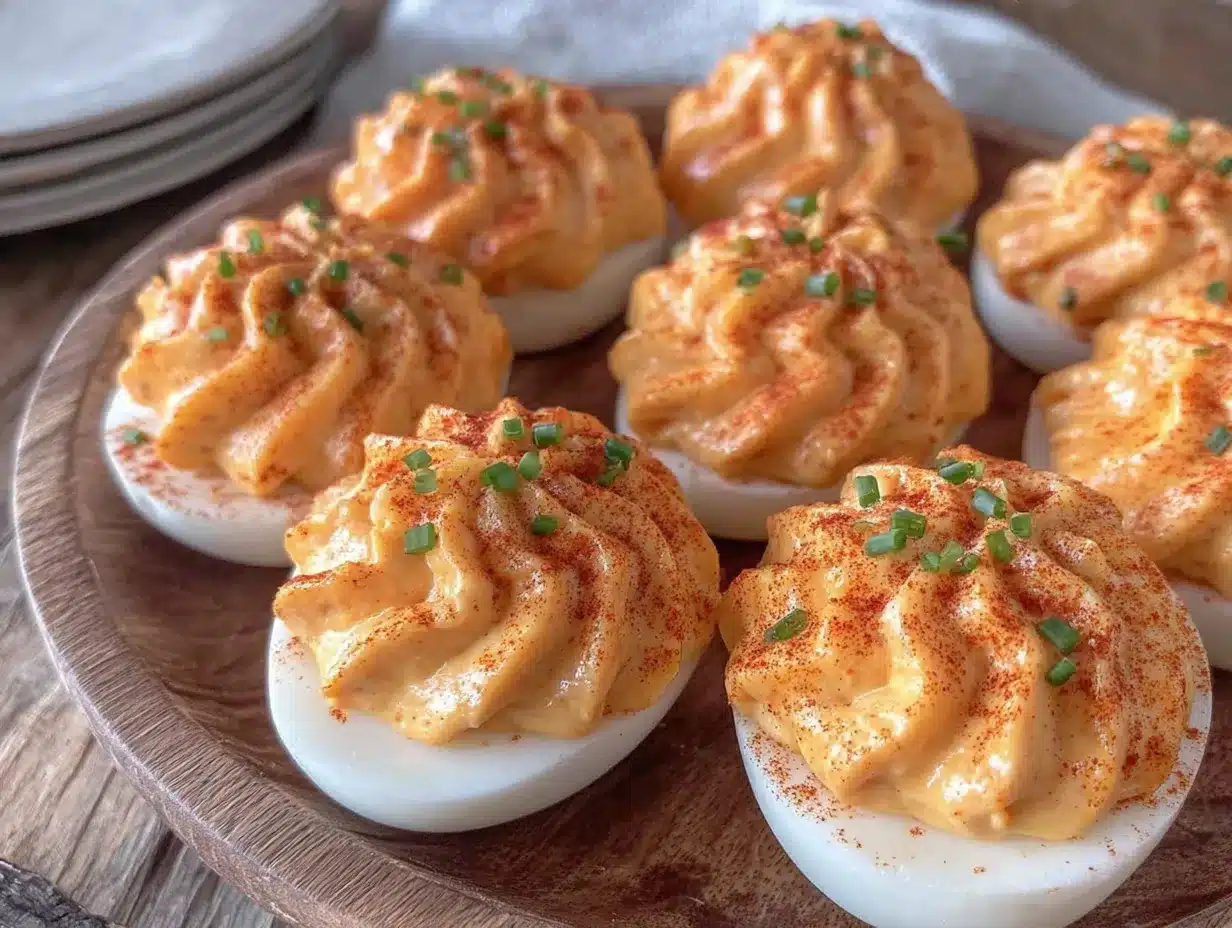
Let’s get to the fun part. Follow these steps carefully, and you’ll have a platter of adorable mini pumpkin deviled eggs that will steal the show.
- Boil the eggs. Place your eggs in a single layer in a medium saucepan. Cover them with cold water by about an inch. Bring the water to a full boil over high heat. Once it’s boiling, turn off the heat, cover the pot, and let it sit for exactly 10 minutes. This method gives you perfectly cooked yolks without that weird green ring around the outside.
- Ice bath. While the eggs are sitting, fill a large bowl with ice and cold water. After 10 minutes, use a slotted spoon to transfer the eggs to the ice bath. Let them cool for at least 5 minutes. This stops the cooking and makes peeling much easier.
- Peel the eggs. Gently tap each egg on the counter to crack the shell all over. Roll it between your palms to loosen the shell, then peel under cold running water. The water helps slide the shell off. Don’t rush this step—I’ve ruined plenty of eggs by peeling too fast.
- Cut the eggs. Using a sharp knife, slice each egg in half lengthwise. Wipe the knife clean between cuts for the neatest results. You should have 24 egg white halves.
- Remove the yolks. Gently pop the yolks out of the whites and place them in a small mixing bowl. Set the whites aside on a serving platter.
- Mash the yolks. Use a fork or potato masher to break the yolks into fine crumbs. You want them smooth with no large chunks.
- Add the wet ingredients. Add the mayonnaise, yellow mustard, white vinegar, salt, and pepper to the mashed yolks. Stir everything together until it’s completely smooth and creamy. Taste it and adjust the salt or mustard to your liking. This is your base filling.
- Fill the eggs. Spoon the filling into a piping bag or a zip-top bag. If using a zip-top bag, squeeze the filling into one corner and snip off about 1/4 inch of the tip. Pipe the filling into each egg white half, mounding it slightly above the edge. You want a little dome shape.
- Shape the pumpkins. Here’s where the magic happens. Use the back of a small spoon or your finger to gently smooth the filling into a rounded pumpkin shape. It should be slightly taller in the center and rounded on top, not flat. Don’t worry if it’s not perfect—imperfect pumpkins look more natural anyway.
- Add the paprika color. Sprinkle a generous pinch of paprika over each filled egg. Use your fingers or a small sieve. You want the entire filling surface to be a warm orange color. Tap off any excess.
- Create the pumpkin ridges. Take a toothpick or the tip of a small knife and gently press 4 to 5 vertical lines into the filling from top to bottom. These are the pumpkin ridges. Press lightly so you don’t deflate the filling.
- Add the stem. Place a tiny piece of fresh parsley or chive on top of each egg, right in the center. This is the pumpkin stem. Press it in gently so it stays.
- Chill before serving. Place the finished eggs in the refrigerator for at least 30 minutes before serving. This helps the flavors meld and the filling firm up.
Pro tip: If you’re making these for a party, you can boil and peel the eggs a day ahead. Store the peeled eggs in a covered container in the fridge. Then just make the filling and assemble them the day of. It saves so much time.
Cooking Tips & Techniques
I’ve made these mini pumpkin deviled eggs at least a dozen times now, and I’ve learned a few things the hard way. Let me share what I wish someone had told me.
Don’t overboil the eggs. That 10-minute rest method I mentioned? It’s not a suggestion. If you leave the eggs in hot water too long, the yolks turn gray and crumbly. They’ll still taste fine, but they won’t look as pretty, and the texture will be off. Set a timer. Seriously.
Peel under running water. This is the single best trick for getting smooth egg whites. The water gets between the shell and the egg, helping it slip off without tearing. I used to peel dry eggs and end up with half the white stuck to the shell. Never again.
Make the filling extra smooth. If you have a food processor, you can blitz the yolks with the mayo and mustard for a silky texture. I don’t always bother, but for a special occasion, it makes a difference. Just pulse a few times and scrape down the sides.
Pipe, don’t spoon. I know it’s tempting to just scoop the filling in with a spoon. But piping gives you that nice rounded shape that looks like a pumpkin. Plus, it’s faster once you get the hang of it. A zip-top bag works just as well as a real piping bag.
Watch the paprika. If you use smoked paprika, go easy at first. It has a stronger flavor than sweet paprika. I once went overboard and the eggs tasted like a campfire. A little goes a long way.
Keep them cold. Deviled eggs are best served cold. If you’re taking them to a party, keep them in a cooler or on ice until it’s time to eat. They can sit out for about 2 hours safely, but after that, they need to go back in the fridge.
One of my biggest failures happened last Thanksgiving. I made a double batch and forgot to put them in the fridge overnight. Woke up to a sad platter of warm, weepy eggs. They were a total loss. Learn from my mistake—don’t skip the chilling step.
Variations & Adaptations
This recipe is super flexible. Here are some ways to change it up based on what you have or who you’re feeding.
Dairy-Free Version: This recipe is already dairy-free since it uses mayo and mustard. Just double-check your mayo label to make sure it doesn’t have any dairy. Most standard mayos are dairy-free.
Spicy Kick: Add 1/4 teaspoon of cayenne pepper or a dash of hot sauce to the filling. It gives the eggs a little warmth without overwhelming the pumpkin flavor. My husband loves this version.
Herb Garden Twist: Mix in a tablespoon of finely chopped fresh dill or chives into the filling. It adds a fresh, bright flavor that pairs beautifully with the eggs. I did this once when I had leftover herbs from another recipe, and it was a hit.
Bacon Lover’s Version: Crumble cooked bacon on top of the filling before adding the paprika. The salty crunch is amazing. Just know that this adds to the cost and isn’t necessary for the pumpkin look.
Vegan Option: You can make a vegan version using silken tofu and black salt (kala namak) for that eggy flavor. It won’t look exactly the same, but it’s a fun alternative if someone in your family avoids eggs.
Different Colors: Instead of paprika, try using beet powder for a deeper red-orange color or turmeric for a brighter yellow. The flavor will change slightly, but the pumpkin look still works.
I personally love the herb garden twist. One summer, I had an overabundance of chives in my garden, and I threw them into everything. They made these eggs taste so fresh and light. It’s become my go-to version now.
Serving & Storage Suggestions
These mini pumpkin deviled eggs are best served cold, straight from the fridge. Arrange them on a platter in a single layer, and garnish with a few extra parsley leaves or a light dusting of paprika for color. They look especially cute on a white or orange plate.
For a Halloween party, I like to serve them alongside other finger foods like veggie sticks, cheese cubes, and small sandwiches. They also pair beautifully with a warm bowl of soup or a simple green salad. If you’re serving them as an appetizer, plan for about 2 to 3 eggs per person. They’re rich, so a little goes a long way.
Storage: Store leftover deviled eggs in an airtight container in the refrigerator for up to 2 days. Place them in a single layer and cover tightly. The filling might soften slightly, but they’ll still taste good.
Freezing: I don’t recommend freezing deviled eggs. The texture of the filling changes and becomes watery when thawed. If you need to prep ahead, boil and peel the eggs, then store the whites and yolks separately. Assemble the day you plan to serve them.
Reheating: These are meant to be served cold, so no reheating needed. If you’ve stored them in the fridge, just take them out about 10 minutes before serving to take the chill off slightly. Don’t leave them out longer than 2 hours.
The flavors actually develop a bit after a few hours in the fridge. I’ve noticed they taste even better the next day, if they last that long. The paprika and mustard have time to meld together, creating a more balanced flavor.
Nutritional Information & Benefits
Here is the estimated nutritional breakdown for one mini pumpkin deviled egg (based on 24 servings from 12 eggs).
| Nutrient | Amount per Serving |
|---|---|
| Calories | 55 |
| Total Fat | 4.5g |
| Saturated Fat | 1g |
| Cholesterol | 95mg |
| Sodium | 90mg |
| Total Carbohydrates | 0.5g |
| Dietary Fiber | 0g |
| Sugars | 0g |
| Protein | 3.5g |
Eggs are a fantastic source of high-quality protein, vitamin B12, and choline, which is important for brain health. The paprika adds a small amount of vitamin A and antioxidants. This recipe is naturally low in carbohydrates and contains no added sugars, making it a great option for low-carb or keto diets.
If you’re watching your sodium intake, you can reduce the salt in the filling or skip it altogether. The mustard and vinegar provide plenty of flavor on their own. Also, this recipe is gluten-free and nut-free, so it works well for many common dietary restrictions.
From a personal perspective, I love that this appetizer feels indulgent but is actually packed with protein. It keeps the kids full and happy without loading them up on sugar or processed snacks. That’s a win in my book.
Conclusion
These mini pumpkin deviled eggs are proof that you don’t need a big budget or fancy skills to make something memorable. With just a dozen eggs and a few pantry staples, you can create an appetizer that looks festive, tastes amazing, and makes everyone smile. Whether you’re bringing them to a Halloween party, a fall potluck, or just making a fun snack for your family, they deliver every single time.
I love this recipe because it’s so adaptable. You can tweak the filling, change the toppings, or adjust the spices to match your family’s taste. Don’t be afraid to experiment. Maybe you’ll discover a version that becomes your own signature dish. That’s the beauty of simple cooking—it leaves room for your creativity.
I’d love to hear how yours turn out. Did your kids help make them? Did you add a special twist? Drop a comment below and let me know. And if you found this recipe helpful, share it with a friend who loves easy, budget-friendly appetizers. Happy cooking, and enjoy those little pumpkin bites!
Frequently Asked Questions
Can I make these eggs ahead of time?
Yes, you can boil and peel the eggs up to 2 days in advance. Store the peeled eggs in a covered container in the fridge. Assemble the filling and pipe it into the whites on the day you plan to serve them for the freshest look and taste.
Why are my deviled eggs watery?
Watery filling usually happens when the eggs are overboiled or when you add too much mayonnaise. Stick to the 10-minute rest method and measure your mayo carefully. Also, make sure the yolks are fully cooled before mixing.
Can I use a different type of paprika?
Absolutely. Sweet paprika gives a classic orange color and mild flavor. Smoked paprika adds a deeper, earthier taste. You can also use a mix of both. Just avoid hot paprika unless you want a spicy kick.
How do I get the pumpkin shape perfect?
Don’t stress about perfection. Pipe the filling into a dome shape, then use a toothpick to gently press vertical lines. The lines create the ridges. If the filling looks messy, smooth it with the back of a spoon before adding the paprika.
Can I freeze these deviled eggs?
I don’t recommend freezing them. The texture of the mayonnaise-based filling changes and becomes watery when thawed. If you need to prep far in advance, just boil and peel the eggs, then freeze the hard-boiled yolks separately. Thaw and mix fresh filling when ready.
Pin This Recipe!

Easy Mini Pumpkin Deviled Eggs: Best Budget Appetizer

These adorable mini pumpkin deviled eggs are a budget-friendly, kid-approved appetizer perfect for Halloween or fall gatherings. Made with simple pantry staples, they look festive and taste amazing.
- Prep Time: 20 minutes
- Cook Time: 10 minutes
- Total Time: 30 minutes (plus 30 minutes chilling)
- Yield: 24 deviled eggs (12 servings of 2 eggs each) 1x
- Category: Appetizer
- Cuisine: American
Ingredients
- 12 large eggs (room temperature preferred)
- 1/4 cup mayonnaise (Hellmann’s or Duke’s recommended)
- 1 teaspoon yellow mustard
- 1/2 teaspoon white vinegar
- 1/4 teaspoon fine sea salt
- 1/8 teaspoon freshly ground black pepper
- 1 to 2 tablespoons paprika (sweet or smoked, or a mix)
- Small fresh parsley or chives for stems (optional)
Instructions
- Boil the eggs: Place eggs in a single layer in a medium saucepan. Cover with cold water by about an inch. Bring to a full boil over high heat, then turn off heat, cover, and let sit for exactly 10 minutes.
- Ice bath: While eggs sit, fill a large bowl with ice and cold water. After 10 minutes, transfer eggs to the ice bath and cool for at least 5 minutes.
- Peel the eggs: Gently tap each egg on the counter to crack the shell all over, roll between palms, then peel under cold running water.
- Cut the eggs: Using a sharp knife, slice each egg in half lengthwise. Wipe knife clean between cuts. You should have 24 egg white halves.
- Remove the yolks: Gently pop yolks out of whites and place in a small mixing bowl. Set whites aside on a serving platter.
- Mash the yolks: Use a fork or potato masher to break yolks into fine crumbs until smooth.
- Add wet ingredients: Add mayonnaise, yellow mustard, white vinegar, salt, and pepper to mashed yolks. Stir until completely smooth and creamy. Taste and adjust seasoning.
- Fill the eggs: Spoon filling into a piping bag or zip-top bag. If using a zip-top bag, squeeze filling into one corner and snip off about 1/4 inch of the tip. Pipe filling into each egg white half, mounding slightly above the edge to form a dome.
- Shape the pumpkins: Use the back of a small spoon or your finger to gently smooth the filling into a rounded pumpkin shape, slightly taller in the center.
- Add paprika color: Sprinkle a generous pinch of paprika over each filled egg, covering the entire surface with a warm orange color. Tap off excess.
- Create pumpkin ridges: Using a toothpick or the tip of a small knife, gently press 4 to 5 vertical lines into the filling from top to bottom to create ridges.
- Add the stem: Place a tiny piece of fresh parsley or chive on top of each egg in the center, pressing gently to secure.
- Chill before serving: Refrigerate finished eggs for at least 30 minutes before serving to meld flavors and firm up filling.
Notes
For best results, use slightly older eggs (about a week old) for easier peeling. If you don’t have a piping bag, a zip-top bag with the corner snipped off works perfectly. You can boil and peel the eggs a day ahead; store peeled eggs in a covered container in the fridge and assemble the day of serving. Don’t overboil the eggs to avoid gray yolks. Keep deviled eggs cold until serving.
Nutrition
- Serving Size: 2 deviled eggs
- Calories: 110
- Sodium: 180
- Fat: 9
- Saturated Fat: 2
- Carbohydrates: 1
- Protein: 7
Keywords: mini pumpkin deviled eggs, Halloween appetizer, budget-friendly appetizer, deviled eggs, fall appetizer, easy deviled eggs


