Half a bag of old-fashioned oats staring at me from the pantry while the clock blinked 2:47 PM and I hadn’t eaten lunch yet. My youngest had just polished off the last of the yogurt tubes, and I was running on caffeine and good intentions. I needed something that would come together faster than my toddler could change her mind about what she wanted to eat. That’s when I spotted the jar of honey sitting next to the peanut butter, and these easy no-bake honey protein balls were born out of pure, desperate necessity.
I wasn’t trying to be healthy that afternoon — I was trying not to hangry-scroll through takeout menus for the third time that week. But honestly? These little bites turned out to be the kind of snack that makes you feel like you actually have your life together. They’re sweet without being sugary, filling without being heavy, and they come together in the time it takes to argue with your partner about what to watch on Netflix. I’ve made them at least twice a week since that first desperate afternoon, and I’ve never once regretted it.
What I love most is how forgiving this recipe is. You can swap things out based on what you have, and they still turn out delicious. No fancy equipment, no baking soda, no waiting around. Just five minutes of mixing and rolling, and you’ve got a week’s worth of snacks that actually keep you full. These easy no-bake honey protein balls have become my go-to for everything from pre-workout fuel to after-school chaos management. They’re the kind of recipe that feels like cheating but isn’t.
Why You’ll Love This Recipe
Let me tell you why these little guys have earned a permanent spot in my fridge. I’ve tested this recipe more times than I can count, tweaking ratios and swapping ingredients until I landed on something that actually works every single time. Here’s what makes them special:
- Ready in 5 Minutes: No baking, no chilling required before serving. You can literally make these in the time it takes to brew a cup of coffee. I’ve timed myself.
- Pantry-Friendly Ingredients: You probably already have everything you need. Oats, peanut butter, honey, protein powder, and a few mix-ins. No trips to specialty stores required.
- Perfect for Busy Days: These are my secret weapon for mornings when I’m running late, afternoons when energy dips, and evenings when dinner is still thirty minutes away and everyone is hungry.
- Kid-Approved and Adult-Approved: My kids think they’re getting a treat. I know they’re getting protein and fiber. Everyone wins, and nobody complains.
- Endlessly Customizable: You can add chocolate chips, dried fruit, seeds, or spices based on what you’re craving. I’ve made versions with everything from shredded coconut to mini M&Ms.
What really sets these apart from other energy ball recipes is the texture. They’re not too sticky, not too dry, and they hold together beautifully without any weird ingredients. The honey adds just the right amount of sweetness without overwhelming the other flavors. Plus, they’re naturally gluten-free if you use certified gluten-free oats, and you can easily make them vegan by swapping the honey for maple syrup. I’ve tested that version too, and it works like a charm.
These easy no-bake honey protein balls have saved me more times than I can count. They’re the kind of snack that makes you feel like you’re treating yourself while actually nourishing your body. And honestly? That’s the best kind of recipe to have in your back pocket.
What Ingredients You Will Need
This recipe uses simple, wholesome ingredients that work together to create a perfectly balanced snack. Most of these are probably already sitting in your pantry right now. Let me walk you through what you need and why each ingredient matters.
- Old-Fashioned Rolled Oats (1 cup / 90g): These provide the base and the chew. I prefer old-fashioned oats over quick oats because they give the balls a better texture. Quick oats can turn mushy, while rolled oats keep their shape. If you need these to be gluten-free, make sure your oats are certified gluten-free.
- Creamy Peanut Butter (½ cup / 130g): This acts as the binder and adds healthy fats and protein. I use natural peanut butter with no added sugar or oil. Just peanuts and salt. If your peanut butter is too runny, the balls won’t hold together well. I recommend brands like Justin’s or Smucker’s Natural for the best consistency. You can also use almond butter or sunflower seed butter if you have allergies.
- Honey (⅓ cup / 110g): This is our natural sweetener and helps bind everything together. I use local honey because I like supporting local beekeepers, but any honey works. If you’re vegan, substitute with maple syrup or agave nectar. Just note that maple syrup will make the mixture slightly stickier.
- Vanilla Protein Powder (¼ cup / 30g): This adds a protein boost and helps with texture. I use a vanilla whey protein powder, but plant-based protein powders work too. If your protein powder is very sweet, you might want to reduce the honey slightly. My go-to is Orgain Vanilla because it blends well and doesn’t have a chalky aftertaste.
- Ground Flaxseed (2 tablespoons / 14g): This adds fiber, omega-3s, and helps bind the mixture. You can substitute with chia seeds or hemp hearts. If you don’t have either, just add an extra tablespoon of oats.
- Mini Chocolate Chips (¼ cup / 45g): These are optional but highly recommended. They add little pockets of melty goodness. I use dark chocolate chips for a less sweet option, but milk chocolate works great too. You can also use chopped nuts or dried fruit instead.
- Pinch of Sea Salt (¼ teaspoon): This enhances all the flavors and balances the sweetness. Don’t skip it. I use flaky sea salt because I like the occasional crunch, but fine salt works fine.
One thing I’ve learned through trial and error: the consistency of your peanut butter matters more than you think. If your peanut butter is too oily, your mixture will be too wet and the balls won’t hold together. If it’s too thick, you’ll need to add a splash of milk or water to help everything come together. Trust your hands here — the mixture should feel like soft Play-Doh that holds its shape when squeezed.
Equipment Needed
You don’t need much to make these easy no-bake honey protein balls. Here’s what I use every time:
- Large Mixing Bowl: Any medium-to-large bowl works. I use a glass mixing bowl because it doesn’t retain odors, but ceramic or stainless steel work great too.
- Measuring Cups and Spoons: Standard set for dry and wet ingredients. I recommend using the same measuring cup for the peanut butter and honey to make cleanup easier.
- Rubber Spatula or Wooden Spoon: For mixing everything together. A sturdy spatula works best because it can scrape the sides of the bowl efficiently.
- Cookie Scoop (1-tablespoon size): This makes portioning the balls quick and consistent. If you don’t have one, use a regular tablespoon measure or just eyeball it with your hands.
- Parchment Paper or Silicone Mat: For rolling and storing the balls. The parchment prevents sticking and makes cleanup a breeze.
- Airtight Container: For storing the finished balls in the fridge. I use a glass meal prep container, but any airtight container works.
If you don’t have a cookie scoop, just wet your hands slightly before rolling — it prevents the mixture from sticking to your palms. I learned that trick after my first batch turned into a sticky mess on my fingers. Also, a silicone mat is worth the investment if you make these regularly. It makes rolling and cleanup so much easier.
Preparation Method
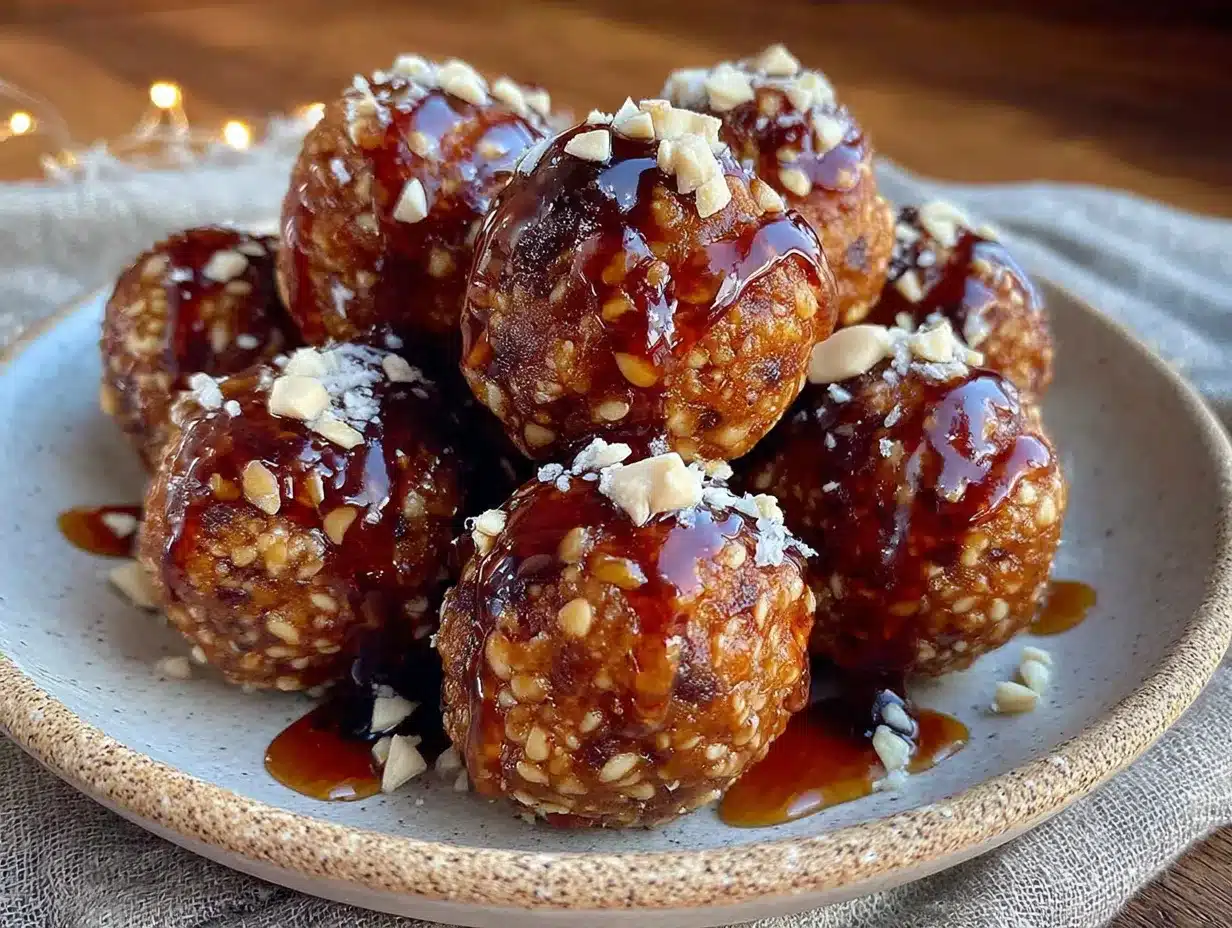
This is where the magic happens. Follow these steps, and you’ll have a batch of easy no-bake honey protein balls in under five minutes. I promise it’s that simple.
- Combine the dry ingredients. In a large mixing bowl, add 1 cup rolled oats, ¼ cup vanilla protein powder, 2 tablespoons ground flaxseed, and ¼ teaspoon sea salt. Whisk them together with a fork or spatula until evenly distributed. This ensures the protein powder doesn’t clump up later.
- Add the wet ingredients. Spoon in ½ cup creamy peanut butter and ⅓ cup honey. Don’t worry if it looks messy — that’s exactly how it should look. Use your spatula to start folding everything together. The mixture will look dry at first, but keep mixing. It comes together surprisingly fast.
- Mix until fully combined. Stir everything together until no dry patches remain. The mixture should be thick, slightly sticky, and hold together when pressed between your fingers. If it feels too dry, add a teaspoon of honey or a splash of milk. If it’s too wet, add a tablespoon of oats. I’ve had to adjust both ways, and it always works out.
- Fold in the chocolate chips. Add ¼ cup mini chocolate chips (or your chosen mix-in) and fold them in gently. You want them evenly distributed without overmixing. The warmth from your hands will slightly soften the chips later, which is a good thing.
- Portion the mixture. Using your cookie scoop or a tablespoon, scoop out even portions of the mixture. I usually get about 16-18 balls from this recipe. Place them on a parchment-lined plate or baking sheet as you go.
- Roll into balls. Lightly wet your hands with water (this is crucial — it prevents sticking). Roll each portion between your palms until smooth and round. Don’t over-roll or they can become dense. Just a few gentle rolls until they hold their shape.
- Optional: Chill before serving. While these are technically ready to eat immediately, I find they hold together better after 15-20 minutes in the fridge. If you’re in a hurry, they’re perfectly fine at room temperature. I’ve eaten them straight from the mixing bowl more times than I care to admit.
Pro tip from someone who’s made these at least fifty times: If your mixture seems too sticky to roll, pop the bowl in the fridge for 10 minutes. The chilling firms up the peanut butter and makes rolling much easier. I learned this after a particularly humid summer day when my kitchen felt like a sauna.
The texture should be slightly chewy but not crumbly. If a ball falls apart when you bite into it, your mixture was too dry. If it sticks to your teeth like caramel, it was too wet. Both are fixable — just adjust the oats or honey in your next batch. You’ll get a feel for it after the first time.
Cooking Tips & Techniques
After making these easy no-bake honey protein balls more times than I can count, I’ve picked up a few tricks that make the process smoother and the results better. Here’s what I wish someone had told me when I started.
Temperature matters more than you think. If your peanut butter has been sitting in the fridge, it will be too stiff to mix properly. Let it sit at room temperature for 15-20 minutes before starting. Same goes for honey — if it’s crystallized, warm the jar in a bowl of hot water for a few minutes. Room temperature ingredients blend together much more easily than cold ones.
Don’t overmix the dough. I know it’s tempting to keep stirring until everything looks perfectly uniform, but overmixing can make the protein balls dense and tough. Mix just until the ingredients come together and no dry spots remain. A few streaks of peanut butter or pockets of oats are totally fine — they add character.
Use the scoop-and-level method for oats. Scoop your oats with the measuring cup and level it off with a knife, rather than packing them down. Packed oats can throw off the moisture balance and make your balls too dry. I made this mistake my first few times and ended up with crumbly balls that wouldn’t hold together.
Wet hands are your best friend. I cannot stress this enough. Dip your hands in water before rolling each ball, and re-wet them as needed. The water creates a barrier between the sticky mixture and your skin, making the process infinitely less frustrating. It also gives the balls a smoother finish.
Make a double batch while you’re at it. These freeze beautifully, so I always make at least double what I think I need. They disappear faster than you’d expect, especially if you have kids or a partner who raids the fridge at midnight. I’ve frozen batches for up to three months with no noticeable loss in quality.
Rotate your mix-ins. I keep a rotation of different add-ins to keep things interesting. One week it’s chocolate chips and coconut flakes, the next it’s dried cranberries and chopped almonds. This prevents snack fatigue and makes each batch feel like a new recipe.
One of my biggest failures was the time I used natural peanut butter that had separated and I didn’t stir it properly. The oil made the mixture too wet, and I ended up with a sticky mess that wouldn’t roll into balls. I had to add extra oats and protein powder to salvage it. Now I always stir my peanut butter thoroughly before measuring. Learn from my mistakes, friends.
Variations & Adaptations
One of the best things about these easy no-bake honey protein balls is how adaptable they are. I’ve experimented with countless variations, and here are some of my favorites:
- Chocolate Peanut Butter Bliss: Add 1 tablespoon of cocoa powder to the dry ingredients and use chocolate protein powder instead of vanilla. The result is a rich, fudgy ball that tastes like dessert. I add extra chocolate chips because I have zero self-control.
- Tropical Coconut Dream: Replace the chocolate chips with ¼ cup shredded unsweetened coconut and ¼ cup dried pineapple or mango. Use almond butter instead of peanut butter for a different flavor profile. These taste like vacation.
- Apple Cinnamon Oatmeal: Add ½ teaspoon cinnamon, ¼ teaspoon nutmeg, and ¼ cup finely diced dried apples. A splash of vanilla extract enhances the cozy flavor. These are perfect for fall mornings and pair beautifully with a cup of coffee.
- Vegan Version: Substitute the honey with maple syrup or agave nectar. Use a plant-based protein powder. Everything else stays the same. The texture will be slightly different — slightly softer — but just as delicious.
- Nut-Free Option: Use sunflower seed butter or tahini instead of peanut butter. Sunflower seed butter can react with baking soda if you bake these (which you won’t), so no worries here. Just be aware that sunflower seed butter can turn green when combined with certain ingredients — it’s harmless, just unexpected.
- High-Protein Boost: Add an extra scoop of protein powder and reduce the oats by 2 tablespoons. You might need to add a splash of milk to help everything come together. These are great for post-workout recovery.
I once made a batch with cookie butter instead of peanut butter, and honestly? It was incredible. Not exactly healthy, but sometimes you need a treat that feels like a cheat day. The cookie butter version tastes like speculoos cookie dough in ball form. Highly recommended for special occasions.
If you love quick, no-bake snacks as much as I do, you’ll also enjoy these easy 3-ingredient peanut butter energy balls for when you’re really short on time. And if you’re in the mood for something savory, these fresh cucumber ranch cream cheese pinwheel wraps make a great lunchbox addition.
Serving & Storage Suggestions
These easy no-bake honey protein balls are incredibly versatile when it comes to serving and storing. Here’s how I handle them in my kitchen.
Serving Temperature: I prefer them straight from the fridge — they’re firmer and chewier that way. But they’re also delicious at room temperature, especially if you’re packing them for a snack on the go. If you’re serving them to guests, let them sit at room temperature for 5-10 minutes before serving. This softens them slightly and makes the flavors more pronounced.
Presentation Ideas: For parties or gifting, arrange them on a platter with a drizzle of melted chocolate and a sprinkle of flaky sea salt. They look impressive with minimal effort. You can also thread them onto skewers with fresh fruit for a fun, portable snack.
Storage Instructions: Store the balls in an airtight container in the refrigerator for up to two weeks. I use a glass meal prep container with a tight-fitting lid. Layer them between sheets of parchment paper to prevent sticking. They’ll stay fresh and chewy for the entire time — if they last that long.
Freezer Instructions: These freeze beautifully for up to three months. Arrange the balls on a parchment-lined baking sheet and freeze until solid (about 1-2 hours). Transfer them to a freezer-safe bag or container. To thaw, just move them to the fridge overnight or let them sit at room temperature for 15-20 minutes. I keep a stash in my freezer at all times for emergency snacks.
Flavor Development: Here’s something interesting — the flavors actually get better after a day or two in the fridge. The oats absorb some moisture from the honey and peanut butter, making the texture more uniform and the flavors more cohesive. I actually prefer them on day two or three.
Pairing Suggestions: These pair beautifully with a cup of coffee or tea for a mid-morning pick-me-up. For a more substantial snack, serve them alongside fresh Greek yogurt overnight oats parfait or a quick high-protein cottage cheese snack bowl. They’re also great crumbled over yogurt or ice cream for added texture.
Nutritional Information & Benefits
Here’s the nutritional breakdown for one ball (based on 16 servings from this recipe). These values are estimates and will vary based on your specific ingredients:
| Nutrient | Amount Per Ball |
|---|---|
| Calories | 145 |
| Protein | 6g |
| Carbohydrates | 18g |
| Fiber | 3g |
| Sugar | 9g |
| Fat | 7g |
| Saturated Fat | 2g |
| Sodium | 85mg |
These little balls pack a surprising nutritional punch. The oats provide complex carbohydrates for sustained energy, while the peanut butter and protein powder deliver a solid dose of protein to keep you full. The flaxseed adds omega-3 fatty acids and extra fiber, which supports digestive health. Honey offers natural sweetness along with antioxidants and antimicrobial properties.
Dietary Considerations: This recipe is naturally vegetarian and can easily be made gluten-free (use certified gluten-free oats) or vegan (swap honey for maple syrup). It contains peanuts and may contain traces of other nuts depending on your protein powder. Always check labels if you have allergies.
I love that these are a treat that actually supports my wellness goals rather than working against them. They satisfy my sweet tooth while keeping me energized and focused. That’s a win in my book.
Conclusion
These easy no-bake honey protein balls have become a staple in my kitchen for good reason. They’re fast, forgiving, and genuinely delicious. Whether you’re a busy parent, a fitness enthusiast, or just someone who needs a better afternoon snack, these little bites deliver every single time.
What I love most is how they’ve become a canvas for my creativity. Some weeks I’m in a chocolate mood, other weeks I want something fruity and tropical. The recipe adapts to whatever I’m craving, and it always works. That kind of reliability is hard to find in a snack recipe.
I’d love to hear how yours turn out. Drop a comment below and let me know what mix-ins you used, or tag me in your photos if you share them online. Did you try the cookie butter version? The apple cinnamon variation? I’m always looking for new ideas to try. And if you’re looking for more quick snack inspiration, don’t miss these easy chewy 4-ingredient banana oat breakfast cookies for another fast, healthy option.
Happy rolling, friends. Your future self (and your hungry family) will thank you.
Frequently Asked Questions
Can I use quick oats instead of rolled oats?
Yes, you can, but the texture will be different. Quick oats are more finely processed, so they absorb moisture faster and create a softer, denser ball. I prefer rolled oats for their chewy texture, but quick oats work in a pinch. Just reduce the honey slightly since quick oats are more absorbent.
How long do these protein balls last at room temperature?
They can sit at room temperature for up to 4-6 hours without issues, making them perfect for lunchboxes or road trips. For longer storage, keep them in the fridge. I don’t recommend leaving them out overnight because the peanut butter can go rancid and the texture becomes too soft.
Can I make these without protein powder?
Absolutely. Just replace the protein powder with an equal amount of oats or almond flour. The texture will be slightly different — less dense and more oat-forward — but they’ll still taste great. You can also add extra flaxseed or chia seeds for a nutritional boost.
Why are my protein balls too dry?
This usually happens when your peanut butter is too thick or you’ve measured your oats too generously. Try adding a teaspoon of honey or a splash of milk to bring the mixture together. If that doesn’t work, add a tiny bit more peanut butter. The mixture should feel like soft dough that holds together when squeezed.
Can I freeze these for meal prep?
Yes, and I highly recommend it. Freeze them in a single layer on a baking sheet, then transfer to a freezer bag. They’ll keep for up to three months. Thaw in the fridge overnight or at room temperature for 15-20 minutes. I always keep a stash in my freezer for busy weeks.
Pin This Recipe!
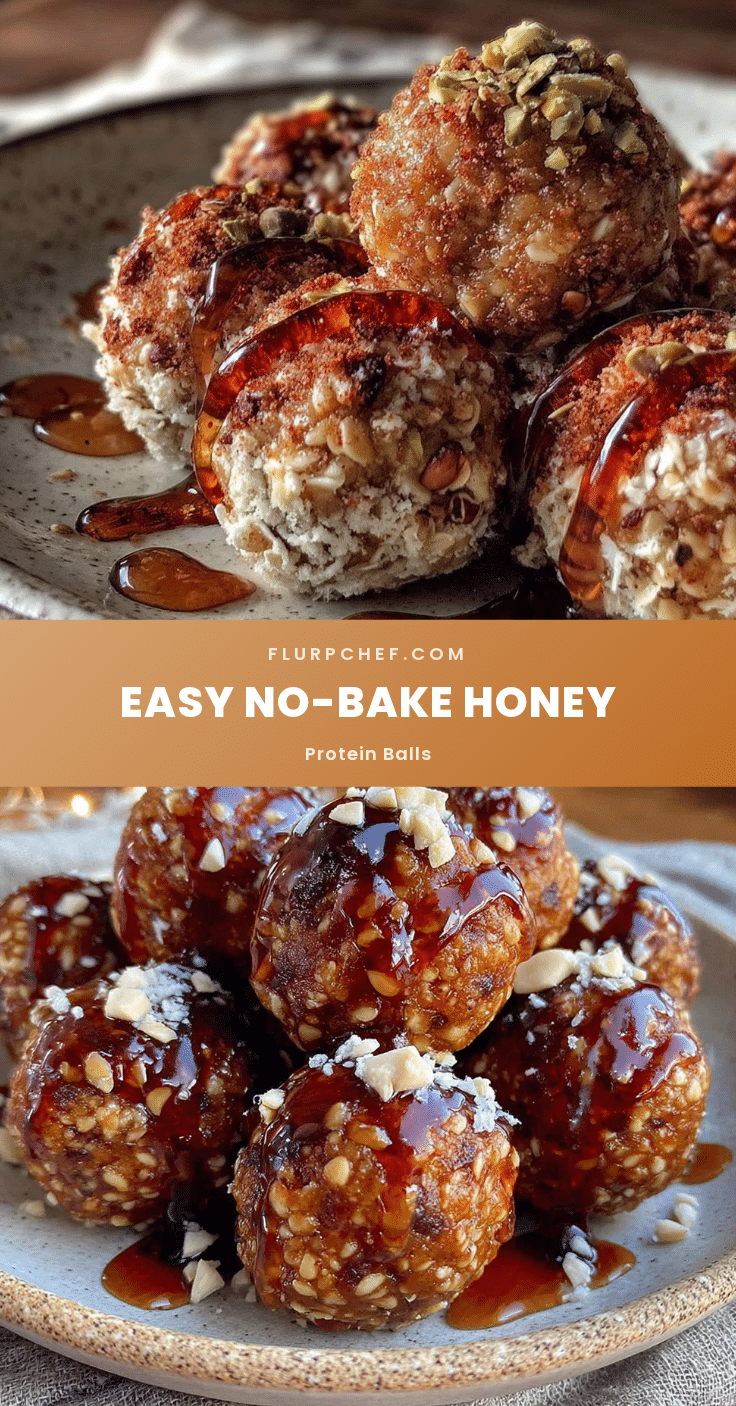
Easy No-Bake Honey Protein Balls: Best 5-Minute Recipe

These easy no-bake honey protein balls are a quick, healthy snack made with oats, peanut butter, honey, and protein powder. Ready in just 5 minutes, they’re perfect for busy days, pre-workout fuel, or after-school chaos management.
- Prep Time: 5 minutes
- Cook Time: 0 minutes
- Total Time: 5 minutes
- Yield: 16-18 balls 1x
- Category: Snack
- Cuisine: American
Ingredients
- 1 cup (90g) old-fashioned rolled oats
- ½ cup (130g) creamy peanut butter
- ⅓ cup (110g) honey
- ¼ cup (30g) vanilla protein powder
- 2 tablespoons (14g) ground flaxseed
- ¼ cup (45g) mini chocolate chips
- ¼ teaspoon sea salt
Instructions
- Combine the dry ingredients. In a large mixing bowl, add 1 cup rolled oats, ¼ cup vanilla protein powder, 2 tablespoons ground flaxseed, and ¼ teaspoon sea salt. Whisk them together with a fork or spatula until evenly distributed.
- Add the wet ingredients. Spoon in ½ cup creamy peanut butter and ⅓ cup honey. Use your spatula to start folding everything together. The mixture will look dry at first, but keep mixing until it comes together.
- Mix until fully combined. Stir everything together until no dry patches remain. The mixture should be thick, slightly sticky, and hold together when pressed between your fingers. If it feels too dry, add a teaspoon of honey or a splash of milk. If it’s too wet, add a tablespoon of oats.
- Fold in the chocolate chips. Add ¼ cup mini chocolate chips and fold them in gently until evenly distributed.
- Portion the mixture. Using a cookie scoop or a tablespoon, scoop out even portions of the mixture. You should get about 16-18 balls. Place them on a parchment-lined plate or baking sheet.
- Roll into balls. Lightly wet your hands with water to prevent sticking. Roll each portion between your palms until smooth and round. Don’t over-roll or they can become dense.
- Optional: Chill before serving. While these are ready to eat immediately, they hold together better after 15-20 minutes in the fridge. If in a hurry, they’re fine at room temperature.
Notes
If the mixture seems too sticky to roll, chill the bowl in the fridge for 10 minutes. Wet hands before rolling to prevent sticking. For best texture, use room temperature peanut butter and honey. The flavors improve after a day or two in the fridge.
Nutrition
- Serving Size: 1 ball
- Calories: 145
- Sugar: 9
- Sodium: 85
- Fat: 7
- Saturated Fat: 2
- Carbohydrates: 18
- Fiber: 3
- Protein: 6
Keywords: no-bake protein balls, honey protein balls, energy balls, healthy snacks, 5-minute recipe, gluten-free snacks, kid-friendly snacks


