My husband took a bite, chewed for a second, and then just looked at the loaf on the counter with this confused expression. “Wait,” he said, fork still hovering. “You didn’t use the mixer for this?” He asked for banana bread for breakfast three days straight after that. I didn’t tell him I was testing the recipe—I just let him think I’d finally perfected my mom’s old method. Honestly, I hadn’t. I’d just gotten lazy one afternoon and decided not to drag the KitchenAid out of the cabinet. That’s the honest truth behind this easy one-bowl banana bread (no mixer needed). It came from a place of pure laziness, and it turned out better than any version I’d ever made with a mixer.
The loaf was tender, perfectly domed, and had that slightly caramelized crust that makes the first slice impossible to resist. The texture was even—no dense spots, no weird streaks of flour. I actually stood there in the kitchen, eating a slice still warm from the pan, trying to figure out why it worked so well. The answer is simple: less air. When you mix by hand, you’re less likely to overwork the gluten, and the batter stays tender. Who knew that skipping a step would be the secret to a better loaf?
This recipe is for those mornings when you have three brown bananas staring at you from the counter and zero energy to deal with a complicated process. It’s for the afternoons when you want the house to smell like cinnamon and comfort but don’t want to wash a single extra bowl. It’s the kind of recipe that makes you feel like you’ve got your act together, even when you’re really just being smart about cutting corners. Trust me on this one—you’ll never go back to the mixer.
Why You’ll Love This Recipe
Let’s be real for a second. Banana bread recipes are everywhere. Everyone’s grandma has one, every blog has one, and you probably have three saved on your phone already. So why does this one deserve a spot in your rotation? Because it actually delivers on its promises, that’s why.
- No Mixer Required: I mean it. You need one bowl, one fork (or whisk), and two hands. That’s it. No attachments to wash, no stand mixer to haul onto the counter, no hand mixer cord getting in the way.
- One Bowl, Minimal Mess: You mix everything in a single bowl. The banana gets mashed right in there. The wet ingredients go in next. The dry ingredients follow. One bowl to wash at the end—that’s the kind of math I like.
- Perfect for Busy Mornings: This batter comes together in about 10 minutes. While the oven preheats, you’re already pouring the batter into the pan. It’s faster than deciding what to order for breakfast.
- Uses Simple Pantry Ingredients: You probably have everything already. Bananas, flour, sugar, eggs, butter, baking soda, salt. No weird extracts, no specialty flours, no trip to the store required.
- Foolproof Texture Every Time: Because you’re mixing by hand, you’re less likely to overmix. Overmixing is the number one reason banana bread turns out tough or gummy. This method practically guarantees a tender crumb.
- Kid-Friendly and Crowd-Pleasing: My nephew, who claims to hate bananas, ate three slices in one sitting. I didn’t say a word. I just smiled and let him have another piece.
This isn’t just another banana bread recipe. It’s the one you’ll remember because it worked when you were tired, when you didn’t want to clean up, and when you just needed something good to happen in the kitchen. It’s comfort food that doesn’t ask for much in return.
What Ingredients You Will Need
This easy one-bowl banana bread (no mixer needed) relies on simple, everyday ingredients that work together to create something genuinely special. Here’s what you’ll need and why each one matters.
- 3 ripe bananas, mashed (about 1 ½ cups) – The riper, the better. You want bananas with brown spots all over the peel. They’re sweeter, softer, and mash more easily. If your bananas aren’t ripe enough, the bread will be less sweet and less moist.
- ⅓ cup unsalted butter, melted (76 grams) – Melted butter gives the bread a rich flavor and tender texture. I use unsalted so I can control the salt level. If you only have salted butter, just reduce the added salt by ¼ teaspoon.
- ¾ cup granulated sugar (150 grams) – Regular white sugar works perfectly here. It dissolves easily into the butter and banana mixture. You can use coconut sugar for a less refined option, but the texture will be slightly denser.
- 1 large egg, room temperature – The egg binds everything together and adds structure. Room temperature egg incorporates more easily into the melted butter. If you forgot to take it out of the fridge, place it in a bowl of warm water for 5 minutes.
- 1 teaspoon vanilla extract – Pure vanilla adds warmth and depth. Imitation vanilla works fine in a pinch, but pure vanilla really does make a difference here.
- 1 ½ cups all-purpose flour (190 grams) – All-purpose flour gives the bread a nice, tender crumb. Spoon and level your flour—don’t scoop directly from the bag, or you’ll end up with too much.
- 1 teaspoon baking soda – This is the only leavening agent you need. Baking soda reacts with the acidity in the bananas to help the bread rise. Make sure yours is fresh—test it by dropping a little into vinegar; it should fizz immediately.
- ½ teaspoon salt – Salt balances the sweetness and enhances all the other flavors. Don’t skip it, even if you think it’s unnecessary.
- Optional: ½ cup mix-ins – Chocolate chips, chopped walnuts, or pecans all work beautifully. I usually add chocolate chips because I have zero self-control around warm chocolate.
Ingredient Tips from Experience: I’ve made this recipe with whole wheat pastry flour, and it works well—just add an extra tablespoon of milk if the batter seems too thick. For a dairy-free version, use melted coconut oil instead of butter. And if you’re out of vanilla, a pinch of cinnamon adds a lovely warmth. I also recommend using a good-quality vanilla like Nielsen-Massey if you can find it—it’s pricier, but the flavor is noticeably better.
Equipment Needed
You really don’t need much for this recipe. That’s kind of the whole point.
- One large mixing bowl – Any medium-to-large bowl works. I use a ceramic one because it feels sturdy, but glass or metal is fine.
- A fork or whisk – A fork works perfectly for mashing the bananas. A whisk is better for mixing the wet and dry ingredients together smoothly.
- 9×5-inch loaf pan – This is the standard size for banana bread. If you use an 8×4-inch pan, the bread will take longer to bake and might dome higher. A 9×5 gives you a nice, even loaf.
- Parchment paper or non-stick spray – Parchment paper makes lifting the bread out of the pan effortless. I also spray the pan lightly with baking spray for extra insurance.
- Cooling rack – Essential for letting the bread cool evenly. If you leave it in the pan too long, the bottom can get soggy.
- Measuring cups and spoons – For accuracy, especially with the flour and baking soda.
I’ve made this bread using a glass loaf pan and a metal one. The metal pan gave me a slightly crisper crust, but both worked perfectly. If you don’t have a loaf pan, you can bake the batter in a 9-inch square pan—just reduce the baking time to about 30-35 minutes. And honestly, if you only have a muffin tin, you can make banana muffins instead. Bake them for 15-18 minutes at the same temperature.
Preparation Method
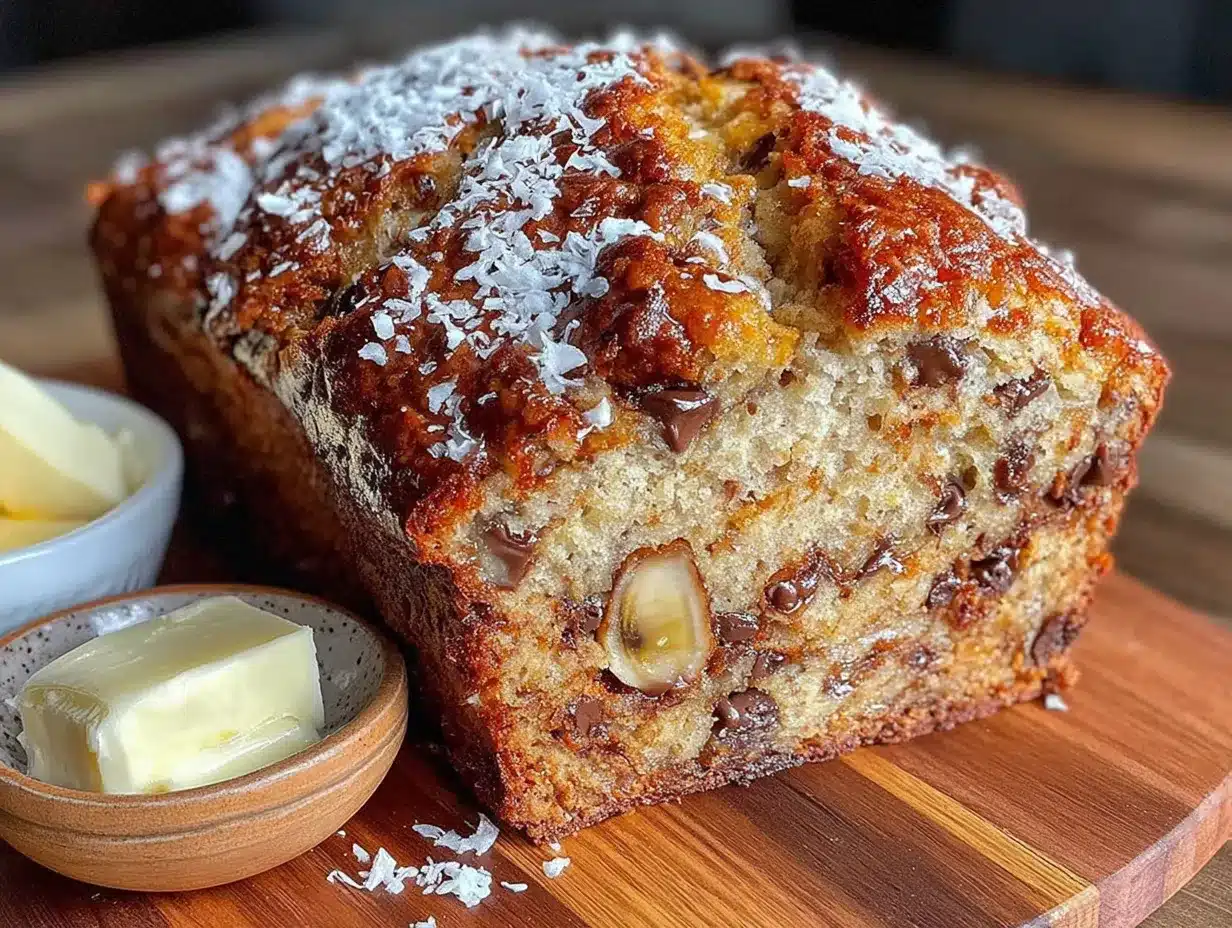
Alright, let’s get to it. This is the part where you see just how easy this easy one-bowl banana bread (no mixer needed) really is.
- Preheat your oven to 350°F (175°C). Grease a 9×5-inch loaf pan with butter or non-stick spray. If you’re using parchment paper, leave some overhang on the long sides—it makes lifting the bread out so much easier later.
- Mash the bananas. In your large mixing bowl, add the three ripe bananas. Mash them with a fork until they’re mostly smooth with a few small lumps remaining. You don’t want a complete paste—a little texture is nice. This should take about 30 seconds.
- Add the melted butter. Pour the melted butter over the mashed bananas and stir until combined. The mixture will look slightly separated at first, but keep stirring—it will come together into a smooth, glossy mixture.
- Add the sugar, egg, and vanilla. Add the sugar, room temperature egg, and vanilla extract. Whisk vigorously for about 30 seconds until everything is well combined and slightly lighter in color. The sugar should be mostly dissolved by now.
- Add the dry ingredients. Sprinkle the flour, baking soda, and salt over the wet mixture. Use a spatula or wooden spoon to fold everything together gently. Stir just until you no longer see streaks of flour—about 10 to 12 strokes. A few lumps are totally fine. Overmixing at this stage will make the bread tough, so err on the side of under-mixing.
- Fold in any mix-ins. If you’re adding chocolate chips, nuts, or anything else, gently fold them in now. Don’t overdo it—just a few folds to distribute them evenly.
- Pour the batter into the prepared pan. Use your spatula to scrape every last bit of batter into the pan. Smooth the top gently. Give the pan a couple of light taps on the counter to release any air bubbles.
- Bake for 50-60 minutes. Place the pan in the center of the oven. Bake until a toothpick inserted into the center comes out clean or with just a few moist crumbs attached. If the top is browning too quickly (after about 35 minutes), tent the pan loosely with aluminum foil.
- Cool in the pan for 10 minutes. Remove the pan from the oven and place it on a cooling rack. Let the bread cool in the pan for exactly 10 minutes. Then, use the parchment paper to lift the bread out and transfer it to the cooling rack to cool completely.
- Slice and enjoy. I know it’s tempting to slice into it while it’s still warm, but letting it cool completely gives you cleaner slices and a better texture. That said, I always sneak a warm slice. It’s practically a rule.
Sensory Cues: When you’re mixing the batter, you should smell the sweet, floral aroma of ripe bananas. The batter should be thick but pourable—like a thick pancake batter. When the bread is done, the kitchen will smell like a bakery, and the top will be a deep golden brown. If you tap the top gently, it should feel firm and spring back slightly.
Cooking Tips & Techniques
I’ve made this easy one-bowl banana bread (no mixer needed) at least twenty times. I’ve made mistakes so you don’t have to. Here’s what I’ve learned.
Use Overripe Bananas: This is the most important tip I can give you. If your bananas are still yellow with green tips, they’re not ready. You want them spotted with brown, almost black on the outside. They should feel soft when you squeeze them. If you’re impatient (like me), you can ripen bananas quickly by placing them on a baking sheet in a 300°F oven for 15-20 minutes until the skins turn black. Let them cool before using.
Don’t Overmix the Batter: I cannot stress this enough. Overmixing develops the gluten in the flour, which makes the bread tough and dense. Mix until you don’t see any more dry flour, then stop. Lumps are your friend here. The batter should look a bit rough, not perfectly smooth.
Check for Doneness Early: Ovens vary wildly. Start checking your bread at the 50-minute mark. Insert a toothpick into the center—if it comes out clean or with a few moist crumbs, it’s done. If there’s wet batter on it, give it another 5 minutes and check again. I once overbaked a loaf by 10 minutes, and it was still edible, but it was definitely dry.
Let It Cool Properly: Cooling in the pan for 10 minutes is non-negotiable. If you try to remove it too soon, the bread will fall apart. If you leave it in the pan too long, the steam will make the bottom soggy. Set a timer. I’ve forgotten before and ended up with a sad, damp loaf.
Room Temperature Ingredients Matter: The egg should be at room temperature so it incorporates smoothly into the melted butter. If you add a cold egg to melted butter, the butter can seize up and create lumps. Trust me, I’ve been there. Just place the egg in a bowl of warm water for 5 minutes before you start.
Weigh Your Flour for Best Results: If you have a kitchen scale, use it. Measuring flour by volume can be inconsistent—you might end up with too much or too little. 190 grams of all-purpose flour is the sweet spot for this recipe. If you don’t have a scale, spoon the flour into your measuring cup and level it off with a knife. Don’t scoop directly from the bag.
Variations & Adaptations
One of the best things about this easy one-bowl banana bread (no mixer needed) is how adaptable it is. You can change it up based on what you have in your pantry or what you’re craving.
Chocolate Chip Banana Bread: This is my go-to. Fold in ½ cup of semi-sweet chocolate chips right before pouring the batter into the pan. The chocolate melts into little pockets of gooey goodness. Use dark chocolate chips if you want a less sweet version.
Nutty Banana Bread: Add ½ cup of chopped walnuts or pecans. Toast them lightly in a dry pan first for extra flavor. I love the crunch they add against the soft crumb. If you’re making this for someone with nut allergies, try sunflower seeds or pumpkin seeds instead.
Gluten-Free Banana Bread: Substitute the all-purpose flour with a 1:1 gluten-free baking flour blend (like Bob’s Red Mill or King Arthur). Add an extra tablespoon of milk or yogurt to help with moisture, since gluten-free flours tend to be drier. The texture will be slightly more crumbly, but it’s still delicious.
Vegan Banana Bread: Replace the egg with a flax egg (1 tablespoon ground flaxseed mixed with 3 tablespoons water, let sit for 5 minutes). Use melted coconut oil instead of butter. The bread will be a bit denser but still incredibly moist and flavorful.
Spiced Banana Bread: Add 1 teaspoon of cinnamon, ½ teaspoon of nutmeg, and ¼ teaspoon of ground ginger to the flour mixture. This gives the bread a warm, cozy flavor that’s perfect for fall. I make this version when I’m craving something that reminds me of apple cider donut muffins but with bananas instead of apples.
Blueberry Banana Bread: Gently fold in 1 cup of fresh or frozen blueberries (don’t thaw them if frozen). Toss them in a tablespoon of flour first to prevent them from sinking to the bottom. The bursts of tart berry against the sweet banana bread are amazing.
I once made a version with shredded coconut and dark chocolate chunks—it reminded me of a tropical candy bar. It was a happy accident, and now it’s one of my favorite variations. Don’t be afraid to experiment. That’s how the best recipes are born.
Serving & Storage Suggestions
This banana bread is wonderful on its own, but a few small additions can make it feel extra special.
Serving Temperature: I prefer it slightly warm. If you’ve stored it in the fridge, pop a slice in the microwave for 10-15 seconds or toast it lightly in a toaster oven. The heat brings out the banana flavor and softens the crumb. A slice of warm banana bread with a pat of butter melting into it? That’s pure happiness.
What to Serve With It: A cup of coffee or tea is the obvious choice, but it’s also fantastic with a glass of cold milk. For a more decadent treat, spread a little cream cheese or honey butter on top. If you’re feeling fancy, drizzle some caramel sauce over a slice and add a dollop of whipped cream. It’s basically dessert at that point.
Storage Instructions: Store the banana bread in an airtight container at room temperature for up to 4 days. Wrap it tightly in plastic wrap or aluminum foil to keep it from drying out. If you live in a humid climate (I do), it might get a little sticky on the surface after a day or two—just toast it to revive the texture.
Freezing Instructions: This bread freezes beautifully. Let it cool completely, then wrap it tightly in plastic wrap, followed by a layer of aluminum foil. Freeze for up to 3 months. To thaw, leave it on the counter overnight, or unwrap and microwave individual slices for 20-30 seconds. You can also freeze slices individually for quick breakfasts or snacks—just wrap each slice in plastic wrap and place them in a freezer bag.
How Flavors Develop: Honestly, this bread tastes even better on the second day. The banana flavor deepens and the texture becomes even more moist. If you can resist eating it all on day one, you’re in for a treat on day two. I’ve never managed to keep a loaf around long enough to test day three, but I’ve heard it’s still great.
Nutritional Information & Benefits
While this is definitely a treat, it does have some redeeming qualities. Here’s a rough estimate per slice (based on 10 slices, without mix-ins):
- Calories: 220
- Fat: 9g
- Carbohydrates: 34g
- Fiber: 2g
- Sugar: 18g
- Protein: 3g
Health Benefits: Bananas are a great source of potassium, which helps regulate blood pressure and supports muscle function. They also contain vitamin B6 and vitamin C. The oats (if you add them as a variation) add fiber that helps with digestion. This bread is also relatively low in saturated fat compared to many bakery-style banana breads.
Dietary Considerations: This recipe can easily be made dairy-free by using coconut oil instead of butter. For a vegan version, use a flax egg and coconut oil. For a lower-sugar option, reduce the sugar to ½ cup—the bananas provide plenty of natural sweetness. If you’re watching your carbs, this bread isn’t keto-friendly, but you can try using almond flour (though the texture will be different).
Potential Allergens: This recipe contains gluten (from the flour), dairy (from the butter), and eggs. If you’re making substitutions for allergies, be sure to check the labels on any alternative ingredients you use.
I like to think of this banana bread as a “better-for-you” treat. It’s not health food, but it’s made with real ingredients and no preservatives. That counts for something, right?
Conclusion
This easy one-bowl banana bread (no mixer needed) has become a staple in my kitchen for all the right reasons. It’s simple, forgiving, and consistently delicious. Whether you’re a seasoned baker or someone who rarely steps foot in the kitchen, this recipe will make you feel like you know what you’re doing.
What I love most about it is the way it fits into real life. You don’t need a special occasion to make it. You don’t need a fully stocked pantry or a professional kitchen. You just need three brown bananas, a bowl, and about 10 minutes of effort. The result is a loaf of banana bread that tastes like it took hours of work—but only you will know the truth.
So go ahead and give it a try. Mash those bananas, grab that fork, and make a mess in just one bowl. When you take that first warm, buttery bite, I think you’ll understand why this recipe has earned a permanent spot in my rotation. And if you make it your own—with chocolate chips, nuts, or a sprinkle of cinnamon on top—I’d love to hear about it. Drop a comment below and tell me how it turned out. Did you add something unexpected? Did your family love it? I read every single comment, and nothing makes me happier than knowing someone tried a recipe and loved it.
Happy baking, friend. You’ve got this.
Frequently Asked Questions
Can I use frozen bananas for this recipe?
Absolutely. Thaw them completely first, then drain off any excess liquid before mashing. Frozen bananas tend to release more water, so the batter might be slightly thinner, but the bread will still bake up beautifully. Just add an extra minute or two to the baking time if needed.
Why did my banana bread sink in the middle?
This usually happens for one of two reasons: either the batter was overmixed (which creates too much air that collapses), or the bread was underbaked. Make sure you’re mixing just until the flour disappears, and always check doneness with a toothpick. If the center is still wet, give it more time.
Can I make this into muffins instead of a loaf?
Yes! This batter works perfectly as muffins. Divide the batter among a greased or lined 12-cup muffin tin. Bake at 350°F for 15-18 minutes, or until a toothpick inserted into the center of a muffin comes out clean. You’ll get about 12 standard-sized muffins.
How do I know when my bananas are ripe enough?
Look for bananas with brown spots covering at least half the peel. They should feel soft when you squeeze them gently. If they’re mostly yellow with just a few spots, they’ll work, but the bread won’t be as sweet or moist. The blacker the banana, the better the bread—trust me on this.
Can I add protein powder to this recipe?
You can, but it will change the texture. Replace about ¼ cup of the flour with your favorite protein powder. The bread will be denser and slightly drier, so you might need to add an extra tablespoon of milk or yogurt. I’ve tried it with vanilla protein powder, and it was decent—just not as fluffy as the original.
Pin This Recipe!
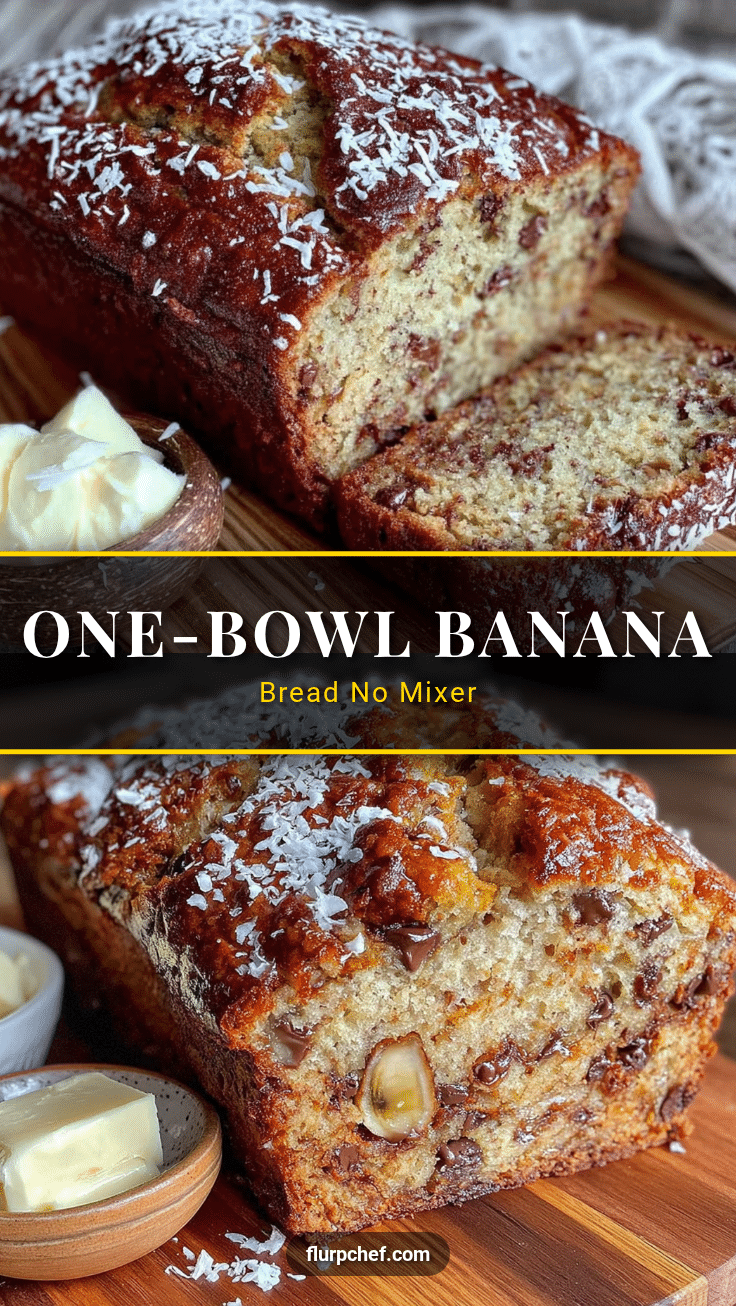
Easy One-Bowl Banana Bread Recipe (No Mixer Needed!)
This easy one-bowl banana bread requires no mixer and comes together in about 10 minutes. It’s tender, perfectly domed, and has a caramelized crust, making it a foolproof comfort food that uses simple pantry ingredients.
- Prep Time: 10 minutes
- Cook Time: 55 minutes
- Total Time: 1 hour 5 minutes
- Yield: 10 servings 1x
- Category: Dessert
- Cuisine: American
Ingredients
- 3 ripe bananas, mashed (about 1 ½ cups)
- ⅓ cup unsalted butter, melted (76 grams)
- ¾ cup granulated sugar (150 grams)
- 1 large egg, room temperature
- 1 teaspoon vanilla extract
- 1 ½ cups all-purpose flour (190 grams)
- 1 teaspoon baking soda
- ½ teaspoon salt
- Optional: ½ cup mix-ins (chocolate chips, chopped walnuts, or pecans)
Instructions
- Preheat your oven to 350°F (175°C). Grease a 9×5-inch loaf pan with butter or non-stick spray. If using parchment paper, leave some overhang on the long sides.
- In your large mixing bowl, mash the three ripe bananas with a fork until mostly smooth with a few small lumps remaining.
- Pour the melted butter over the mashed bananas and stir until combined and smooth.
- Add the sugar, room temperature egg, and vanilla extract. Whisk vigorously for about 30 seconds until well combined and slightly lighter in color.
- Sprinkle the flour, baking soda, and salt over the wet mixture. Fold gently with a spatula or wooden spoon just until no streaks of flour remain (about 10 to 12 strokes). A few lumps are fine.
- If using mix-ins, gently fold them in now.
- Pour the batter into the prepared pan, smooth the top, and tap the pan lightly on the counter to release air bubbles.
- Bake for 50-60 minutes, until a toothpick inserted into the center comes out clean or with a few moist crumbs. If the top browns too quickly, tent with foil after about 35 minutes.
- Cool in the pan for 10 minutes, then lift the bread out using parchment paper and transfer to a cooling rack to cool completely.
- Slice and enjoy. For best texture, let cool completely before slicing.
Notes
Use overripe bananas (brown spots) for best sweetness and moisture. Don’t overmix the batter to avoid tough bread. Check for doneness at 50 minutes. Let cool in pan for exactly 10 minutes to prevent sogginess. Room temperature egg is important for smooth incorporation. Weigh flour for accuracy (190g).
Nutrition
- Serving Size: 1 slice
- Calories: 220
- Sugar: 18
- Sodium: 250
- Fat: 9
- Saturated Fat: 5
- Carbohydrates: 34
- Fiber: 2
- Protein: 3
Keywords: banana bread, easy banana bread, one-bowl banana bread, no mixer banana bread, quick bread, homemade banana bread


