I want a dessert that tastes like a candy bar but feels like a warm hug, and I have everything in my pantry except the willpower to stop myself. That’s the exact thought I had last Tuesday at 3:47 PM, standing in my kitchen with the autumn sun slanting through the window. I had a bag of Reese’s peanut butter cups leftover from Halloween prep, a box of yellow cake mix I bought on a whim, and a can of pumpkin puree I’d stashed away for “someday.” Someday was apparently right now.
This Easy Reese’s Peanut Butter Fall Dump Cake happened because I refused to go to the store. Honestly, that’s where the best recipes come from—not from careful planning, but from staring into your pantry and making a deal with yourself. I wanted something that captured that cozy fall feeling without spending hours in the kitchen. Something that tasted like October feels, you know?
The first bite made me laugh out loud. It was ridiculous how good it was for how little effort I put in. The peanut butter melted into the pumpkin, the cake layer got all crispy on top and soft underneath, and suddenly my lazy Tuesday felt like a celebration. This is one of those recipes you’ll make for every football party, every potluck, every “I need dessert right now” emergency. It’s the kind of dessert that makes people think you tried way harder than you actually did.
Why You’ll Love This Recipe
Let me tell you why this dump cake is going to become your new fall obsession. I’ve tested this recipe four times in two weeks—my neighbors are very happy, by the way—and every single time it disappears faster than anything else on the table.
- Ridiculously Easy : We’re talking 10 minutes of prep, max. Dump, spread, bake. That’s it. No creaming butter, no fancy techniques, no multiple bowls to wash.
- Pantry-Friendly Ingredients : Cake mix, pumpkin puree, peanut butter cups, butter—you probably have most of this stuff already. No special fall ingredient hunt required.
- Perfect for Fall Gatherings : This cake screams autumn. It’s great for Thanksgiving dessert tables, Halloween parties, bonfire nights, or just a cozy Tuesday when you need something sweet.
- Crowd-Pleaser Status : Kids love the candy factor, adults love the pumpkin-pumpkin spice vibe, and everyone loves how the peanut butter and chocolate play together.
- Unbelievably Delicious : The top gets all golden and slightly crunchy, the middle stays soft and gooey, and those pockets of melted peanut butter cup? Absolute magic.
What makes this different from every other dump cake you’ve seen is the peanut butter-pumpkin combo. Most pumpkin dump cakes are just pumpkin and spice—which is fine, but it’s missing that extra something. Adding Reese’s peanut butter cups takes it from “nice fall dessert” to “I need the recipe right now.” The saltiness of the peanut butter balances the sweetness of the cake mix, and the pumpkin keeps everything moist without making it taste like a vegetable. Trust me on this one.
This is the dessert you make when you want to impress people but also want to watch the game. It’s comfort food at its finest—warm, sweet, salty, and completely satisfying.
What Ingredients You Will Need
This recipe uses simple ingredients that work together to create something way more delicious than the sum of their parts. Here’s what you’ll need and why each one matters.
- 1 can (15 oz) pumpkin puree (not pumpkin pie filling—make sure it’s pure pumpkin. I prefer Libby’s for consistent texture)
- 1 can (12 oz) evaporated milk (adds richness without making it too heavy. You can use regular milk in a pinch, but evaporated gives better texture)
- 3 large eggs (room temperature works best, but cold eggs will still work—just mix a little longer)
- 1 cup granulated sugar (adds sweetness and helps create that soft, custard-like pumpkin layer)
- 2 teaspoons pumpkin pie spice (or make your own: 1 tsp cinnamon, 1/2 tsp ginger, 1/4 tsp nutmeg, 1/4 tsp cloves)
- 1 box (15.25 oz) yellow cake mix (Duncan Hines or Betty Crocker both work great. Do not use a mix with pudding in the mix—it changes the texture)
- 1 cup unsalted butter (melted. Salted butter works too, just reduce the salt elsewhere. I use Land O’Lakes)
- 2 cups Reese’s peanut butter cups (chopped into chunks. Use the miniatures or the regular size—both work. About 12-15 regular cups)
- 1/2 cup chopped peanuts (optional, but adds amazing crunch. Dry roasted, unsalted is my preference)
- Caramel sauce for drizzling (optional, but highly recommended. Store-bought is fine, or use homemade)
For the pumpkin layer, make sure you’re using pure pumpkin puree, not pumpkin pie filling. The pie filling has sugar and spices already added, which throws off the whole balance. I learned this the hard way my first time—the cake came out way too sweet and the texture was off.
The cake mix is the magic ingredient here. Yellow cake mix works best because it’s neutral enough to let the pumpkin and peanut butter shine, but has enough vanilla flavor to tie everything together. Don’t use chocolate cake mix—it competes with the peanut butter cups and makes everything too chocolate-heavy. Trust me on this one.
For the butter, melt it completely but let it cool slightly before pouring. If you pour boiling butter over the cake mix, it can make the top layer too greasy. I usually melt mine in the microwave, then let it sit while I chop the peanut butter cups.
Equipment Needed
You don’t need fancy equipment for this recipe, which is part of why I love it. Here’s what you’ll need:
- 9×13 inch baking dish (glass or ceramic works best. Metal works too, but watch the baking time—it might cook faster)
- Large mixing bowl (for the pumpkin mixture. Any medium-large bowl will do)
- Whisk (for mixing the pumpkin layer. A fork works in a pinch, but whisk is better for getting out lumps)
- Sharp knife and cutting board (for chopping the peanut butter cups. A chef’s knife works best, but a serrated knife also works)
- Measuring cups and spoons (for the sugar and spice. Eyeballing works for the spice, but measure the sugar)
- Spatula (for spreading the cake mix evenly. I use a rubber spatula, but a regular spoon works too)
- Cooling rack (optional but helpful for even cooling. You can just let it cool in the pan on the counter)
I’ve made this in a disposable aluminum pan for potlucks and it works perfectly. Just put it on a baking sheet first for stability. If you don’t have a whisk, use a fork—it takes a little longer but gets the job done. The key is making sure the pumpkin mixture is smooth before you add the cake mix layer.
For chopping the peanut butter cups, I like to keep them in the fridge for about 10 minutes before cutting. They’re less sticky and you get cleaner chunks. Room temperature peanut butter cups tend to squish and smear, which is fine if you don’t care about appearance, but cold ones give you nice distinct pieces.
Preparation Method
Alright, let’s make this happen. I’ve broken it down step by step with all the little details I wish someone had told me the first time.
- Preheat your oven to 350°F (175°C). Do this first so it’s ready when you are. Grease your 9×13 baking dish with butter or non-stick spray. I use butter because it adds flavor, but spray works fine.
- Make the pumpkin layer. In your large mixing bowl, combine the pumpkin puree, evaporated milk, eggs, sugar, and pumpkin pie spice. Whisk until everything is smooth and well combined. You’re looking for a uniform orange mixture with no streaks of egg white or lumps of spice. This takes about 1-2 minutes of whisking. Don’t overmix—just until it’s smooth.
- Pour the pumpkin mixture into your prepared baking dish. Spread it evenly with your spatula. It should cover the bottom completely. Give the dish a little shake to level it out if needed.
- Sprinkle the dry cake mix evenly over the top. This is the dump part—just pour the entire box of cake mix over the pumpkin layer. Don’t stir it. Don’t mix it. Just let it sit on top. Use your fingers or a fork to break up any big clumps. You want an even layer of dry cake mix covering the entire surface.
- Sprinkle the chopped peanut butter cups over the cake mix. Distribute them evenly across the surface. Some will sink into the cake mix, some will stay on top—both are fine. Reserve a handful for the last 10 minutes of baking if you want visible chunks on top.
- Pour the melted butter evenly over everything. This is the most important step. Drizzle the melted butter over the entire surface, trying to cover as much of the cake mix as possible. Don’t pour it all in one spot—move your spoon or measuring cup around so it distributes evenly. Some dry spots are okay, but try to get most of it moistened.
- If using, sprinkle the chopped peanuts over the top. This adds crunch and makes it look fancy. Press them in slightly so they stick to the buttered cake mix.
- Bake for 45-55 minutes. The top should be golden brown and the edges should be bubbly. The center might still look a little jiggly—that’s fine. It will set as it cools. If the top is browning too fast (after about 30 minutes), tent loosely with foil.
- Let it cool for at least 20 minutes. I know, I know—you want to dig in immediately. But letting it cool allows the layers to set properly. If you cut it too soon, it’ll be soupy. After 20 minutes, it should be warm but not hot, and the pumpkin layer will have firmed up nicely.
- Drizzle with caramel sauce and serve. Warm or at room temperature, this cake is incredible. Add a scoop of vanilla ice cream if you’re feeling extra.
A few things I’ve learned: If your cake seems too wet after baking, it probably needs another 5-10 minutes. Every oven runs differently. My oven runs hot, so I check at 45 minutes. Also, if you’re using a glass dish, it might take a few minutes longer than metal. Go by look and feel, not just time.
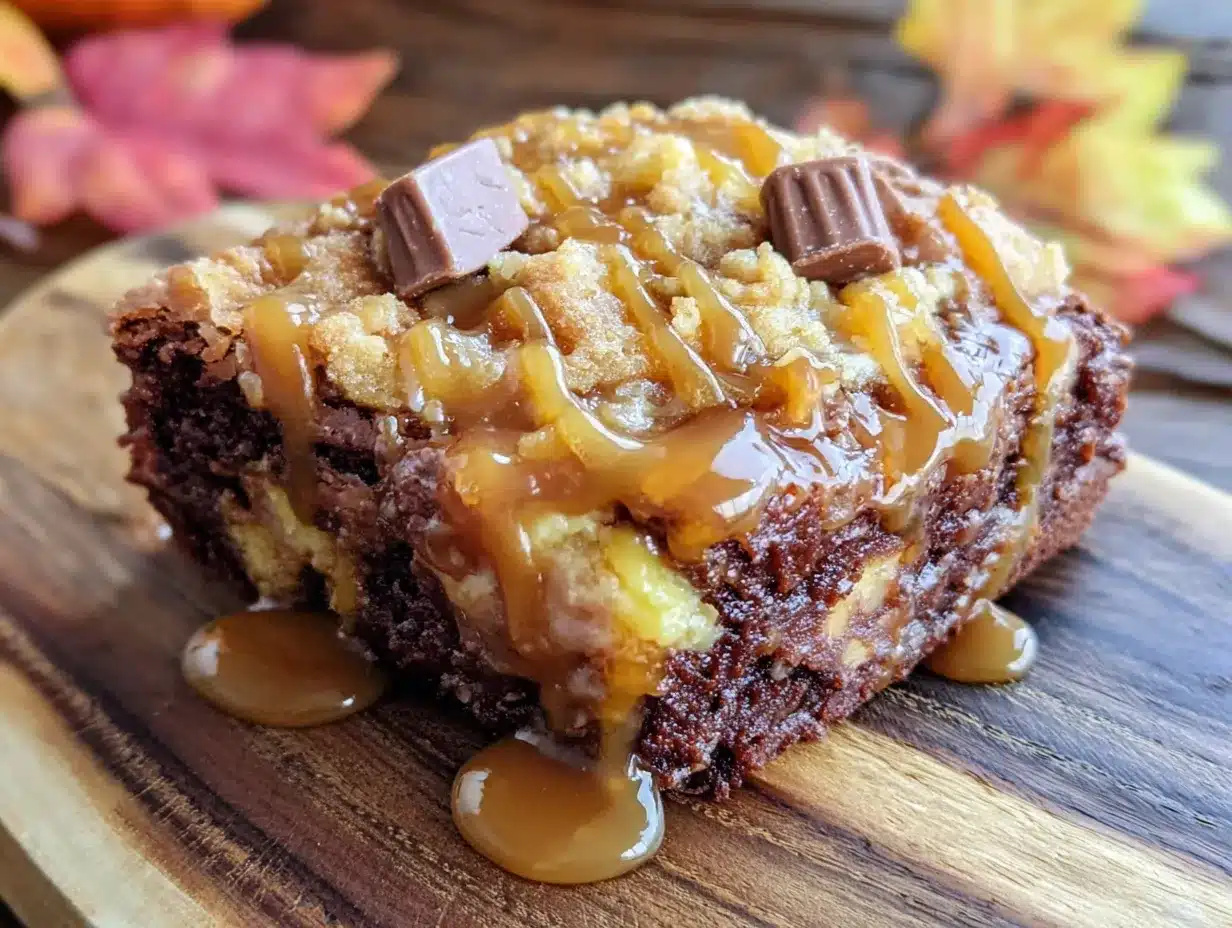
The top should be golden and slightly crispy, and you should see caramelized edges where the butter and sugar have bubbled up. That’s the good stuff right there.
Cooking Tips & Techniques
I’ve made this cake enough times to learn a few things the hard way. Here’s what I wish I’d known from the beginning.
Don’t stir the layers. I know it’s tempting to mix everything together, but the magic of a dump cake is the distinct layers. The pumpkin stays soft and custard-like on the bottom, while the cake mix and butter create a golden, slightly crunchy crust on top. If you stir it, you get a dense, wet mess. Let the layers do their thing.
Room temperature ingredients matter. Cold eggs and cold pumpkin straight from the fridge can make the pumpkin layer lumpy and harder to whisk smooth. Take everything out about 20 minutes before you start. If you forget (I always forget), you can warm the pumpkin in the microwave for about 15 seconds and run the eggs under warm water for a minute.
Watch your butter temperature. Melted butter should be warm but not hot. If it’s too hot when you pour it over the cake mix, it can melt the peanut butter cups before they have a chance to bake properly. Let the melted butter sit for 2-3 minutes before pouring.
My biggest failure: The first time I made this, I used pumpkin pie filling instead of pure pumpkin. The cake came out cloyingly sweet and the texture was off—too dense and almost gummy. I also didn’t let it cool long enough, so it turned into pumpkin soup on the plate. Learn from my mistakes.
For consistent results, use the same brand of cake mix every time. Different brands have different moisture levels and sugar content, which affects the final texture. I stick with Duncan Hines yellow cake mix because it gives me the perfect balance of crispy top and soft middle.
Timing tip: While the cake is baking, make your caramel sauce if you’re going homemade. Or just open a jar of store-bought—no judgment here. I’ve done both, and honestly, the store-bought version with a pinch of flaky salt tastes just as good.
Variations & Adaptations
This recipe is super flexible. Here are some ways I’ve changed it up depending on what I had on hand or who I was feeding.
Gluten-Free Version: Use a gluten-free yellow cake mix. I’ve tried this with King Arthur’s gluten-free yellow cake mix and it works perfectly. Just make sure your peanut butter cups are certified gluten-free if that’s a concern. Everything else in the recipe is naturally gluten-free.
Dairy-Free Version: Swap the butter for a dairy-free alternative like Earth Balance or Miyoko’s. Use coconut milk or oat milk instead of evaporated milk—full-fat canned coconut milk works best for that creamy texture. The peanut butter cups are naturally dairy-free, which is awesome.
Extra Chocolatey Version: Add 1/2 cup chocolate chips along with the peanut butter cups. I like dark chocolate chips to balance the sweetness. You can also drizzle melted chocolate over the top after baking for a more decadent finish.
Nut-Free Version: Skip the chopped peanuts and use sunflower seed butter cups instead of Reese’s. Or just leave out the peanut butter cups entirely and use chocolate chips—it won’t be the same, but it’ll still be delicious.
Spice It Up Version: Add 1/4 teaspoon cayenne pepper to the pumpkin layer for a sweet-heat combo that’s surprisingly good. The heat sneaks up on you after the sweetness, and it’s perfect for fall gatherings.
I once made this with white chocolate chips and dried cranberries mixed in, and it was like a pumpkin white chocolate cookie in cake form. Not as peanut-buttery, but still amazing. The possibilities are endless.
Serving & Storage Suggestions
This cake is best served warm, about 20-30 minutes after it comes out of the oven. The top is still slightly crispy, the middle is soft and gooey, and the peanut butter cups are all melty and irresistible.
How to serve: Scoop it into bowls with a big spoon—don’t try to cut perfect squares, it’s meant to be messy. Top with vanilla ice cream, whipped cream, or a drizzle of caramel sauce. A sprinkle of flaky sea salt on top takes it to another level, trust me.
What goes with it: This cake is rich enough to stand alone, but it pairs beautifully with a cup of hot apple cider or a pumpkin spice latte. For a fun fall dessert bar, serve it alongside some apple cider donut muffins or salted caramel apple blondie bars.
Storage: Cover the baking dish tightly with foil or plastic wrap and store in the refrigerator for up to 5 days. The texture changes slightly as it sits—the top gets softer and the pumpkin layer firms up more—but it’s still delicious.
Reheating: Microwave individual servings for 20-30 seconds to bring back that warm, gooey texture. For a bigger portion, reheat in a 300°F oven for about 10 minutes. The top won’t be as crispy as fresh, but it’ll still be amazing.
Freezer instructions: This cake freezes beautifully. Let it cool completely, then wrap the entire dish in plastic wrap, then foil. Freeze for up to 3 months. Thaw in the refrigerator overnight, then reheat as directed above. I’ve done this for holiday prep and it works perfectly.
The flavors actually develop more after a day in the fridge. The pumpkin and peanut butter meld together, and the spice becomes more pronounced. Some people prefer it cold, straight from the fridge—I’m not one of them, but I get it.
Nutritional Information & Benefits
Let’s be real—this is a dessert, not a health food. But it does have some redeeming qualities worth mentioning.
Estimated per serving (12 servings): 420 calories, 22g fat, 55g carbohydrates, 7g protein, 3g fiber, 35g sugar. These are rough estimates and will vary based on brands and modifications.
Pumpkin benefits: Pumpkin is packed with vitamin A (great for eye health), fiber (helps with digestion), and antioxidants. It’s also naturally low in calories and fat, which makes it a surprisingly good base for a dessert. Plus, it adds moisture without needing extra oil or butter.
Peanut butter benefits: Peanut butter provides protein, healthy fats, and vitamin E. The Reese’s cups add some protein too, though obviously they also bring sugar and processed ingredients. If you want to make it healthier, use natural peanut butter chips instead of Reese’s cups, but honestly, live a little.
Dietary considerations: This recipe contains gluten, dairy, eggs, peanuts, and soy (in the cake mix). For gluten-free, use a gluten-free cake mix. For dairy-free, use plant-based butter and coconut milk. For nut-free, skip the peanuts and use seed butter cups.
My personal take: I don’t make this cake because it’s healthy. I make it because it makes people happy, including me. Sometimes a warm, gooey dessert is exactly what you need, and that’s okay. Balance is everything.
Conclusion
This Easy Reese’s Peanut Butter Fall Dump Cake is the kind of recipe that makes you look like a hero with almost zero effort. It’s warm, comforting, and packed with all the flavors that make fall the best season for baking. The pumpkin keeps it moist, the cake mix creates that perfect crispy top, and those pockets of melted peanut butter cup? Absolute perfection.
I love this recipe because it reminds me that you don’t need fancy techniques or rare ingredients to make something truly special. Sometimes the best desserts come from a box of cake mix, a can of pumpkin, and a handful of candy—plus a little bit of trust in the process.
If you try this recipe, I’d love to hear how it turned out. Did you add anything? Change anything? Serve it with something amazing? Drop a comment below and let me know. And if you’re looking for more easy fall desserts, check out my slow cooker pumpkin dump cake with cream cheese swirl or these brown butter pumpkin snickerdoodle cookies for more cozy autumn baking.
Go make this cake. Your kitchen is about to smell incredible.
Frequently Asked Questions
Can I use pumpkin pie filling instead of pumpkin puree?
No, I don’t recommend it. Pumpkin pie filling has added sugar and spices, which throws off the balance of the recipe. The cake will come out way too sweet and the texture will be denser. Stick with pure pumpkin puree for the best results.
Do I have to use Reese’s peanut butter cups?
Not at all! You can use any peanut butter cups or even chocolate chips. I’ve made it with chopped Snickers bars, and that was amazing too. Just keep the total amount around 2 cups of mix-ins.
Why is my dump cake soupy in the middle?
It probably needs more baking time or cooling time. The center will look slightly jiggly when it comes out of the oven, but it should set as it cools. Let it rest for at least 20-30 minutes before serving. If it’s still soupy after that, pop it back in the oven for another 10 minutes.
Can I make this in a slow cooker?
Yes! Layer everything the same way in a greased slow cooker. Cook on low for 3-4 hours or on high for 1.5-2 hours. The texture will be softer and more pudding-like, but it’s still delicious. Check at the 2-hour mark on low to avoid overcooking.
How do I make the top extra crispy?
For a crunchier top, sprinkle an extra tablespoon of sugar over the cake mix before adding the butter. You can also broil it for 1-2 minutes at the end of baking—watch it closely so it doesn’t burn. The sugar caramelizes and creates an amazing crunchy crust.
Pin This Recipe!
Easy Reeses Peanut Butter Fall Dump Cake
This Easy Reese’s Peanut Butter Fall Dump Cake is a warm, comforting dessert that tastes like a candy bar but feels like a warm hug. With pumpkin, peanut butter cups, and a crispy cake mix topping, it’s the perfect no-fuss fall treat.
- Prep Time: 10 minutes
- Cook Time: 50 minutes
- Total Time: 1 hour
- Yield: 12 servings 1x
- Category: Dessert
- Cuisine: American
Ingredients
- 1 can (15 oz) pumpkin puree
- 1 can (12 oz) evaporated milk
- 3 large eggs
- 1 cup granulated sugar
- 2 teaspoons pumpkin pie spice
- 1 box (15.25 oz) yellow cake mix
- 1 cup unsalted butter, melted
- 2 cups Reese’s peanut butter cups, chopped
- 1/2 cup chopped peanuts (optional)
- Caramel sauce for drizzling (optional)
Instructions
- Preheat your oven to 350°F (175°C). Grease a 9×13 inch baking dish with butter or non-stick spray.
- In a large mixing bowl, combine the pumpkin puree, evaporated milk, eggs, sugar, and pumpkin pie spice. Whisk until smooth and well combined.
- Pour the pumpkin mixture into the prepared baking dish and spread evenly.
- Sprinkle the dry cake mix evenly over the pumpkin layer. Do not stir.
- Sprinkle the chopped peanut butter cups over the cake mix. Reserve a handful for the last 10 minutes of baking if desired.
- Pour the melted butter evenly over the entire surface, trying to cover as much of the cake mix as possible.
- If using, sprinkle the chopped peanuts over the top and press them in slightly.
- Bake for 45-55 minutes, until the top is golden brown and the edges are bubbly. If the top is browning too fast, tent loosely with foil after 30 minutes.
- Let it cool for at least 20 minutes before serving.
- Drizzle with caramel sauce and serve warm or at room temperature.
Notes
Don’t stir the layers—the magic of a dump cake is the distinct layers. Use pure pumpkin puree, not pumpkin pie filling. Let the cake cool for at least 20 minutes to allow the layers to set properly. For a crunchier top, sprinkle an extra tablespoon of sugar over the cake mix before adding the butter.
Nutrition
- Serving Size: 1 serving
- Calories: 420
- Sugar: 35
- Sodium: 380
- Fat: 22
- Saturated Fat: 12
- Carbohydrates: 55
- Fiber: 3
- Protein: 7
Keywords: dump cake, Reese's, peanut butter, pumpkin, fall dessert, easy dessert, cake mix


