I was standing in the baking aisle last November, staring at a tube of pre-made sugar cookie dough I had no intention of buying, when the smell hit me. Not the dough itself—but a faint ghost of cinnamon and butter that shot me straight back to my Aunt Maggie’s tiny kitchen in Buffalo. I was maybe six, sitting cross-legged on her linoleum floor while she rolled out dough on a floured counter, the radio playing Christmas music way too early. She let me press my hand into the dough, fingers splayed, and I remember thinking, this must be what making art feels like. She passed away a few years ago, and I haven’t thought about those cookies in forever. But standing there in the aisle, I could feel the flour on my fingers and hear her laughing at my crooked thumbprint.
I grabbed a bag of flour and some butter, and honestly, I was a little nervous. What if they didn’t turn out the same? What if I messed up the dough or the cookies spread into blobs? But here’s the thing—these cookies aren’t about perfection. They’re about getting your hands messy with someone you love, even if that someone is a three-year-old who thinks sprinkles are a food group. The first batch I made came out a little lopsided, and one of the turkey “feathers” looked more like a deformed starfish. My kid didn’t care. She said it was the best cookie she ever ate, and she ate it while still holding the cookie cutter.
These Easy Turkey Handprint Sugar Cookies are exactly that kind of recipe. They’re forgiving, they’re fun, and they turn out adorable even when you’re rushing. Maybe you’ve been there—trying to find a Thanksgiving activity that doesn’t require a degree in patience or a trip to three different craft stores. This is it. No fancy tools, no stress, just butter, sugar, and a little bit of flour on your nose.
Why You’ll Love This Recipe
Let’s be real—most Thanksgiving recipes with kids involve a lot of cleanup and a lot of crying. Not these cookies. I’ve tested this recipe four times now (yes, four—my family is very supportive), and every single time, it delivered. Here’s why I keep coming back to it, especially on those crazy weeknights when we’re already running late for school pickup.
- Quick & Easy: From start to finish, these cookies take about 45 minutes. That includes chilling time, which you can skip if you’re in a hurry (I’ve done it—they still work). Perfect for that evening before the school Thanksgiving feast when you realize you need something to bring.
- Simple Ingredients: You probably have everything in your pantry right now. Butter, sugar, flour, eggs, vanilla—that’s it. No weird extracts or specialty flours. I used to buy those pre-made tubes, but honestly, homemade is faster when you factor in the drive to the store.
- Perfect for Busy Weeknights: This isn’t a weekend project. You can whip up the dough in 10 minutes, chill it while you help with homework, and bake them off in 8 minutes flat. The decorating is the fun part, and you can do that while dinner is in the oven.
- Crowd-Pleaser: I brought these to my daughter’s preschool Thanksgiving party, and they were gone in 15 minutes. One mom asked for the recipe, and another said her kid usually doesn’t like sugar cookies but ate three. That’s the kind of feedback that makes a food blogger’s day.
- Unbelievably Delicious: These aren’t dry, crumbly sugar cookies. They’re soft in the center with slightly crispy edges, and the butter flavor is just right. The handprint shape means more surface area for that perfect chewiness.
What makes this recipe different from the dozens of other turkey cookies out there? It’s the texture, honestly. I spent a while tweaking the butter-to-flour ratio so the cookies hold their shape when you press your hand in, but they’re still tender. No spreading into weird blobs, no cracking down the middle. Plus, I figured out a trick for getting clean handprints every time—chill the dough for just 10 minutes before pressing. That little detail makes all the difference.
This recipe isn’t just good—it’s the kind that makes you close your eyes after the first bite. It’s comfort food reimagined for busy families: faster, easier, but with the same soul-soothing satisfaction. Perfect for impressing the other parents at the school party without actually stressing about it.
What Ingredients You Will Need
This recipe uses simple, wholesome ingredients to deliver that classic sugar cookie flavor with a soft, tender crumb. Nothing fancy here—just pantry staples that come together beautifully. You’ll find everything at your regular grocery store, no special trips required.
- Unsalted butter, softened (1 cup / 226g) — I use Land O’Lakes for consistent results. Make sure it’s truly softened to room temperature, not melted. If you forget to take it out, microwave it for 10 seconds at 30% power. Don’t rush this—cold butter won’t cream properly, and your cookies will be dense.
- Granulated sugar (3/4 cup / 150g) — Regular white sugar works perfectly. I’ve tried coconut sugar, and it makes the cookies darker and slightly grainier. Stick with white for that classic look. (Adds sweetness and helps with spreading.)
- Large egg, room temperature (1) — If your egg is cold, place it in a bowl of warm water for 5 minutes. Room temperature eggs incorporate better into the butter mixture. (Adds structure and richness.)
- Vanilla extract (2 teaspoons / 10ml) — Pure vanilla extract is worth the splurge here. I recommend Nielsen-Massey for the best flavor. Imitation vanilla works in a pinch, but you’ll notice the difference. (Adds warmth and depth.)
- All-purpose flour (2 cups / 250g) — Spoon and level your flour—don’t scoop directly from the bag. Too much flour makes cookies dry and crumbly. I use Gold Medal unbleached. (Provides structure.)
- Baking powder (1/2 teaspoon) — Make sure it’s fresh. Test it by dropping a bit in hot water—if it fizzes, it’s good. (Helps cookies rise slightly.)
- Salt (1/4 teaspoon) — Just enough to balance the sweetness. I use fine sea salt. (Enhances flavor.)
For the turkey decorations:
- Candy corn (about 20 pieces) — For the turkey feathers. You’ll need 5 pieces per cookie, arranged in a fan shape. I buy the Brach’s brand because they’re sturdier and less sticky. (Adds color and sweetness.)
- Mini chocolate chips (about 30) — For the eyes. You can also use candy eyes if you have them. (Adds cuteness factor.)
- Orange frosting or orange candy melts (for the beak and wattle) — I use Wilton orange frosting in a tube for convenience. A tiny piping tip helps, but you can also use a ziplock bag with the corner snipped. (Adds detail.)
- Red frosting or red candy melts (for the wattle, optional) — That little red dangly bit under the beak. Not essential, but it makes the turkey look more authentic. (Adds character.)
Substitution guidance: For a dairy-free version, use vegan butter (I recommend Miyoko’s) and check that your candy corn is dairy-free. For gluten-free, swap the all-purpose flour with a 1:1 gluten-free flour blend that contains xanthan gum. I’ve tested this with King Arthur Measure for Measure, and it worked well—just add an extra tablespoon of milk if the dough seems dry. If you don’t have candy corn, you can use colored candy melts or even fruit leather cut into feather shapes. And if you’re out of mini chocolate chips, just chop up regular ones—your kids won’t notice the difference.
Equipment Needed
You don’t need much for these cookies, which is part of the beauty. Here’s what you’ll need, plus some alternatives if you’re working with a less-stocked kitchen.
- Large mixing bowl — Any bowl works, but a wide one makes creaming easier. I use a glass Pyrex bowl because it doesn’t slide around.
- Electric hand mixer or stand mixer — You can cream butter and sugar by hand with a wooden spoon, but it takes about 10 minutes of serious arm work. I’ve done it—my wrist hurt for two days. A hand mixer is faster and easier. I use a KitchenAid hand mixer, but any brand works.
- Baking sheet (2, if possible) — Standard half-sheet pans work best. If you only have one, let it cool completely between batches, or the dough will start melting before it hits the oven.
- Parchment paper or silicone baking mat — Parchment paper is cheap and disposable. Silicone mats are reusable and non-stick. I prefer parchment for these because the cookies slide right off. (Adds ease of cleanup.)
- Plastic wrap — For chilling the dough. You can also use a reusable beeswax wrap if you’re eco-conscious.
- Small offset spatula — Not essential, but it helps transfer the cookies without breaking them. A thin metal spatula works too.
- Cooling rack — Wire racks let air circulate so cookies cool evenly. If you don’t have one, a clean dish towel works in a pinch—just flip the cookies after a few minutes.
- Piping bag or small ziplock bag — For the frosting details. A ziplock bag with a tiny corner snipped off is honestly easier to use and cheaper.
For the handprint part, you literally just need your hand. Wash it first, obviously. I learned that the hard way after a batch of cookies that tasted faintly of garlic. Not my finest moment.
Preparation Method
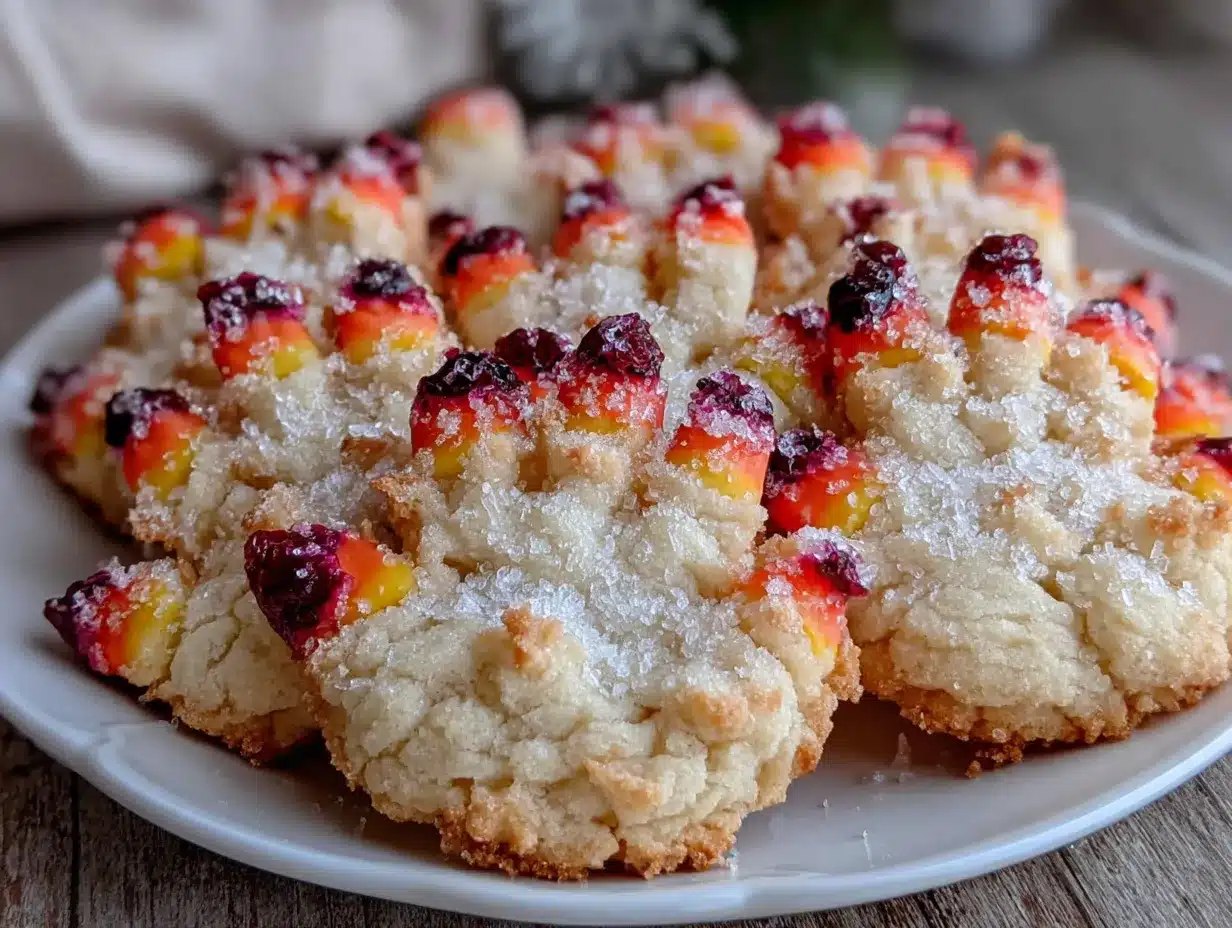
Alright, let’s get to the fun part. I’ve broken this down into clear steps with all the little tricks I’ve learned from making these cookies about a dozen times. Take your time—rushing is the only way to mess these up.
- Cream the butter and sugar. In your large mixing bowl, beat the softened butter and granulated sugar together on medium speed until light and fluffy—about 3 minutes. You’re looking for a pale yellow color and a texture that reminds you of whipped cream. Scrape down the sides of the bowl halfway through. If you’re using a hand mixer, this is a good arm workout. Don’t skip this step—proper creaming means air bubbles, which means tender cookies.
- Add the egg and vanilla. Crack the egg into a small bowl first (just in case you get shell pieces—trust me, fishing them out of the batter is no fun). Add it to the butter mixture along with the vanilla extract. Beat on low speed until just combined, about 30 seconds. The mixture might look a little curdled at this point—that’s normal. Don’t overmix, or the cookies will be tough.
- Mix the dry ingredients. In a separate bowl, whisk together the flour, baking powder, and salt. I use a fork for this because I’m too lazy to wash another whisk. Make sure the baking powder is evenly distributed—you don’t want one cookie to taste metallic.
- Combine wet and dry. Add the flour mixture to the butter mixture in two additions, mixing on low speed after each. Scrape the bowl down in between. The dough will look shaggy at first, then come together into a soft, slightly sticky ball. If it’s too sticky to handle, add a tablespoon more flour. If it’s too dry and crumbly, add a teaspoon of milk. I usually end up adding the extra tablespoon of flour because my kitchen is humid.
- Chill the dough. Flatten the dough into a disk (it chills faster this way), wrap it tightly in plastic wrap, and refrigerate for at least 30 minutes. This is the hardest part if you have impatient kids. I’ve skipped this step before, and the cookies spread into weird shapes. The chill time solidifies the butter, which means cleaner handprints and less spreading. If you’re in a rush, pop it in the freezer for 15 minutes instead.
- Preheat the oven. Set your oven to 350°F (175°C). Line your baking sheets with parchment paper. If you’re using two sheets, position them on separate racks. If you’re using one, plan to bake in batches.
- Shape the cookies. Here’s where the magic happens. Scoop out about 2 tablespoons of dough (I use a cookie scoop for consistency) and roll it into a ball. Place it on the prepared baking sheet, leaving about 3 inches between each ball—these spread a little. Now, wash and dry your hand completely. Press your palm firmly into the center of the dough ball, spreading your fingers slightly. Press down until the dough is about 1/4-inch thick. The palm creates the body, and the fingers create the feathers. If the dough sticks to your hand, lightly dust your palm with flour. I learned this after my first attempt where the dough stuck to my hand like glue and I ended up with a mangled blob.
- Bake. Bake for 8-10 minutes, or until the edges are just barely golden. The centers will look slightly underdone—that’s perfect. They’ll continue cooking on the hot baking sheet after you pull them out. Overbaked sugar cookies are dry and sad. I set a timer for 8 minutes and check. If they’re not done, I give them one more minute. Every oven is different—my friend’s oven runs hot, and hers are done at 7 minutes.
- Cool. Let the cookies rest on the baking sheet for 5 minutes. This is crucial—they’re too fragile to move right away. After 5 minutes, transfer them to a wire rack to cool completely. If you don’t have a wire rack, a clean cutting board works. Don’t try to decorate them while they’re warm, or the frosting will melt into a mess.
- Decorate the turkeys. Once the cookies are completely cool, it’s time to make them look like turkeys. Arrange 5 candy corn pieces in a fan shape at the top of the “fingers” (the feathers). Place two mini chocolate chips in the palm area for eyes. Use the orange frosting to pipe a small triangle for the beak, just below the eyes. If you’re adding the wattle, pipe a tiny red dot or line under the beak. Let the frosting set for about 10 minutes before serving. If you’re doing this with kids, expect some creative interpretations—my daughter’s turkeys all looked like they were winking, and it was adorable.
Cooking Tips & Techniques
I’ve made enough mistakes with these cookies to fill a small notebook. Here are the lessons I learned so you don’t have to repeat them.
The handprint trick. Press firmly but gently. If you press too hard, the dough squishes out the sides and you get a thin, crispy cookie instead of a soft one. Too light, and the handprint is shallow and hard to see. The sweet spot is about 1/4-inch thickness. I press with my palm and then use my fingers to gently reshape any edges that look uneven. Also, wash your hands between batches—the butter from the dough builds up and makes the next press sticky.
Chilling is non-negotiable. I know, I know—you’re busy. But trust me on this one. The first time I made these, I skipped the chill step because my daughter was already crying about being hungry. The cookies spread into flat, unrecognizable blobs. The handprints disappeared. It was a disaster. The second time, I chilled for the full 30 minutes, and they came out perfect. The cold butter holds its shape in the oven. If you’re really pressed for time, freeze the shaped cookies for 10 minutes before baking. That works too.
Don’t overmix the dough. Once you add the flour, mix just until it comes together. Overmixing develops gluten, which makes cookies tough and bready. You want tender, melt-in-your-mouth cookies. I mix on low speed and stop the moment I don’t see any more white flour streaks. A few lumps are fine—they’ll bake out.
Batch baking strategy. If you’re making a big batch for a party, bake one sheet at a time in the center of the oven. Baking two sheets at once can lead to uneven baking—the top sheet might brown faster than the bottom. I rotate my single sheet halfway through for even color. Also, let the baking sheet cool completely between batches. A hot sheet will start melting the dough before it hits the oven, and you’ll lose those nice handprints.
My biggest failure. I once tried to double the batch and used margarine instead of butter because I ran out. Don’t do it. Margarine has more water, which makes cookies spread like crazy. The handprints turned into puddles, and the candy corn sank into the dough. It was a sad, flat mess. Stick with real butter—it’s worth it.
Variations & Adaptations
One of the best things about this recipe is how flexible it is. Here are some variations I’ve tried, plus ideas from friends who’ve adapted it for their own families.
Dietary variations: For a gluten-free version, swap the all-purpose flour with a 1:1 gluten-free blend. I’ve tested this with Bob’s Red Mill and King Arthur, and both worked well. The dough will be slightly stickier, so chill it for an extra 10 minutes. For a dairy-free version, use vegan butter and skip the egg wash. The cookies will be a bit more crumbly, but still delicious. I made these for a friend’s dairy-free daughter, and she ate four without complaint.
Seasonal variations: These aren’t just for Thanksgiving! For Christmas, use red and green candy melts for the feathers and add a tiny red nose to make reindeer. For Halloween, use orange and black sprinkles and shape the handprint into a spider. For spring, use pastel candy corn and add flower-shaped sprinkles. I made a batch of “Easter bunny” handprints by adding pink frosting ears on top of the palm—my kids thought it was hilarious.
Flavor variations: Add 1/2 teaspoon of almond extract along with the vanilla for a nutty twist. Or add 1 teaspoon of lemon zest for a bright, citrusy flavor that cuts through the sweetness. I tried a cinnamon-sugar version by rolling the dough balls in cinnamon sugar before pressing—the handprints were still visible, and the cookies had a warm, spicy kick. My husband said they tasted like churros. Not a complaint.
Candy substitutions: If you don’t have candy corn, use colored candy melts or even fruit leather cut into feather shapes. For the eyes, you can use mini M&Ms or even small dabs of black frosting. I once used black sprinkles for the eyes, and they looked like tiny pupils—creepy but cute.
My personal favorite variation: I made a batch with browned butter last Thanksgiving. I browned 1 cup of butter in a saucepan until it smelled nutty and turned golden, then let it cool to room temperature before creaming it with the sugar. The cookies had a deeper, almost toffee-like flavor that paired perfectly with the candy corn. It’s a bit more work, but honestly, it’s worth it for a special occasion. Just make sure the browned butter is completely cool before you start—warm butter will melt the sugar and ruin the texture.
Serving & Storage Suggestions
These cookies are best served at room temperature, which means you can make them ahead and just set them out when you’re ready. They’re perfect for school parties, Thanksgiving dinner, or just a fun afternoon snack with the kids.
Serving temperature: Room temperature is ideal. If you’ve stored them in the fridge, let them sit out for about 15 minutes before serving. The cookies soften up and the flavors come through better. I wouldn’t recommend serving them warm—the candy corn gets soft and the frosting melts. Trust me, I tried it once, and it was a sticky mess.
Presentation ideas: Arrange the cookies on a platter with the handprints facing up so everyone can see the turkey design. I like to place them in a circle around a small bowl of extra candy corn for a festive look. For a school party, I put each cookie in a small cellophane bag tied with a orange ribbon—it makes them easy to grab and keeps them from breaking. If you’re feeling extra, add a small tag that says “Happy Thanksgiving from our hands to yours!”
Complementary dishes: These cookies pair beautifully with a warm cup of apple cider or a mug of hot chocolate. For a dessert spread, serve them alongside pumpkin pie, pecan bars, or a simple vanilla ice cream. They’re sweet enough to stand alone, but a scoop of vanilla ice cream never hurt anyone.
Storage instructions: Store the undecorated cookies in an airtight container at room temperature for up to 5 days. If you’ve already decorated them, layer them between sheets of parchment paper to prevent the candy corn from sticking. I use a glass container with a tight lid—plastic containers can make cookies soft. If you’re making them ahead, I recommend baking the cookies and storing them plain, then decorating the day you plan to serve them. The candy corn stays crunchier that way.
Freezer instructions: These cookies freeze beautifully. Place the undecorated baked cookies in a single layer on a baking sheet and freeze for 1 hour. Then transfer them to a freezer-safe bag or container, layering with parchment paper. They’ll keep for up to 3 months. To thaw, just leave them at room temperature for about 30 minutes, then decorate as usual. I’ve also frozen the dough itself—wrap the disk tightly in plastic wrap and then foil, and freeze for up to 2 months. Thaw overnight in the fridge before rolling and cutting.
How flavors develop: Honestly, these cookies taste even better the next day. The flavors meld together, and the texture softens slightly. I actually prefer them on day two. If you can resist eating them all on day one, you’re a stronger person than me.
Nutritional Information & Benefits
Let’s be real—these are sugar cookies with candy corn on top. They’re a treat, not a health food. But here’s the thing: I believe in balance. These cookies are made with real ingredients, no preservatives, and they’re made with love. That counts for something.
Estimated nutritional values (per cookie, based on 24 cookies):
- Calories: 145
- Fat: 7g
- Saturated Fat: 4g
- Carbohydrates: 20g
- Sugar: 12g
- Protein: 2g
- Sodium: 55mg
Health benefits of key ingredients: Butter contains vitamin A and butyrate, which supports gut health. Eggs provide high-quality protein and choline, which is important for brain development. And while sugar isn’t a health food, a little bit can make a special occasion feel truly special. The act of baking together—measuring, mixing, pressing handprints—has proven benefits for kids’ motor skills and emotional bonding. So really, these cookies are good for the soul.
Dietary considerations: This recipe contains gluten, dairy, and eggs. For gluten-free and dairy-free options, see the variations section above. The candy corn may contain corn syrup and artificial colors, so check the label if you have sensitivities. I’ve seen organic candy corn at some stores, but it’s harder to find.
My personal wellness perspective: I don’t believe in labeling food as “good” or “bad.” These cookies are a celebration. They’re meant to be enjoyed with family, shared with friends, and eaten with a smile. One cookie isn’t going to derail anyone’s health goals. But a whole batch? Well, that’s a different story. I speak from experience.
Conclusion
These Easy Turkey Handprint Sugar Cookies are more than just a recipe—they’re a memory in the making. They’re the kind of thing your kids will remember years from now, when they’re standing in a baking aisle somewhere, and a whiff of butter and sugar takes them right back to your kitchen. That’s the real magic here.
I love that these cookies are forgiving. They don’t require perfect handprints or Pinterest-worthy decorations. They just require a little flour, a little patience, and a willingness to get messy. My daughter’s first batch looked like mutant turkeys with three eyes and no beaks. She was so proud of them. And you know what? They were the best cookies I ever ate.
So go ahead—make these with your kids, your grandkids, or just for yourself. Customize them however you like. Use different candies, add sprinkles, make them into reindeer for Christmas. The recipe is just a starting point. The real joy is in the making.
I’d love to see how yours turn out! Leave a comment below with your turkey creations, or tag me on Pinterest with your photos. And if you have a variation I haven’t tried yet, please share it—I’m always looking for new ways to make these cookies even better. Happy baking, friends!
Frequently Asked Questions
Can I use pre-made sugar cookie dough instead?
You can, but the handprints won’t be as defined. Pre-made dough has more preservatives and a different fat ratio, so it spreads more in the oven. If you’re in a real pinch, go for it—just know the results won’t be as crisp. I’ve tried it with Pillsbury dough, and the handprints were barely visible after baking.
How do I keep the candy corn from falling off?
Press the candy corn into the cookie while it’s still slightly warm (but not hot). The residual heat helps the candy stick. If you’re adding them to completely cooled cookies, use a tiny dab of frosting as “glue” under each piece. I use the orange frosting for this—it blends right in.
Can I make these cookies ahead of time for a party?
Absolutely. Bake the cookies up to 3 days ahead and store them in an airtight container at room temperature. Decorate them the morning of your party or the night before. The candy corn stays crunchiest if you add it within 24 hours of serving. I’ve also frozen the baked, undecorated cookies for up to 3 months.
My handprint cookies spread into blobs. What went wrong?
This usually happens for one of three reasons: the dough wasn’t chilled long enough, the butter was too soft, or the baking sheet was hot when you placed the dough on it. Make sure to chill the shaped cookies for at least 10 minutes before baking. Also, let your baking sheet cool completely between batches. I keep a second sheet in the fridge for this reason.
Can I use a different type of candy for the feathers?
Definitely! Colored candy melts, fruit leather cut into feather shapes, or even small pretzel sticks work great. I’ve used colorful sprinkles arranged in a fan pattern, and it looked like a disco turkey. My kids loved it. Just make sure whatever you use is flat enough to stay on the cookie without rolling off.
Pin This Recipe!
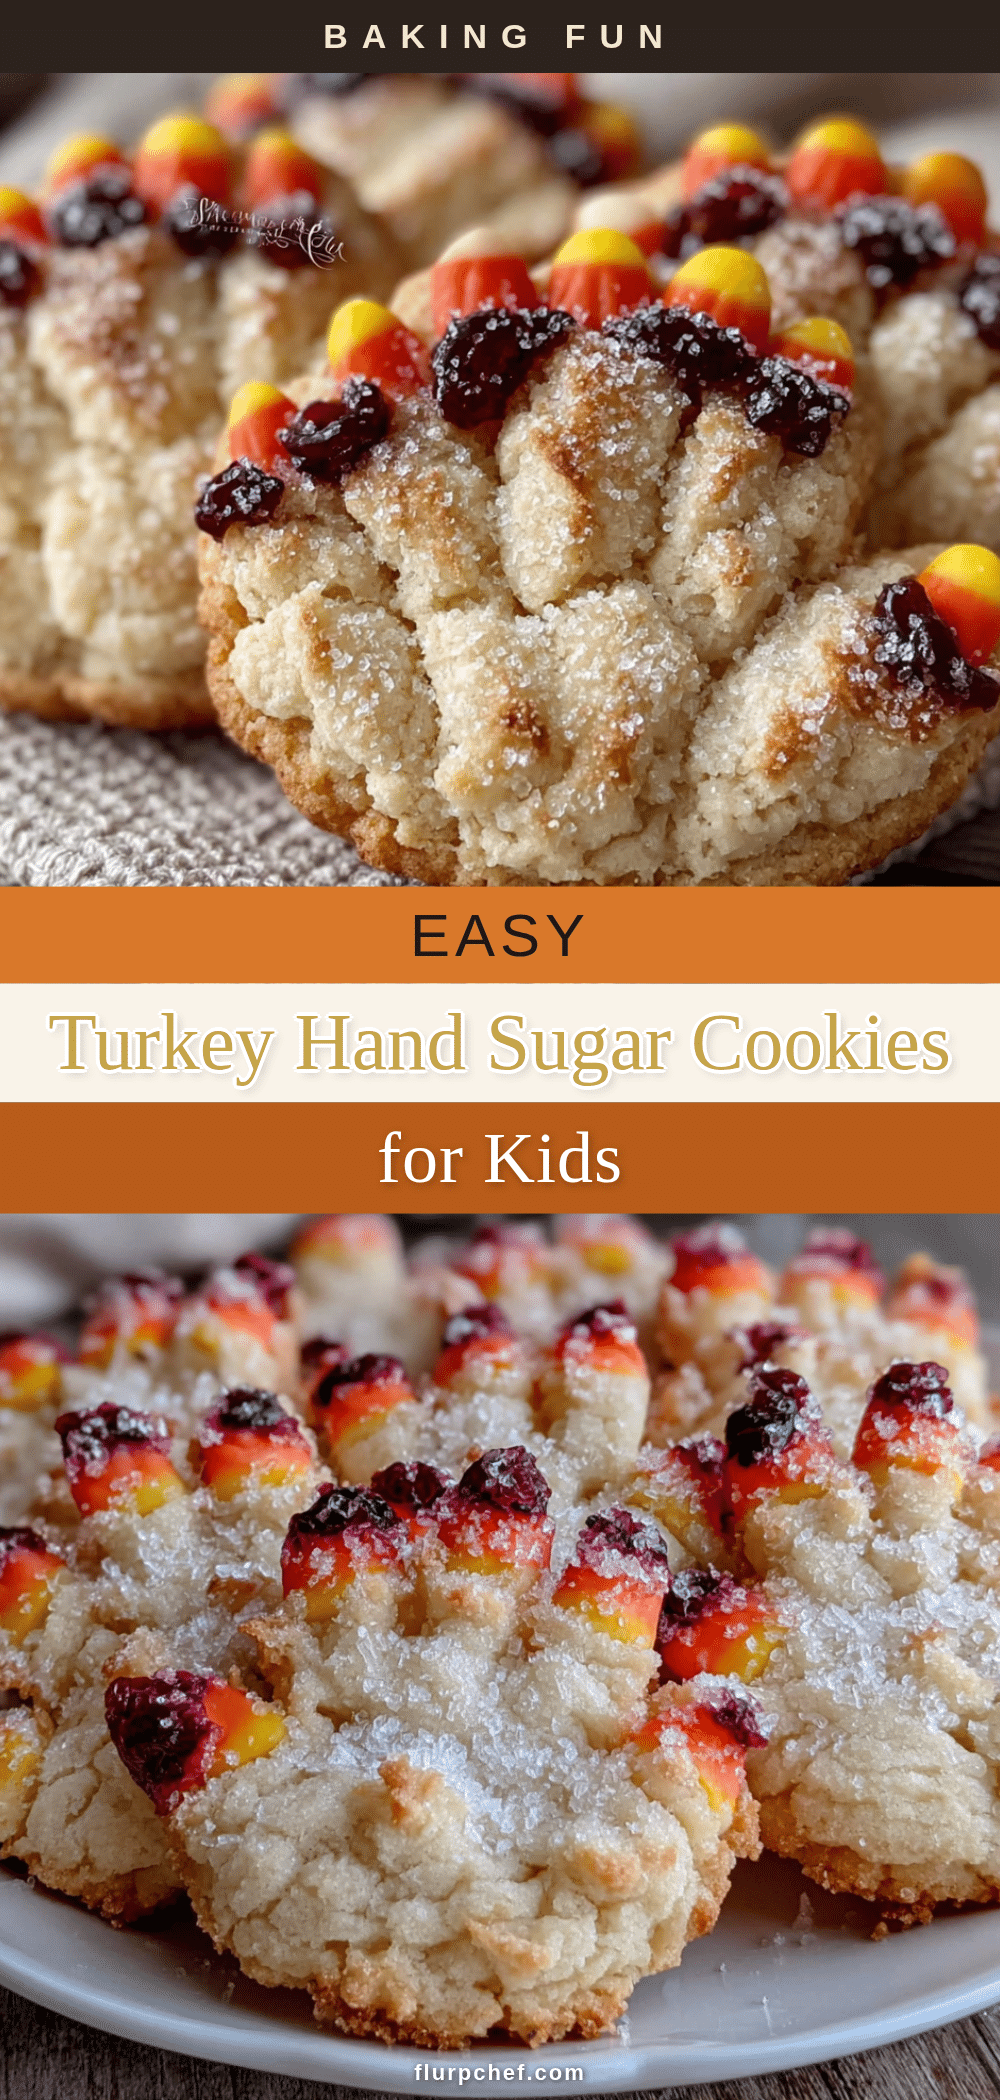
Easy Turkey Handprint Sugar Cookies: Best Kid-Friendly Recipe

These Easy Turkey Handprint Sugar Cookies are forgiving, fun, and turn out adorable even when you’re rushing. They’re perfect for Thanksgiving with kids, using simple ingredients and no fancy tools.
- Prep Time: 15 minutes
- Cook Time: 8-10 minutes
- Total Time: 45 minutes (includes chilling)
- Yield: 24 cookies 1x
- Category: Dessert
- Cuisine: American
Ingredients
- 1 cup (226g) unsalted butter, softened
- 3/4 cup (150g) granulated sugar
- 1 large egg, room temperature
- 2 teaspoons (10ml) vanilla extract
- 2 cups (250g) all-purpose flour
- 1/2 teaspoon baking powder
- 1/4 teaspoon fine sea salt
- About 20 pieces candy corn (for feathers)
- About 30 mini chocolate chips (for eyes)
- Orange frosting or orange candy melts (for beak and wattle)
- Red frosting or red candy melts (for wattle, optional)
Instructions
- Cream the butter and sugar. In a large mixing bowl, beat the softened butter and granulated sugar together on medium speed until light and fluffy—about 3 minutes. Scrape down the sides halfway through.
- Add the egg and vanilla. Crack the egg into a small bowl first, then add to the butter mixture along with the vanilla extract. Beat on low speed until just combined, about 30 seconds.
- Mix the dry ingredients. In a separate bowl, whisk together the flour, baking powder, and salt.
- Combine wet and dry. Add the flour mixture to the butter mixture in two additions, mixing on low speed after each. Scrape the bowl down in between. The dough should be soft and slightly sticky.
- Chill the dough. Flatten the dough into a disk, wrap tightly in plastic wrap, and refrigerate for at least 30 minutes (or freeze for 15 minutes if in a rush).
- Preheat the oven to 350°F (175°C). Line baking sheets with parchment paper.
- Shape the cookies. Scoop about 2 tablespoons of dough and roll into a ball. Place on prepared baking sheet, leaving 3 inches between each. Press your clean, dry palm firmly into the center, spreading fingers slightly, until dough is about 1/4-inch thick. Lightly dust hand with flour if sticky.
- Bake for 8-10 minutes, until edges are just barely golden. Centers will look slightly underdone. Let rest on baking sheet for 5 minutes, then transfer to a wire rack to cool completely.
- Decorate the turkeys. On cooled cookies, arrange 5 candy corn pieces in a fan shape at the top (feathers). Place two mini chocolate chips in the palm area for eyes. Pipe a small orange triangle for the beak and a red dot or line for the wattle (optional). Let frosting set for about 10 minutes before serving.
Notes
Chill the dough for at least 30 minutes for best results. If dough is too sticky, add a tablespoon of flour. For gluten-free, use a 1:1 gluten-free flour blend. For dairy-free, use vegan butter. Cookies can be stored in an airtight container at room temperature for up to 5 days, or frozen for up to 3 months.
Nutrition
- Serving Size: 1 cookie
- Calories: 145
- Sugar: 12
- Sodium: 55
- Fat: 7
- Saturated Fat: 4
- Carbohydrates: 20
- Protein: 2
Keywords: turkey cookies, handprint cookies, sugar cookies, Thanksgiving cookies, kid-friendly, easy recipe


