There used to be a tiny bakery on Grand Avenue, tucked between a dry cleaner and a vintage shop, that made the most ridiculous Halloween cupcakes. They weren’t fancy, not at all. But their ghost cupcakes—little piles of marshmallow frosting with chocolate chip eyes—were the thing I looked forward to every October. When that bakery closed three years ago, I honestly felt a little lost. I mean, where do you go for a cupcake that makes you actually smile? After seven tries—seven!—and one spectacular frosting disaster that coated my entire kitchen in sticky white fluff, I finally cracked it. These fluffy ghost cupcakes are the ones. They’re the ones that taste like that bakery, like fall afternoons, like the perfect balance of tender vanilla cake and cloud-like marshmallow frosting. Maybe you’ve been there, chasing a taste you can’t find anymore. Let me tell you, the hunt was worth it.
Why You’ll Love This Recipe
These aren’t just another Halloween cupcake. After testing this recipe more times than I care to admit, I can tell you exactly why these fluffy ghost cupcakes stand out from the crowd. They’re the kind of treat that makes people stop and say, “Wait, you made these?”
- Quick & Easy: From start to finish, you’re looking at about 45 minutes. The marshmallow frosting comes together in under 10 minutes with a hand mixer—no candy thermometer, no fuss.
- Simple Ingredients: No weird stabilizers or hard-to-find extracts. You probably have everything in your pantry right now, except maybe the marshmallow creme.
- Perfect for Halloween Parties: These little ghosts are the life of any spooky spread. Kids adore them, adults sneak two, and they photograph beautifully for social media.
- Crowd-Pleaser: I’ve brought these to three different gatherings now, and every single time, they’re the first thing to disappear. People actually fight over the last one.
- Unbelievably Delicious: The cake is genuinely fluffy—not dense, not dry—and the frosting tastes like the inside of a gourmet marshmallow. It’s next-level comfort food disguised as a cute ghost.
What makes these different from every other ghost cupcake recipe out there? It’s the technique. I spent a whole afternoon figuring out how to get the cake so light it practically floats, and the frosting so stable it holds its shape without being stiff. This isn’t just another version—it’s the one I’d make for my own Halloween party, and honestly, I’m pretty picky.
What Ingredients You Will Need
This recipe uses simple, everyday ingredients to create something that feels special. The magic is in how they come together, not in fancy additions. Here’s what you’ll need to gather before you start.
For the Cupcakes
- All-purpose flour, 1 ½ cups (190g) — Spoon and level it, don’t scoop straight from the bag or you’ll end up with dense cakes
- Granulated sugar, 1 cup (200g) — Regular white sugar gives the best texture here
- Baking powder, 1 ½ teaspoons — Make sure it’s fresh; stale baking powder is the number one reason cupcakes don’t rise
- Baking soda, ¼ teaspoon — Just a touch to help with browning and lift
- Salt, ½ teaspoon — Balances the sweetness and brings out the vanilla flavor
- Unsalted butter, ½ cup (113g), softened to room temperature — I use Kerrygold for the richness, but any good brand works
- Vegetable oil, ¼ cup (60ml) — This is my secret for extra moisture; butter alone can make cakes dry
- Large eggs, 2, room temperature — Cold eggs seize up the batter, so let them sit out for 30 minutes first
- Vanilla extract, 2 teaspoons — Pure vanilla, not imitation, makes a noticeable difference
- Buttermilk, ¾ cup (180ml), room temperature — If you don’t have buttermilk, add 1 tablespoon of lemon juice to regular milk and let it sit for 5 minutes
For the Marshmallow Frosting
- Unsalted butter, 1 cup (226g), softened — Let it get really soft, almost squishy, for the smoothest frosting
- Marshmallow creme (fluff), 1 jar (about 7 ounces or 200g) — I prefer Jet-Puffed for consistency, but store brands work fine
- Powdered sugar, 2 cups (240g), sifted — Sifting prevents lumps; trust me on this one
- Vanilla extract, 1 teaspoon — Adds warmth and depth
- Pinch of salt — Just a tiny one to cut the sweetness
- Heavy cream or milk, 2-3 tablespoons — Only if needed to adjust consistency
For Decoration
- Mini chocolate chips or black decorating gel — For the ghost faces. I use mini chips because they look more like eyes, but gel is easier for piping smiles
A quick note on the marshmallow creme: don’t substitute with melted marshmallows. I tried that once and ended up with a sticky, weeping mess. The creme is what gives this frosting its light, airy texture that’s perfect for piping ghost shapes.
Equipment Needed
You don’t need a professional bakery setup for these fluffy ghost cupcakes. Here’s what you’ll actually use.
- Standard 12-cup muffin tin — Any metal pan works, but avoid dark nonstick ones if you can; they brown the bottoms faster
- Paper cupcake liners — White ones look classic, but orange or black are fun for Halloween. I’ve used both and prefer white so the ghost pops
- Electric hand mixer or stand mixer — You can whisk the frosting by hand, but your arm will hate you. I’ve done it once, never again
- Large mixing bowls — At least two, one for dry ingredients and one for wet
- Whisk and rubber spatula — For combining ingredients without overmixing
- Cooling rack — Crucial for letting cupcakes cool completely before frosting. A hot cupcake will melt marshmallow frosting into a puddle
- Piping bag with a large round tip — A Wilton 1A or similar works beautifully for making ghost shapes. If you don’t have a piping bag, a zip-top bag with the corner snipped off works in a pinch
- Measuring cups and spoons — For accuracy, especially with the baking powder and salt
I bought a cheap piping bag set from a craft store years ago, and it’s still going strong. You don’t need expensive equipment—just clean, dry tools and a little patience.
Preparation Method
Let’s get to the fun part. I’ve broken this down step by step so you can follow along without any surprises. Take your time, especially with the frosting—it’s worth it.
Step 1: Preheat and Prep
Preheat your oven to 350°F (175°C). Line your muffin tin with 12 paper liners. This is one of those recipes where prep really matters, so don’t skip this step. I once forgot to line the pan and spent 20 minutes scraping cupcake bits out of the crevices. Learn from my mistake.
Step 2: Mix the Dry Ingredients
In a medium bowl, whisk together the flour, baking powder, baking soda, and salt. Whisk for about 20 seconds—this aerates the flour and distributes the leavening agents evenly. Set this aside for now.
Step 3: Cream the Butter and Sugar
In a large bowl, beat the softened butter and granulated sugar together with your electric mixer on medium speed until light and fluffy, about 3 to 4 minutes. You’re looking for a pale, almost-white color and a texture that looks like soft sand. Scrape down the sides and bottom of the bowl with your spatula halfway through.
Step 4: Add Oil, Eggs, and Vanilla
With the mixer on low, drizzle in the vegetable oil. Then add the eggs one at a time, beating well after each addition. The batter might look a little separated at this point—that’s normal. Add the vanilla extract and beat until combined. Don’t rush this step; properly emulsified batter means fluffier cupcakes.
Step 5: Alternate Dry and Wet Ingredients
With the mixer on low speed, add about one-third of the dry ingredients, then half of the buttermilk. Mix until just combined. Repeat with another third of the dry ingredients, the remaining buttermilk, and finally the last of the dry ingredients. Stop mixing as soon as the flour disappears. Overmixing develops gluten, which makes tough cupcakes. You want tender, not tough.
Step 6: Fill and Bake
Divide the batter evenly among the 12 liners, filling each about two-thirds full. I use a cookie scoop for this—it’s less messy and gives you even portions. Bake for 18 to 22 minutes, or until a toothpick inserted into the center of a cupcake comes out clean or with a few moist crumbs. The tops should be golden and spring back when lightly touched.
Let the cupcakes cool in the pan for 5 minutes, then transfer them to a wire rack to cool completely. And I mean completely—warm cupcakes will turn your marshmallow frosting into a sticky disaster. I learned this the hard way when I frosted a slightly warm batch and ended up with ghost puddles.
Step 7: Make the Marshmallow Frosting
While the cupcakes cool, make the frosting. In a large bowl, beat the softened butter on medium speed until smooth and creamy, about 2 minutes. Add the marshmallow creme and beat until fully incorporated—it should look light and fluffy. Reduce the speed to low and gradually add the sifted powdered sugar, about ½ cup at a time. Add the vanilla and salt, then increase the speed to medium-high and beat for 2 to 3 minutes until the frosting is smooth and spreadable. If it’s too thick, add heavy cream or milk one tablespoon at a time until it reaches the right consistency. If it’s too thin, add a little more powdered sugar.
Step 8: Pipe the Ghosts
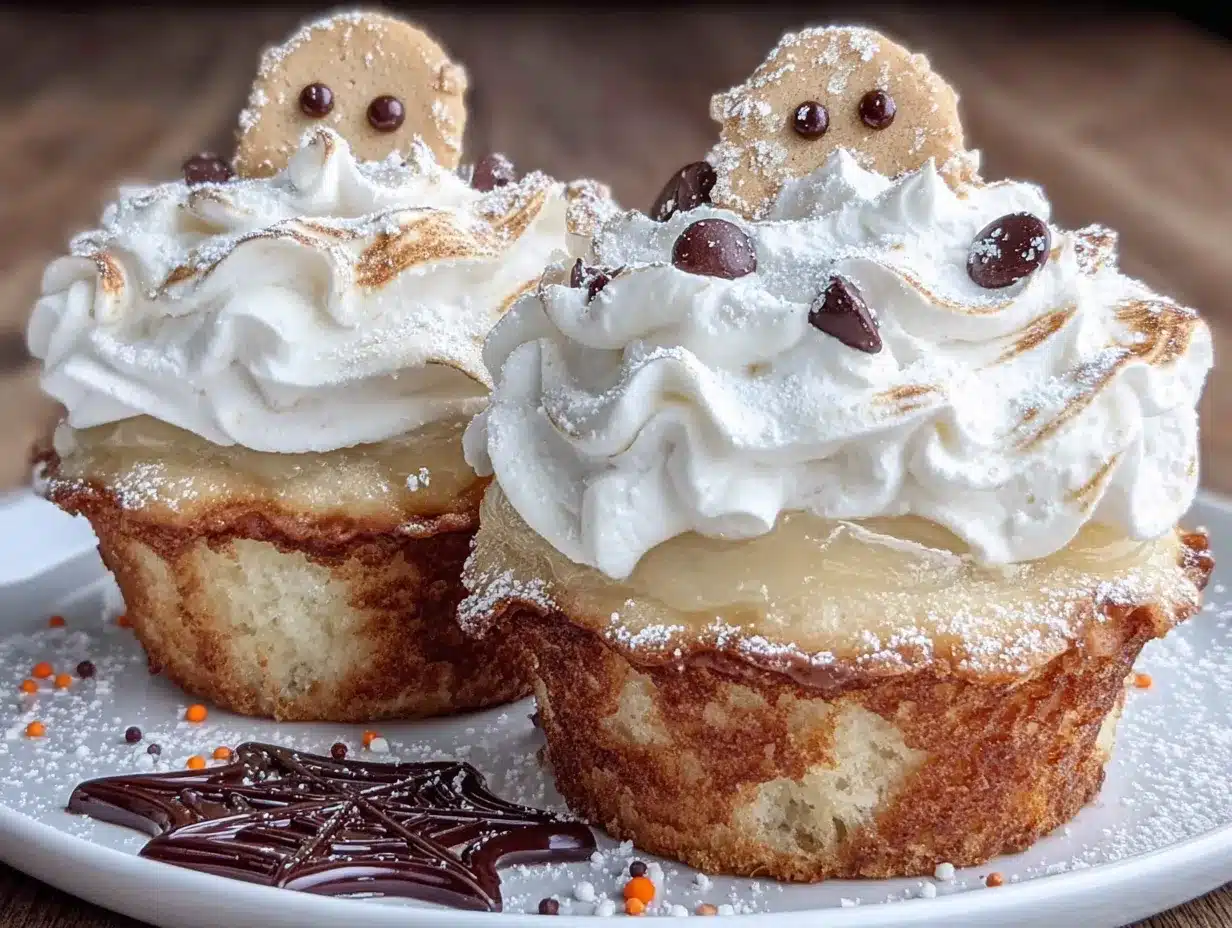
Fit your piping bag with the large round tip and fill it with the marshmallow frosting. Starting at the outer edge of each cupcake, pipe a spiral moving inward and upward, creating a tall, rounded mound. Gently pull the tip straight up at the top to create a little peak—this is the ghost’s head. Don’t worry if they look a little wonky; ghosts are supposed to be imperfect.
Step 9: Add the Faces
Press two mini chocolate chips into the frosting for eyes and one or two for a mouth. If you’re using black decorating gel, pipe little dots and a smile. I prefer chocolate chips because they add a tiny crunch, but gel gives you more control over the expression. Make them happy ghosts, not scary ones—this is a treat, not a fright.
Cooking Tips & Techniques
After making these fluffy ghost cupcakes more times than I can count, I’ve picked up a few tricks that make a real difference. Here’s what I wish someone had told me before my first attempt.
Room temperature ingredients are non-negotiable. I know it’s tempting to use cold eggs straight from the fridge, but they won’t emulsify properly with the butter and sugar. The result is a denser, less fluffy cake. Set your eggs and buttermilk out on the counter at least 30 minutes before you start mixing. If you’re in a hurry, place the eggs in a bowl of warm water for 5 minutes.
Don’t overmix the batter. This is the most common mistake I see in cupcake recipes. Once you add the flour, mix only until it disappears. A few small lumps are fine—they’ll bake out. Overmixing develops gluten and gives you tough, rubbery cupcakes. I speak from experience; my first batch was more like hockey pucks than fluffy clouds.
The frosting consistency matters for piping. If your marshmallow frosting is too stiff, it won’t pipe smoothly and will look lumpy. If it’s too thin, the ghost shapes will collapse. The perfect consistency is like thick peanut butter—spreadable but holds its shape. If you’re unsure, do a test swirl on a piece of parchment paper before piping on the cupcakes.
Chill the frosting slightly if it’s too soft. On a warm day, the butter in the frosting can get too soft, making it hard to pipe. Pop the bowl in the fridge for 10 to 15 minutes, then beat it again for 30 seconds before piping. This saved my ghost shapes during a particularly warm October afternoon.
Use a damp paper towel under your mixing bowl. When you’re beating the butter and sugar, the bowl can slide around on the counter. A folded damp paper towel underneath keeps it steady and makes the whole process less frustrating.
Variations & Adaptations
One of the best things about this recipe is how easily it adapts to different tastes and dietary needs. Here are a few variations I’ve tried and loved.
Gluten-Free Version: Substitute the all-purpose flour with a 1:1 gluten-free baking flour blend. I’ve used Bob’s Red Mill with great success. Add an extra tablespoon of buttermilk to compensate for the different absorption rate. The texture is slightly more delicate, but the flavor is spot on.
Dairy-Free Adaptation: Use vegan butter sticks (not tub margarine) and replace the buttermilk with a mixture of unsweetened almond milk and 1 tablespoon of apple cider vinegar. For the frosting, use vegan butter and make sure your marshmallow creme is dairy-free—most brands are, but check the label. The frosting won’t be quite as stable, so pipe the ghosts right before serving.
Chocolate Ghost Cupcakes: Replace ¼ cup of the flour with unsweetened cocoa powder. Reduce the vanilla to 1 teaspoon. The dark cake makes the white marshmallow ghosts pop even more dramatically. My nephew declared these “the best Halloween thing ever.”
Pumpkin Spice Twist: Add 1 teaspoon of pumpkin pie spice to the dry ingredients and substitute ¼ cup of the buttermilk with canned pumpkin puree. The warm spices pair beautifully with the sweet marshmallow frosting. This version tastes like autumn in cupcake form.
Mini Ghost Cupcakes: Use a mini muffin tin and reduce the baking time to 10 to 12 minutes. These are perfect for classroom parties or when you need a smaller treat. You’ll get about 24 mini cupcakes from this batter. Pipe smaller ghost shapes and use tiny sprinkle eyes.
Serving & Storage Suggestions
These fluffy ghost cupcakes are best served at room temperature, which lets the cake stay tender and the frosting keep its pillowy texture. If you’ve refrigerated them, let them sit out for about 30 minutes before serving. The first bite should feel like biting into a cloud—cold frosting just doesn’t have the same magic.
For a Halloween party spread, arrange the ghosts on a white platter or cake stand. The contrast makes them look even cuter. I like to scatter a few candy pumpkins or autumn leaves around the base for a festive touch. They pair beautifully with a warm apple cider or a pumpkin spice latte—honestly, they’re the perfect companion to any fall drink.
Storage: Store unfrosted cupcakes in an airtight container at room temperature for up to 3 days. Frosted cupcakes should be stored in the refrigerator, but bring them back to room temperature before serving. The marshmallow frosting will firm up when cold, but it softens again beautifully.
Freezing: You can freeze the unfrosted cupcakes for up to 3 months. Wrap each one individually in plastic wrap, then place them in a freezer bag. Thaw at room temperature and frost just before serving. I’ve also frozen the frosting separately in an airtight container for up to 2 months. Thaw it in the refrigerator overnight, then beat it for a minute to restore the texture before piping.
Make-Ahead Tip: Bake the cupcakes and make the frosting up to 2 days in advance. Store them separately—cupcakes at room temperature, frosting in the fridge. Pipe the ghosts the day you plan to serve them for the freshest look. The chocolate chip eyes can soften if left on too long, so add them just before serving if you want them to stay crisp.
Nutritional Information & Benefits
Let’s be honest—these are a treat, not a health food. But knowing what’s in them helps you enjoy them mindfully. Here’s the approximate nutritional breakdown for one frosted cupcake.
- Calories: Approximately 380
- Total Fat: 18g
- Saturated Fat: 10g
- Cholesterol: 65mg
- Sodium: 220mg
- Total Carbohydrates: 52g
- Sugars: 38g
- Protein: 4g
On the bright side, the buttermilk adds a small amount of calcium and protein, and the eggs provide high-quality protein and essential vitamins. The butter, while rich, contains fat-soluble vitamins A, D, E, and K. I like to think of these cupcakes as a celebration treat—something you make for a special occasion, not an everyday snack. And honestly, a little sweetness now and then is good for the soul.
If you’re watching your sugar intake, you can reduce the sugar in the cake to ¾ cup without affecting the texture too much. The frosting is harder to adjust, but you can use a sugar-free marshmallow creme if you can find one. Just know the texture might be slightly different.
Conclusion
These fluffy ghost cupcakes with marshmallow frosting are everything I wanted them to be—and then some. They bring back that feeling of walking into the bakery on Grand Avenue, the paper bag warm in my hands, knowing I was about to eat something that would make me genuinely happy. After all those tries, after that sticky kitchen disaster, I finally have a recipe that does that bakery justice.
I hope you make these for your Halloween party, or just for a random Tuesday in October when you need a little joy. Customize them however you like—make them spooky or sweet, chocolate or pumpkin, gluten-free or dairy-free. That’s the beauty of a good recipe; it becomes yours the moment you make it.
If you try these fluffy ghost cupcakes, I’d love to hear how they turned out. Drop a comment below and tell me about your own Halloween memories, or share a photo of your ghost creations. And if you loved this recipe, share it with a friend who needs a little marshmallow magic in their life. Happy baking, and may your ghosts always be fluffy.
Frequently Asked Questions
Can I use homemade marshmallow creme instead of store-bought?
You can, but I don’t recommend it for this recipe. Homemade marshmallow creme is less stable and can make the frosting too soft to hold its ghost shape. Store-bought marshmallow creme has stabilizers that help the frosting pipe beautifully. Save the homemade stuff for s’mores or hot chocolate.
Why did my cupcakes sink in the middle?
Sinking cupcakes usually mean the oven temperature was too low or the batter was overmixed. Make sure your oven is fully preheated to 350°F (175°C) and use an oven thermometer to verify the temperature. Also, mix the batter only until the flour disappears—overmixing creates too much air that collapses during baking.
Can I make these cupcakes ahead of time for a party?
Absolutely. Bake the cupcakes up to 2 days in advance and store them in an airtight container at room temperature. Make the frosting up to 2 days ahead and refrigerate it in a sealed container. Pipe the ghosts and add the faces the day of your party for the freshest presentation. The frosting softens beautifully when brought back to room temperature.
How do I get the ghost shape to stand up tall?
The key is frosting consistency and piping technique. Make sure your frosting is stiff enough to hold its shape—if it’s too soft, chill it for 10 to 15 minutes. When piping, start from the outside edge and work your way inward and upward in a continuous spiral. Pull straight up at the top to create a peak. Practice on parchment paper first if you’re nervous.
Can I use this frosting recipe for other decorations?
Yes, this marshmallow frosting is incredibly versatile. It pipes beautifully for rosettes, swirls, and even simple borders. You can tint it with gel food coloring for different designs. It also makes a wonderful filling for whoopie pies or a topping for hot chocolate. Just keep it refrigerated if you’re not using it right away, and beat it briefly to restore the texture before piping.
Pin This Recipe!
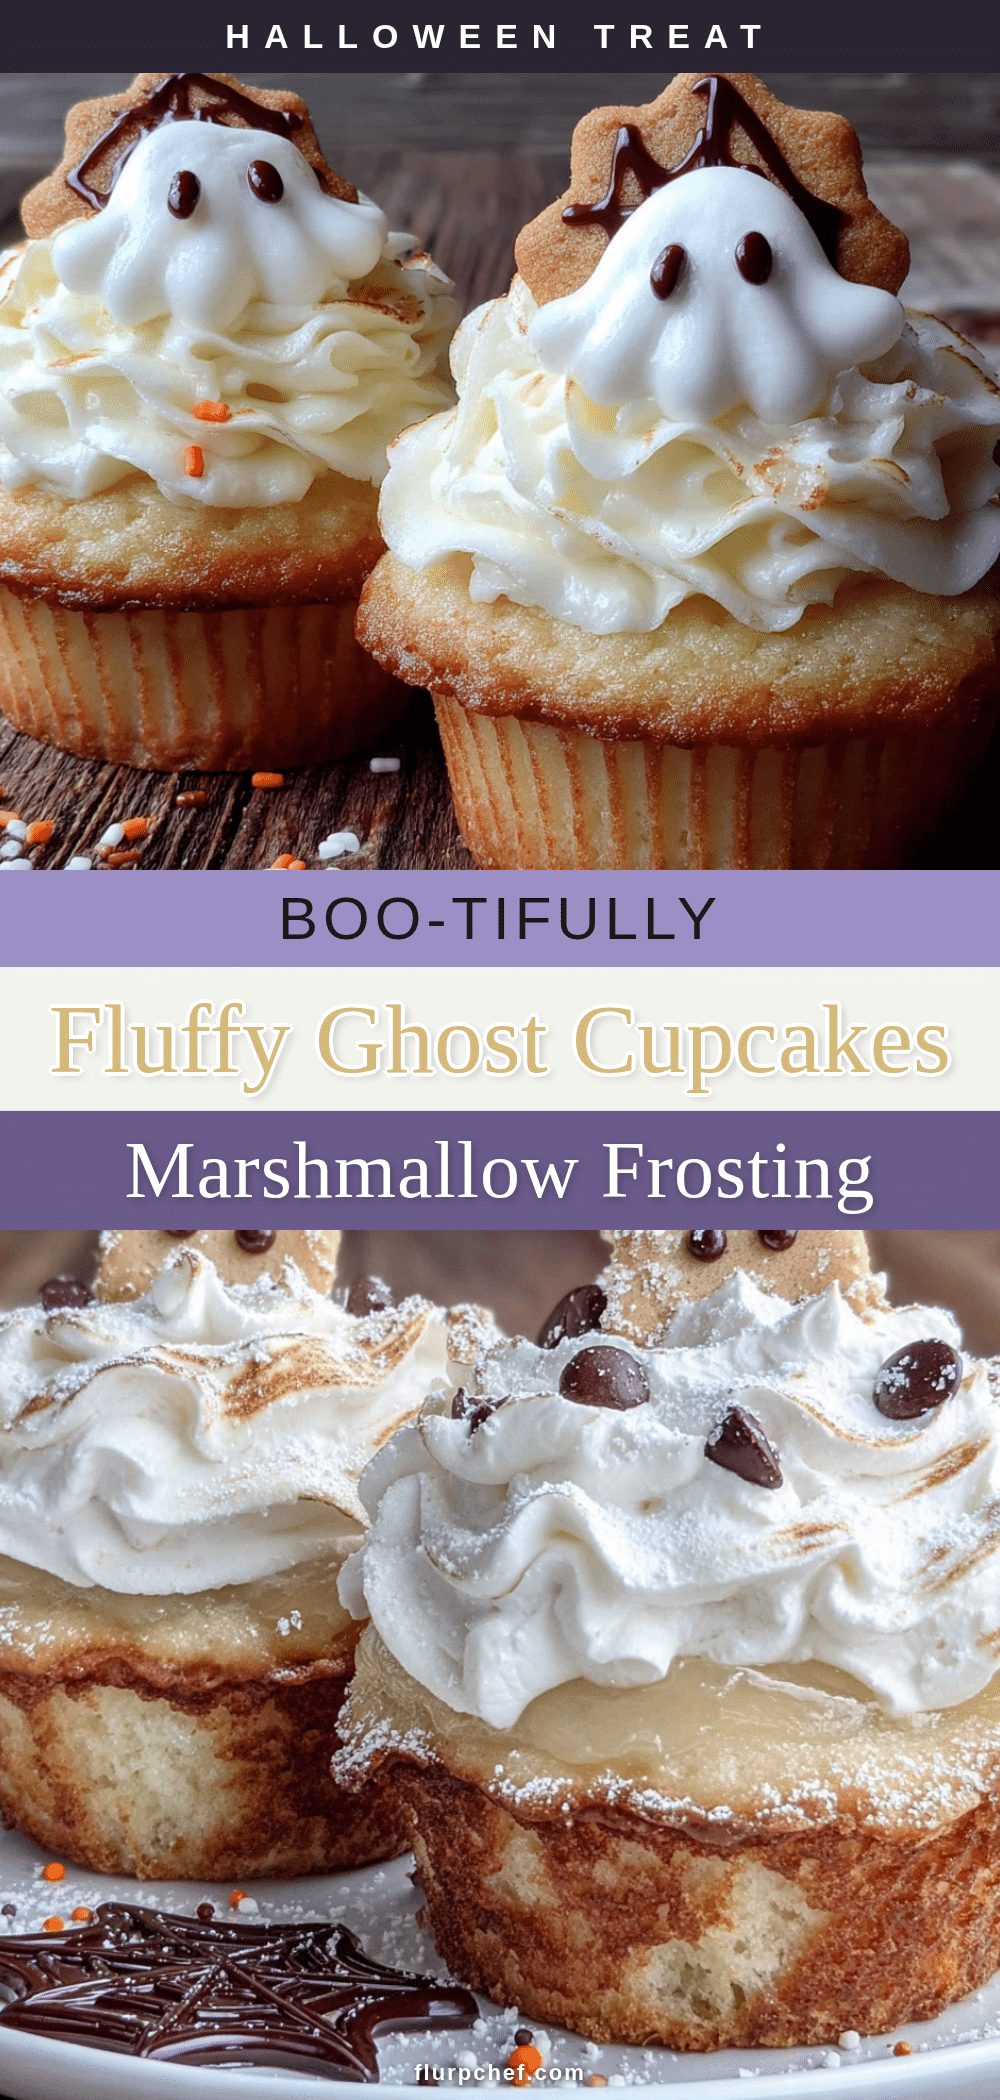
Fluffy Ghost Cupcakes with Easy Marshmallow Frosting
These fluffy ghost cupcakes feature a tender vanilla cake topped with cloud-like marshmallow frosting, decorated with chocolate chip eyes for a cute Halloween treat. They’re quick to make with simple ingredients and are perfect for parties.
- Prep Time: 15 minutes
- Cook Time: 20 minutes
- Total Time: 45 minutes
- Yield: 12 cupcakes 1x
- Category: Dessert
- Cuisine: American
Ingredients
- 1 ½ cups (190g) all-purpose flour
- 1 cup (200g) granulated sugar
- 1 ½ teaspoons baking powder
- ¼ teaspoon baking soda
- ½ teaspoon salt
- ½ cup (113g) unsalted butter, softened to room temperature
- ¼ cup (60ml) vegetable oil
- 2 large eggs, room temperature
- 2 teaspoons vanilla extract
- ¾ cup (180ml) buttermilk, room temperature
- 1 cup (226g) unsalted butter, softened (for frosting)
- 1 jar (7 oz or 200g) marshmallow creme (fluff)
- 2 cups (240g) powdered sugar, sifted
- 1 teaspoon vanilla extract (for frosting)
- Pinch of salt (for frosting)
- 2–3 tablespoons heavy cream or milk (if needed)
- Mini chocolate chips or black decorating gel (for decoration)
Instructions
- Preheat oven to 350°F (175°C). Line a 12-cup muffin tin with paper liners.
- In a medium bowl, whisk together flour, baking powder, baking soda, and salt for about 20 seconds. Set aside.
- In a large bowl, beat softened butter and granulated sugar with an electric mixer on medium speed until light and fluffy, about 3-4 minutes. Scrape down sides halfway through.
- With mixer on low, drizzle in vegetable oil. Add eggs one at a time, beating well after each. Add vanilla extract and beat until combined.
- With mixer on low, add one-third of dry ingredients, then half of buttermilk, mixing until just combined. Repeat with another third of dry ingredients, remaining buttermilk, and final dry ingredients. Stop mixing as soon as flour disappears.
- Divide batter evenly among 12 liners, filling each about two-thirds full. Bake for 18-22 minutes, until a toothpick inserted in center comes out clean or with a few moist crumbs. Cool in pan 5 minutes, then transfer to wire rack to cool completely.
- For frosting: In a large bowl, beat softened butter on medium speed until smooth and creamy, about 2 minutes. Add marshmallow creme and beat until fully incorporated. Reduce speed to low and gradually add sifted powdered sugar, about ½ cup at a time. Add vanilla and salt, then increase speed to medium-high and beat 2-3 minutes until smooth. If too thick, add heavy cream or milk 1 tablespoon at a time; if too thin, add more powdered sugar.
- Fit a piping bag with a large round tip and fill with frosting. Starting at outer edge of each cupcake, pipe a spiral moving inward and upward to create a tall mound. Gently pull tip straight up at top to create a peak.
- Press two mini chocolate chips into frosting for eyes and one or two for a mouth, or use black decorating gel to pipe dots and a smile.
Notes
Room temperature ingredients are crucial for fluffy cupcakes. Do not overmix batter. For stable frosting, chill if too soft. Use store-bought marshmallow creme, not homemade. Cupcakes can be made 2 days ahead; frost day of serving.
Nutrition
- Serving Size: 1 frosted cupcake
- Calories: 380
- Sugar: 38
- Sodium: 220
- Fat: 18
- Saturated Fat: 10
- Carbohydrates: 52
- Protein: 4
Keywords: Halloween cupcakes, ghost cupcakes, marshmallow frosting, vanilla cupcakes, easy Halloween dessert


