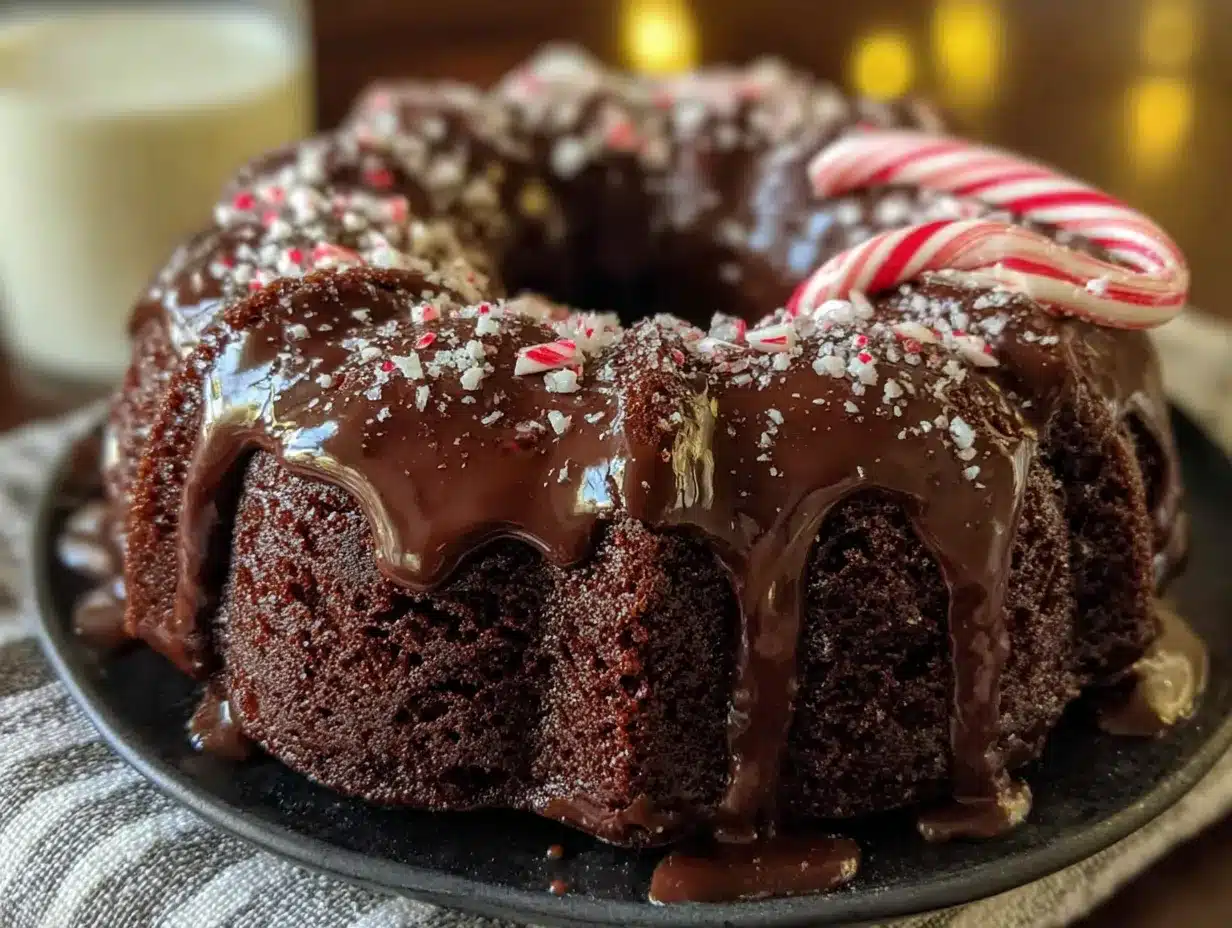
There used to be a tiny bakery tucked behind the old hardware store on Maple Street called “The Frosted Sleigh.” It was the kind of place that only appeared during the holiday season, and they made a Chocolate Peppermint Bundt Cake that was pure magic—dense, fudgy, with a crackly peppermint glaze that shattered just a little when you bit into it. When they closed down three winters ago, I actually stood outside the shuttered door for a minute, feeling a little ridiculous for being so sad about a cake. After seven tries—and one spectacular failure where the cake stuck to the pan so badly I almost cried—I finally cracked the code. Honestly, my kids now say this version is even better than the original, and that’s the highest compliment I can get.
This isn’t just a cake you bake for dessert. It’s the kind you make when you want the house to smell like Christmas morning, but you also need something that comes together without a ton of fuss. The peppermint isn’t overpowering—it just whispers through the rich chocolate, making every bite feel special. I’ve brought this to school bake sales, family dinners, and even a neighbor’s holiday party, and let me tell you, the pan comes back empty every single time. There’s something about that combination of cool peppermint and deep chocolate that just works, especially when you’re feeding a crowd that includes picky eaters.
Why You’ll Love This Recipe
I’ve tested this recipe more times than I care to admit, and here’s what makes it stand out from every other chocolate cake you’ve tried:
- Quick & Easy : From start to finish, you’re looking at about an hour. The batter comes together in one bowl, so there’s minimal cleanup. Perfect for those afternoons when the kids are asking for a treat and you haven’t even started dinner yet.
- Simple Ingredients : You probably already have most of what you need in your pantry. No weird extracts or hard-to-find specialty items. I use standard all-purpose flour, cocoa powder, and a box of instant pudding mix for that extra moist crumb.
- Perfect for the Holidays : This cake screams Christmas, but honestly, I’ve made it in July too. The peppermint adds a refreshing twist that works year-round, especially when you need a break from heavy desserts.
- Crowd-Pleaser : My three kids have very different taste buds, and they all agree this is their favorite cake. One of them usually picks out the candy cane pieces, but that’s part of the fun.
- Unbelievably Delicious : The texture is where this recipe shines. It’s dense without being dry, moist without being gummy. The glaze adds a satisfying crunch that contrasts beautifully with the soft cake.
What makes this different from other chocolate peppermint cakes? It’s the technique of blooming the cocoa powder in hot coffee. Don’t worry—you can’t taste the coffee at all. It just deepens the chocolate flavor and makes it taste like you spent hours on it. I learned this trick from a pastry chef friend, and it’s been a game-changer for every chocolate recipe I make. This cake is the kind that makes you close your eyes after the first bite, even if you’re just standing over the kitchen counter with a fork.
What Ingredients You Will Need
This recipe uses simple, wholesome ingredients to deliver bold flavor and satisfying texture without the fuss. Most of these are pantry staples, which means you can whip this up on a whim.
- All-purpose flour (2 ½ cups) – Provides structure. I prefer Gold Medal for consistent results, but any brand works.
- Granulated sugar (2 cups) – Adds sweetness and helps with browning.
- Unsweetened cocoa powder (¾ cup) – Use a good quality one like Ghirardelli or Hershey’s Special Dark for a richer flavor.
- Instant chocolate pudding mix (3.4 oz box) – This is my secret weapon. It keeps the cake incredibly moist and adds a fudgy texture. Don’t skip it.
- Baking powder (1 ½ teaspoons) and baking soda (1 teaspoon) – For lift.
- Salt (1 teaspoon) – Balances the sweetness.
- Large eggs (3, room temperature) – Room temperature eggs incorporate better and create a more even crumb.
- Buttermilk (1 cup) – Adds tanginess and moisture. If you don’t have buttermilk, you can make a quick substitute by adding 1 tablespoon of lemon juice or vinegar to a cup of milk and letting it sit for 5 minutes.
- Vegetable oil (½ cup) – Keeps the cake tender. I use canola or avocado oil.
- Hot coffee (1 cup, freshly brewed) – This deepens the chocolate flavor without making the cake taste like coffee. Trust me on this one.
- Vanilla extract (2 teaspoons) – Enhances the chocolate.
- Peppermint extract (1 teaspoon, plus more for the glaze) – Use pure peppermint extract, not mint. They’re different, and mint can taste like toothpaste.
For the Glaze:
- Powdered sugar (2 cups)
- Butter (2 tablespoons, melted)
- Milk (3-4 tablespoons)
- Peppermint extract (½ teaspoon)
- Crushed candy canes or peppermint candies (½ cup, for topping)
Equipment Needed
You don’t need a professional kitchen to pull this off. Here’s what I use:
- 10- or 12-cup Bundt pan : I recommend a non-stick pan, but any heavy-duty one works. My favorite is the Nordic Ware Anniversary Bundt Pan—it releases cakes beautifully and has never let me down. If you’re using an older pan, make sure to grease it thoroughly with shortening or a baking spray that contains flour.
- Large mixing bowl : A good-sized bowl for whisking dry ingredients.
- Electric hand mixer or stand mixer : You can mix this by hand, but a mixer makes it faster and ensures everything is well combined. I’ve done both, and honestly, the hand mixer saves my wrists.
- Wire cooling rack : Essential for letting the cake cool completely before glazing. If you glaze a warm cake, the glaze will just melt and slide off.
- Measuring cups and spoons : For accuracy. I’ve learned the hard way that eyeballing ingredients leads to inconsistent results.
- Rubber spatula : For scraping down the bowl and folding in the final ingredients.
Preparation Method
Let’s get baking. This method is straightforward, but I’ll walk you through each step with the little tricks I’ve picked up along the way.
- Preheat and prepare your pan. Preheat your oven to 350°F (175°C). Generously grease your Bundt pan. I use a baking spray that contains flour—it’s a lifesaver. Make sure you get into all the nooks and crannies. If you miss a spot, the cake will stick, and you’ll have a sad pile of crumbs instead of a beautiful ring. Take your time here; it’s worth it.
- Mix the dry ingredients. In your large bowl, whisk together the flour, sugar, cocoa powder, pudding mix, baking powder, baking soda, and salt. Break up any clumps with your whisk. This ensures everything is evenly distributed so you don’t end up with pockets of baking powder in your finished cake.
- Add the wet ingredients. Make a well in the center of the dry ingredients. Add the eggs, buttermilk, vegetable oil, vanilla extract, and peppermint extract. Beat on medium speed for about 2 minutes until the batter is smooth and well combined. Scrape down the sides of the bowl halfway through.
- Add the hot coffee. With the mixer on low speed, slowly pour in the hot coffee. The batter will be very thin—don’t panic. That’s exactly what you want. This is the step that gives the cake its incredible moistness and deep chocolate flavor. Mix just until the coffee is incorporated, about 30 seconds.
- Pour and bake. Pour the batter into your prepared Bundt pan. It will fill the pan about three-quarters full. Bake for 40 to 45 minutes, or until a toothpick inserted into the center comes out with just a few moist crumbs. My oven runs a little hot, so I start checking at 38 minutes. The cake should also pull away slightly from the edges of the pan.
- Cool in the pan. Let the cake cool in the pan on a wire rack for 15 minutes. This is crucial. If you try to turn it out too soon, it will fall apart. After 15 minutes, place a cooling rack on top of the pan, flip it over, and gently lift the pan off. If you greased it well, the cake should release with a satisfying thud. Let it cool completely—at least an hour—before glazing.
- Make the glaze. While the cake cools, whisk together the powdered sugar, melted butter, 3 tablespoons of milk, and ½ teaspoon of peppermint extract. Add more milk, one tablespoon at a time, until you reach a thick but pourable consistency. You want it to coat the back of a spoon but still drip off slowly.
- Glaze and decorate. Once the cake is completely cool, drizzle the glaze over the top. Let it run down the sides naturally. Immediately sprinkle the crushed candy canes over the glaze before it sets. If you wait too long, the candy won’t stick. Let the glaze set for about 20 minutes before slicing.
Cooking Tips & Techniques
I’ve made this cake a dozen times, and I’ve learned a few things the hard way. Here are my best tips:
- Don’t overmix the batter. Once you add the wet ingredients, mix just until combined. Overmixing develops the gluten and makes the cake tough. You want a tender crumb, not a rubbery one.
- Use room temperature ingredients. Cold eggs and buttermilk won’t emulsify properly, which can lead to a dense, uneven cake. Take them out of the fridge about 30 minutes before you start baking.
- Crush candy canes strategically. Instead of pulverizing them into dust, leave some small chunks. The larger pieces add a nice crunch and look prettier on the glaze. I put them in a ziplock bag and use a rolling pin—my kids love helping with this part.
- Watch the coffee temperature. The coffee should be hot, but not boiling. If it’s too hot, it can scramble the eggs. I brew a fresh cup and let it sit for about a minute before adding it to the batter.
- Test for doneness with a toothpick. This is non-negotiable. Every oven is different, and a minute too long can dry out the cake. When the toothpick comes out with a few moist crumbs, it’s done. If it comes out clean, you’ve overbaked it slightly.
Variations & Adaptations
This recipe is forgiving, so feel free to play around with it. Here are a few ways I’ve customized it:
- Gluten-Free Version : Substitute the all-purpose flour with a 1:1 gluten-free baking flour blend. I’ve used Bob’s Red Mill with great results. The texture is slightly more tender, but the flavor is still spot-on.
- Dairy-Free Version : Use a plant-based buttermilk (mix almond milk with lemon juice) and replace the butter in the glaze with vegan butter or coconut oil. The cake will be a little less rich, but still delicious.
- Double Chocolate Peppermint : Fold in 1 cup of semi-sweet chocolate chips into the batter before baking. I did this for my daughter’s birthday, and the melted chocolate pockets took it to another level.
- Mint Chocolate Chip Twist : Replace the crushed candy canes with mini chocolate chips in the glaze. It gives a similar crunch but with a more chocolate-forward finish.
- Peppermint Mocha Version : Add 2 tablespoons of instant espresso powder to the dry ingredients. The coffee flavor becomes more pronounced, pairing beautifully with the peppermint. This is my husband’s favorite variation.
Serving & Storage Suggestions
This cake is best served at room temperature, but honestly, I’ve eaten it straight from the fridge and loved it too. Here’s how to make the most of it:
- Serving : Slice the cake with a serrated knife for clean cuts. Serve it on its own, or with a dollop of whipped cream and a few extra crushed candy canes on top. A scoop of vanilla ice cream on the side never hurts either.
- Storage : Store the cake in an airtight container at room temperature for up to 3 days. If you live in a humid climate, the glaze might get a little sticky—that’s fine, it still tastes amazing. For longer storage, wrap the cake tightly in plastic wrap and then foil, and freeze for up to 3 months. Thaw overnight in the refrigerator before serving.
- Reheating : If you want that just-baked warmth, pop individual slices in the microwave for 10 to 15 seconds. The glaze will soften slightly, and the cake will taste fresh out of the oven.
- Flavor development : Honestly, this cake tastes even better the next day. The flavors meld together overnight, and the texture becomes even more moist. If you can resist eating it right away, you’re in for a treat.
Nutritional Information & Benefits
Let’s be real—this is a dessert, so it’s not health food. But there are a few bright spots:
- Calories : Approximately 380 per slice (based on 12 servings).
- Protein : 5 grams per slice, thanks to the eggs and buttermilk.
- Iron : The cocoa powder provides a decent amount of iron, which is always a nice bonus.
- Antioxidants : Dark cocoa powder is rich in flavonoids, which are good for heart health. So technically, this cake is good for you? I’ll take it.
- Dietary considerations : This recipe can be made gluten-free or dairy-free with simple substitutions. It contains eggs and dairy, so it’s not suitable for vegans as written.
Conclusion
This Kid-Approved Chocolate Peppermint Bundt Cake is more than just a recipe—it’s a little piece of holiday magic you can recreate in your own kitchen. It’s the cake my kids request every single year, and honestly, I never get tired of making it. The combination of rich, fudgy chocolate and cool, refreshing peppermint is just unbeatable, especially when you’re feeding a crowd that includes everyone from toddlers to grandparents.
I’d love to hear how yours turns out! Leave a comment below and let me know if you tried any of the variations, or if you came up with your own twist. Did you add extra candy canes? Swap in dark chocolate? Share your creation with me. And if you’re looking for another family favorite, check out our easy chocolate lava cake for a quick weeknight indulgence. Happy baking, friends!
Frequently Asked Questions
Can I use peppermint extract instead of mint extract?
Yes, absolutely. In fact, I recommend it. Peppermint extract has a cleaner, more intense flavor that works perfectly in this cake. Mint extract often has a slightly artificial taste that can remind you of toothpaste. Stick with pure peppermint extract for the best results.
Why did my Bundt cake stick to the pan?
This usually happens when the pan isn’t greased thoroughly enough. Make sure you use a baking spray that contains flour, and get into every groove of the pan. Let the cake cool in the pan for exactly 15 minutes before turning it out. If you wait too long, the steam can cause the cake to stick, and if you rush it, the structure isn’t set yet.
Can I make this cake ahead of time?
Yes, and it actually tastes better the next day. Bake the cake, let it cool completely, and store it tightly wrapped at room temperature. Add the glaze and crushed candy canes just before serving to keep the crunch intact. You can also freeze the unglazed cake for up to 3 months.
Can I skip the coffee in this recipe?
You can, but I don’t recommend it. The coffee doesn’t make the cake taste like coffee—it simply enhances the chocolate flavor. If you really can’t use coffee, substitute with hot water. The cake will still be good, but it won’t have that same depth of flavor.
How do I get clean slices without the glaze cracking?
Use a sharp serrated knife and cut with a gentle sawing motion. Wipe the knife clean between slices. For the cleanest cuts, refrigerate the cake for 30 minutes before slicing. The glaze will be firmer and less likely to crack or slide off.
Pin This Recipe!
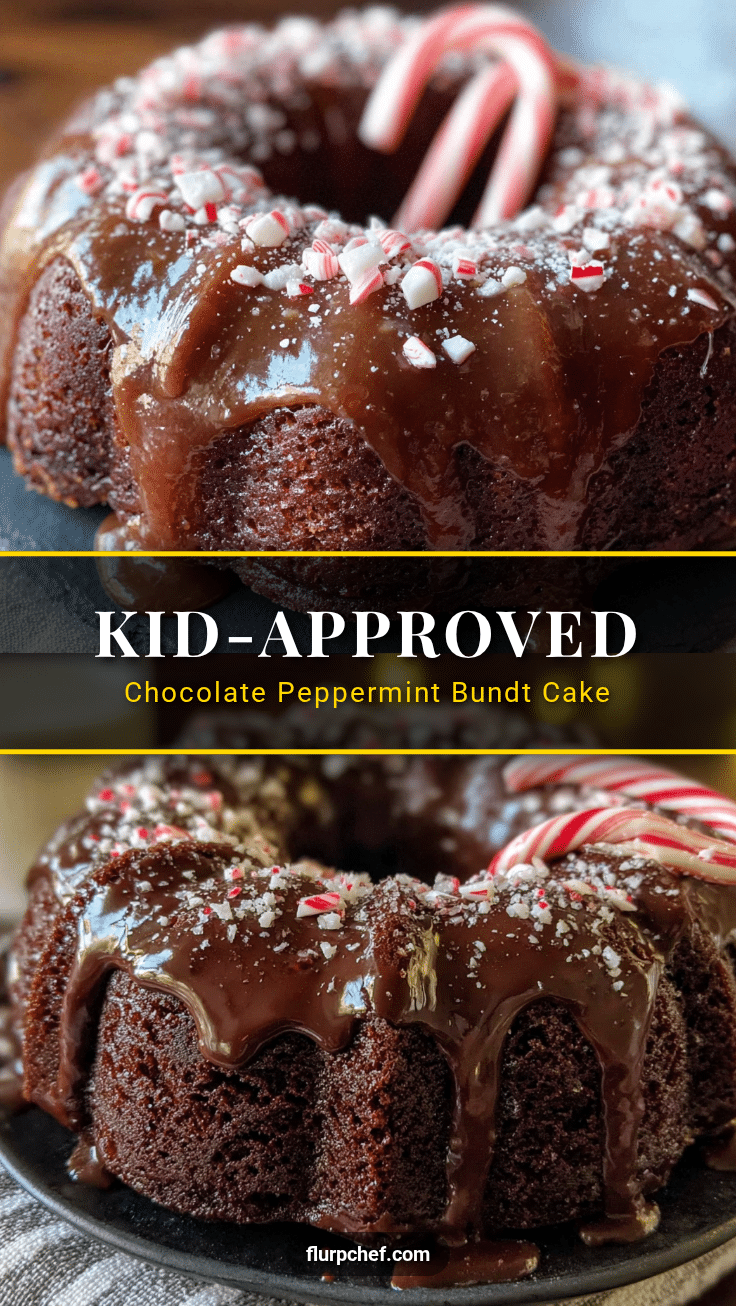
Kid-Approved Chocolate Peppermint Bundt Cake: Best Easy Recipe
This dense, fudgy Chocolate Peppermint Bundt Cake features a crackly peppermint glaze and is a holiday favorite that comes together in one bowl. It’s a crowd-pleaser that tastes like Christmas morning, with a secret ingredient—hot coffee—that deepens the chocolate flavor.
- Prep Time: 15 minutes
- Cook Time: 45 minutes
- Total Time: 1 hour 15 minutes
- Yield: 12 servings 1x
- Category: Dessert
- Cuisine: American
Ingredients
- 2 ½ cups all-purpose flour
- 2 cups granulated sugar
- ¾ cup unsweetened cocoa powder
- 1 (3.4 oz) box instant chocolate pudding mix
- 1 ½ teaspoons baking powder
- 1 teaspoon baking soda
- 1 teaspoon salt
- 3 large eggs, room temperature
- 1 cup buttermilk
- ½ cup vegetable oil (canola or avocado)
- 1 cup hot coffee, freshly brewed
- 2 teaspoons vanilla extract
- 1 teaspoon peppermint extract
- For the Glaze:
- 2 cups powdered sugar
- 2 tablespoons butter, melted
- 3–4 tablespoons milk
- ½ teaspoon peppermint extract
- ½ cup crushed candy canes or peppermint candies
Instructions
- Preheat oven to 350°F (175°C). Generously grease a 10- or 12-cup Bundt pan with baking spray that contains flour, ensuring all nooks and crannies are covered.
- In a large bowl, whisk together flour, sugar, cocoa powder, pudding mix, baking powder, baking soda, and salt until evenly combined.
- Make a well in the center of the dry ingredients. Add eggs, buttermilk, vegetable oil, vanilla extract, and peppermint extract. Beat on medium speed for about 2 minutes until smooth, scraping down the sides halfway through.
- With the mixer on low speed, slowly pour in the hot coffee. Mix just until incorporated, about 30 seconds. The batter will be thin.
- Pour batter into the prepared Bundt pan. Bake for 40 to 45 minutes, or until a toothpick inserted into the center comes out with a few moist crumbs. Start checking at 38 minutes.
- Let the cake cool in the pan on a wire rack for 15 minutes. Then invert onto a cooling rack and let cool completely, at least 1 hour, before glazing.
- For the glaze: Whisk together powdered sugar, melted butter, 3 tablespoons milk, and ½ teaspoon peppermint extract. Add more milk, 1 tablespoon at a time, until thick but pourable.
- Drizzle glaze over the completely cooled cake. Immediately sprinkle crushed candy canes on top before the glaze sets. Let set for about 20 minutes before slicing.
Notes
The coffee deepens the chocolate flavor without making the cake taste like coffee. For best results, use room temperature ingredients. The cake tastes even better the next day. Store in an airtight container at room temperature for up to 3 days, or freeze unglazed for up to 3 months.
Nutrition
- Serving Size: 1 slice
- Calories: 380
- Sugar: 38
- Sodium: 380
- Fat: 14
- Saturated Fat: 4
- Carbohydrates: 58
- Fiber: 3
- Protein: 5
Keywords: chocolate peppermint bundt cake, easy bundt cake, holiday cake, chocolate cake, peppermint cake, kid-friendly dessert, Christmas cake


