My nephew, Leo, asked me why I couldn’t just toss some candy corn on a regular dinner plate and call it a day. I started to explain why that wouldn’t work — then stopped. He was six, and his logic was pretty solid. Why make something complicated when the good stuff is right there in the bag?
I remember standing in my kitchen, holding a bag of candy corn and a stack of paper plates, feeling a little silly. I had spent the morning planning this elaborate charcuterie board with themed cutters and fancy cheeses. Leo watched me from the counter, munching on a pretzel stick, and I realized I was overthinking the whole thing. Honestly, sometimes the best ideas come from the simplest places.
That afternoon, we built our first board together. He grabbed the candy corn, I grabbed the crackers, and we just started arranging. The power went out halfway through — a classic Halloween storm — but we kept going by flashlight. It was messy, a little chaotic, and absolutely perfect. I learned more from his straightforward approach than I had from any fancy food blog. Maybe you’ve been there, making things harder than they need to be. This kid-approved Halloween charcuterie board is the result of that moment, and I keep making it because it reminds me that fun food doesn’t have to be fussy.
Why You’ll Love This Recipe
This isn’t just another snack board. It’s the one that makes your kids squeal with delight and your wallet breathe a sigh of relief. I’ve tested this with my own family, and trust me, it’s a winner on every level.
- Quick & Easy: You can put this together in under 15 minutes. No cooking, no baking, just arranging. Perfect for those last-minute Halloween parties or after-school surprises.
- Simple Ingredients: Everything comes from your regular grocery store. No fancy trips to specialty shops needed. You probably already have half of these items in your pantry.
- Perfect for Halloween Fun: Great for classroom parties, trick-or-treat gatherings, or a spooky movie night at home. It’s the centerpiece that gets everyone talking.
- Crowd-Pleaser: Kids and adults alike can’t resist this combination of sweet, salty, and crunchy. I’ve seen grown-ups sneak extra candy corn when they think no one is looking.
- Unbelievably Delicious: The mix of textures and flavors is just right. The saltiness of the pretzels balances the sweetness of the candy corn, and the fresh fruit adds a pop of brightness.
What makes this recipe different from the rest is the balance. I’ve played around with the ratios until everything works together. It’s not just a pile of candy — it’s a thoughtful arrangement that feels special without being stressful. This is comfort food reimagined for the Halloween season, and it has the same soul-soothing satisfaction as a warm slice of pie.
What Ingredients You Will Need
This recipe uses simple, everyday ingredients to create a board that looks impressive but comes together without the fuss. Most of these are pantry staples or easy to find at any grocery store.
- Candy Corn (1 cup) — The star of the show! I prefer Brach’s for that classic flavor and texture. (adds that nostalgic sweetness)
- Mini Pretzel Twists (1 cup) — Salty crunch that balances the candy. Stick with the mini size for easy grabbing.
- Orange Cheddar Cheese Cubes (8 ounces) — The color fits the theme perfectly. I recommend a sharp cheddar for more flavor. (use mild if kids prefer)
- Ghost Pepper Jack Cheese Slices (4 ounces) — Cut into spooky shapes using small cookie cutters. This adds a fun visual element. (optional but worth it)
- Red Seedless Grapes (1 cup) — They look like little eyeballs! Kids love picking them off the board.
- Apple Slices (1 apple) — Toss them in a little lemon juice to keep them from browning. (adds freshness and crunch)
- Halloween-Themed Crackers (1 cup) — Look for pumpkin or bat shapes. If you can’t find them, regular butter crackers work fine.
- Peanut Butter Filled Pretzels (1/2 cup) — These are a huge hit with the older kids. (check for nut allergies first)
- Marshmallows (1/2 cup) — Ghost-shaped marshmallows are adorable, but regular ones work too.
- Dark Chocolate Covered Almonds (1/2 cup) — Add a touch of grown-up sophistication to the board.
- Baby Carrots (1/2 cup) — Their orange color fits the theme, and they give the board some veggie love.
- Edible Googly Eyes (a handful) — These are optional but so much fun. Stick them on cheese cubes or marshmallows for extra spookiness.
For the candy corn, I’ve tried a few different brands, and Brach’s holds up the best. They don’t get sticky too quickly, and the flavor is spot on. If you’re looking for a substitution, you can swap the ghost pepper jack for regular Monterey Jack to keep it mild for the little ones. The peanut butter pretzels can be replaced with regular pretzels if allergies are a concern.
Equipment Needed
You don’t need much to pull this board together. I’ve made it with just a few basic kitchen tools, and it always turns out great.
- Large Wooden Cutting Board or Serving Platter — Any flat surface works. I use a wooden board because it looks rustic and holds everything well.
- Small Cookie Cutters — Pumpkin, bat, and ghost shapes are perfect for cutting cheese. If you don’t have them, a knife works fine.
- Small Bowls or Ramekins — Great for holding the candy corn, marshmallows, and other small items. Keeps everything organized.
- Cheese Knife or Paring Knife — For cutting the cheese into cubes or shapes. A sharp knife makes clean cuts.
- Toothpicks or Small Skewers — Helpful for picking up the smaller items. Kids love using them.
- Paper Napkins or Small Plates — For serving. I always have extra on hand because things get messy.
If you don’t have a wooden board, a large baking sheet covered with parchment paper works just as well. I’ve done it that way when I was short on time, and it looked just as festive. For the cookie cutters, check your local dollar store — they usually have a Halloween set for cheap.
Preparation Method
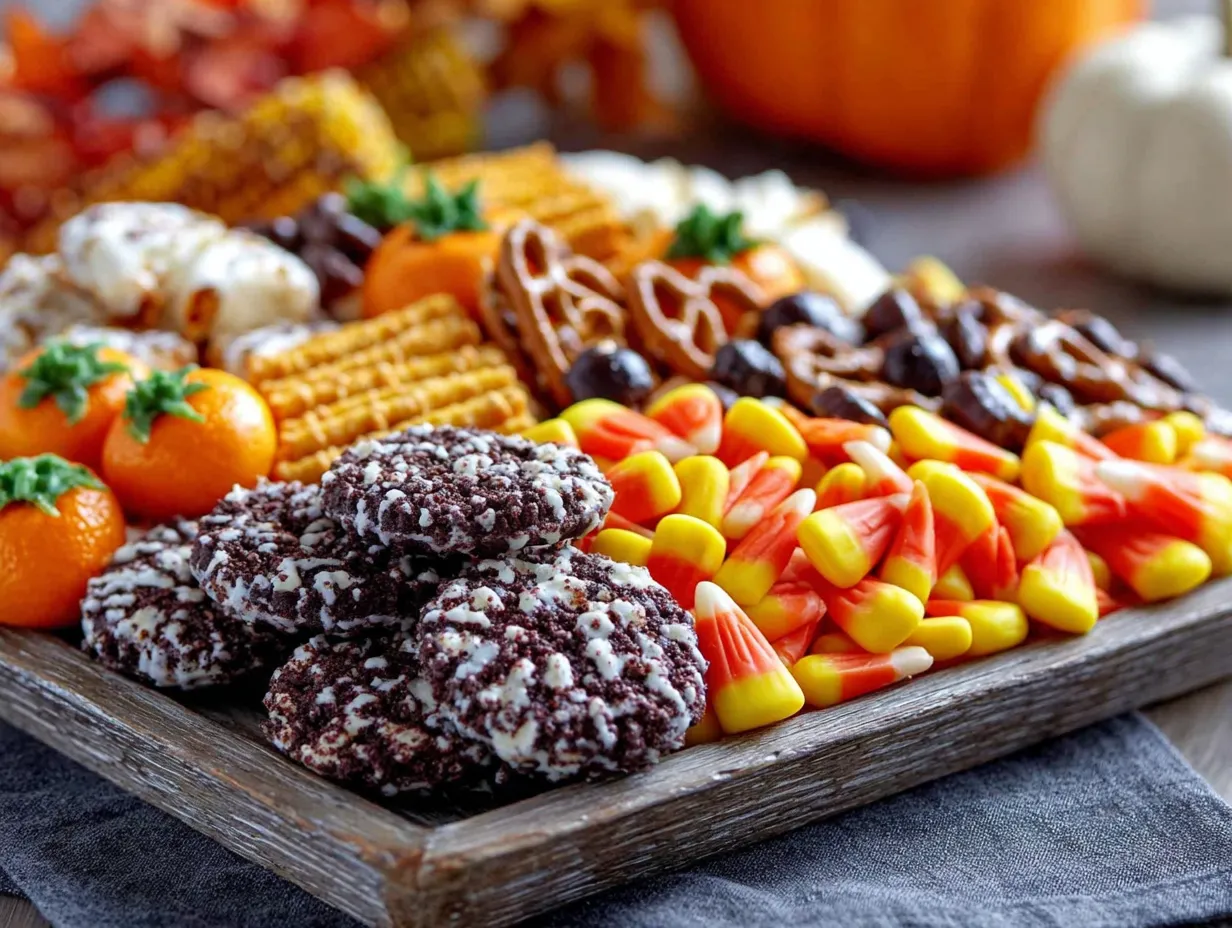
Let’s put this board together. It’s simple, but I’ll walk you through each step so you get the best results.
- Prep Your Ingredients (5 minutes): Wash the grapes and baby carrots. Slice the apple and toss it with a little lemon juice to prevent browning. Cut the orange cheddar into small cubes, about 1-inch each. If you’re using the ghost pepper jack, slice it into 1/4-inch thick pieces and use your cookie cutters to make spooky shapes.
- Arrange the Bowls (2 minutes): Place your small bowls or ramekins on the board. I like to put the candy corn in one bowl, the marshmallows in another, and the peanut butter pretzels in a third. This keeps the smaller items from rolling all over the place.
- Place the Cheese (3 minutes): Arrange the cheese cubes and shaped slices around the bowls. Spread them out so there’s a little bit in each quadrant of the board. This makes it easy for everyone to grab some without reaching too far.
- Add the Crackers and Pretzels (2 minutes): Scatter the Halloween crackers and mini pretzel twists in the empty spaces. Don’t pile them up too high — you want them to be easy to pick up. I like to create little clusters of crackers near the cheese.
- Fill in with Fruit and Veggies (3 minutes): Place the grapes, apple slices, and baby carrots around the board. The grapes can go in small clusters, and the apple slices can fan out like little fans. The carrots add a nice pop of orange color.
- Add the Finishing Touches (2 minutes): Sprinkle the dark chocolate covered almonds in any remaining gaps. If you’re using the edible googly eyes, press them gently onto a few cheese cubes or marshmallows. This is where the kids can help — they love sticking on the eyes.
- Check the Balance (1 minute): Step back and look at your board. Make sure there’s a good mix of colors and textures. If one area looks too empty, move a few items around. The goal is to make it look abundant but not crowded.
One thing I learned the hard way — don’t put the candy corn in direct sunlight or near a heat source. They can get sticky and melt a little. Keep the board in a cool spot until you’re ready to serve. Also, if you’re making this ahead of time, cover it loosely with plastic wrap and store it in the fridge. Just take it out 15 minutes before serving so everything comes to room temperature.
Cooking Tips & Techniques
I’ve made this board more times than I can count, and I’ve picked up a few tricks along the way. Some of them came from mistakes, but hey, that’s how we learn.
Don’t overthink the arrangement. I used to stress about making everything look perfect, but kids don’t care about that. They just want to grab and eat. My nephew taught me that the best boards are the ones that look a little messy. It feels more inviting.
Balance sweet and salty. This is the key to a board that keeps people coming back. If you have too much candy corn, it gets overwhelming. Mix in plenty of pretzels, crackers, and cheese to cut the sweetness. I once made a board with way too much candy, and it was a sugar bomb. Learn from my mistake.
Use the “color wheel” approach. When you’re placing items, think about contrasting colors. The orange cheese pops next to the green grapes. The white marshmallows stand out against the dark chocolate almonds. It makes the board look more visually appealing and helps people find what they want.
Keep it kid-friendly. If you’re serving this at a party with very young children, avoid anything too hard or sticky. I skip the whole almonds and use regular almonds instead. Also, watch out for peanut butter if there are allergies. You can always swap in sunflower seed butter pretzels.
Timing is everything. Assemble the board no more than an hour before serving. The crackers can get stale, and the fruit can start to brown. If you need to prep ahead, cut the cheese and wash the fruit the night before. Store them separately and assemble right before the party.
Variations & Adaptations
This board is super flexible. I’ve tried a few different versions, and they’ve all been hits. Here are some ideas to make it your own.
Dairy-Free Version: Swap the cheddar and ghost pepper jack for your favorite dairy-free cheese alternatives. Many brands now make shreds and blocks that melt well and taste great. I’ve used Violife cheddar-style blocks, and they work perfectly for cutting into shapes.
Nut-Free Version: Replace the peanut butter pretzels with plain pretzels or cheese crackers. Skip the dark chocolate covered almonds and use regular chocolate chips or M&Ms instead. Always check labels to make sure everything is nut-free.
Seasonal Twist: In the fall, add some roasted pumpkin seeds or dried cranberries. For a winter version, use candy canes and peppermint bark. This board is easy to adapt for any holiday or season.
Savory Lovers’ Board: If your family prefers savory over sweet, reduce the candy corn and marshmallows. Add more cheese, some salami slices, and a few olives. The kids might not love it as much, but the adults will appreciate the balance.
Personal Variation: I once made a “monster mash” version where I added green grapes and broccoli florets to make it look like a monster’s face. The kids thought it was hilarious, and they actually ate the broccoli. Sometimes a little creativity goes a long way.
Serving & Storage Suggestions
This board is best served at room temperature, so take it out of the fridge about 15 minutes before you’re ready to eat. Arrange it on a large platter or wooden board, and let everyone grab what they want. I like to put out small plates and napkins so people can make their own little piles.
For drinks, apple cider or sparkling water with a splash of orange juice pairs perfectly. If you’re serving this at a Halloween party, a bowl of popcorn on the side is always a good idea. It adds another texture and keeps the kids busy.
When it comes to storage, this board doesn’t keep super well once it’s assembled. The crackers can get soft, and the fruit can brown. If you have leftovers, separate the items into airtight containers. The candy corn and pretzels will last for weeks. The cheese should be wrapped tightly and eaten within a few days. The fruit is best consumed the same day.
I’ve found that the flavors actually develop a little if you let the cheese sit out for a while. The cheddar gets creamier, and the candy corn softens slightly. But don’t leave it out for more than two hours, especially if you’re serving it at a party. Food safety first.
Nutritional Information & Benefits
Let’s be real — this is a treat board, not a health food. But that doesn’t mean it can’t have some redeeming qualities. Here’s a rough estimate for a serving size (about 1/8 of the board).
| Nutrient | Amount per Serving |
|---|---|
| Calories | 280 |
| Total Fat | 12g |
| Saturated Fat | 6g |
| Cholesterol | 25mg |
| Sodium | 450mg |
| Total Carbohydrates | 38g |
| Dietary Fiber | 3g |
| Sugars | 22g |
| Protein | 8g |
The cheese provides calcium and protein, which helps balance out the sugar from the candy corn. The grapes and apples offer fiber and vitamin C, so you’re getting a little bit of goodness in there. The dark chocolate covered almonds have antioxidants, which is a nice bonus.
This board is not gluten-free unless you use gluten-free crackers and pretzels. It also contains dairy and peanuts (if you use the peanut butter pretzels). Always check labels and consider your guests’ dietary needs. I’ve made a version with all gluten-free items, and it worked just fine.
Conclusion
This kid-approved Halloween charcuterie board is the kind of recipe that makes you feel like a hero without breaking a sweat. It’s fun, festive, and forgiving. You can’t really mess it up, and that’s the beauty of it.
I love this board because it brings people together. There’s something about sharing food from a communal platter that makes everyone feel included. And when the kids see their favorite treats all in one place, their faces light up. That’s the magic of it.
So go ahead and give it a try. Customize it with your family’s favorite snacks, and don’t be afraid to let the kids help. I promise you’ll have a great time making it, and an even better time eating it. If you come up with a fun variation, I’d love to hear about it. Drop a comment below or tag me in your photos. Happy Halloween, and happy snacking!
Frequently Asked Questions
Can I make this board ahead of time?
You can prep the ingredients the night before, but assemble the board no more than an hour before serving. The crackers and pretzels can get stale, and the fruit can brown if left out too long.
What can I use instead of candy corn?
If you’re not a fan of candy corn, try using candy pumpkins, M&Ms, or even gummy worms for a spooky twist. The key is to keep the sweet and salty balance.
How do I keep the apple slices from turning brown?
Toss the apple slices in a little lemon juice or lime juice right after cutting. This will keep them looking fresh for a few hours. You can also use a commercial product like Fruit-Fresh.
Is this board safe for toddlers?
Yes, but with some modifications. Skip the whole almonds and hard candies. Use softer cheese and cut everything into small, manageable pieces. Always supervise young children while they eat.
Can I add hot dogs or other proteins?
Absolutely! Mini hot dogs or cocktail sausages would be a great addition. Just make sure they’re fully cooked and cut into bite-sized pieces. It adds a savory element that balances the sweetness.
Pin This Recipe!
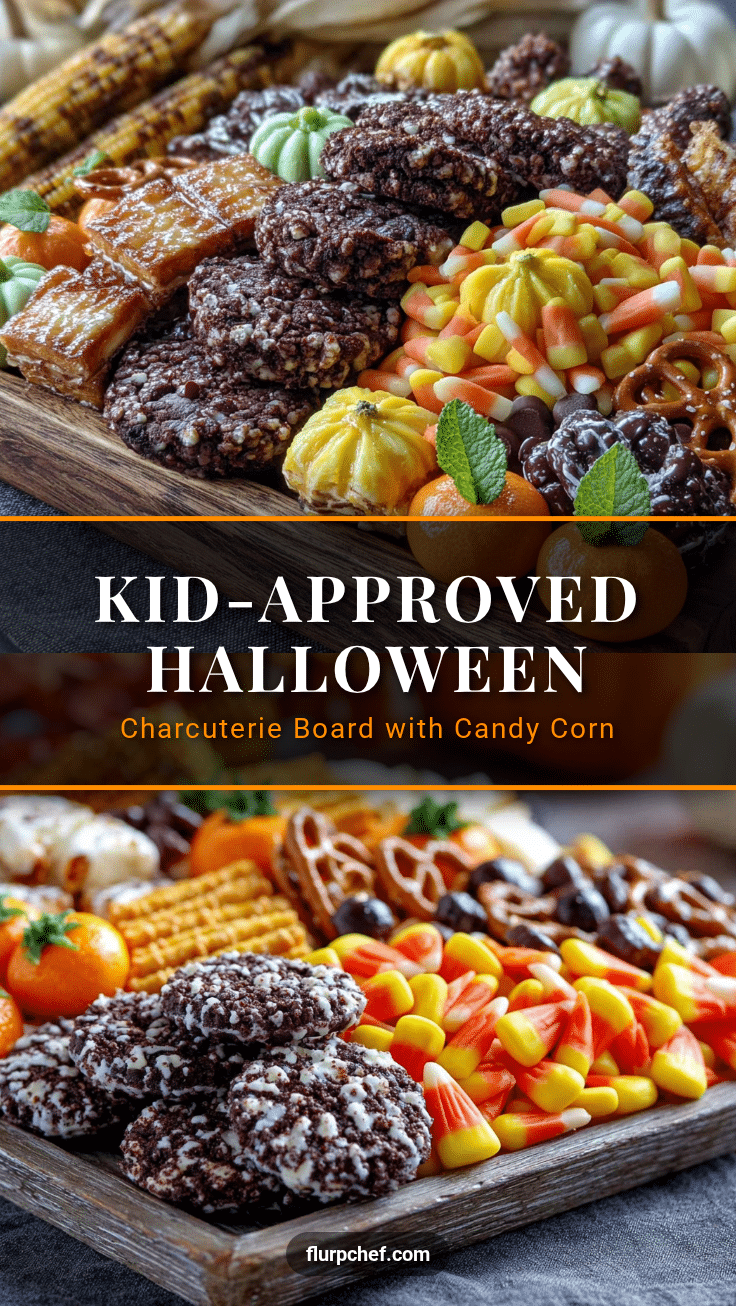
Kid-Approved Halloween Charcuterie Board with Candy Corn
A fun and easy Halloween snack board that combines sweet and salty treats, perfect for parties or movie nights. This kid-approved charcuterie board comes together in under 15 minutes with simple ingredients.
- Prep Time: 15 minutes
- Cook Time: 0 minutes
- Total Time: 15 minutes
- Yield: 8 servings 1x
- Category: Appetizer
- Cuisine: American
Ingredients
- 1 cup candy corn
- 1 cup mini pretzel twists
- 8 ounces orange cheddar cheese cubes
- 4 ounces ghost pepper jack cheese slices
- 1 cup red seedless grapes
- 1 apple, sliced
- 1 cup Halloween-themed crackers
- 1/2 cup peanut butter filled pretzels
- 1/2 cup marshmallows
- 1/2 cup dark chocolate covered almonds
- 1/2 cup baby carrots
- A handful of edible googly eyes
Instructions
- Prep your ingredients: Wash the grapes and baby carrots. Slice the apple and toss with lemon juice to prevent browning. Cut the orange cheddar into 1-inch cubes. Slice the ghost pepper jack into 1/4-inch thick pieces and use cookie cutters to make spooky shapes.
- Arrange small bowls or ramekins on the board. Place candy corn in one, marshmallows in another, and peanut butter pretzels in a third.
- Arrange the cheese cubes and shaped slices around the bowls, spreading them out across the board.
- Scatter the Halloween crackers and mini pretzel twists in the empty spaces, creating little clusters near the cheese.
- Place the grapes, apple slices, and baby carrots around the board. Fan out the apple slices and cluster the grapes.
- Sprinkle the dark chocolate covered almonds in any remaining gaps. If using edible googly eyes, press them gently onto a few cheese cubes or marshmallows.
- Step back and check the balance. Adjust items to ensure a good mix of colors and textures.
Notes
Keep the board in a cool spot until serving to prevent candy corn from getting sticky. Assemble no more than an hour before serving. For a nut-free version, replace peanut butter pretzels with plain pretzels and skip the dark chocolate almonds. For a dairy-free version, use dairy-free cheese alternatives.
Nutrition
- Serving Size: 1/8 of the board
- Calories: 280
- Sugar: 22
- Sodium: 450
- Fat: 12
- Saturated Fat: 6
- Carbohydrates: 38
- Fiber: 3
- Protein: 8
Keywords: Halloween charcuterie board, kid-friendly snack, candy corn, Halloween party food, easy appetizer


