I was elbow-deep in a sink full of muddy soccer cleats last October when my accountant — a quiet, cardigan-wearing man named Gerald who I’d only ever seen behind a desk — started talking about cupcakes. Not tax write-offs, not quarterly projections. Cupcakes. He’d cornered me at my son’s game, and I was half-listening, honestly, until he said the words “black velvet” and “lightened up” in the same sentence. I stopped scrubbing.
Gerald, it turns out, has a secret life as a weekend baker. He told me his wife can’t do heavy desserts anymore, so he spent a whole fall figuring out how to make a Halloween cupcake that feels indulgent but doesn’t leave you regretting your life choices. “The trick,” he said, “is the tang.” I nodded like I understood, but really I was just imagining the deep, dark crumb of a classic black velvet cake — but somehow lighter, fluffier, almost airy. He scribbled the gist of it on a napkin that was already smudged with orange buttercream from the batch he’d brought along. I still have that napkin, stained and crumpled, tucked into my favorite cookbook.
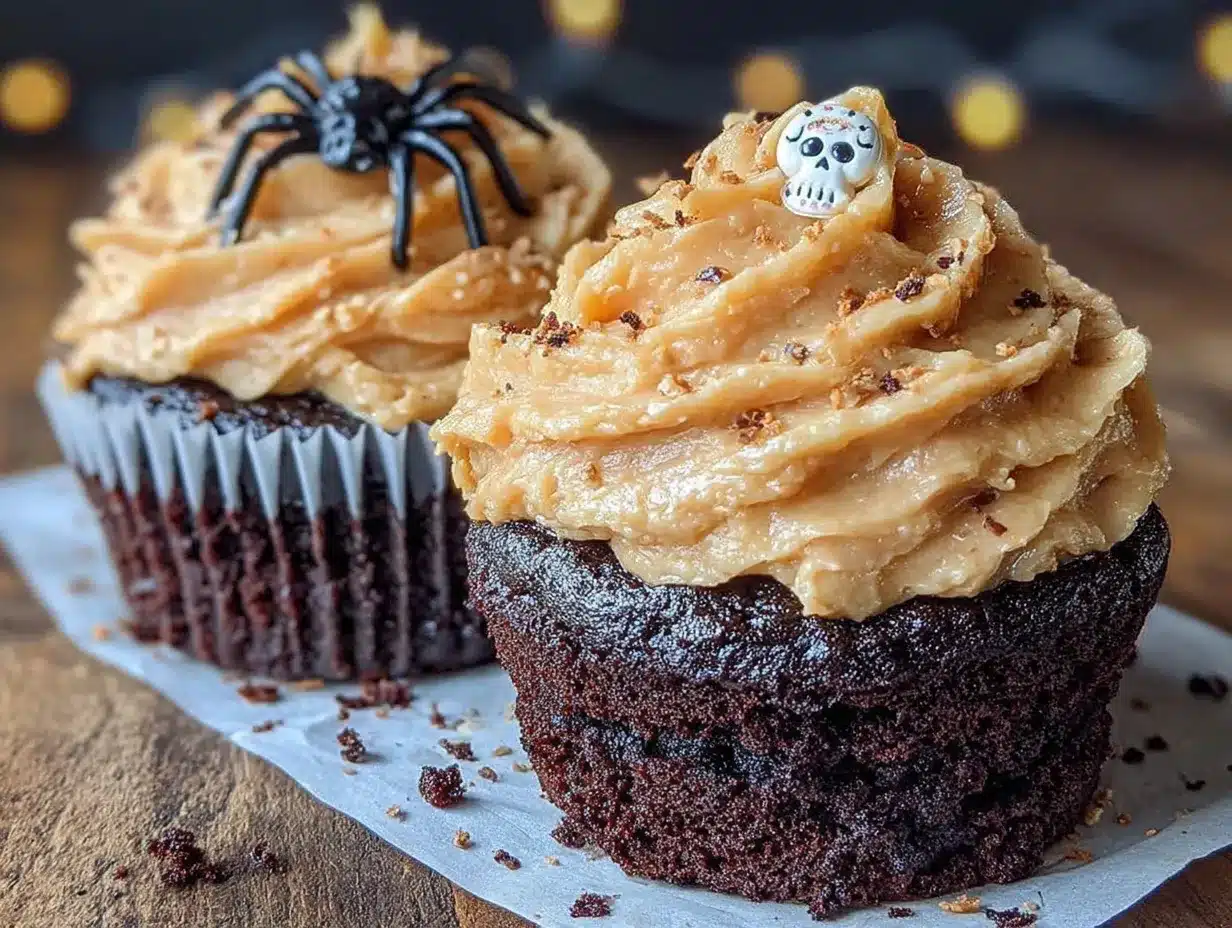
These lightened-up black velvet Halloween cupcakes with orange buttercream became my go-to that season. I tweaked the method a little — swapped in some Greek yogurt, cut the sugar just enough — but Gerald’s core idea stayed. It’s the kind of recipe that makes you wonder why all holiday treats have to be so heavy. Maybe you’ve been there, staring at a lineup of dense, overly sweet desserts and wishing for something that actually lets you eat two without guilt. These cupcakes are that answer. They’re dark, dramatic, and perfect for Halloween — but the lightness keeps you coming back for more.
Why You’ll Love This Recipe
These aren’t your average Halloween cupcakes. They’ve been tested in my kitchen (and Gerald’s) more times than I can count, and every version came out better than the last. Here’s why they’ve earned a permanent spot in my fall rotation:
- Quick & Easy: From mixing bowl to cooling rack in under 45 minutes. No complicated steps, no fuss — just a straightforward batter that comes together with a whisk and a spatula.
- Simple Ingredients: You probably have most of these in your pantry right now. No weird extracts, no specialty flours — just real, recognizable stuff that makes sense for a weeknight baking session.
- Perfect for Halloween: The black velvet crumb is dramatic enough for any spooky spread, and the orange buttercream is a showstopper. Kids love the color, adults love the flavor balance.
- Crowd-Pleaser: I’ve brought these to school parties, office potlucks, and family dinners. Every single time, someone asks for the recipe. Even the “I don’t do healthy desserts” crowd goes back for seconds.
- Unbelievably Delicious: Here’s the thing — these cupcakes don’t taste lightened up. The texture is tender, the crumb is moist, and the tang from the yogurt and vinegar gives it that classic black velvet complexity without the usual heavy butter and oil load.
What makes these different from every other Halloween cupcake recipe out there? It’s the method. Instead of loading up on fat for moisture, I rely on buttermilk and a touch of Greek yogurt to keep the crumb tender. The cocoa powder does double duty — it gives that deep color and a rich flavor that plays perfectly off the sweet, citrusy buttercream. This isn’t just another version. It’s the version you’ll actually want to make every October.
What Ingredients You Will Need
This recipe uses simple, wholesome ingredients to deliver bold flavor and satisfying texture without the fuss. Most of these are pantry staples, which means you can whip up a batch on a whim — no special trip to the store required.
For the Cupcakes
- All-purpose flour — 1 ½ cups (180g). Spoon and level for accuracy. I’ve tested this with a 1:1 gluten-free blend, and it works well if you need that swap.
- Granulated sugar — ¾ cup (150g). Just enough sweetness without overpowering the cocoa.
- Unsweetened cocoa powder — ¼ cup (20g). Use a Dutch-process cocoa for the deepest color and smoothest flavor. I prefer Rodelle for its rich, almost fudgy notes.
- Baking soda — 1 teaspoon. This reacts with the vinegar to give the cupcakes their lift.
- Salt — ½ teaspoon. Balances the sweetness and enhances the chocolate.
- Buttermilk — ¾ cup (180ml), at room temperature. The acidity tenderizes the gluten, giving you a softer crumb. No buttermilk? Add 1 tablespoon lemon juice to regular milk and let it sit for 5 minutes.
- Greek yogurt — ¼ cup (60g), plain, full-fat or 2%. This replaces some of the oil and adds moisture without extra fat.
- Vegetable oil — 3 tablespoons (45ml). Keeps the cupcakes tender. Use a neutral oil like canola or avocado.
- Large egg — 1, at room temperature. Binds everything together.
- Vanilla extract — 1 teaspoon. Pure, not imitation, for the best flavor.
- White vinegar — 1 teaspoon. Reacts with the baking soda for lift. Don’t skip it — it’s what makes the velvet texture happen.
- Black gel food coloring — 1 to 2 teaspoons. Start with less and add more until you reach your desired darkness. I like Americolor Super Black for a true, deep black without a weird aftertaste.
For the Orange Buttercream
- Unsalted butter — ½ cup (113g), softened to room temperature. Use a good brand like Kerrygold for the creamiest texture.
- Powdered sugar — 2 cups (240g), sifted to remove lumps.
- Orange zest — 1 tablespoon, from about 1 large orange. This is where the fresh flavor comes from — don’t use extract alone.
- Fresh orange juice — 2 tablespoons, strained to remove pulp.
- Vanilla extract — ½ teaspoon.
- Salt — A tiny pinch, to balance the sweetness.
- Orange gel food coloring — A few drops, optional, for a brighter color. I use Americolor Orange for a vibrant Halloween look.
Equipment Needed
You don’t need a fancy bakery setup for these cupcakes. Here’s what I use in my own kitchen:
- Muffin tin — A standard 12-cup pan works perfectly. I’ve had good results with Wilton nonstick pans — they release cupcakes cleanly every time.
- Paper liners — Use black or orange liners for a festive look. If you go with white, just know the black batter might show through a little.
- Mixing bowls — One large, one medium. Glass or stainless steel works best.
- Whisk and spatula — A whisk for dry ingredients, a silicone spatula for folding.
- Electric hand mixer or stand mixer — For the buttercream. You can do it by hand with a wooden spoon, but your arm will thank you for the mixer.
- Piping bag and tip — A large star tip (like a 1M or 2D) gives that classic rosette look. No piping bag? A zip-top bag with the corner snipped off works in a pinch.
- Cooling rack — Essential for even cooling. I’ve used a wire rack from OXO for years — it’s sturdy and holds up well.
- Microplane or zester — For fresh orange zest. A box grater works too, but a microplane gives finer, more aromatic zest.
Preparation Method
Let’s get baking. These steps are straightforward, but I’ve included a few little tricks I learned the hard way — like the time I forgot the vinegar and ended up with flat, sad cupcakes. Learn from my mistakes!
Step 1: Preheat and Prep
Preheat your oven to 350°F (175°C). Line your muffin tin with paper liners — this recipe makes exactly 12 cupcakes, so no need to grease anything extra. Set the tin aside.
Step 2: Mix Dry Ingredients
In a large bowl, whisk together the flour, sugar, cocoa powder, baking soda, and salt. Make sure there are no lumps — the cocoa tends to clump, so take an extra 30 seconds to break them up. You want everything evenly distributed before the wet ingredients go in.
Step 3: Combine Wet Ingredients
In a medium bowl or a large liquid measuring cup, whisk together the buttermilk, Greek yogurt, vegetable oil, egg, vanilla extract, and white vinegar. Whisk until smooth and well combined — the yogurt should be fully incorporated with no streaks left.
Step 4: Mix Batter
Pour the wet ingredients into the dry ingredients. Stir gently with a spatula or wooden spoon until just combined — about 15 to 20 strokes. A few small lumps are totally fine. Overmixing will make the cupcakes tough, so resist the urge to keep stirring. Now add the black gel food coloring, starting with 1 teaspoon. Stir it in gently until the batter is evenly dark. If it’s not black enough for your taste, add another ½ teaspoon and mix again. The color deepens slightly as it bakes, so don’t go overboard.
Step 5: Fill and Bake
Divide the batter evenly among the 12 liners. I use a cookie scoop for this — it keeps things neat and ensures even-sized cupcakes. Fill each liner about two-thirds full. Bake for 16 to 18 minutes, or until a toothpick inserted into the center of a cupcake comes out clean or with a few moist crumbs. The tops should spring back when lightly touched. Let the cupcakes cool in the pan for 5 minutes, then transfer them to a wire rack to cool completely. Don’t rush this — warm cupcakes will melt your buttercream into a sad, soupy mess.
Step 6: Make the Orange Buttercream
While the cupcakes cool, make the frosting. In a large bowl, beat the softened butter with an electric mixer on medium speed until creamy and smooth — about 2 minutes. Scrape down the sides of the bowl. Add the sifted powdered sugar, one cup at a time, beating on low speed after each addition. Once all the sugar is in, add the orange zest, orange juice, vanilla extract, and a tiny pinch of salt. Beat on medium-high speed for 3 to 4 minutes, until the buttercream is light, fluffy, and spreadable. If it’s too thick, add a teaspoon more orange juice. If it’s too thin, add a tablespoon more powdered sugar. Stir in a few drops of orange gel food coloring if you want a brighter Halloween orange.
Step 7: Frost and Decorate
Once the cupcakes are completely cool, pipe or spread the buttercream on top. I like to use a star tip and pipe a tall rosette — it looks impressive with minimal effort. For extra Halloween flair, add a few orange or black sprinkles, or a tiny candy eyeball on top. Serve immediately or store as directed below.
Cooking Tips & Techniques
After a few batches (and a few flops), I’ve picked up some tricks that make these cupcakes foolproof. Here’s what I wish someone had told me the first time around.
Don’t skip the vinegar. I know it sounds weird in a cupcake, but the vinegar reacts with the baking soda to create lift. Without it, your cupcakes will be dense and flat. I learned this the hard way when I substituted lemon juice and got a slightly different texture — still good, but not as light.
Room temperature ingredients matter. Cold buttermilk and egg can seize the batter, making it lumpy and harder to mix. Take them out of the fridge 20 minutes before you start. If you’re in a rush, warm the buttermilk in the microwave for 10 seconds — just don’t let it get hot.
Measure your flour correctly. Scooping directly from the bag packs the flour down, giving you way more than you need. Use the spoon-and-level method: fluff the flour with a spoon, scoop it into your measuring cup, then level it off with a knife. It makes a real difference in the crumb.
Pipe with confidence. If your buttercream feels too stiff, add a tiny splash more orange juice. If it’s too soft, pop it in the fridge for 10 minutes. The perfect consistency is smooth but holds its shape when piped. Practice on a plate first if you’re nervous — I still do that sometimes.
Plan your timing. Bake the cupcakes a day ahead if you’re making these for a party. Store them unfrosted in an airtight container at room temperature, then make the buttercream and frost the day of. It saves you from feeling rushed and stressed.
Variations & Adaptations
One of the best things about this recipe is how flexible it is. Here are a few ways I’ve adapted it over the years:
- Gluten-Free Version: Swap the all-purpose flour with a 1:1 gluten-free baking blend. I’ve used King Arthur Measure for Measure with great results. The texture is slightly more delicate, so handle the batter gently.
- Dairy-Free Version: Use a plant-based buttermilk (almond milk + 1 tablespoon lemon juice) and a dairy-free yogurt like Kite Hill plain unsweetened. Replace the butter in the frosting with a good vegan butter stick — not the spreadable kind in a tub.
- Spiced Orange Buttercream: Add ½ teaspoon of cinnamon and a pinch of nutmeg to the buttercream for a cozy fall twist. It pairs beautifully with the chocolate.
- Chocolate Orange Buttercream: Melt 2 ounces of dark chocolate, let it cool slightly, then beat it into the finished buttercream. It’s like a chocolate-orange candy bar in frosting form.
- Mini Cupcakes: Use a mini muffin tin and bake for 10 to 12 minutes. This makes about 36 mini cupcakes — perfect for parties where you want people to grab and go.
Serving & Storage Suggestions
These cupcakes are best served at room temperature. The crumb is most tender, and the buttercream is perfectly soft. If you’ve refrigerated them, let them sit out for 20 minutes before serving.
For a Halloween party, arrange them on a black cake stand or a wooden board. Add some fake spiderwebs, candy eyeballs, or a few orange and black sprinkles scattered around the base. They’re dramatic enough to be the centerpiece of your dessert table.
To store leftovers (if you have any!), place them in an airtight container. They’ll keep at room temperature for up to 2 days, or in the fridge for up to 5 days. The fridge can dry out the cupcakes a little, so I prefer room temp storage for short-term. For longer storage, freeze the unfrosted cupcakes in a freezer-safe bag for up to 3 months. Thaw at room temperature, then frost fresh. The buttercream can also be frozen in a sealed container for up to 3 months — just re-whip it for a minute after thawing to bring back the fluffiness.
One note: the orange flavor in the buttercream actually gets a little more mellow after a day in the fridge. Some people prefer it that way — less punchy, more integrated. I like it both ways, honestly, but if you want that bright citrus kick, serve them the same day.
Nutritional Information & Benefits
Here’s the approximate nutritional breakdown for one cupcake with frosting (based on 12 servings):
- Calories: 285
- Fat: 12g
- Saturated Fat: 6g
- Carbohydrates: 42g
- Sugar: 30g
- Protein: 4g
- Fiber: 1g
These numbers are lower than a traditional black velvet cupcake, thanks to the Greek yogurt replacing some of the oil and the reduced sugar in the batter. The cocoa powder is rich in antioxidants, and the orange zest adds a small dose of vitamin C. If you’re watching your sugar intake, you can reduce the powdered sugar in the buttercream by a quarter cup — it’ll be a little less sweet but still delicious.
For those with dietary concerns: this recipe contains dairy, eggs, and gluten. The variations above offer dairy-free and gluten-free options. The cupcakes are nut-free as written, which makes them a good choice for school parties.
FAQs
Can I make these cupcakes ahead of time?
Yes! Bake the cupcakes up to a day in advance and store them unfrosted in an airtight container at room temperature. Make the buttercream and frost them the day you plan to serve them for the best texture and flavor.
Why did my cupcakes turn out flat?
This usually happens when the vinegar and baking soda reaction is weak. Make sure your baking soda is fresh — test it by dropping a pinch into vinegar; it should fizz vigorously. Also, don’t overmix the batter, as that can deflate the air bubbles.
Can I use natural cocoa powder instead of Dutch-process?
You can, but the color will be lighter — more of a dark brown than true black. The flavor will also be slightly more acidic. If you use natural cocoa, you might need a bit more black food coloring to achieve the same dramatic look.
How do I get the black color without food coloring?
It’s tricky. Some bakers use black cocoa powder (like the kind from The Cocoa Trader), which gives a naturally dark color. But it can be hard to find and expensive. For most home bakers, gel food coloring is the most reliable and affordable option.
My buttercream is too runny. What went wrong?
This usually means the butter was too soft when you started, or you added too much orange juice. Pop the bowl in the fridge for 10 to 15 minutes, then re-whip. If it’s still runny, beat in a tablespoon or two more powdered sugar.
Conclusion
These lightened-up black velvet Halloween cupcakes with orange buttercream are proof that you don’t have to sacrifice flavor for a lighter treat. They’re dark, dramatic, and full of that tangy chocolate complexity that makes black velvet so irresistible — but they won’t weigh you down. Whether you’re hosting a Halloween party, sending treats to a school event, or just craving something seasonal that feels a little less indulgent, these cupcakes deliver every time.
I love that this recipe came from an unexpected place — a muddy soccer field and a quiet accountant who just wanted his wife to enjoy a cupcake again. It reminds me that the best recipes often come from the most surprising moments. So go ahead, make a batch. Add your own twist — maybe a little extra orange zest, or a sprinkle of black sanding sugar. And if you come up with a variation you love, I’d honestly love to hear about it. Drop a comment below, or tag me in your photos. Happy Halloween, and happy baking!
PrintLightened-Up Black Velvet Halloween Cupcakes: Easy Orange Buttercream Recipe
These lightened-up black velvet Halloween cupcakes with orange buttercream are dark, dramatic, and perfect for Halloween—but the lightness keeps you coming back for more. They’re quick, easy, and made with simple ingredients.
- Prep Time: 15 minutes
- Cook Time: 18 minutes
- Total Time: 33 minutes
- Yield: 12 cupcakes 1x
- Category: Dessert
- Cuisine: American
Ingredients
- 1 ½ cups (180g) all-purpose flour
- ¾ cup (150g) granulated sugar
- ¼ cup (20g) unsweetened cocoa powder (Dutch-process preferred)
- 1 teaspoon baking soda
- ½ teaspoon salt
- ¾ cup (180ml) buttermilk, at room temperature
- ¼ cup (60g) plain Greek yogurt (full-fat or 2%)
- 3 tablespoons (45ml) vegetable oil (neutral like canola or avocado)
- 1 large egg, at room temperature
- 1 teaspoon vanilla extract
- 1 teaspoon white vinegar
- 1 to 2 teaspoons black gel food coloring
- ½ cup (113g) unsalted butter, softened
- 2 cups (240g) powdered sugar, sifted
- 1 tablespoon orange zest (from about 1 large orange)
- 2 tablespoons fresh orange juice, strained
- ½ teaspoon vanilla extract
- A tiny pinch of salt
- A few drops orange gel food coloring (optional)
Instructions
- Preheat oven to 350°F (175°C). Line a 12-cup muffin tin with paper liners.
- In a large bowl, whisk together flour, sugar, cocoa powder, baking soda, and salt until no lumps remain.
- In a medium bowl, whisk together buttermilk, Greek yogurt, vegetable oil, egg, vanilla extract, and white vinegar until smooth.
- Pour wet ingredients into dry ingredients. Stir gently with a spatula until just combined (15-20 strokes). Add black gel food coloring starting with 1 teaspoon; stir until evenly dark. Add more if desired.
- Divide batter evenly among the 12 liners, filling each about two-thirds full. Bake for 16-18 minutes, until a toothpick inserted in the center comes out clean or with a few moist crumbs. Cool in pan for 5 minutes, then transfer to a wire rack to cool completely.
- For the buttercream: In a large bowl, beat softened butter with an electric mixer on medium speed until creamy (about 2 minutes). Add sifted powdered sugar one cup at a time, beating on low. Add orange zest, orange juice, vanilla extract, and salt. Beat on medium-high for 3-4 minutes until light and fluffy. Add orange food coloring if desired.
- Once cupcakes are completely cool, pipe or spread buttercream on top. Decorate as desired. Serve immediately or store.
Notes
Don’t skip the vinegar—it reacts with baking soda for lift. Room temperature ingredients matter for even mixing. Measure flour using spoon-and-level method. Pipe buttercream with confidence; if too stiff, add more orange juice; if too soft, chill briefly. Bake cupcakes a day ahead and frost the day of serving for best results.
Nutrition
- Serving Size: 1 cupcake
- Calories: 285
- Sugar: 30
- Fat: 12
- Saturated Fat: 6
- Carbohydrates: 42
- Fiber: 1
- Protein: 4
Keywords: Halloween cupcakes, black velvet, orange buttercream, lightened-up, easy, fall baking


