My sister swore she hated ice cream. For years. Every birthday party, every beach trip, every sweltering July afternoon — she’d wave it away like I was offering her a plate of boiled liver. “Too cold,” she’d say, or “It hurts my teeth,” or my personal favorite, “I just don’t get the hype.” I stopped trying to convince her after a while. Some battles aren’t worth fighting, you know? Especially when there’s a perfectly good pint of Haagen-Dazs in the freezer with your name on it. Then, last summer, I caught her. It was a Tuesday, around 9 PM. I’d come downstairs for a glass of water and there she was, standing in front of the open freezer door, the light casting a pale glow on her face. She was holding a spoon. My spoon. And she was eating directly from the container of this Lighter No-Churn Salted Caramel Ice Cream I’d made just that morning. She froze when she saw me, spoon halfway to her mouth, a look of pure, caught-in-the-act panic on her face. I just leaned against the counter and waited. She swallowed, looked at the container, then back at me. “Okay,” she said, her voice a little sheepish. “This is different. This is… good.” Different. Good. Coming from her, that was practically a standing ovation. And honestly? I knew exactly what she meant. This isn’t your average store-bought tub of caramel-flavored sugar. This is something else entirely — a recipe that somehow manages to be lighter, creamier, and more intensely flavored than the heavy, custard-based stuff. It’s the kind of frozen treat that makes you close your eyes on the first bite, not because it’s overly sweet, but because that perfect balance of rich, buttery caramel and flaky sea salt hits every single note just right. And the best part? No ice cream maker. No eggs. No endless stirring over a hot stove. Just a few simple ingredients, a little bit of patience, and the quiet satisfaction of proving someone — even yourself — wrong.
Why You’ll Love This Recipe
Let’s be real for a second. Most “light” desserts come with a side of disappointment. They’re either watery, icy, or taste like a sad compromise. This Lighter No-Churn Salted Caramel Ice Cream is not that. It’s the recipe I bring to every summer barbecue, the one friends text me about in the middle of winter, and the one that finally cracked my ice-cream-hating sister. Here’s why it works so well:
- Incredibly Simple: No fancy equipment, no tempering eggs, no churning. You just whip, fold, swirl, and freeze. It’s that easy.
- Lighter, Not Less: By using a clever base of whipped cream and sweetened condensed milk, we skip the heavy custard while keeping that ultra-creamy, scoopable texture. You get all the indulgence with a fraction of the work.
- Perfectly Balanced Flavor: The real magic is in the salted caramel. It’s not cloying or one-note. The flaky sea salt cuts through the sweetness, creating that craveable sweet-salty combo that makes you go back for “just one more spoonful.”
- Naturally Crowd-Pleasing: Whether you’re serving it to kids, health-conscious friends, or dessert purists, this one always disappears. It’s familiar enough to be comforting, but special enough to feel like a treat.
- Make-Ahead Magic: This is the perfect dessert for entertaining. You make it the day before, pop it in the freezer, and forget about it until it’s time to scoop. No last-minute stress, no oven heating up the kitchen.
This recipe isn’t just good for a “light” ice cream. It’s good, period. It’s the kind of dessert that makes you feel good about eating it — not because it’s virtuous, but because it’s genuinely delicious and you know exactly what went into it.
What Ingredients You Will Need
This Lighter No-Churn Salted Caramel Ice Cream relies on a short list of pantry-friendly ingredients. The key is using good-quality components, especially for the caramel, since it’s the star of the show. Here’s everything you’ll need:
- 2 cups (480 ml) heavy whipping cream, cold: This is your base. The cold cream whips up into stiff peaks, creating the airy, light texture that makes this ice cream so scoopable. Don’t substitute with half-and-half or milk — you need the high fat content for the right consistency. I usually grab a brand like Horizon Organic or Organic Valley for a clean taste.
- 1 (14-ounce / 397 g) can sweetened condensed milk: This is the secret to the no-churn method. It adds sweetness, body, and prevents ice crystals from forming, giving you that smooth, creamy texture without a machine. It’s not the place to skimp — go with a trusted brand like Eagle Brand or Borden.
- 1/2 cup (120 ml) homemade or high-quality store-bought caramel sauce: This is where the flavor lives. You can absolutely use a good jarred sauce (I’m partial to Stonewall Kitchen or Trader Joe’s Fleur de Sel Caramel Sauce), but homemade is surprisingly easy and lets you control the sweetness. If you’re using store-bought, look for one that lists cream and butter, not just corn syrup and artificial flavor.
- 1 teaspoon vanilla extract: Pure vanilla extract adds warmth and depth, rounding out the caramel flavor. Imitation vanilla will work in a pinch, but the pure stuff really does make a difference here.
- 1/2 teaspoon flaky sea salt, plus more for garnish: This is non-negotiable. The flaky salt (like Maldon or Jacobsen) provides little bursts of salinity that cut through the sweetness of the caramel. Don’t use fine table salt — it will dissolve and you’ll lose that wonderful textural contrast.
Ingredient Selection Tip: For the best texture, make sure your heavy cream is as cold as possible. I like to pop my mixing bowl and whisk attachment in the freezer for 10-15 minutes before I start whipping. It makes a noticeable difference in how quickly the cream whips up and how stable the peaks are.
Substitution Guidance: Need a dairy-free version? You can substitute the heavy cream with full-fat canned coconut cream (chilled overnight) and use a dairy-free sweetened condensed milk (like the one from Nature’s Charm). The texture will be slightly different — a touch icier — but the flavor is still fantastic. For a vegan caramel, use a coconut milk-based caramel sauce.
Equipment Needed
The beauty of this Lighter No-Churn Salted Caramel Ice Cream is that it doesn’t require any fancy gadgets. You probably already have everything you need in your kitchen. Here’s the list:
- Large mixing bowl: Glass or stainless steel works best. Avoid plastic, as it can retain odors and is harder to keep cold.
- Electric hand mixer or stand mixer: While you can whip the cream by hand with a whisk, it takes a lot of elbow grease. A hand mixer makes the job quick and easy. If you’re using a stand mixer, use the whisk attachment.
- Rubber spatula: For folding the condensed milk and caramel into the whipped cream. A flexible spatula is your best friend here — it helps you incorporate everything without deflating the air you’ve whipped in.
- 9×5-inch (23×13 cm) loaf pan or similar freezer-safe container: This is the perfect size for this recipe. A standard loaf pan gives you nice, tall scoops. You can also use an 8×8-inch square pan or a wide, shallow dish — just keep in mind that a wider surface area means faster freezing.
- Plastic wrap or parchment paper: To cover the surface of the ice cream directly. This prevents ice crystals from forming on top and keeps your ice cream smooth.
- Small microwave-safe bowl or small saucepan: For warming the caramel sauce slightly so it swirls easily into the base.
Budget-Friendly Tip: Don’t have a loaf pan? A clean, empty 2-pound yogurt container or a plastic deli container works perfectly. Just make sure it has a tight-fitting lid. I’ve used a repurposed takeout container in a pinch, and it worked like a charm.
Preparation Method
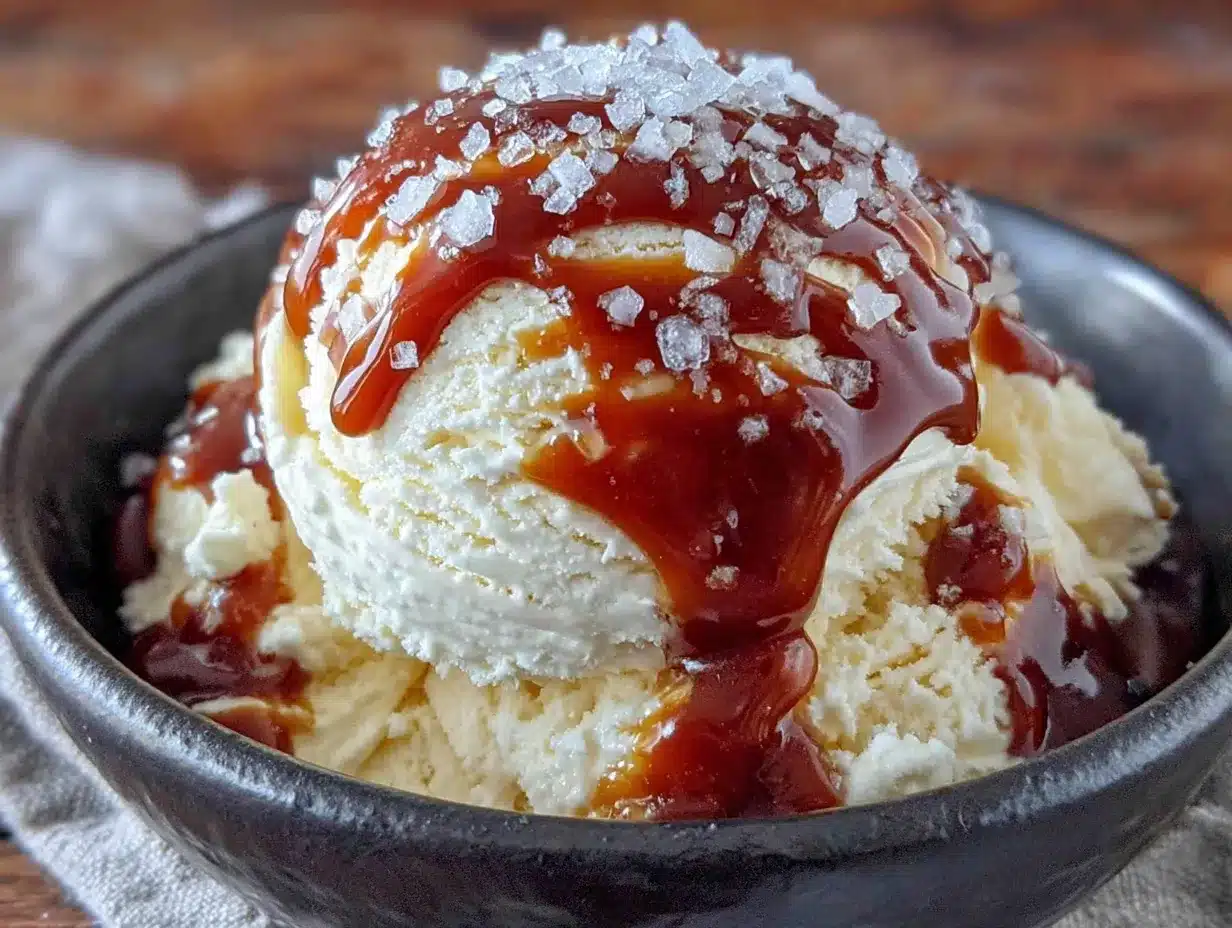
Making this Lighter No-Churn Salted Caramel Ice Cream is almost too easy. The hardest part is waiting for it to freeze. Follow these steps, and you’ll have a dessert that rivals any gourmet ice cream shop.
- Chill your tools (optional but recommended): Place your large mixing bowl and the beaters from your hand mixer in the freezer for 10-15 minutes. This helps the cream whip up faster and hold its shape better.
- Whip the heavy cream: Pour the cold heavy cream into your chilled mixing bowl. Using the hand mixer on medium-high speed, whip the cream until stiff peaks form. This usually takes about 3-4 minutes. You’re looking for peaks that stand straight up when you lift the beaters, but be careful not to overwhip — you don’t want to turn it into butter! (Sensory cue: The cream will go from sloshy to thick and billowy. It should look like soft, pillowy clouds.)
- Fold in the sweetened condensed milk and vanilla: Add the entire can of sweetened condensed milk and the vanilla extract to the whipped cream. Using your rubber spatula, gently fold everything together. Start from the bottom of the bowl and bring the mixture up and over, rotating the bowl as you go. Fold just until no white streaks remain. Be gentle — you want to keep as much air in the mixture as possible. (Tip from experience: Don’t stir vigorously. A light hand is the secret to a creamy, not dense, ice cream.)
- Prepare the caramel swirl: If your caramel sauce is thick or has been in the fridge, warm it up slightly. You want it to be pourable but not hot. A quick 10-15 second blast in the microwave should do the trick. Let it cool for a minute so it doesn’t melt the ice cream base.
- Layer and swirl: Spoon about one-third of the ice cream base into your loaf pan and spread it into an even layer. Drizzle about one-third of the warm caramel sauce over the top. Sprinkle with a pinch of flaky sea salt. Repeat this process two more times, ending with a layer of caramel and salt on top.
- Create the swirl: Here’s the fun part. Take a butter knife or a skewer and gently drag it through the layers in a figure-eight or zigzag pattern. Don’t overdo it — you want distinct ribbons of caramel, not one uniform color. A few gentle passes are all you need. (Visual cue: You should see clear streaks of dark caramel against the pale cream base.)
- Cover and freeze: Press a piece of plastic wrap directly onto the surface of the ice cream. This is crucial — it prevents ice crystals from forming. Then cover the pan with a lid or another layer of plastic wrap. Place it in the coldest part of your freezer and freeze for at least 6 hours, but preferably overnight. The longer it freezes, the firmer and more scoopable it becomes.
- The final touch: Before serving, let the ice cream sit at room temperature for 5-10 minutes to soften slightly. This makes scooping much easier. Sprinkle each serving with an extra pinch of flaky sea salt right before you serve it. That little bit of fresh salt on top is pure magic.
Cooking Tips & Techniques
I’ve made this Lighter No-Churn Salted Caramel Ice Cream more times than I can count, and I’ve learned a few things the hard way. Here are my best tips to ensure success every single time.
The Cold Cream Rule: This is the most important tip. If your cream isn’t cold enough, it won’t whip properly. I’ve made the mistake of using cream that was just fridge-cold, and it took forever to whip and never got as stiff as I wanted. For best results, keep your cream in the back of the fridge (the coldest part) and chill your bowl and beaters. It’s a small step that makes a huge difference.
Don’t Overwhip: I learned this one the hard way during a particularly distracted afternoon. You want stiff peaks, but if you keep going, the cream will start to look grainy and separate. That’s the butter starting to form. Once you see that, there’s no going back. Stop the mixer as soon as the peaks hold their shape.
Warm the Caramel, But Not Too Much: The caramel needs to be warm enough to pour and swirl, but if it’s hot, it will melt the ice cream base and create a soupy mess. Warm it just enough to be fluid — about 10-15 seconds in the microwave. Let it sit for a minute if it feels warm to the touch.
The Patience Factor: This is the hardest part for me. I always want to dig in after four hours, but the texture is noticeably better after a full overnight freeze. The flavors meld, the texture firms up perfectly, and you get those clean, beautiful scoops. Trust the process.
Flavor Development: If you can, make this a day or two before you plan to serve it. The caramel flavor deepens and the salt mellows out slightly, creating an even more balanced, complex taste. It’s one of those rare desserts that actually gets better with a little age.
Variations & Adaptations
One of the best things about this Lighter No-Churn Salted Caramel Ice Cream is how easily it adapts. Here are a few of my favorite ways to change it up.
- Chocolate-Covered Pretzel: My personal favorite twist. After you’ve layered the ice cream and caramel, sprinkle in a generous handful of crushed salted pretzels and mini chocolate chips. The salty, crunchy pretzels and the rich chocolate chunks take this over the top. It’s like a fancy ice cream shop flavor, but way easier.
- Bourbon Caramel: For an adult version, add 1-2 tablespoons of your favorite bourbon to the caramel sauce before swirling it in. The bourbon adds a warm, vanilla-tinged complexity that pairs beautifully with the salt. Plus, the alcohol keeps the ice cream a touch softer, making it even easier to scoop straight from the freezer.
- Vegan & Dairy-Free: As mentioned earlier, swap the heavy cream for full-fat coconut cream and use dairy-free sweetened condensed milk. The coconut flavor is subtle but present, and it actually works wonderfully with the caramel. Just be sure to chill the coconut cream overnight before whipping.
- Espresso Caramel: Dissolve 1 teaspoon of instant espresso powder in a tablespoon of hot water and stir it into your caramel sauce. The coffee doesn’t scream “coffee” — it just deepens the caramel flavor and adds a sophisticated, slightly bitter edge that balances the sweetness perfectly.
- Nutty Crunch: Toast 1/2 cup of chopped pecans or walnuts and let them cool completely. Fold them into the ice cream base along with the caramel. The toasted nuts add a wonderful crunch and a warm, buttery flavor that feels incredibly indulgent.
Serving & Storage Suggestions
This Lighter No-Churn Salted Caramel Ice Cream is a star all on its own, but a few thoughtful accompaniments can turn it into a full-fledged dessert experience.
How to Serve: Let the ice cream sit at room temperature for 5-10 minutes before scooping. This softens it just enough for perfect, creamy scoops. Drizzle a little extra caramel sauce over each serving and finish with a generous pinch of flaky sea salt. For a gorgeous presentation, serve it in chilled glass bowls or small coupe glasses.
Perfect Pairings: This ice cream is amazing alongside a warm brown butter chocolate chip cookie for a classic ice cream sandwich. It also pairs beautifully with a simple fruit crisp or a slice of warm apple pie. For a lighter option, serve it with fresh berries — the tartness of raspberries or blackberries cuts through the richness beautifully. A shot of espresso or a small glass of bourbon makes an excellent grown-up pairing.
Storage Instructions: Store the ice cream in the freezer, tightly covered with plastic wrap pressed directly onto the surface and a lid or additional layer of wrap on top. Properly stored, it will keep for up to two weeks. After that, it may start to develop ice crystals, but it will still be perfectly safe to eat.
Reheating/Softening Tip: If your ice cream has been in the freezer for a few days and is rock hard, don’t panic. Microwave the entire container on 50% power for 15-20 seconds, or let it sit on the counter for 10-15 minutes. It will soften up beautifully.
Flavor Evolution: I find this ice cream actually tastes even better on day two or three. The caramel flavor deepens, the salt mellows into the background, and everything becomes more cohesive. So don’t be afraid to make it ahead of time.
Nutritional Information & Benefits
This Lighter No-Churn Salted Caramel Ice Cream is a dessert that feels indulgent but is made with simple, recognizable ingredients. Here’s a quick look at what’s in a serving.
Estimated Nutritional Values (per 1/2 cup serving):
- Calories: 320
- Fat: 22g
- Carbohydrates: 28g
- Protein: 4g
- Sugar: 24g
- Sodium: 180mg
Note: These values are estimates and will vary based on the specific brands of ingredients you use.
Health Highlights: By using a no-custard, no-egg base, this recipe is naturally lighter than traditional French-style ice creams. The heavy cream provides a good source of healthy fats, which can help keep you feeling satisfied. The sweetened condensed milk provides calcium, and a small amount goes a long way in terms of flavor. The flaky sea salt is a great source of trace minerals.
Dietary Considerations: This recipe is naturally gluten-free and can be made dairy-free and vegan with the substitutions listed above. It is not low-fat, but it is a more wholesome alternative to many store-bought ice creams that are loaded with stabilizers, gums, and artificial flavors.
My Perspective: I’m a firm believer that dessert should be a joy, not a source of guilt. This recipe fits perfectly into a balanced lifestyle. It’s a treat, yes, but it’s one you can feel good about serving to your family — made with real ingredients, a whole lot of love, and zero complicated steps.
Conclusion
This Lighter No-Churn Salted Caramel Ice Cream is more than just a recipe. It’s a little piece of summer magic that you can whip up any time the craving strikes. It’s the dessert that proves you don’t need a fancy machine or a culinary degree to create something genuinely, soul-satisfyingly delicious. It’s for the warm evenings when you want something cold and sweet, the dinner parties where you want to impress without stress, and the quiet moments when you just need a spoonful of something wonderful.
I love this recipe because it’s forgiving, adaptable, and always, always delivers. It’s the kind of dessert that makes people’s eyes light up when they take that first bite. And honestly? That never gets old.
So go ahead — give it a try. Make it your own. Add your favorite mix-ins, play with the salt level, and serve it with abandon. And when you do, I’d love to hear about it. Drop a comment below and let me know how it turned out, or share your own twist on this recipe. Happy scooping, friends!
Frequently Asked Questions
Can I make this without an electric mixer?
Absolutely! You can whip the heavy cream by hand using a whisk and a large bowl. It will take a bit of elbow grease — about 8-10 minutes of vigorous whisking — but it’s totally doable. Just make sure your cream and bowl are very cold.
Why did my ice cream turn out icy?
Icy ice cream is usually a sign of one of two things: either the cream wasn’t whipped to stiff enough peaks, or the ice cream wasn’t covered properly during freezing. Make sure you whip the cream until it’s very stiff, and always press plastic wrap directly onto the surface of the ice cream before freezing.
Can I use a different type of salt?
Flaky sea salt is strongly recommended for the best texture and flavor. It provides little bursts of saltiness that you can actually taste. Fine table salt will dissolve completely and can make the ice cream taste overly salty. If you only have table salt, use about half the amount and sprinkle it very sparingly.
How long does this ice cream last in the freezer?
Properly stored, this ice cream will keep for up to two weeks. After that, it may start to develop ice crystals and the texture might become a bit less creamy. But honestly, in my house, it never lasts that long!
Can I double this recipe?
Yes, you can easily double this recipe. Just use a larger container for freezing, like a 9×13-inch baking dish or a large freezer-safe bowl. Keep in mind that a wider, shallower container will freeze faster than a deep, narrow one.
PrintLighter No-Churn Salted Caramel Ice Cream: Best Easy Recipe

This lighter no-churn salted caramel ice cream is incredibly creamy and intensely flavored, made without an ice cream maker or eggs. It’s the perfect balance of rich, buttery caramel and flaky sea salt.
- Prep Time: 15 minutes
- Cook Time: 0 minutes
- Total Time: 6 hours 15 minutes (includes freezing time)
- Yield: 8 servings 1x
- Category: Dessert
- Cuisine: American
Ingredients
- 2 cups (480 ml) heavy whipping cream, cold
- 1 (14-ounce / 397 g) can sweetened condensed milk
- 1/2 cup (120 ml) homemade or high-quality store-bought caramel sauce
- 1 teaspoon vanilla extract
- 1/2 teaspoon flaky sea salt, plus more for garnish
Instructions
- Chill your large mixing bowl and the beaters from your hand mixer in the freezer for 10-15 minutes (optional but recommended).
- Pour the cold heavy cream into the chilled mixing bowl. Using a hand mixer on medium-high speed, whip the cream until stiff peaks form, about 3-4 minutes.
- Add the entire can of sweetened condensed milk and the vanilla extract to the whipped cream. Gently fold with a rubber spatula until no white streaks remain.
- If your caramel sauce is thick, warm it slightly in the microwave for 10-15 seconds until pourable but not hot. Let it cool for a minute.
- Spoon about one-third of the ice cream base into a 9×5-inch loaf pan and spread into an even layer. Drizzle about one-third of the warm caramel sauce over the top and sprinkle with a pinch of flaky sea salt. Repeat this process two more times, ending with a layer of caramel and salt on top.
- Using a butter knife or skewer, gently drag through the layers in a figure-eight or zigzag pattern to create swirls. Do not overmix.
- Press a piece of plastic wrap directly onto the surface of the ice cream, then cover the pan with a lid or another layer of plastic wrap. Freeze for at least 6 hours, preferably overnight.
- Before serving, let the ice cream sit at room temperature for 5-10 minutes to soften slightly. Sprinkle each serving with an extra pinch of flaky sea salt.
Notes
For best texture, ensure heavy cream is very cold and chill the bowl and beaters. Do not overwhip the cream. Warm caramel just enough to be fluid but not hot. Freeze overnight for best results. The ice cream can be stored for up to two weeks.
Nutrition
- Serving Size: 1/2 cup
- Calories: 320
- Sugar: 24
- Sodium: 180
- Fat: 22
- Saturated Fat: 14
- Carbohydrates: 28
- Protein: 4
Keywords: no-churn ice cream, salted caramel ice cream, lighter ice cream, easy ice cream, homemade ice cream, no machine ice cream


